Creating a simple TCP Server with Raspberry Pi Pico W
This tutorial shows how to create a basic Raspberry Pi Pico W project that will connect to the specified Wi-Fi network and accept TCP connections.We will explain how to configure the Pico W board to connect to a specific network and use the lwIP API to handle the incoming connections. Before you begin, install VisualGDB 5.6R8 or later.
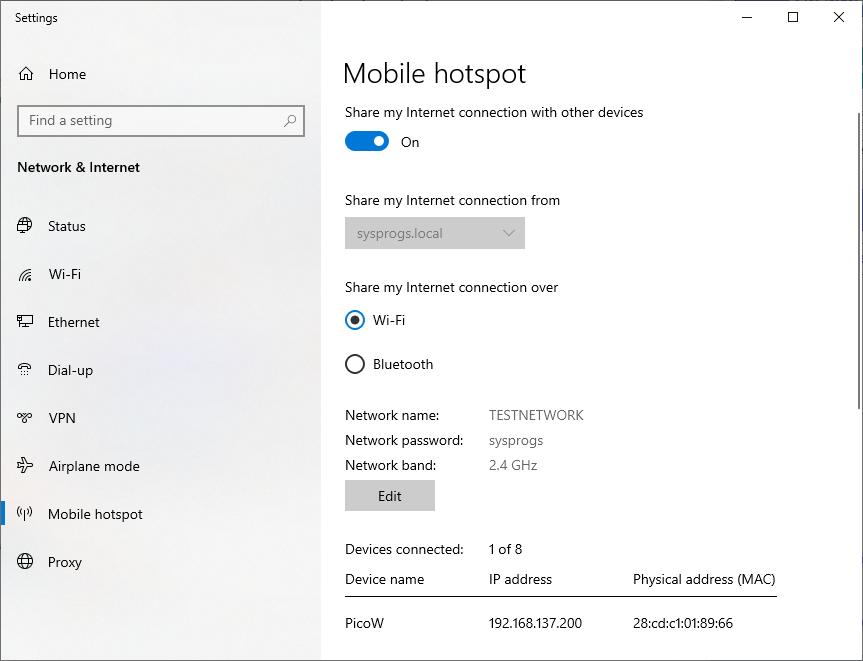
- Make sure you have a Wi-Fi network that Pico W can connect to. In this tutorial we will use the Windows Mobile Hotspot to create a new test network, however any other Wi-Fi network will work as well:
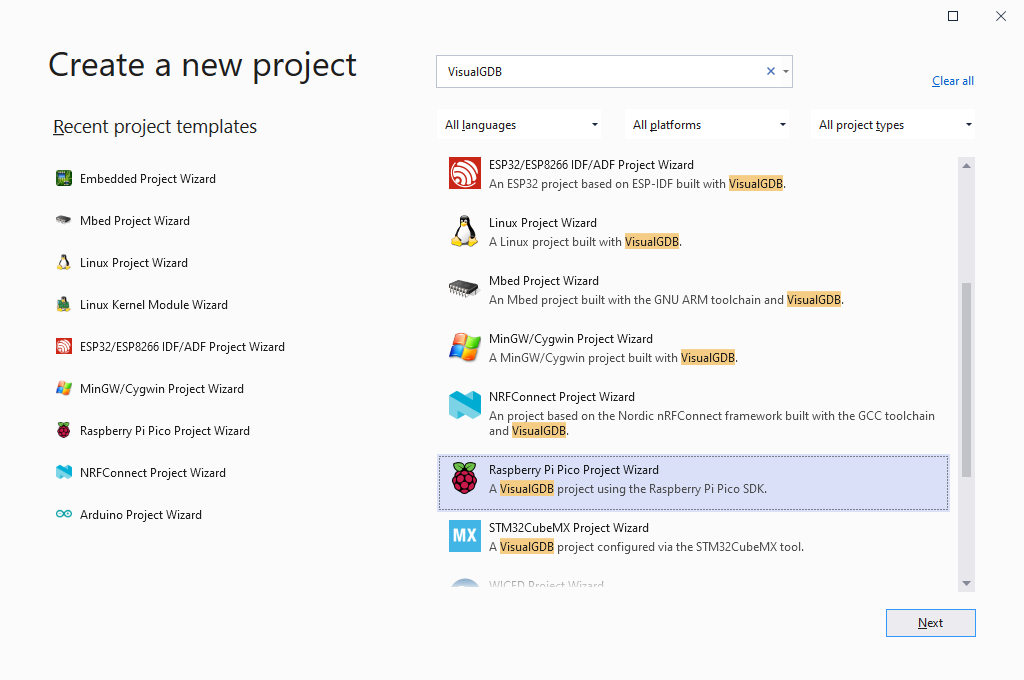
- Start Visual Studio and locate the Raspberry Pi Pico Project Wizard:
- Select the name and location for your project, then press “Create”:

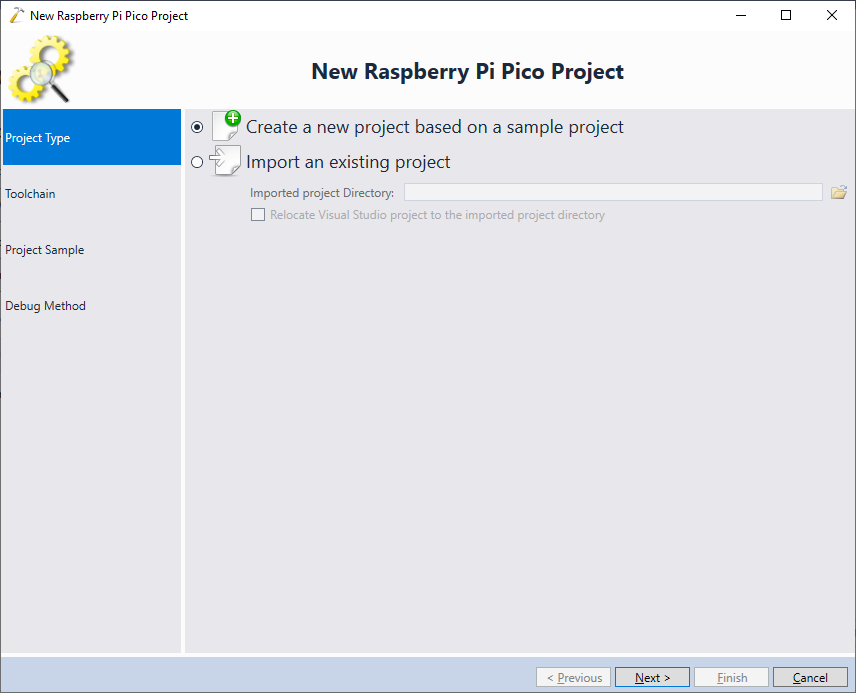
- Proceed with creating a new project based on the sample:
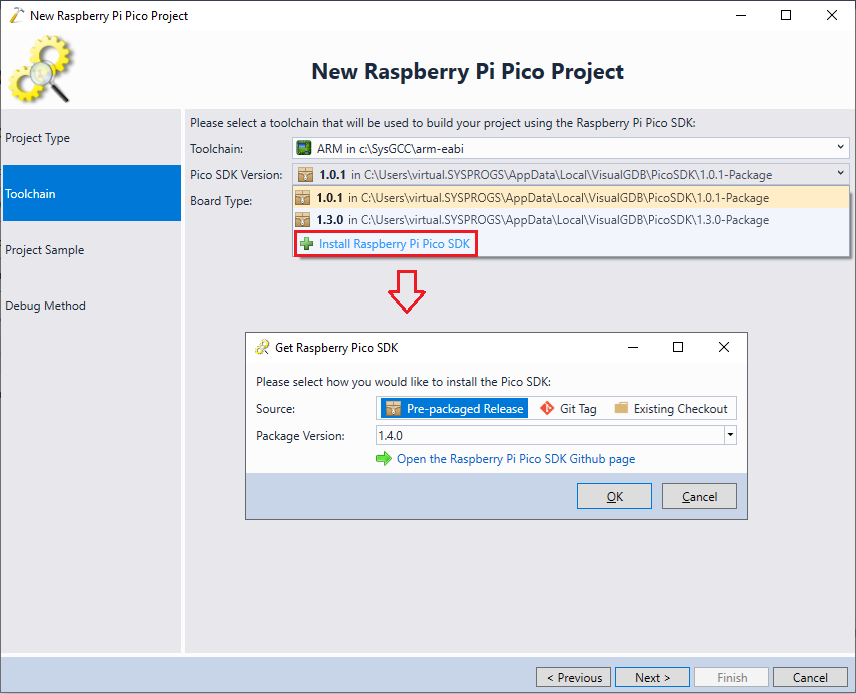
- Make sure you are using a recent ARM toolchain and the Pico SDK 1.4.0 or later, since the earlier versions do not support Pico W. You can install the latest Pico SDK by clicking the “Install Raspberry Pi Pico SDK” link in the SDK selector:
- Once you have selected the SDK 1.4.0+, set the board type to PICO_W and enter the Wi-Fi SSID and password below:
 If you are using a custom board with a different name and VisualGDB does not show the SSID/Password prompt, try editing the BoardWithWiFi element in the <VisualGDB Directory>\Rules\PicoSDK.xml file. The element contains a regular expression that can cover multiple board names.
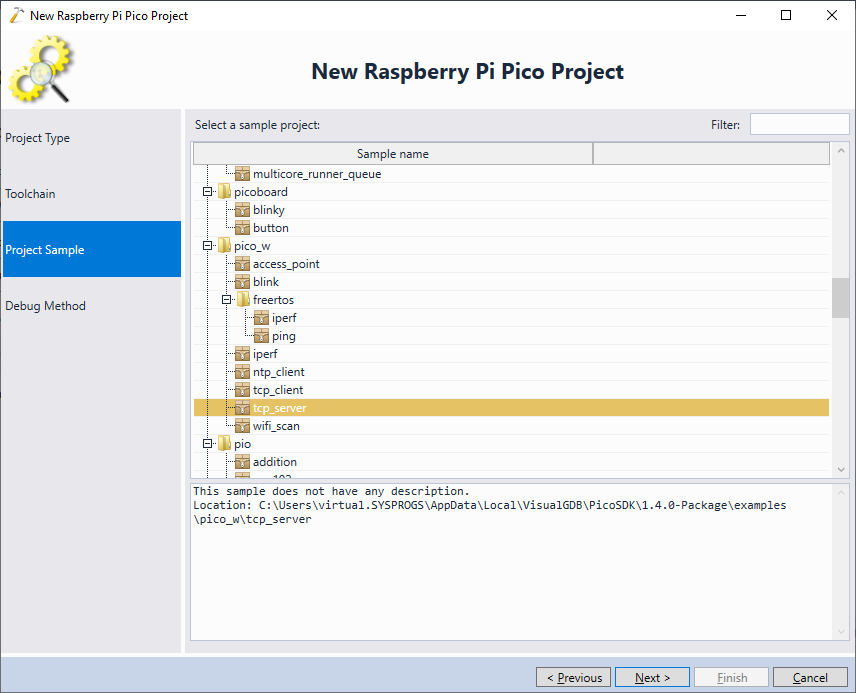
 - On the next page of the wizard pick the tcp_server example:
- Finally, connect the SWD pins of your Pico W to a debug probe (see this page for detailed instructions) and select the matching configuration on the Debug Method page:
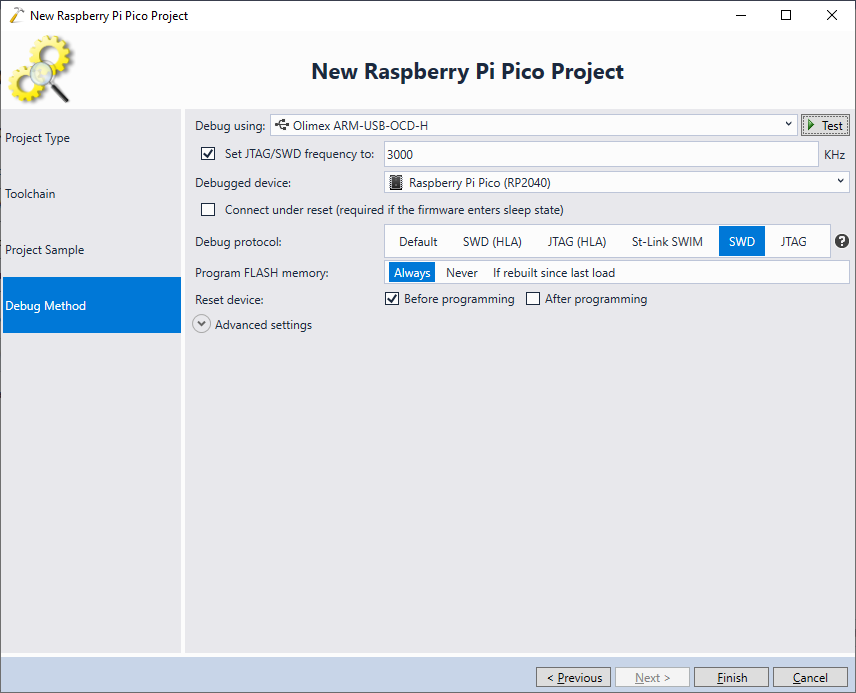 You can use the Test button to instantly verify that OpenOCD can connect to the target via SWD.
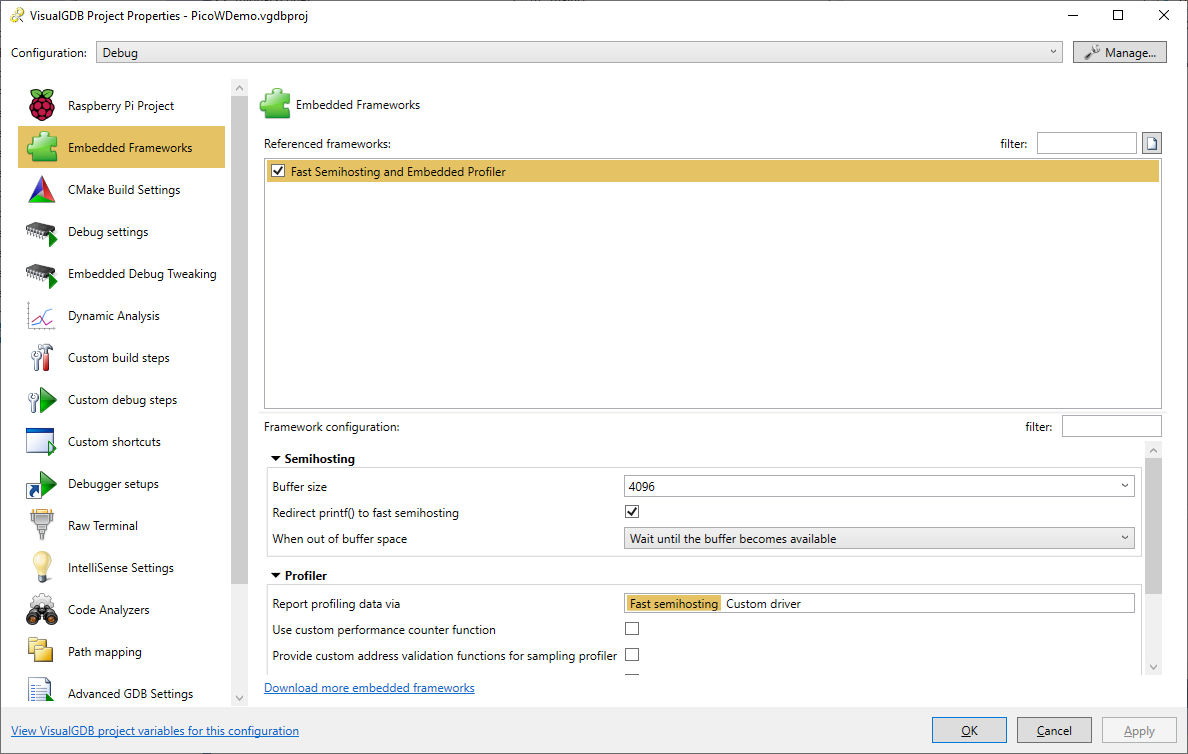
 - Press “Finish” to create the project. Before you can build it, we advise opening VisualGDB Project Properties via the context menu in Solution Explorer and referencing the Fast Semihosting and Embedded Profiler framework:
 This will redirect the output from printf() to the VisualGDB Output window, so you won’t need to setup the UART connection. If you do not need the printf() output, you can skip this step.
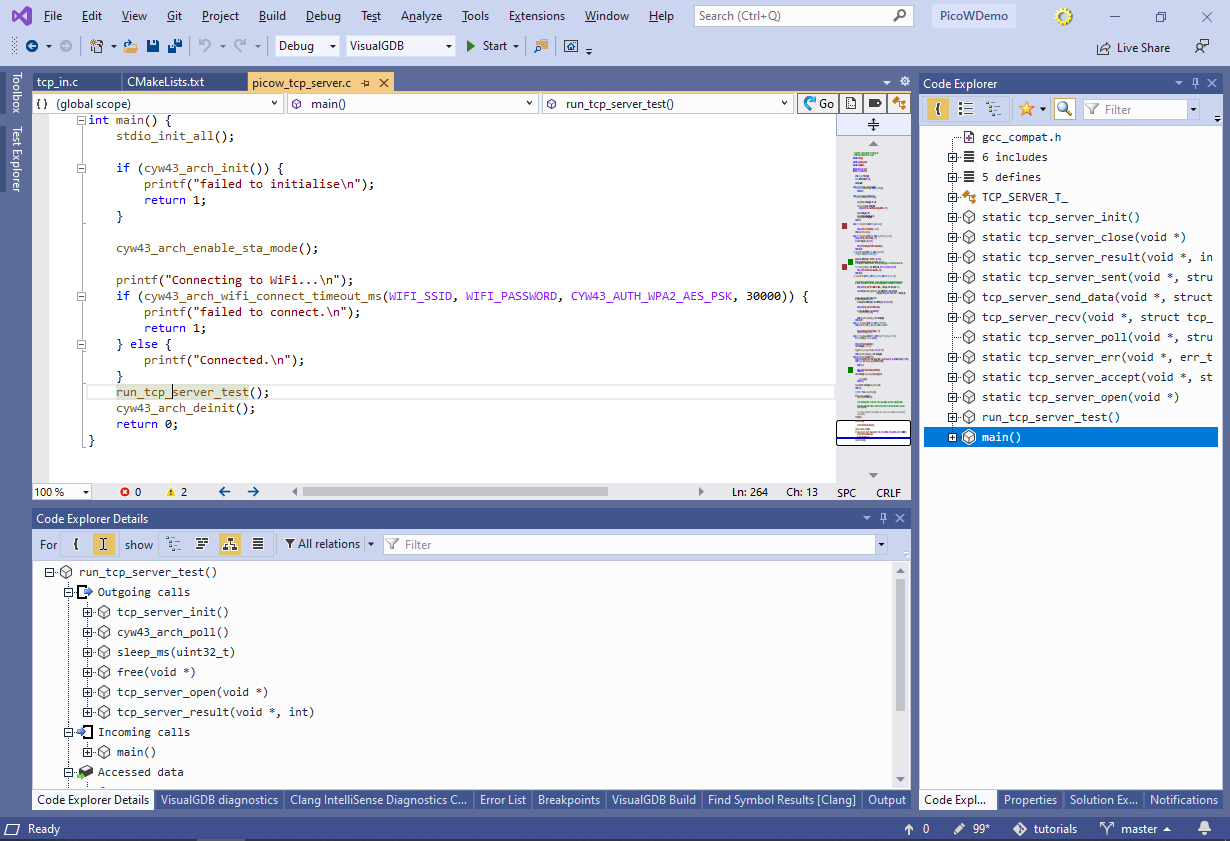
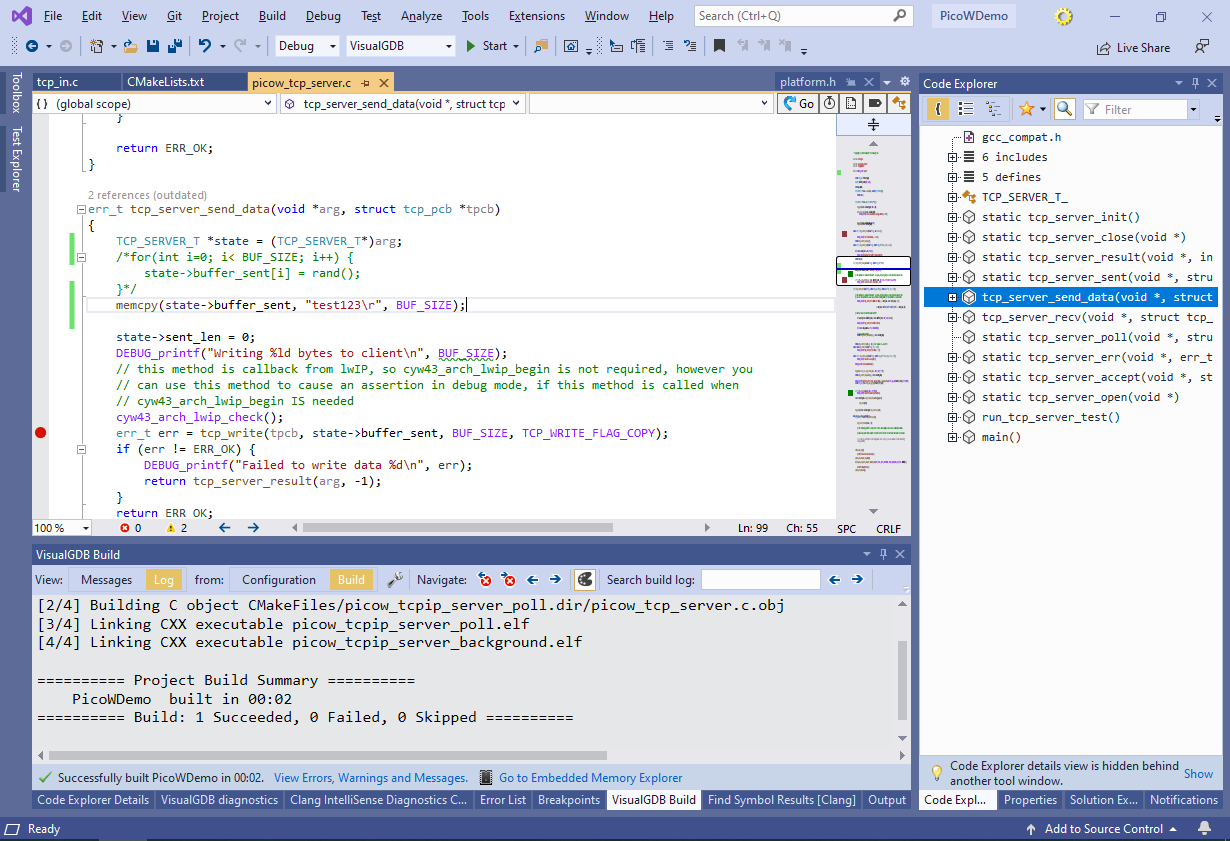
 - Open the main source file (picow_tcp_server.c) and use the View->VisualGDB Code Explorer to get a quick overview of its contents. You can right-click on any top-level node in Code Explorer and select “Collapse->Nodes at this Level” to quickly view all functions inside the file:
- The tcp_server example works as shown below:
- First it connects to the Wi-Fi network by calling cyw43_arch_enable_sta_mode() and cyw43_arch_wifi_connect_timeout_ms().
- Then it calls the tcp_server_open() function that:
- Creates a new TCP connection object by calling tcp_new_ip_type().
- Binds it to port 4242 by calling tcp_bind() and then starts listening for incoming connections by calling tcp_listen_with_backlog().
- Configures lwIP to call the tcp_server_accept() callback whenever anyone connects to the TCP port.
- When a client connects to the TCP port 4242, the tcp_server_accept() callback sets 4 additional callbacks on the newly created connection:
- tcp_server_sent() that will be called by lwIP once it completed sending a chunk of data to the client.
- tcp_server_recv() once it received data from the client.
- tcp_server_poll() once there has not been any activity on the socket for 10 seconds (POLL_TIME_S * 2)
- tcp_server_err() once the socket encounters an internal error.
- Once the callbacks are set, tcp_server_accept() sends a random payload to the client, expecting it to echo it back.
- The tcp_server_recv() callback buffers the incoming data in the TCP_SERVER_T::buffer_recv buffer, and once the amount of received data matches the amount of sent data, it compares it against the sent block.
- Normally, the TCP server example would require a small test program that could receive and echo back a large random chunk of data, however we will modify it so that it could be tested with the telnet tool. First of all, locate the definition of BUF_SIZE and reduce it to 8. Then, locate the tcp_server_send_data() function and replace the initialization logic for buffer_sent with this:
memcpy(state->buffer_sent, "test123\r", BUF_SIZE);
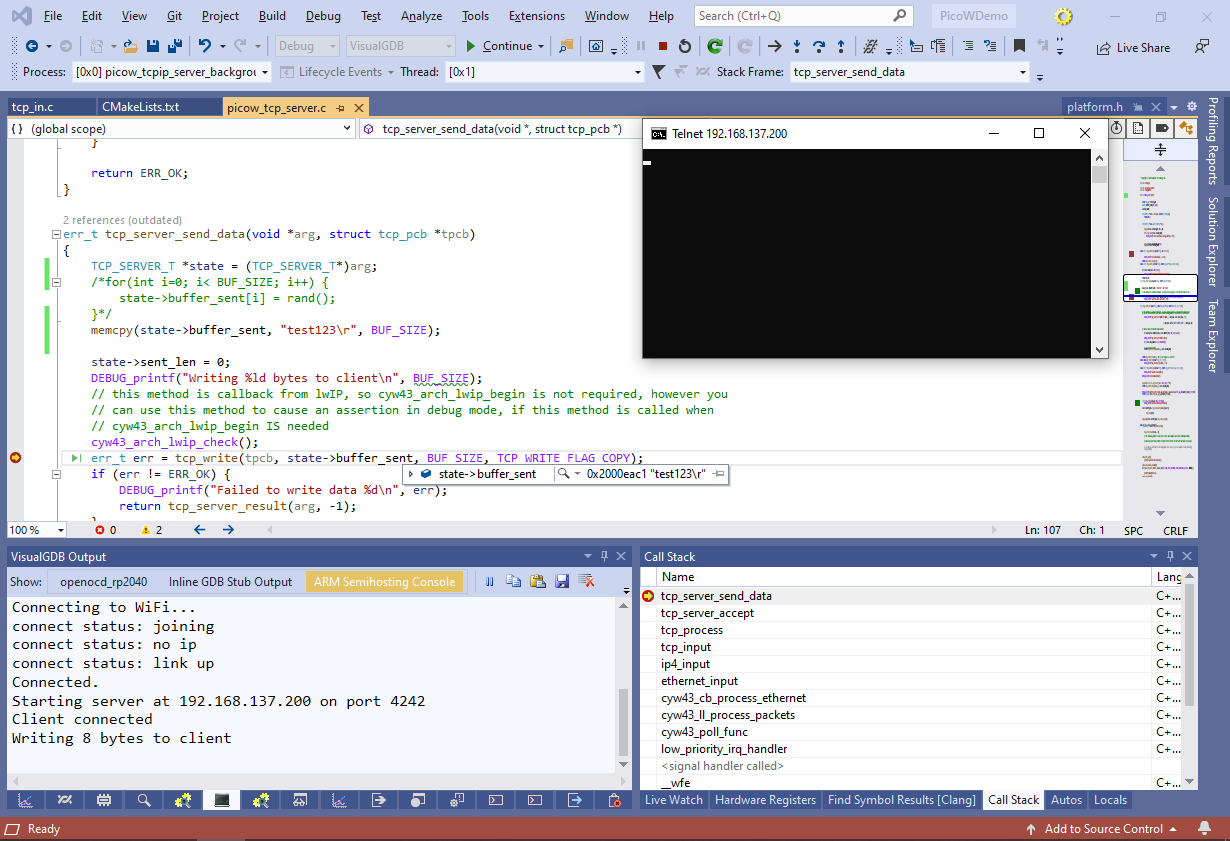
- Now set a breakpoint at the tcp_write() call and press F5 to build the project and begin debugging it:
- Wait for the board to connect to the Wi-Fi network (it will report the IP address it got via the printf() output) and run “telnet <Board IP> 4242” on your Windows machine. Telnet will connect to the board and the breakpoint in tcp_server_send_data() will trigger:
- Note that due to security considerations, Windows does not have the telnet client installed by default. You can install it via Control Panel -> Add/Remove Programs->Turn Windows features on and off -> Telnet Client:

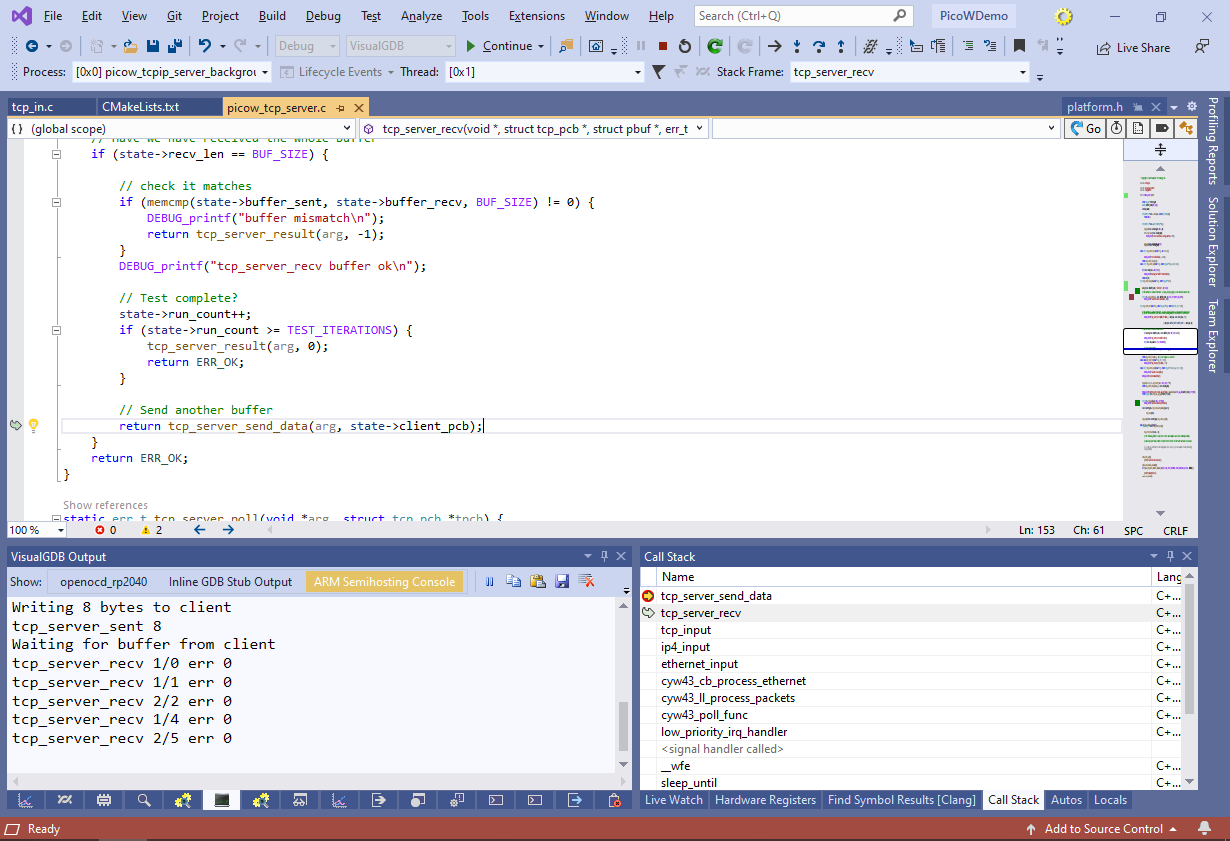
- Press F5 to continue debugging. Go to the telnet client, type “test123” and press <ENTER>. The board will show a series of “tcp_server_recv X/Y err 0” messages in the semihosting console (one for each received packet) and will finally call tcp_server_send_data() to do another round of tests:
Note that the TCP server example shown in this tutorial does not use FreeRTOS, so it has to do handle ALL the connections inside the one and only thread, forcing the use of the callbacks instead of the classic socket API. For all practical purposes, we recommend using FreeRTOS-based projects instead.
You can find the source code of the project shown in this tutorial in our GitHub repository.