Developing C++ Projects for Raspberry Pi Zero from Windows
This tutorial shows how to create C++ projects for the ultra-low-cost Raspberry Pi Zero board using Visual Studio, VisualGDB and an automatically installed cross-toolchain.
We will show how to configure the Pi to act as a USB network device and how to access this device from Windows and upload your programs there. Then we will make a basic C++ 11 program that will test the performance of the sin() function and will use it to compare the speed of Raspberry Pi Zero vs. Raspberry Pi 3.
Before you begin, install VisualGDB 5.1 or later.
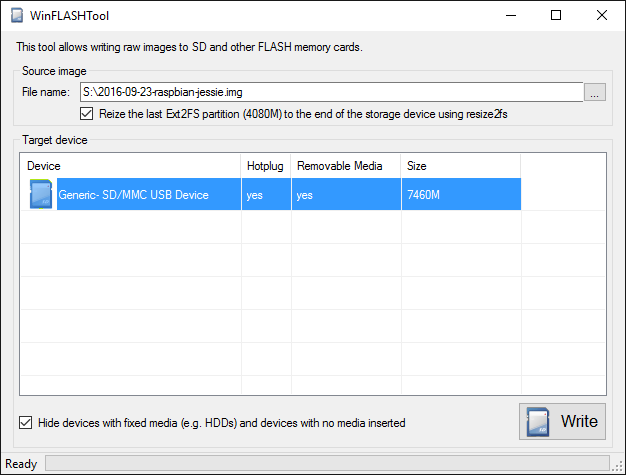
- Download the latest Raspberry Pi image and use WinFLASHTool to write it on an SD card (Raspberry Pi Zero uses the same images as Raspberry Pi 2 or 3). Ensure you check the “Resize the last Ext2FS partition” checkbox to make use of the full capacity of your SD card:
- Raspberry Pi Zero does not have an on-board network connector, so if you start it from the unmodified SD card image, you will not be able to connect to it. We will fix that by switching its USB port from the USB host mode to USB device mode. Open the <SD CARD drive>:\config.txt file in a text editor and add the following line to the end of it:
dtoverlay=dwc2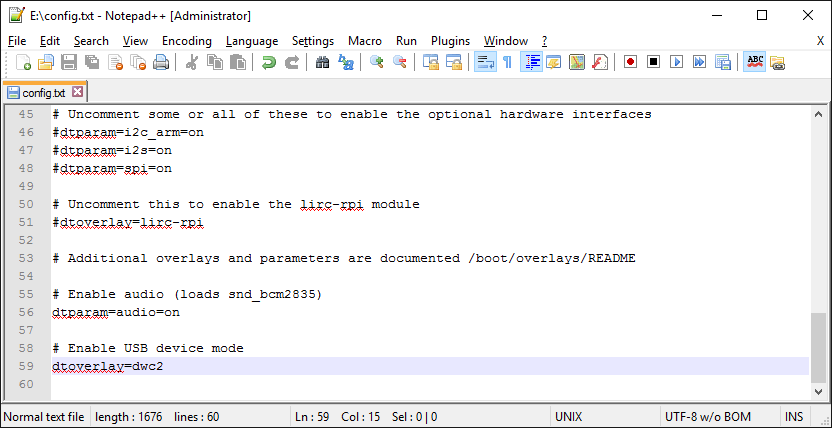
- Now open the <SD card drive>:\cmdline.txt file and insert “modules-load=dwc2,g_ether” just after the “rootwait” word:
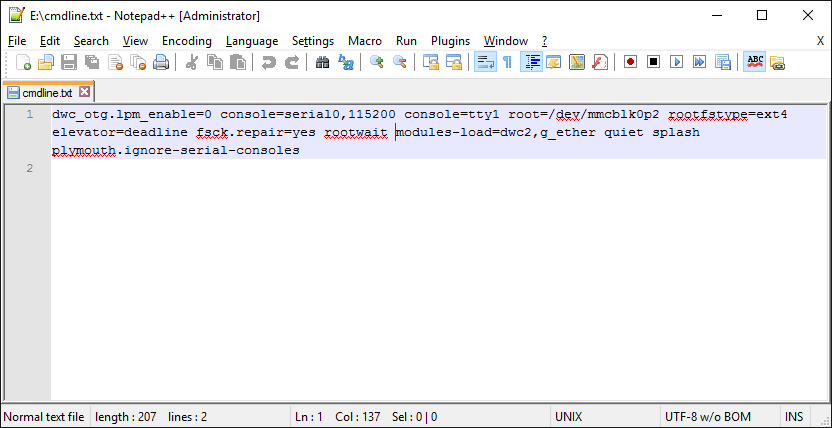 This will load the “ethernet device” driver, so the Raspberry Pi Zero will appear as a USB ethernet controller.
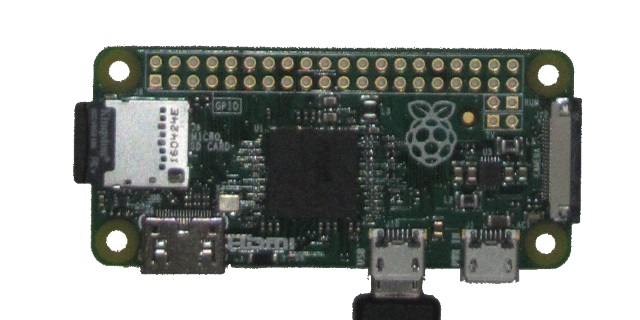
 - Now you can insert the SD card into your Raspberry Pi Zero and plug the a USB cable into the “USB” connector:
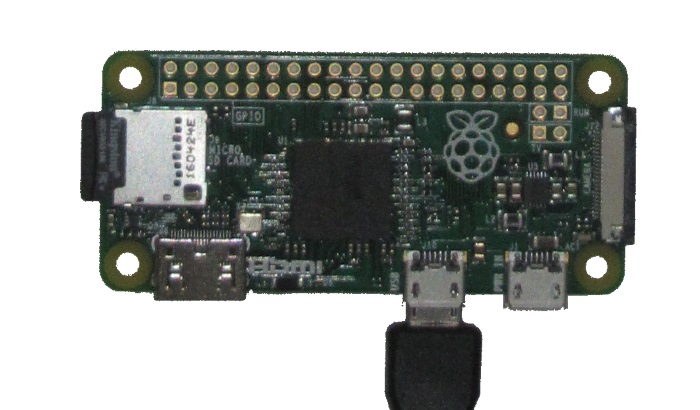
- The green LED on the board will start blinking sporadically and turning off for prolonged times. This is normal – the board will start in approximately 30 seconds and you should see a new network device in your Device Manager:

- Unless you specially install and configure a DHCP server on your computer, both Raspberry Pi and your PC will get temporary addresses from the 169.254.x.x range. However finding out the exact address of your Raspberry Pi will require one extra step. First check if your computer has the “Bonjour” service installed by running services.msc:
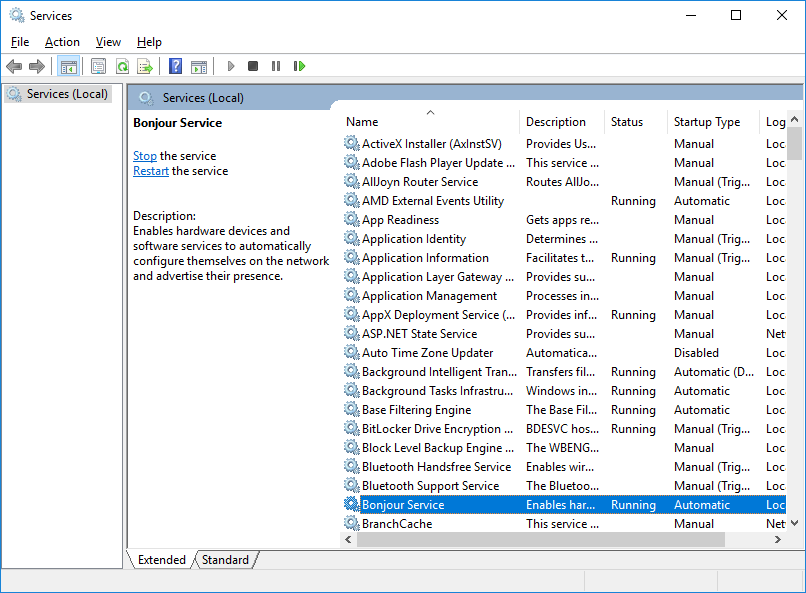 If it is not installed, download and install the Apple Bonjour Service for Windows. This service will use the Bonjour protocol to automatically locate your Raspberry Pi Zero.
 - Run “ping -4 raspberrypi.local” to check if your Raspberry Pi was discovered:
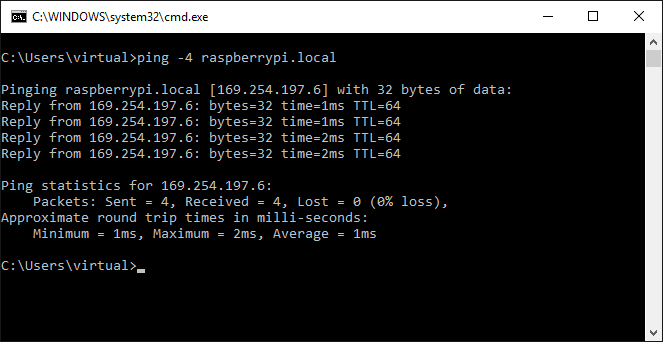 If the ‘ping’ command does not work, ensure that the Bonjour service is installed and running.
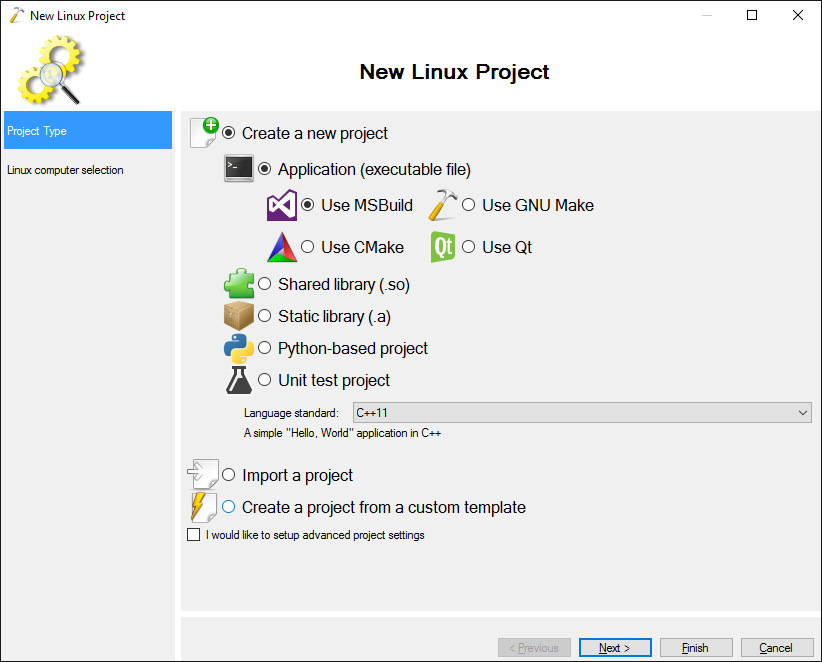
 - Now we will create a basic application and run it on Raspberry Pi Zero. Start Visual Studio and launch the VisualGDB Linux Project Wizard:

- Proceed with the default “Create a new project -> Application -> MSBuild” settings and select C++11 as the language standard:
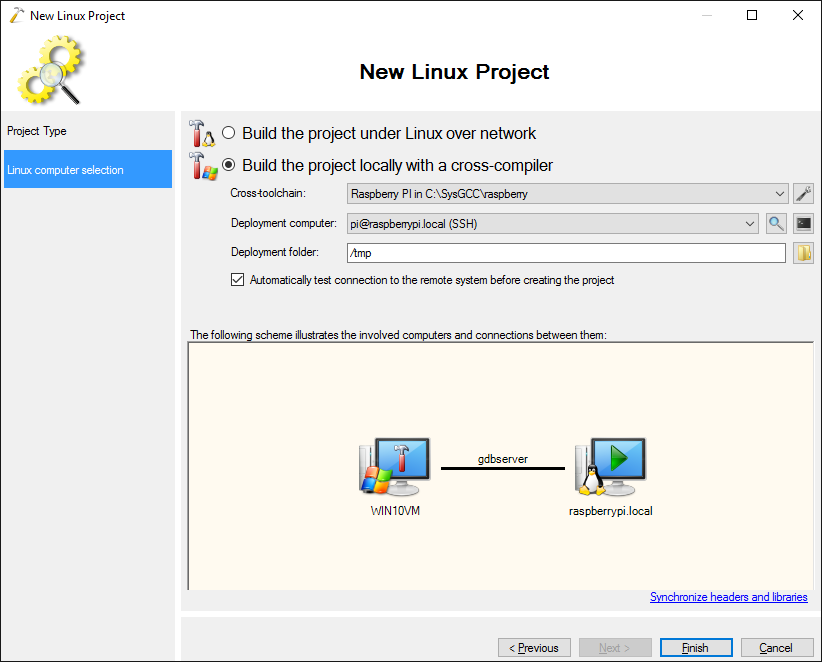
- On the next page select “Build the project locally with a cross-compiler” and choose the Raspberry Pi toolchain. If it is not installed yet, VisualGDB will download and install it automatically. Then choose “pi@raspberrypi.local” as the deployment computer. If it does not appear in the list, select “Create a new SSH connection” and specify the host name, user and password there. The default password for the “pi” user is “raspberry”.
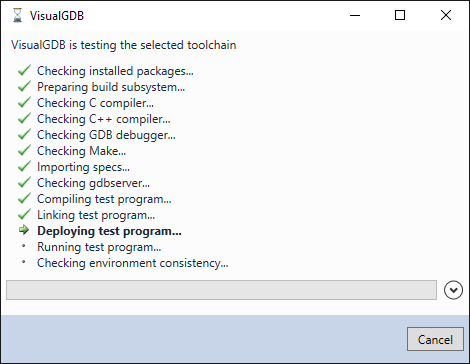
- When you press “Finish”, VisualGDB will automatically test the toolchain and verify that it can upload and run programs on your board:
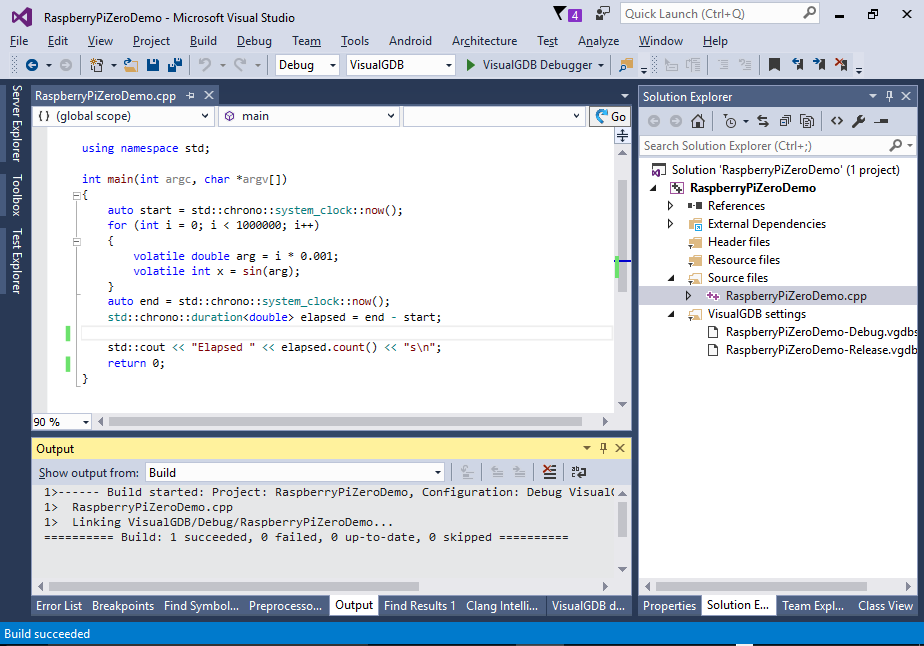
- Once the project is created, replace the contents of the main cpp file with this:
#include <iostream>
#include <chrono>
#include <math.h>

using namespace std;

int main(int argc, char *argv[])
{
    auto start = std::chrono::system_clock::now();
    for (int i = 0; i < 1000000; i++)
    {
        volatile double arg = i * 0.001;
        volatile int x = sin(arg);
    }
    auto end = std::chrono::system_clock::now();
    std::chrono::duration<double> elapsed = end - start;

    std::cout << "Elapsed " << elapsed.count() << "s\n";
    return 0;
}
This code will call the sin() function 1 million times and measure the time it takes. We will use the time to roughly compare the performance of Raspberry Pi Zero vs. Raspberry Pi 3.
- Build the project via Ctrl-Shift-B:
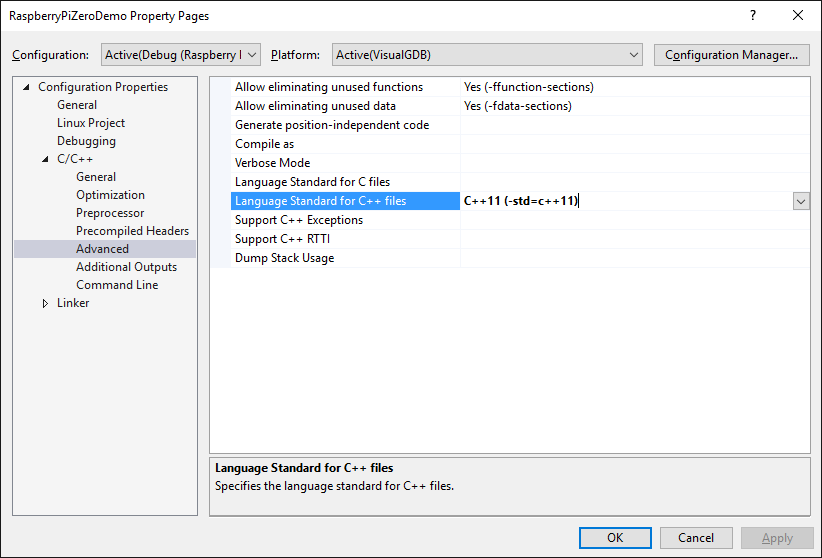
- If the C++11 features like std::chrono don’t work, double-check that you have C++11 selected via Project Properties:
- Set a breakpoint on the “return 0” line and press F5 to start debugging. Once the breakpoint is hit, check the “gdbserver” window for the output:
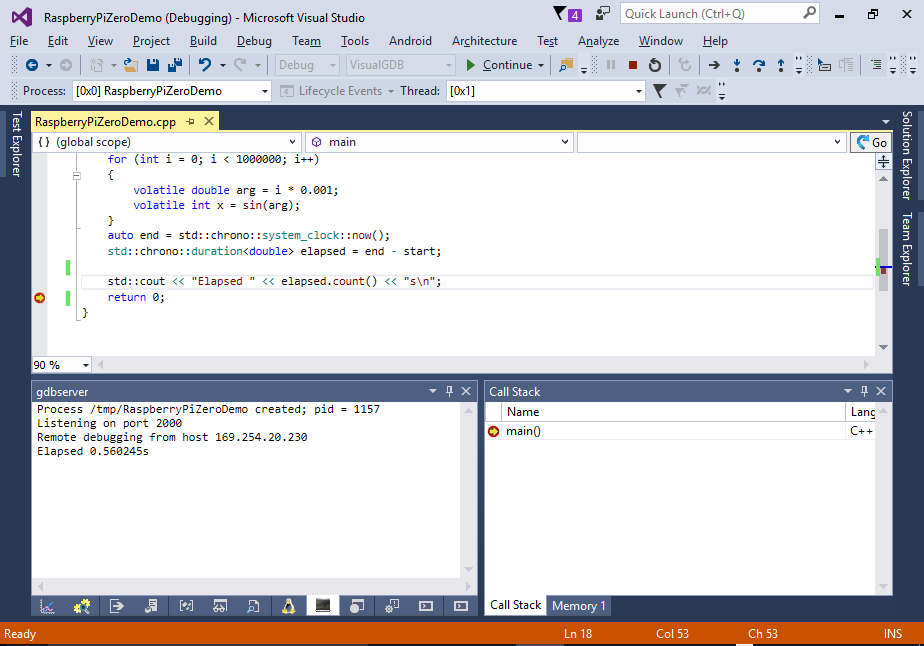 In our tests running the loop on Raspberry Pi Zero took approximately 0.5 seconds.
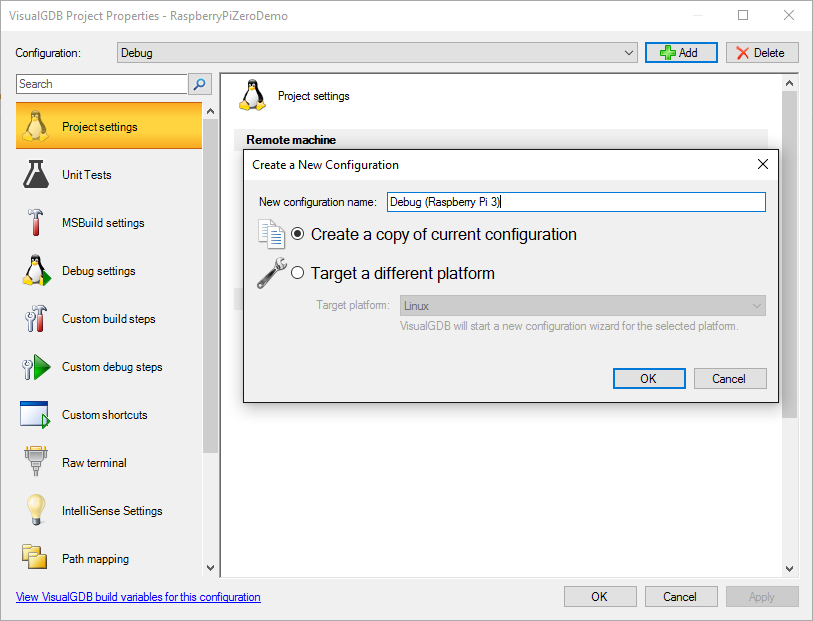
 - Now we will create another configuration to run the same program on Raspberry Pi 3. Open VisualGDB Project Properties and clone the current configuration:
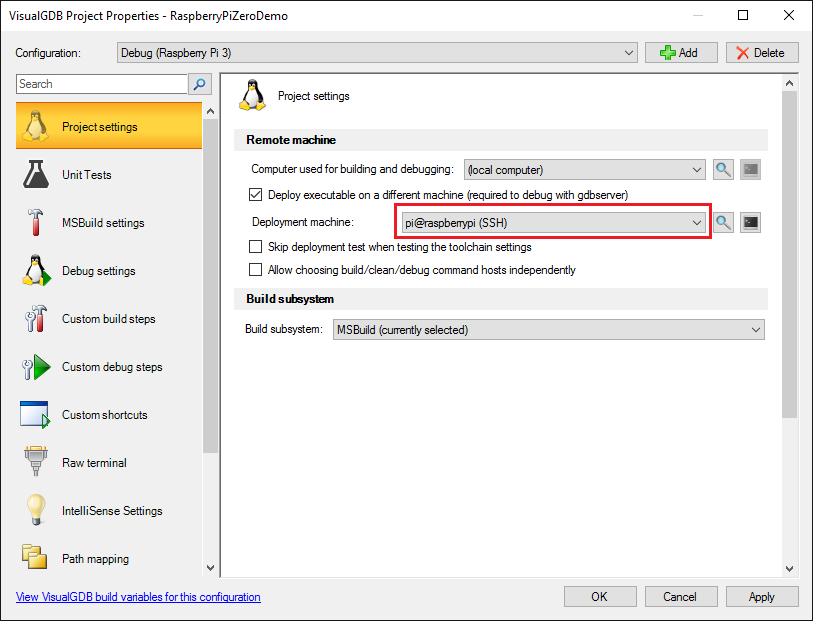
- Switch “deployment machine” to the regular Raspberry Pi:
- Connect your Raspberry Pi to the network (you can use the same SD card image), wait for it to start and run the program by pressing F5. Note the new time:
 In our tests one core of Raspberry Pi 3 was roughly twice faster then Raspberry Pi Zero.


