Building VisualGDB projects with Team Foundation Server
This tutorial shows how to configure Team Foundation Server to automatically build VisualGDB projects. In this tutorial we will use 3 machines:
- A developer machine with Visual Studio and VisualGDB. It will be used to create projects and orchestrate builds (client).
- A machine running Team Foundation Server (server).
- A machine running the build agent that will be doing continuous integration builds. In this tutorial we will run the build agent on the same machine that runs Team Foundation Server (server).
We will begin the tutorial with installing and configuring Team Foundation Server, then show how to create a project from Visual Studio and put it under TFS and finally will demonstrate how to setup automatic builds.
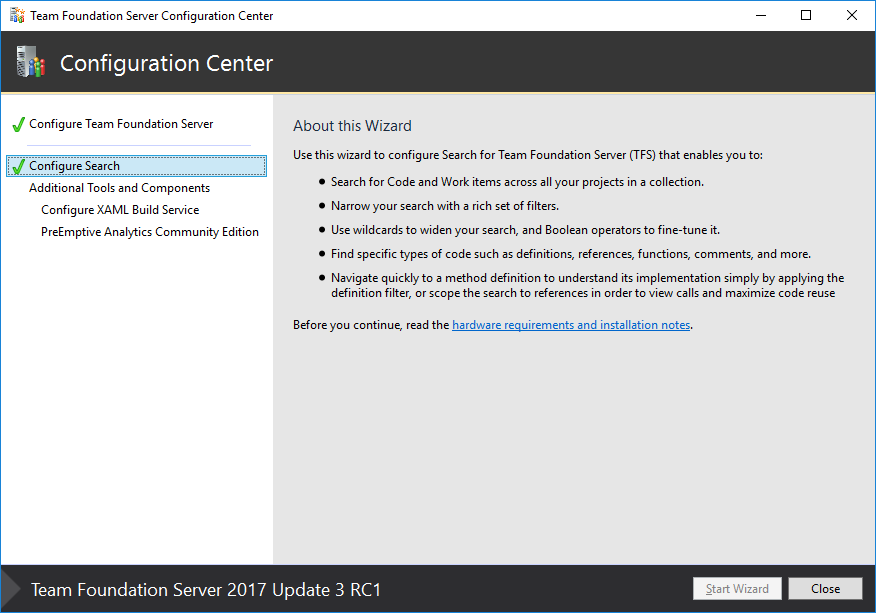
- Install Team Foundation Server on the server:
 Warning! Older TFS2017 versions will not be able to detect VS2017.4 on the server when setting up the build agent. Please ensure you use TFS2017 Update 3 or later.
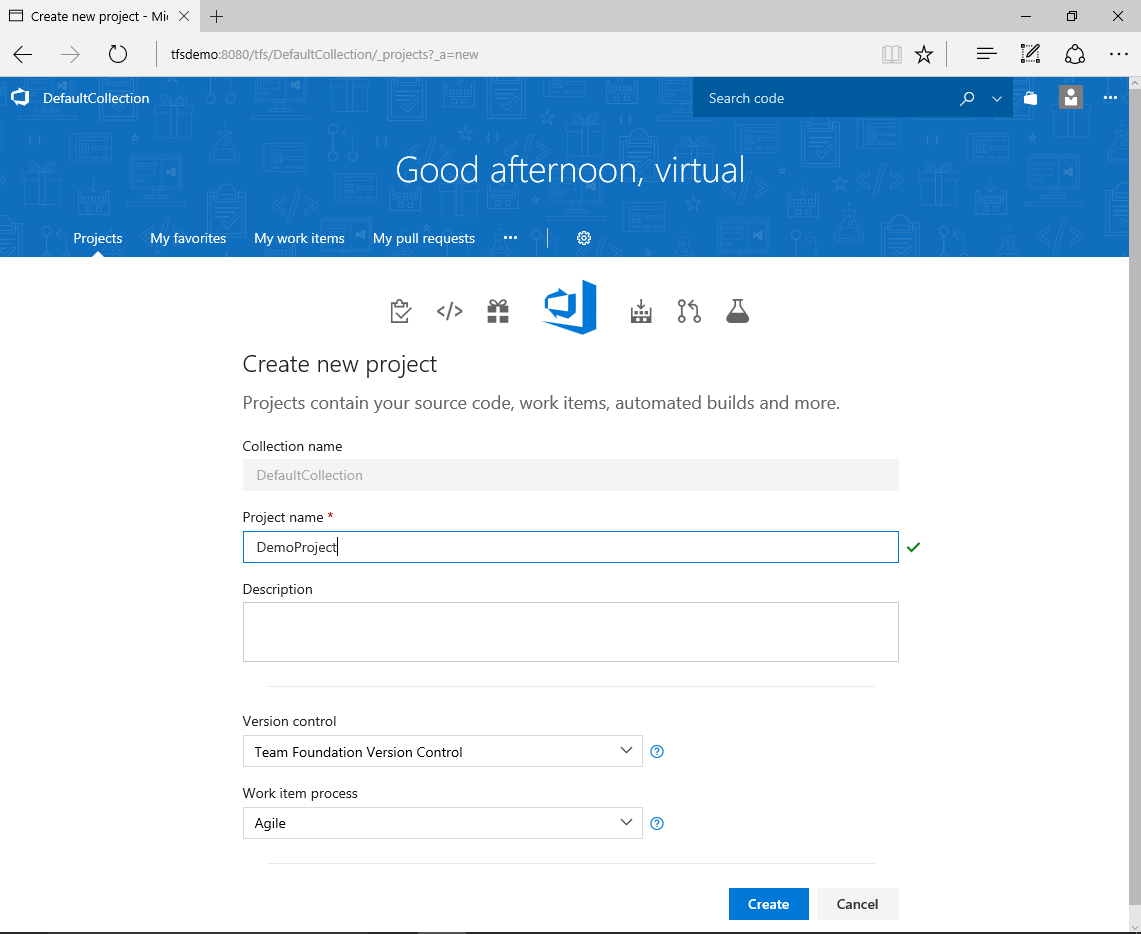
 - Open the TFS administration console in your browser (usually http://<server name>:8080/tfs) and create a new project:
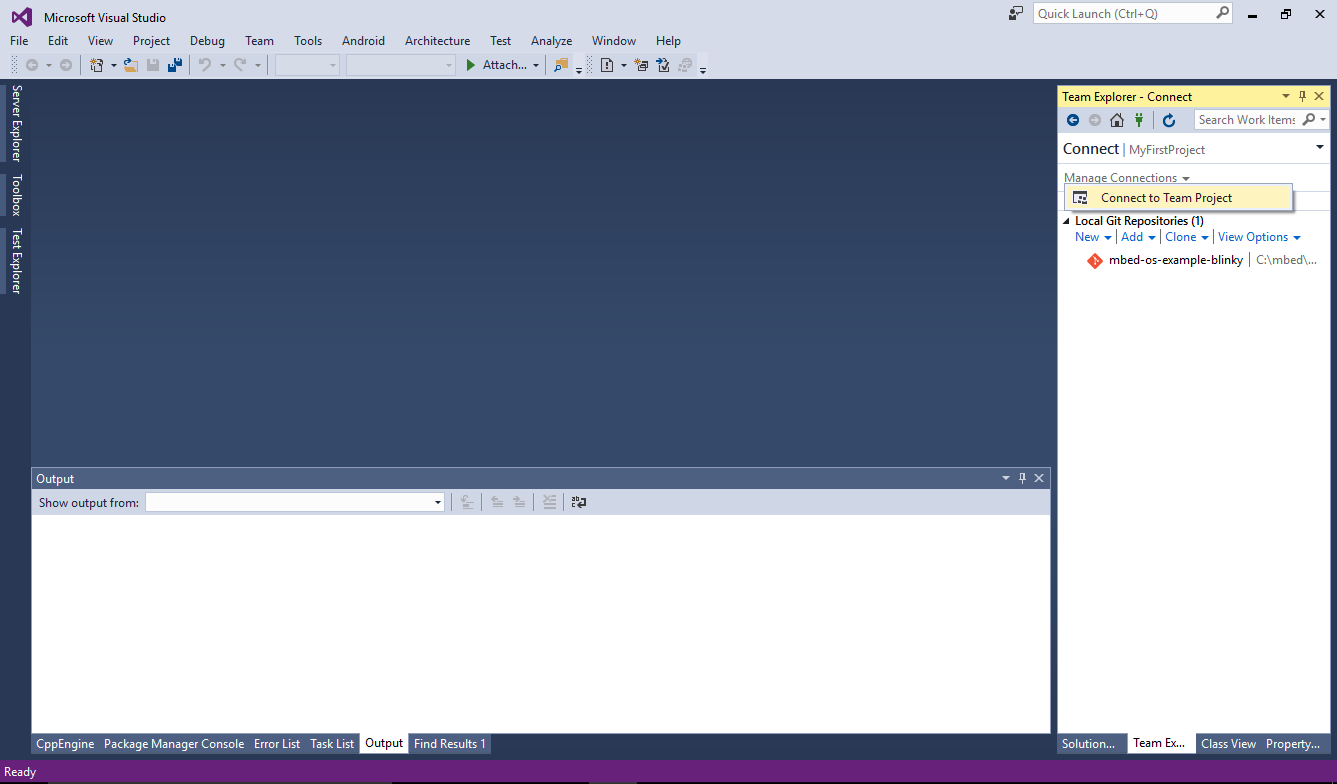
- Go to the development machine and open Team Explorer. Then select “Connect to Team Project”:
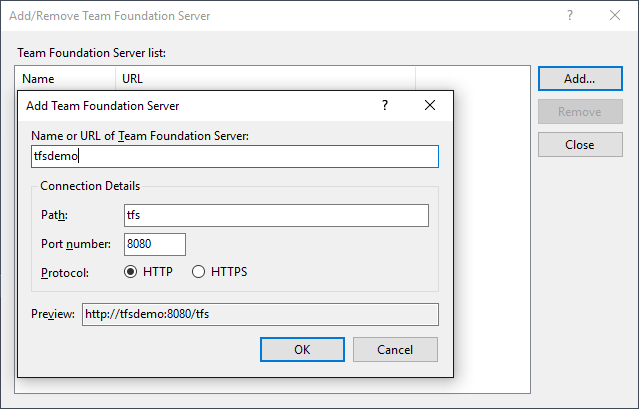
- Add your TFS server to the server list in Visual Studio:
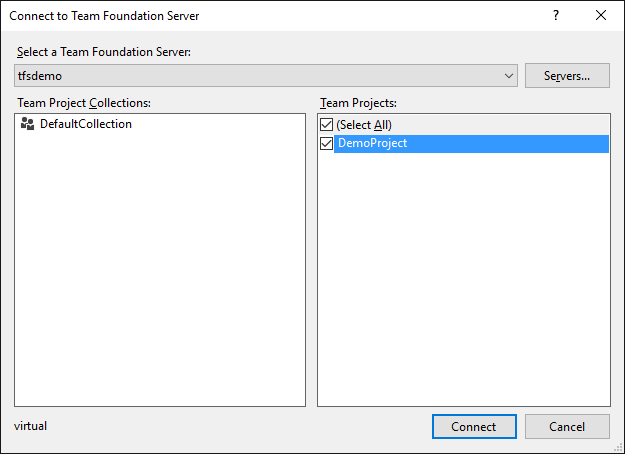
- Select your server and the project in the “Connect to Team Foundation Server” dialog and press “Connect”:
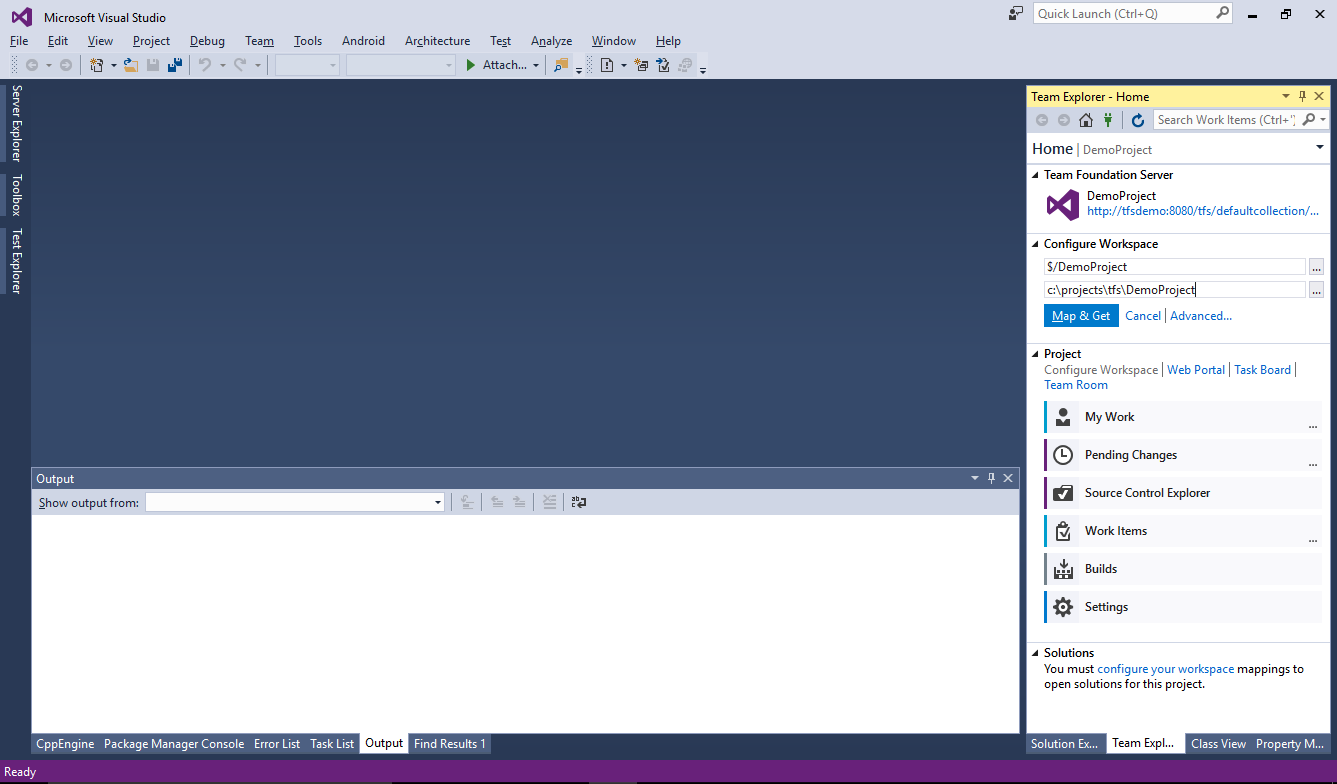
- Specify the directory where you want to store the project on the client and click “Map & Get”:
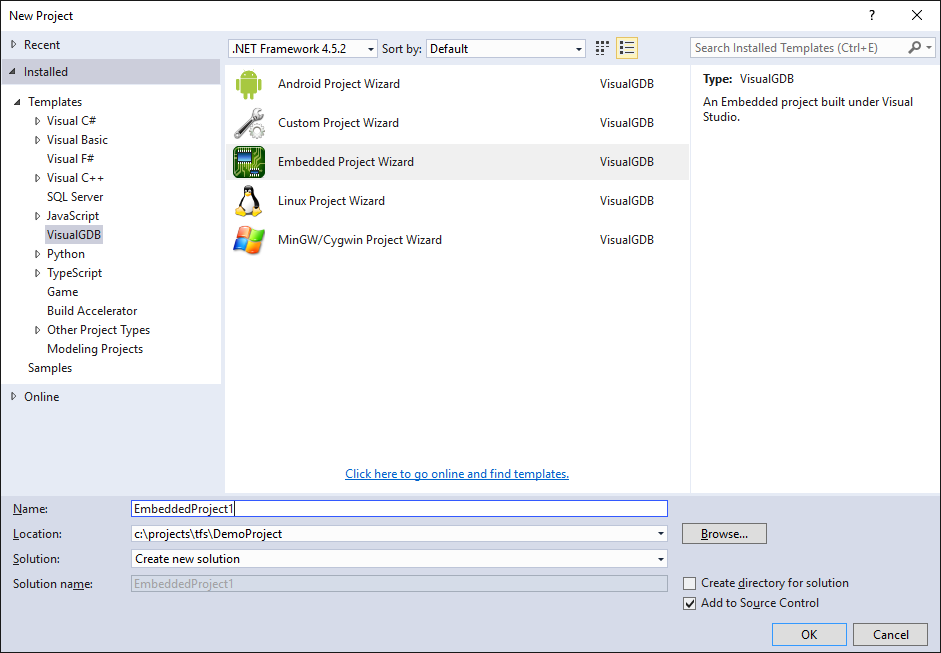
- The steps described in this tutorial will work with different types of VisualGDB projects, however we will demonstrate it based on the embedded project to show how to synchronize toolchains and BSPs between machines. Select File->New Project->VisualGDB->Embedded Project Wizard and check the “Add to Source Control” checkbox:
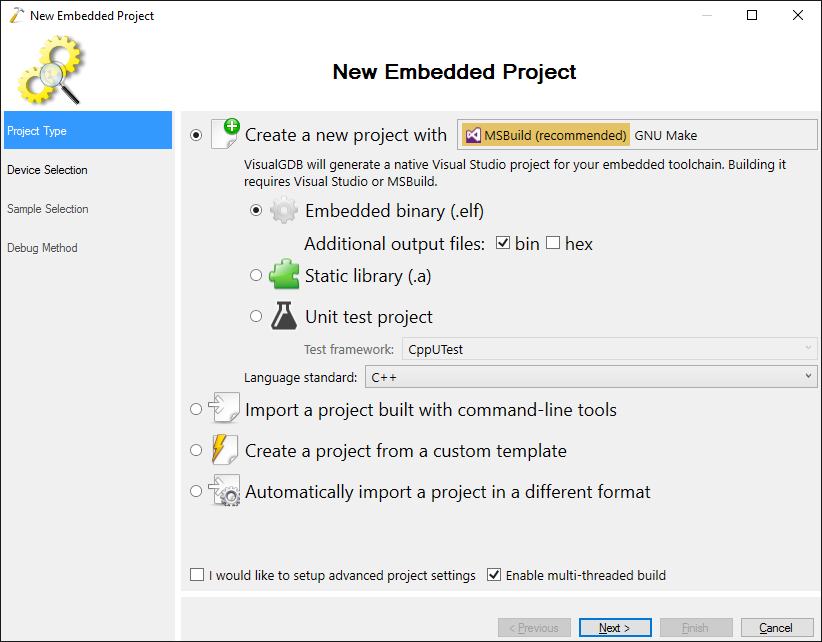
- On the first page of the wizard select “Create a new Project -> MSBuild”:
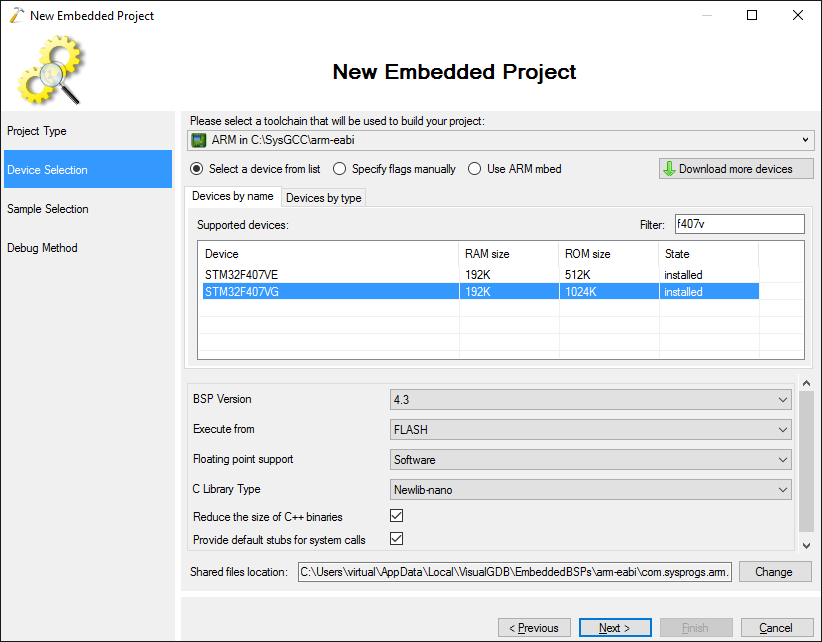
- On the next page select the toolchain and the device you want to target:
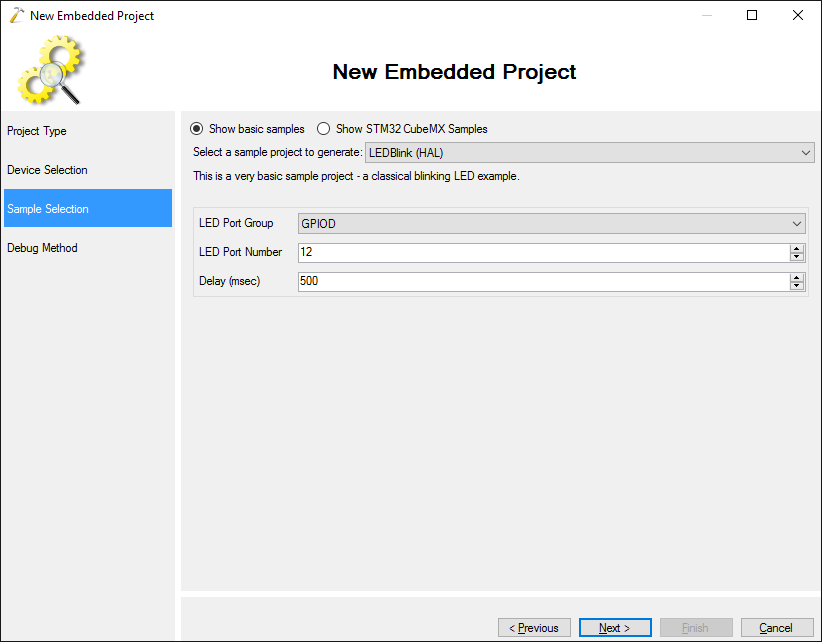
- Select the project template you want to use and click “Next”:
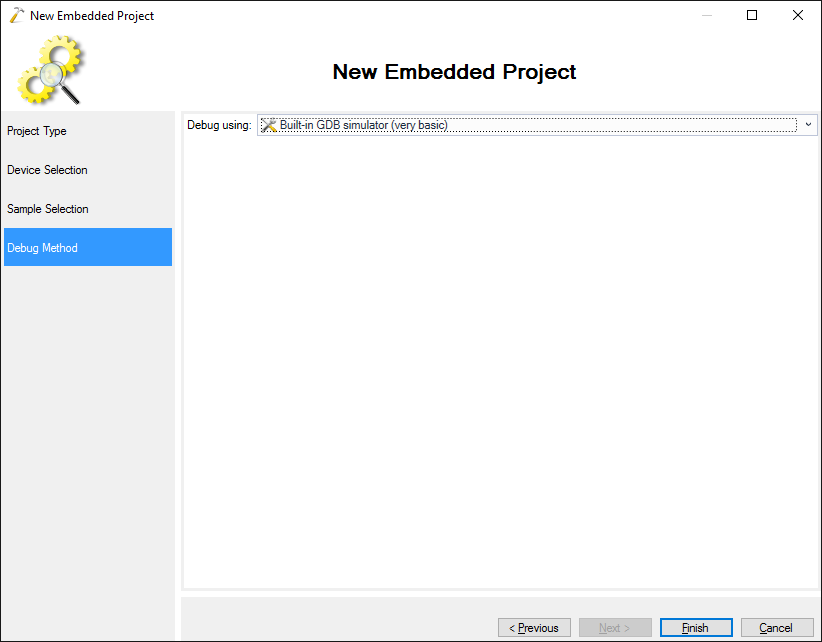
- Finally choose your debug method. As this tutorial focuses on build only, we select the GDB simulator, that doesn’t need any extra setup, but is impractical for most real debugging:
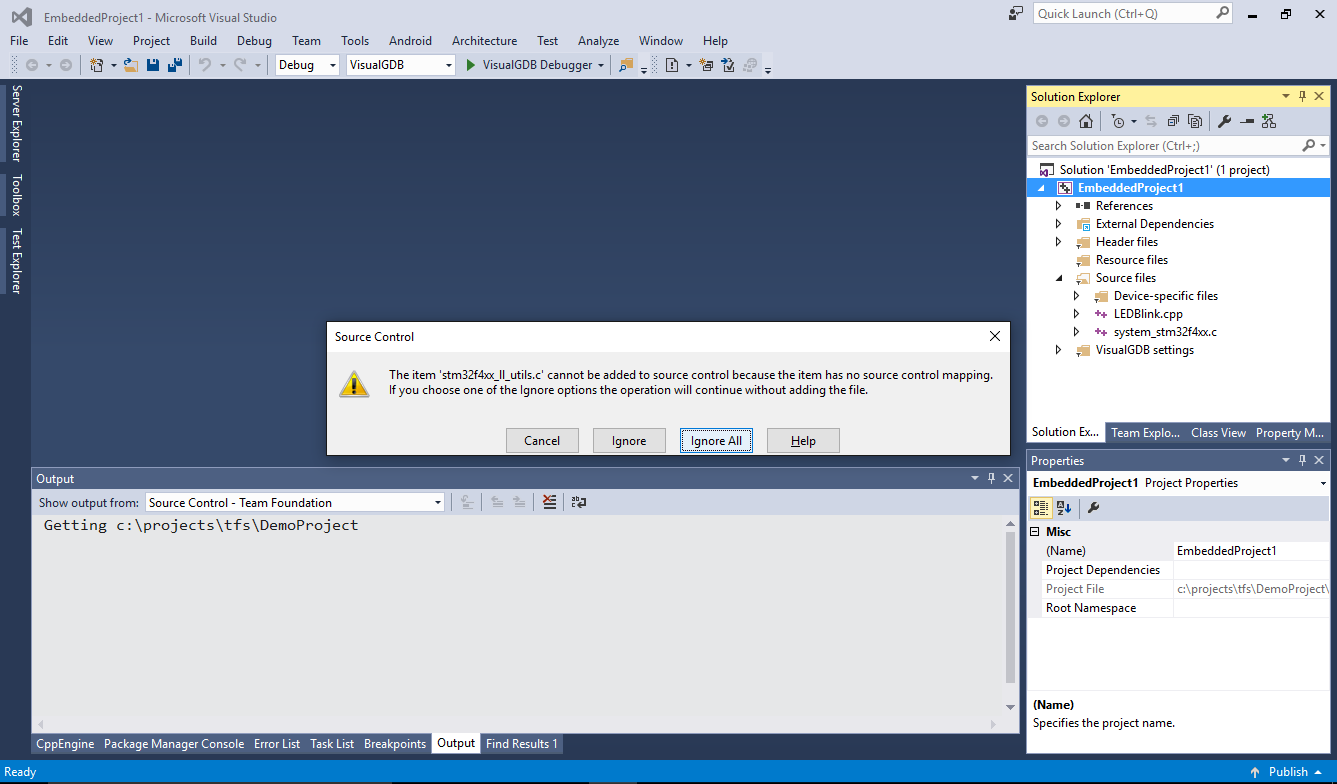
- Press “Finish” to create the project. Visual Studio will warn you that certain files coming from the device SDK are not under source control. We will show how VisualGDB handles it later, so click “ignore all” for now:
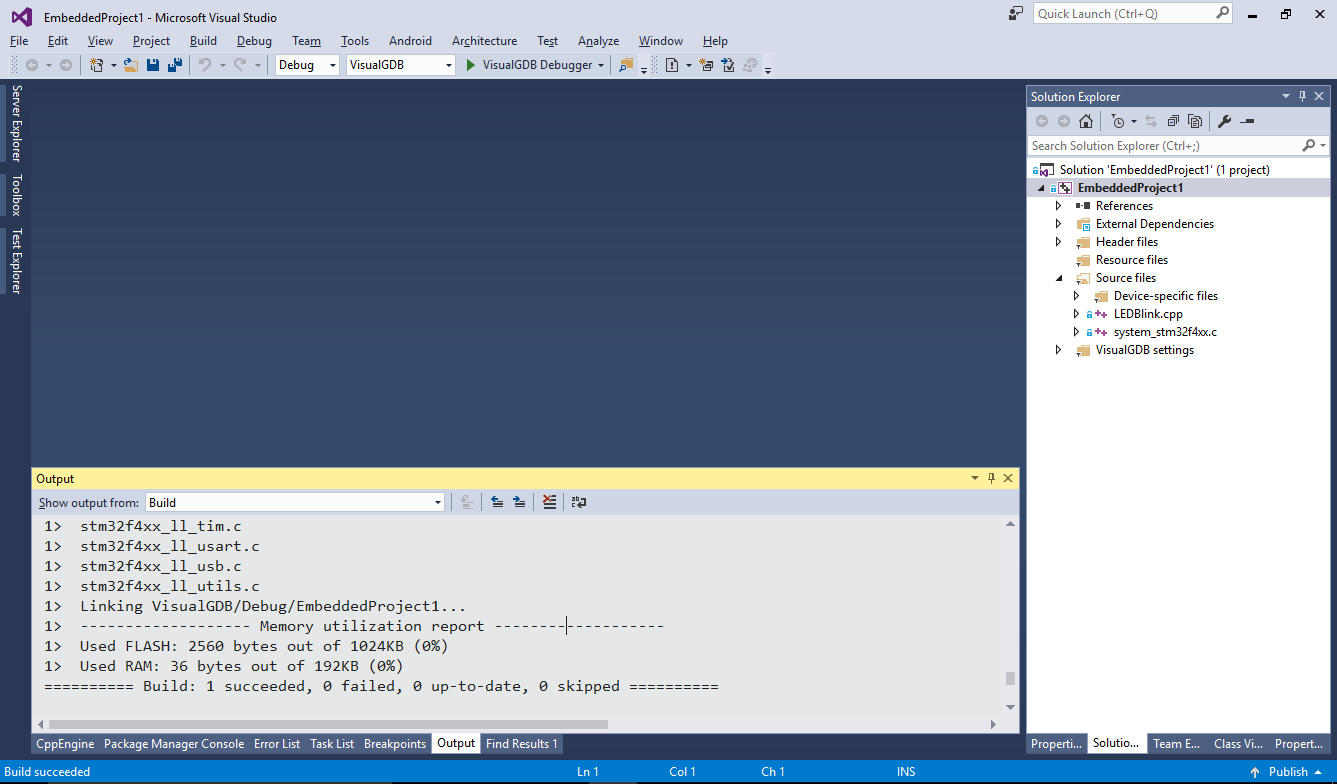
- Build the solution to ensure that the project is complete and all necessary components are present:
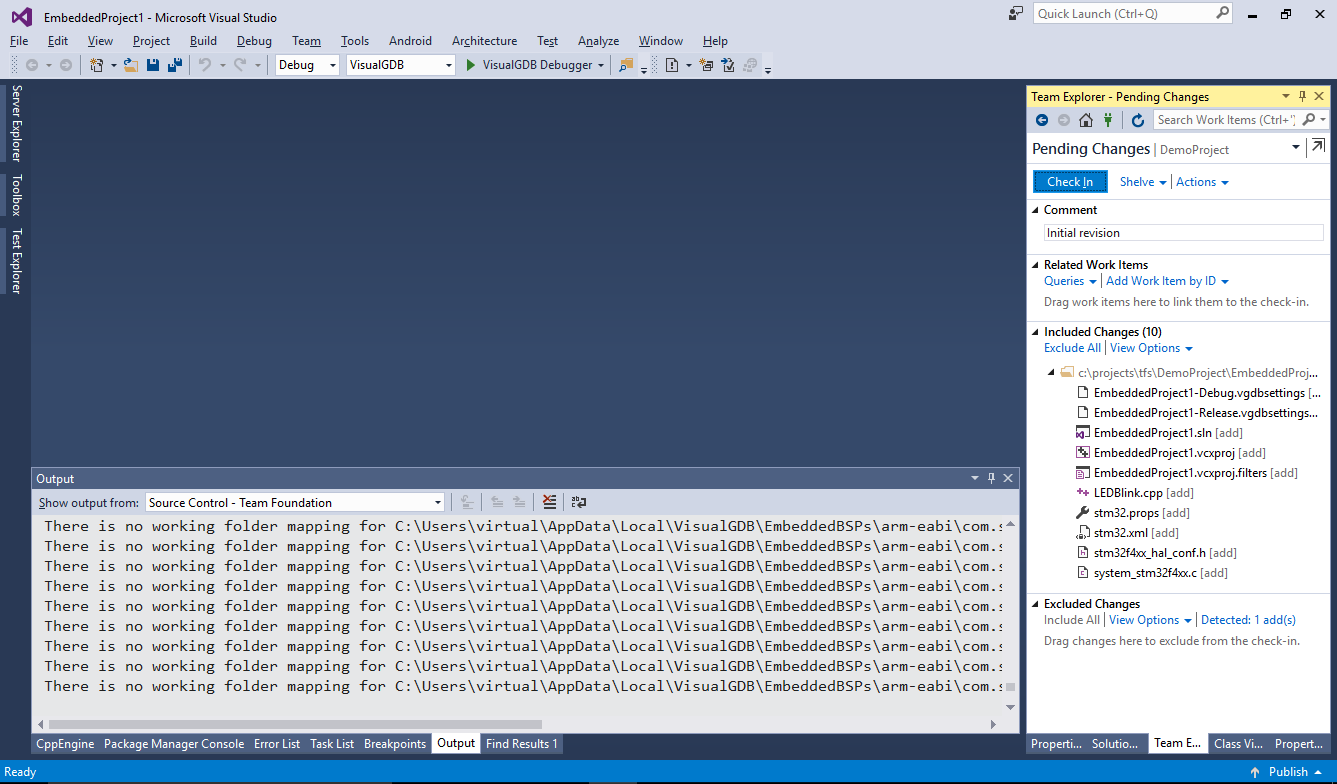
- Go to the “Pending changes” view in Team Explorer. It will automatically list all relevant files (excluding the embedded device SDK). Click “Check In” to send the project to the TFS server:
- Go to the machine that will be used as a build agent and open the TFS management console. Select your project, switch to the “Build” tab and click “+Agent”:
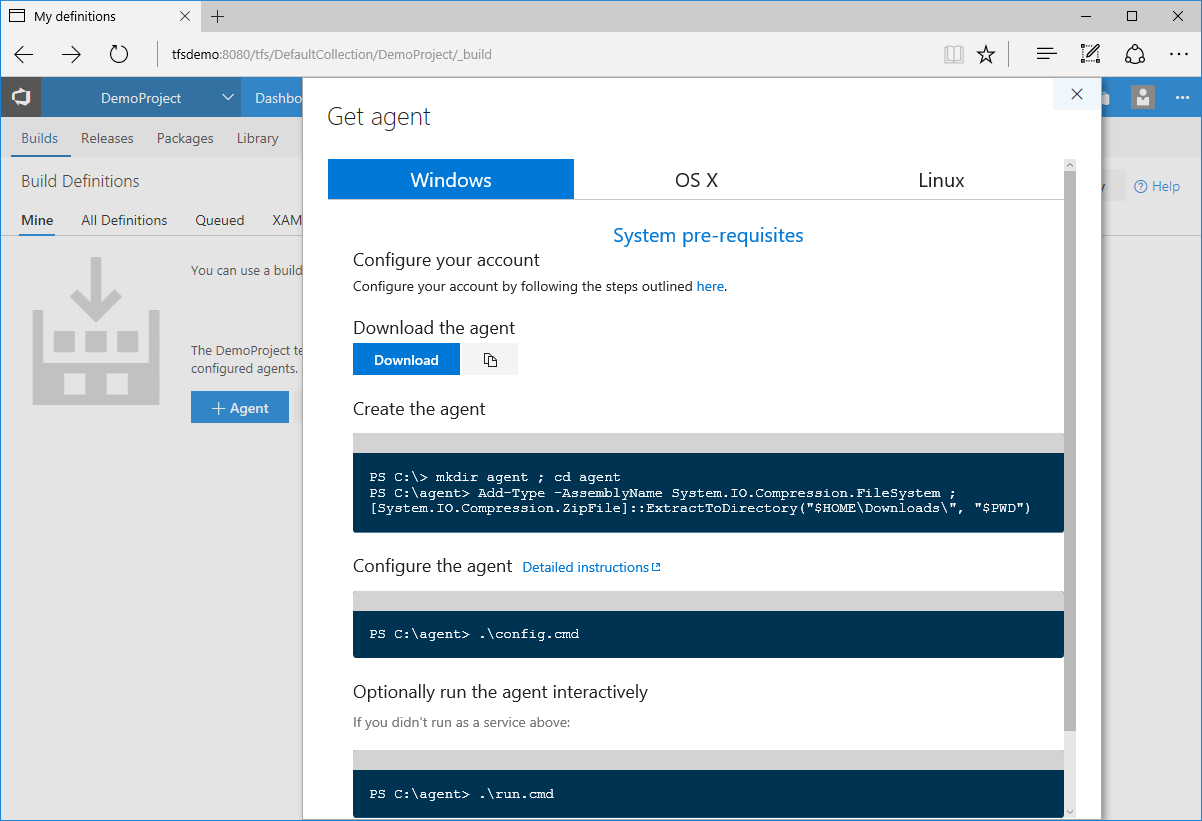 Then click on the “Download” button and save the build agent archive somewhere on the server.
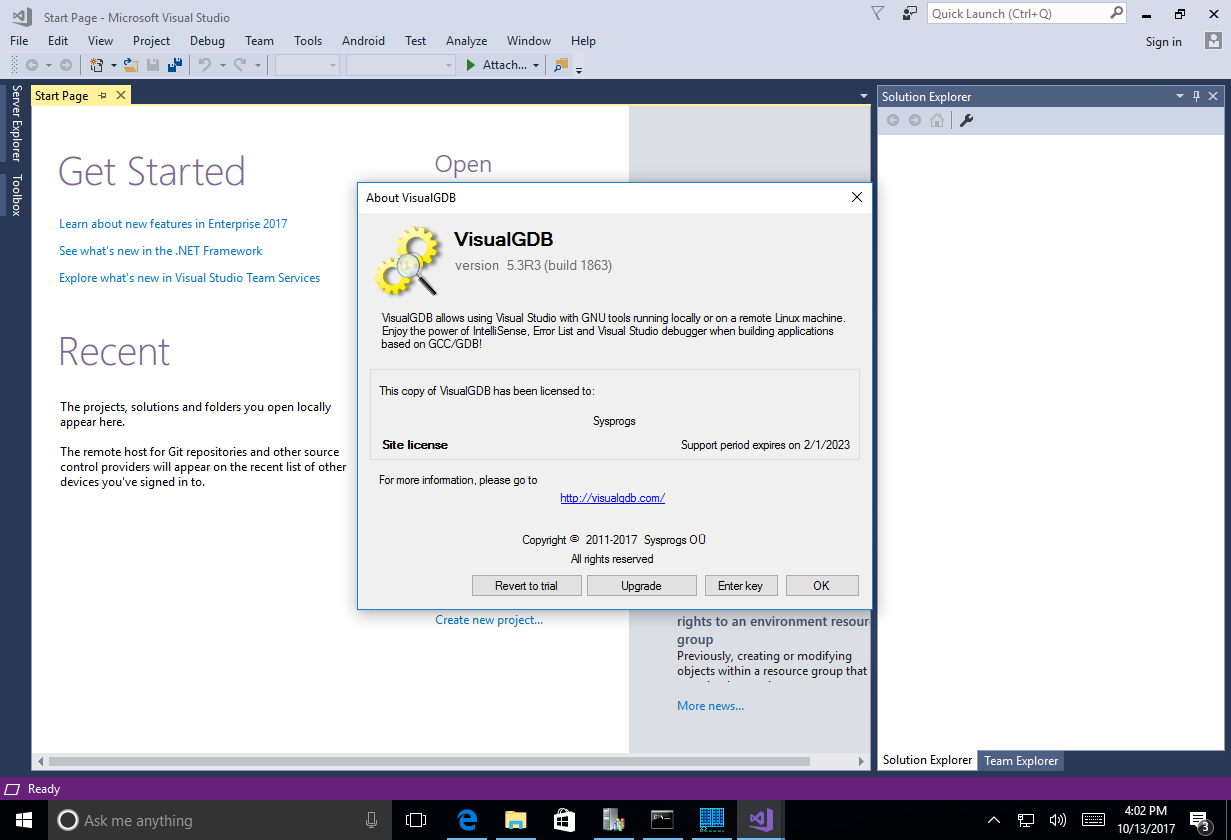
 - Install Visual Studio and VisualGDB on the server. They are required to build MSBuild-based projects. If your projects use GNU Make, or any other build system, you can setup a manual build action instead, however this tutorial will focus on using MSBuild. Open the “About VisualGDB” window to start your trial or enter your VisualGDB key:
- Once the TFS agent is downloaded, unpack it, open its directory in Command Prompt and run “config”:
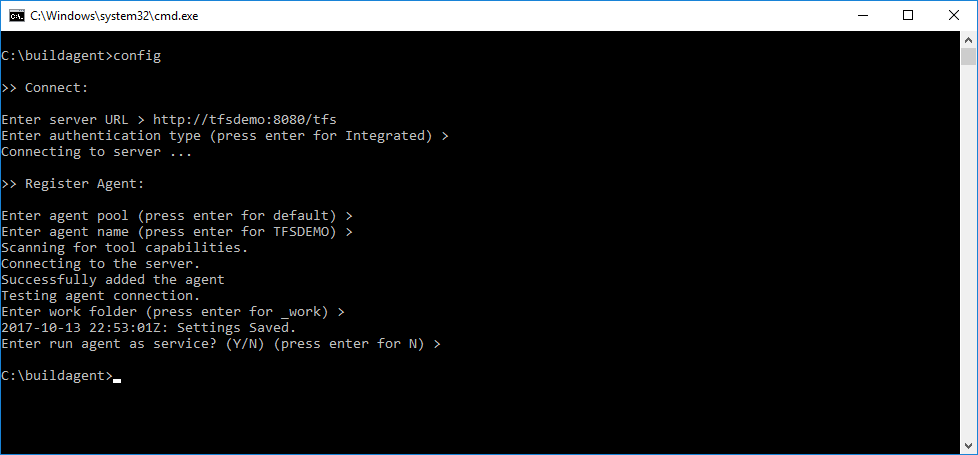 Do not configure the agent to run as a service before you confirm that VisualGDB-based builds work. Running agent as service may interfere with various tools that VisualGDB uses and is only recommended once the build process is otherwise stable.
 - Ensure that the %VISUALGDB_DIR% variable is visible in the command prompt where you run the agent and start it by running the “run” script:

- Get back to the development machine and open the TFS console in your browser. Go to “Build & Release -> Build Definitions -> +New Definition”:
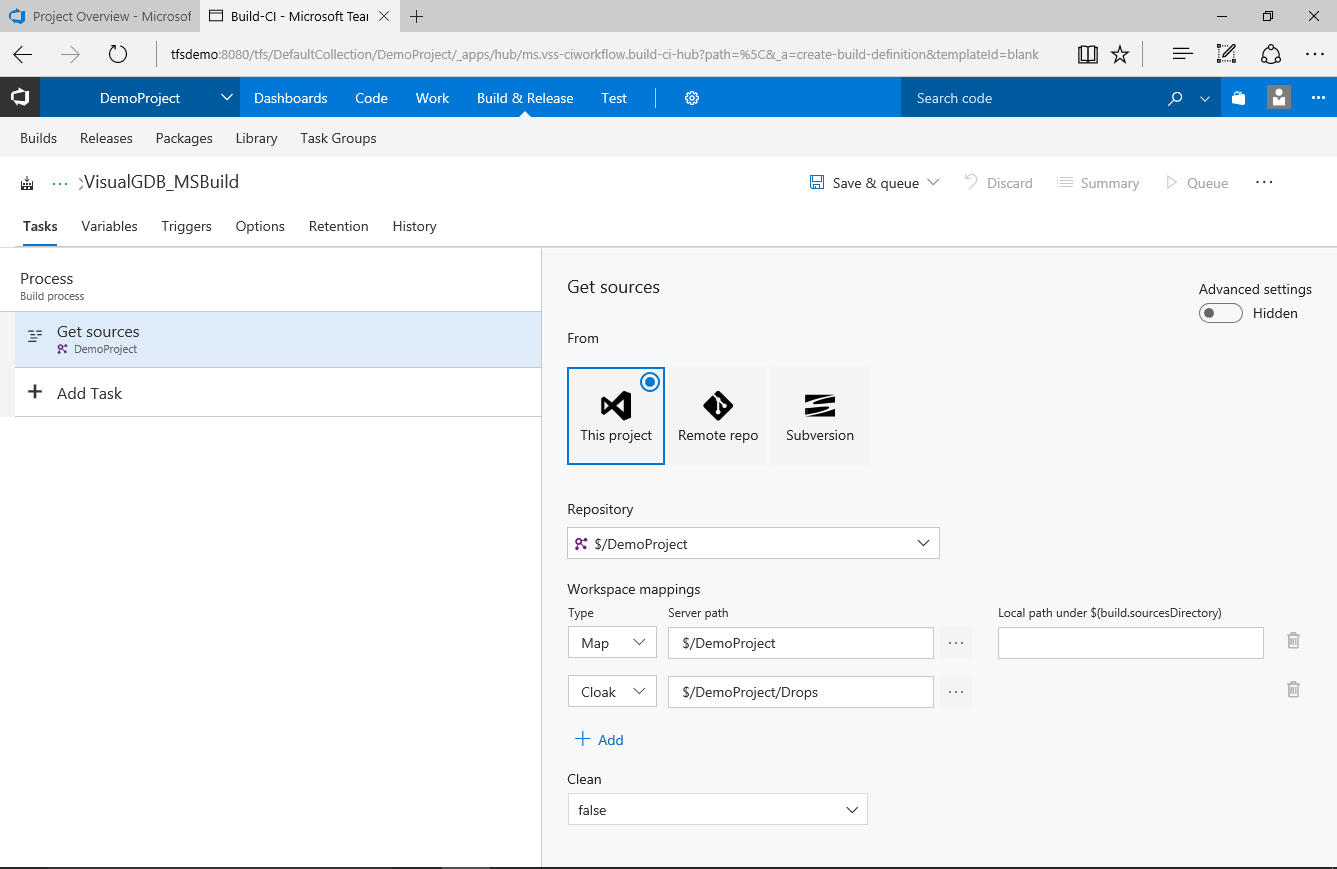
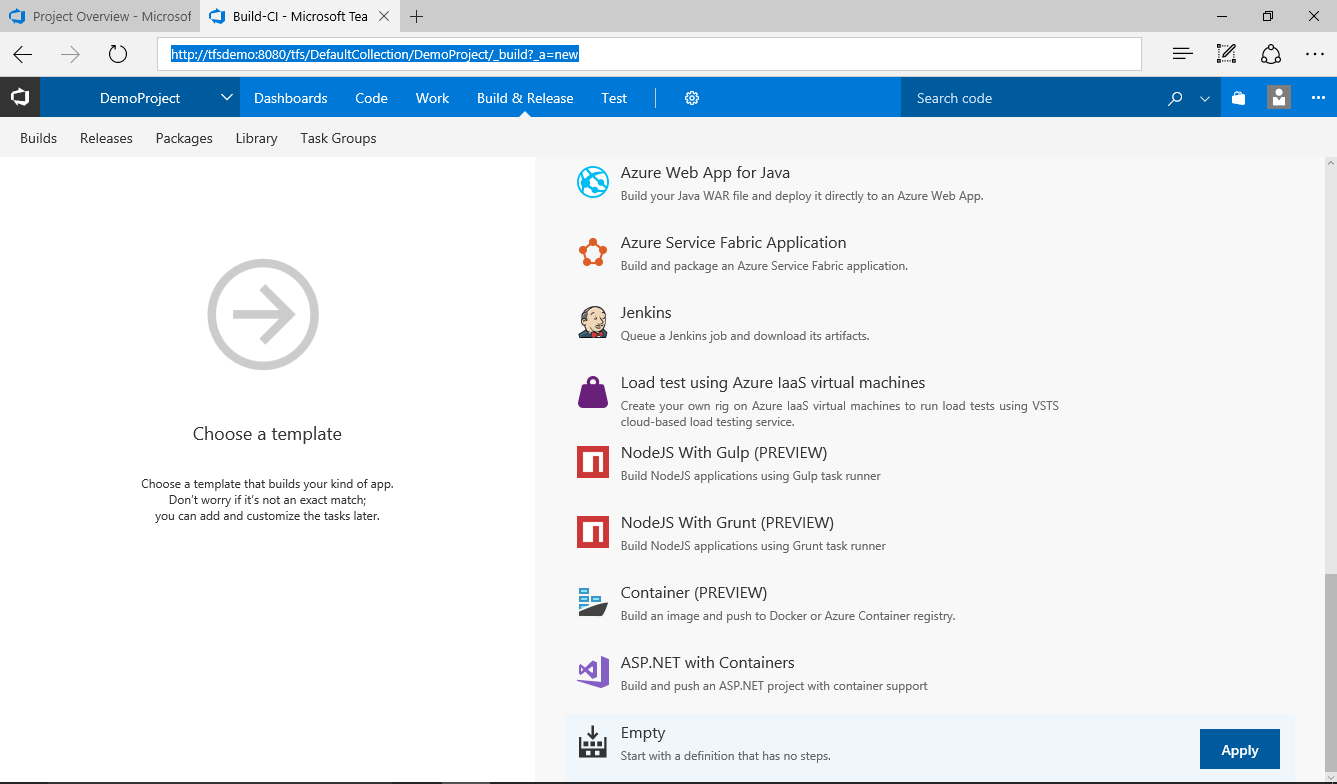 Then create a new definition based on the “Empty” template.
 - Proceed with the default settings for the “Get sources” step:
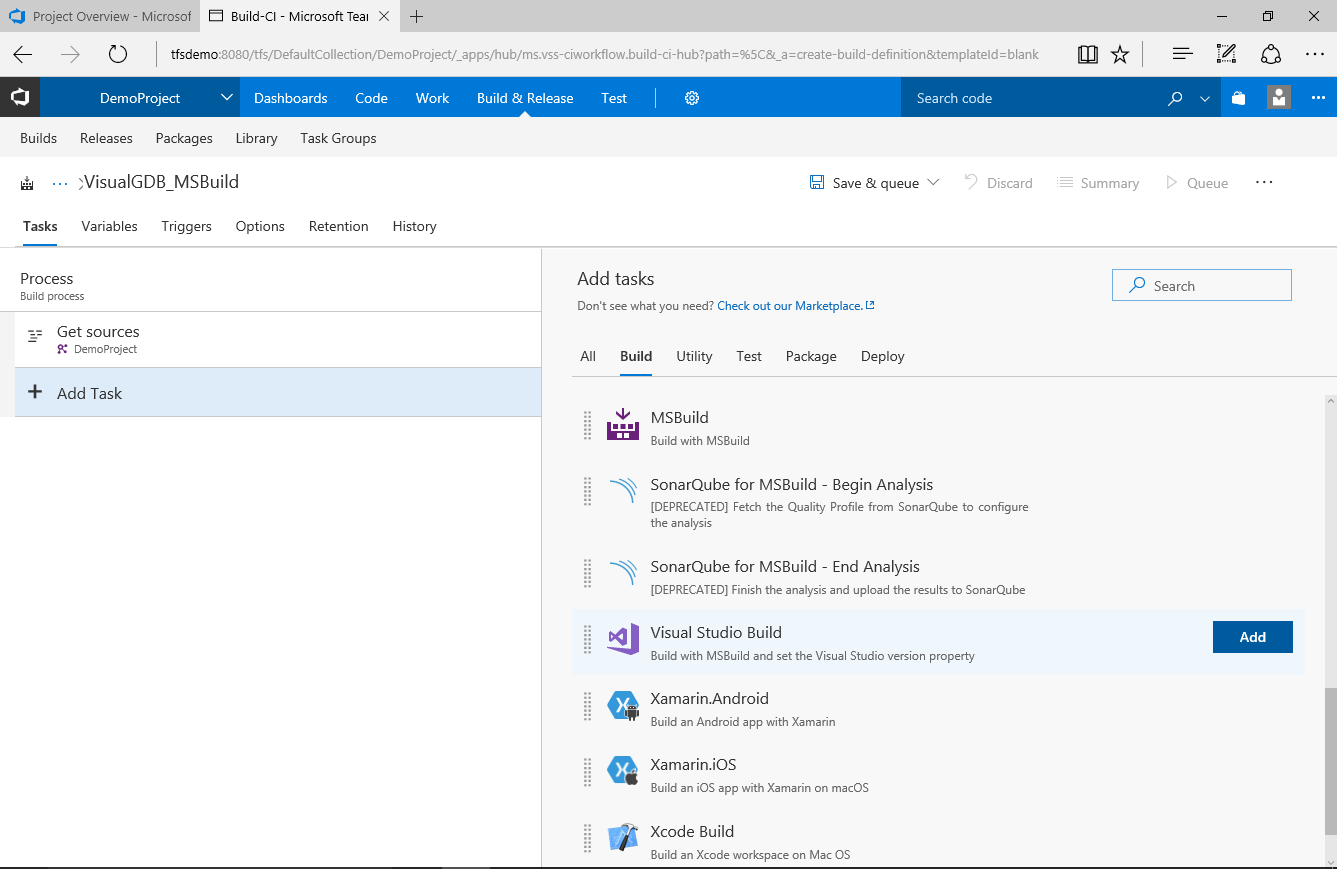
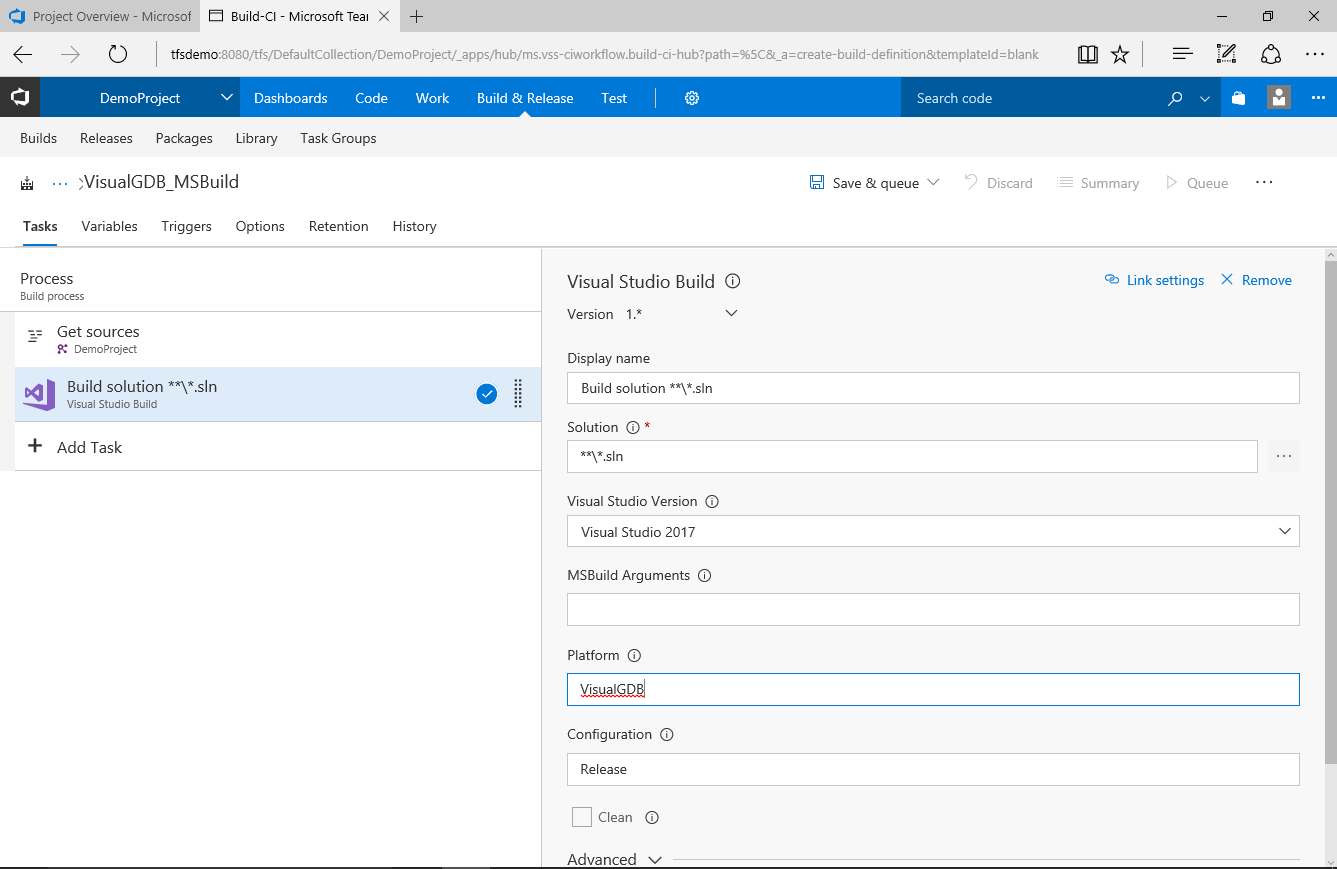
- Then click “Add task”, locate “Visual Studio Build” and click “Add”:
- Go to the task properties and set platform to “VisualGDB” and configuration to “Release”:
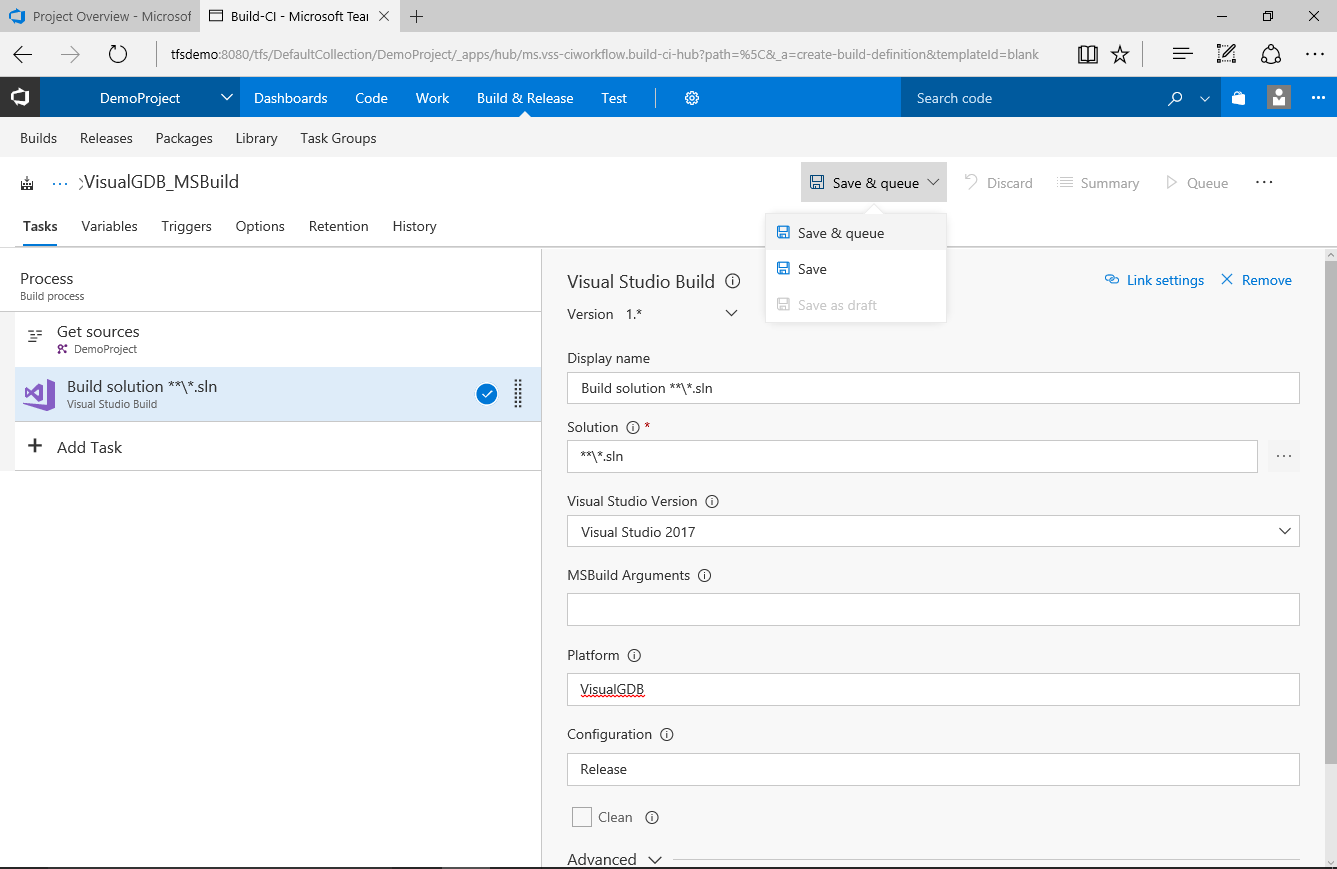
- Click “Save and queue” to start the build:
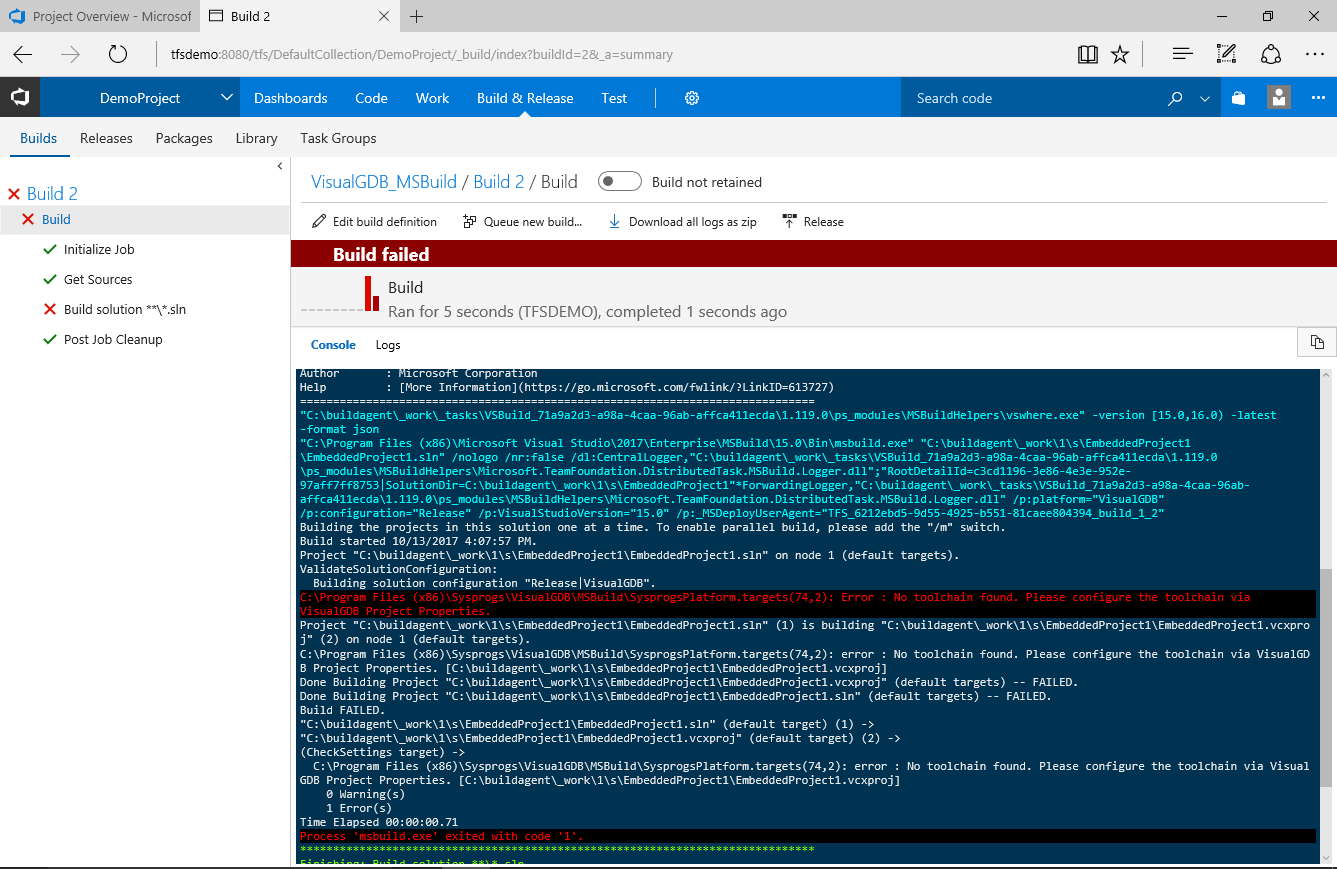
- TFS will automatically check out the project on the server and try building it. As we have not installed the ARM toolchain on that machine, the build will initially fail:
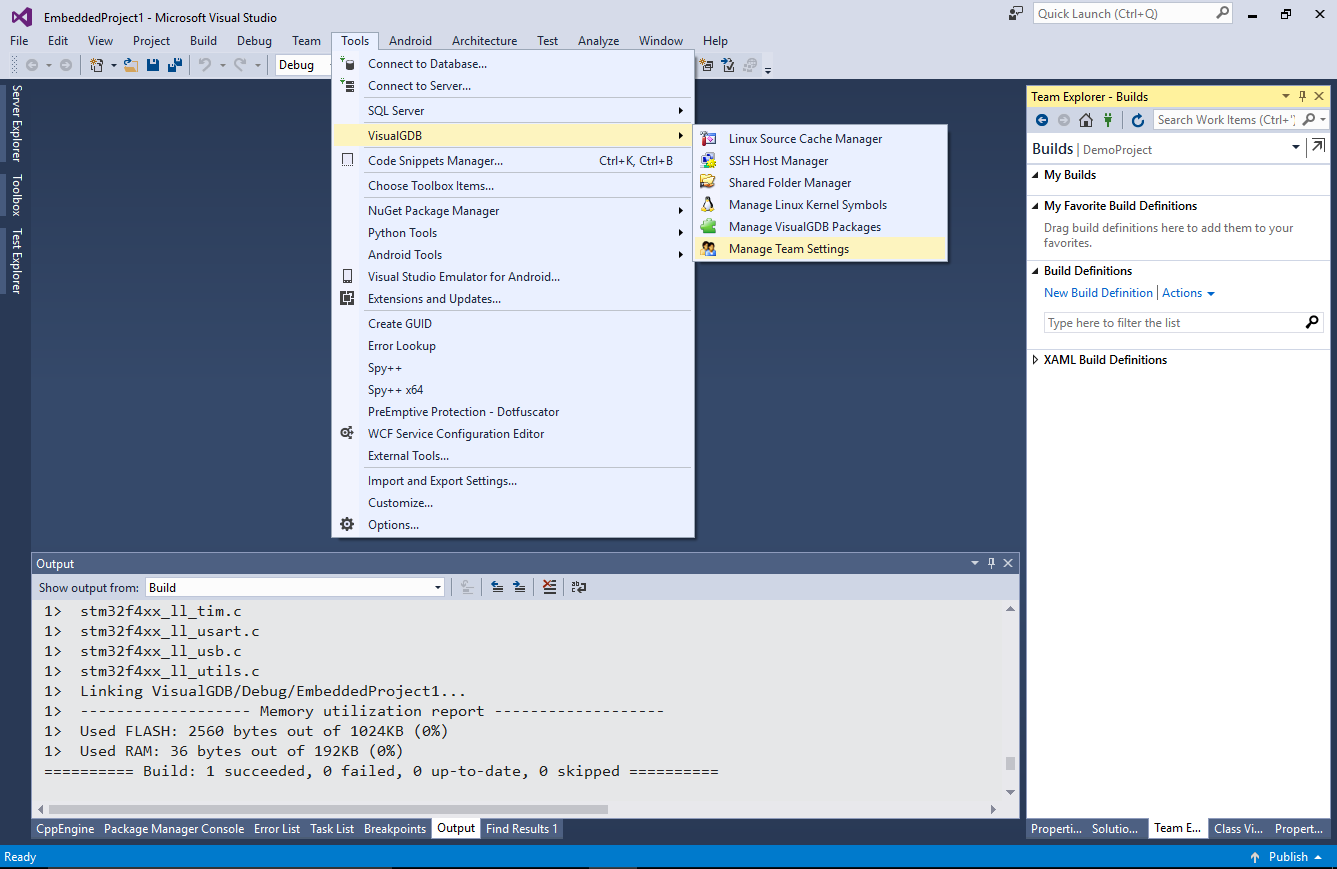
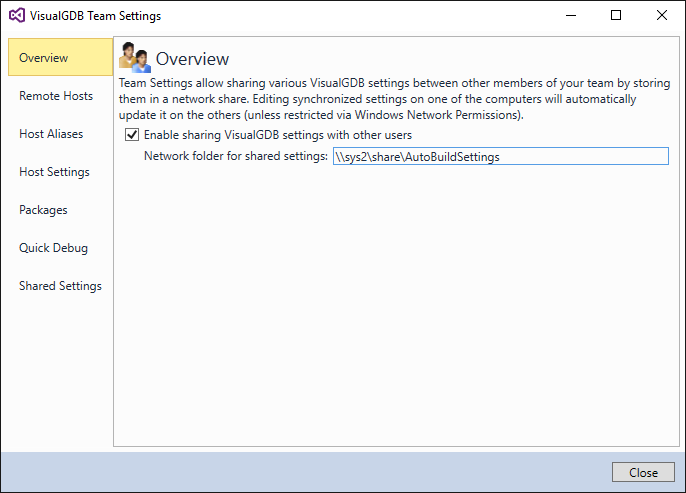
- If you are using the Custom edition of VisualGDB or higher, you can easily synchronize settings like toolchains between the client and server machines via Team Settings. Select Tools->VisualGDB->Manage Team Settings on the client machine:
- Enter a folder visible from both client and server machines as the shared settings folder:
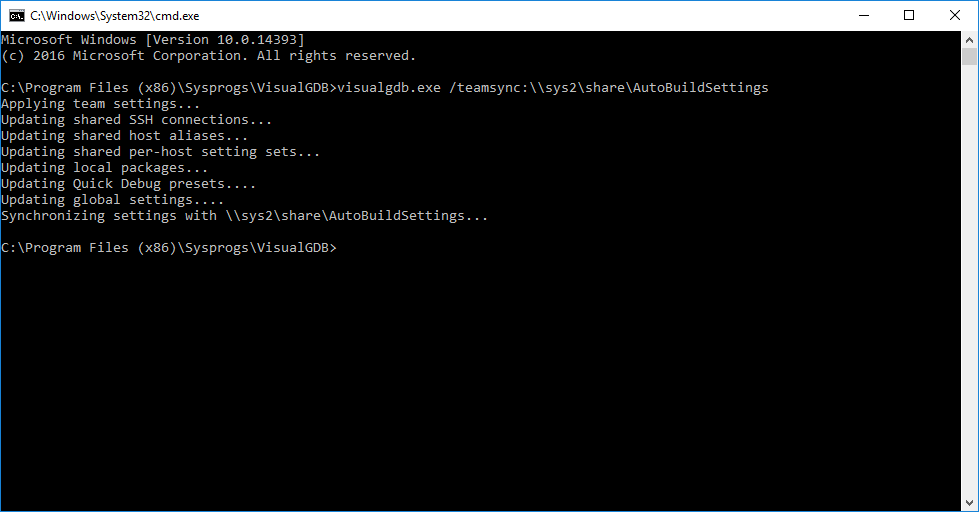
- On the server machine open the VisualGDB folder and run “VisualGDB /teamsync:<shared folder path>” to synchronize the shared settings. As we have not shared anything yet, the synchronization will complete instantly:
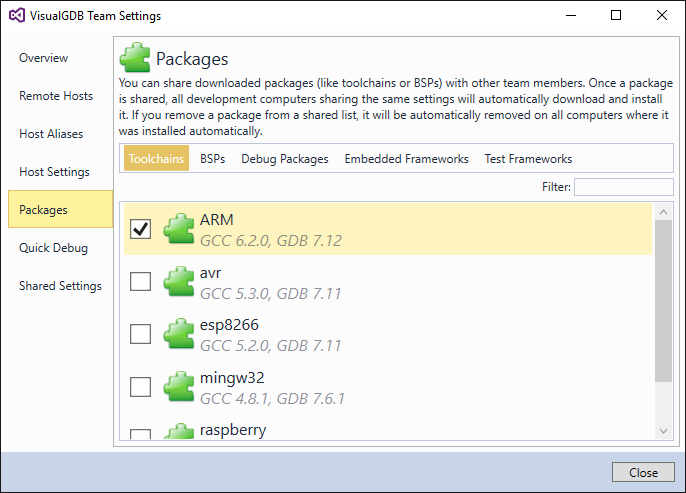
- On the client machine go to the Packages tab and share the toolchain and BSP required to build projects for your device, then click “Close”:
- Start another build in TFS. If you are using VisualGDB 5.3R3 or later, it will automatically detect that it’s running under TFS and will apply the shared settings without showing any dialogs:
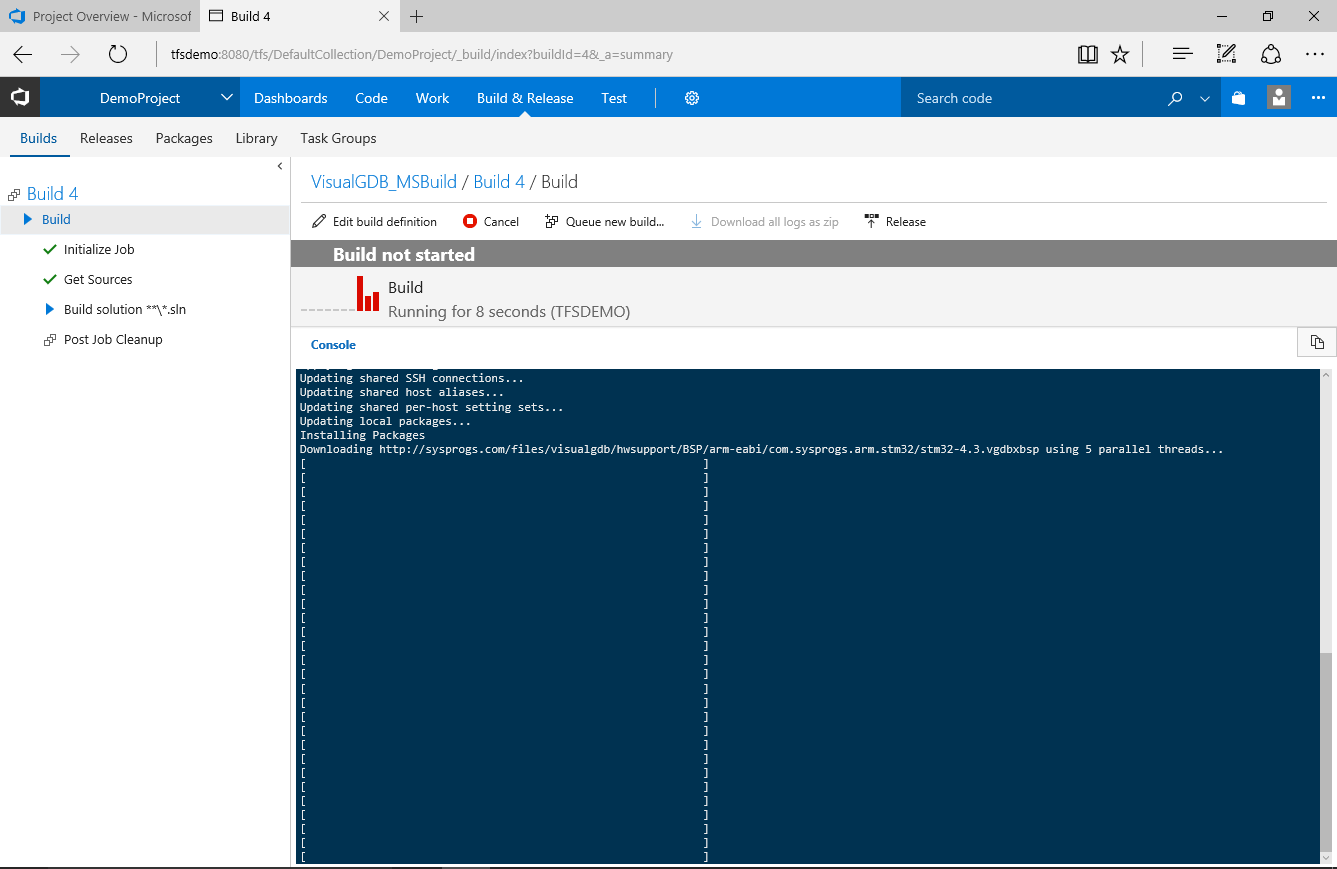 The toolchain will be automatically installed inside the TFS agent work folder; the BSP will be installed under %LOCALAPPDATA%.
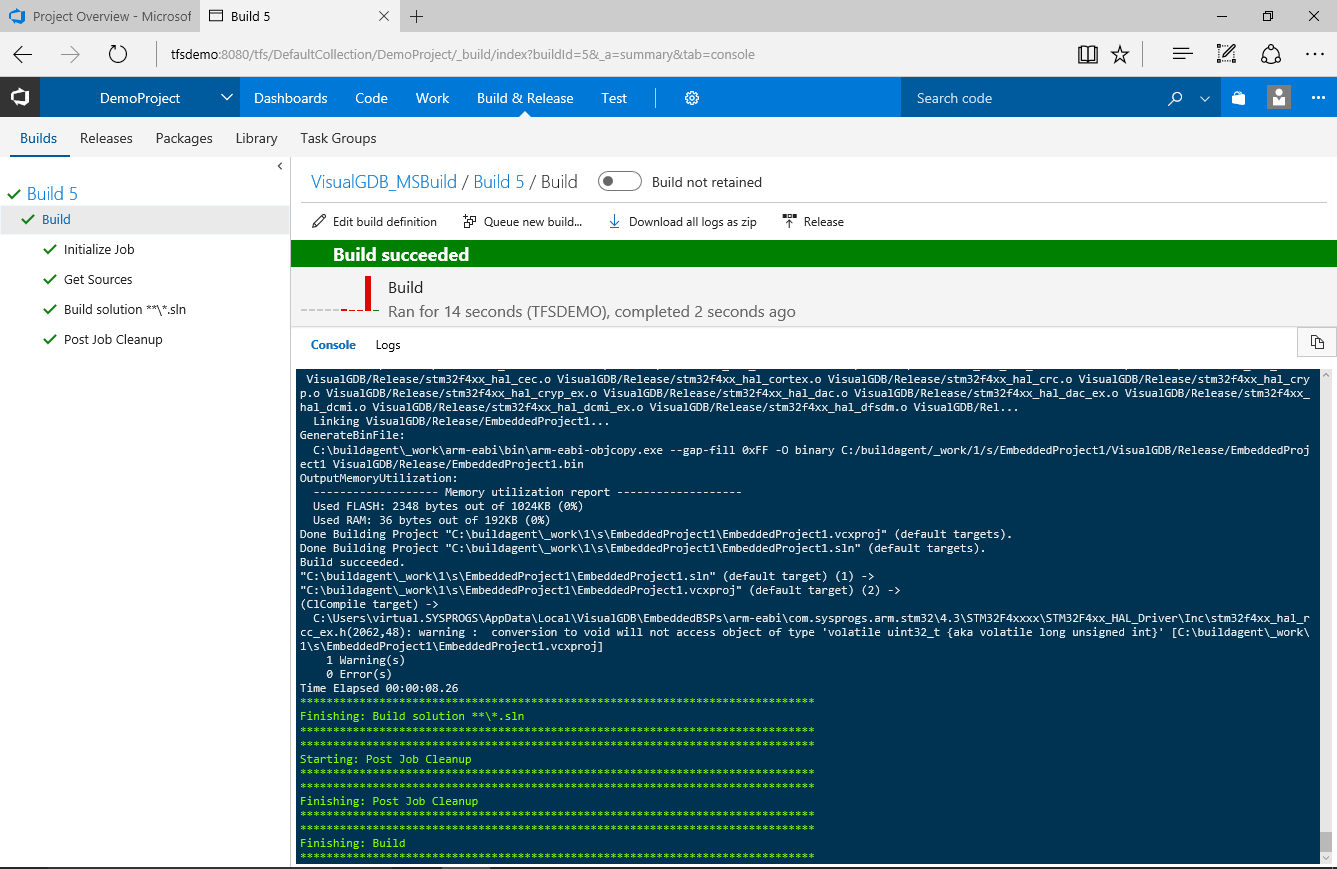
 - The initial build during which the toolchain and the BSP are installed will still fail as Visual Studio does not refresh the definitions mid-build. Start another build via the TFS console. This time it will succeed:
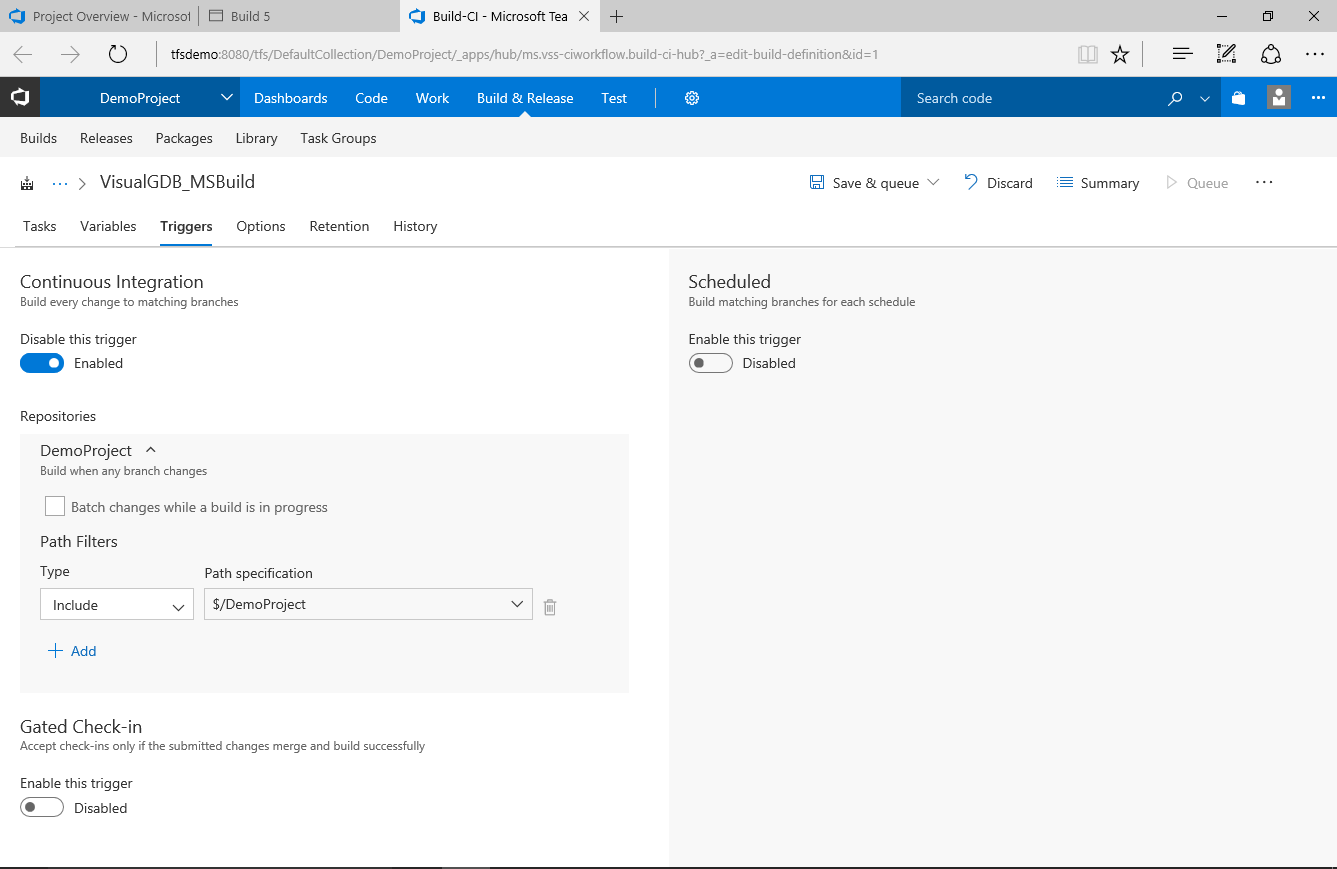
- You can configure the build to run automatically each time new source code is checked in via the Triggers page:
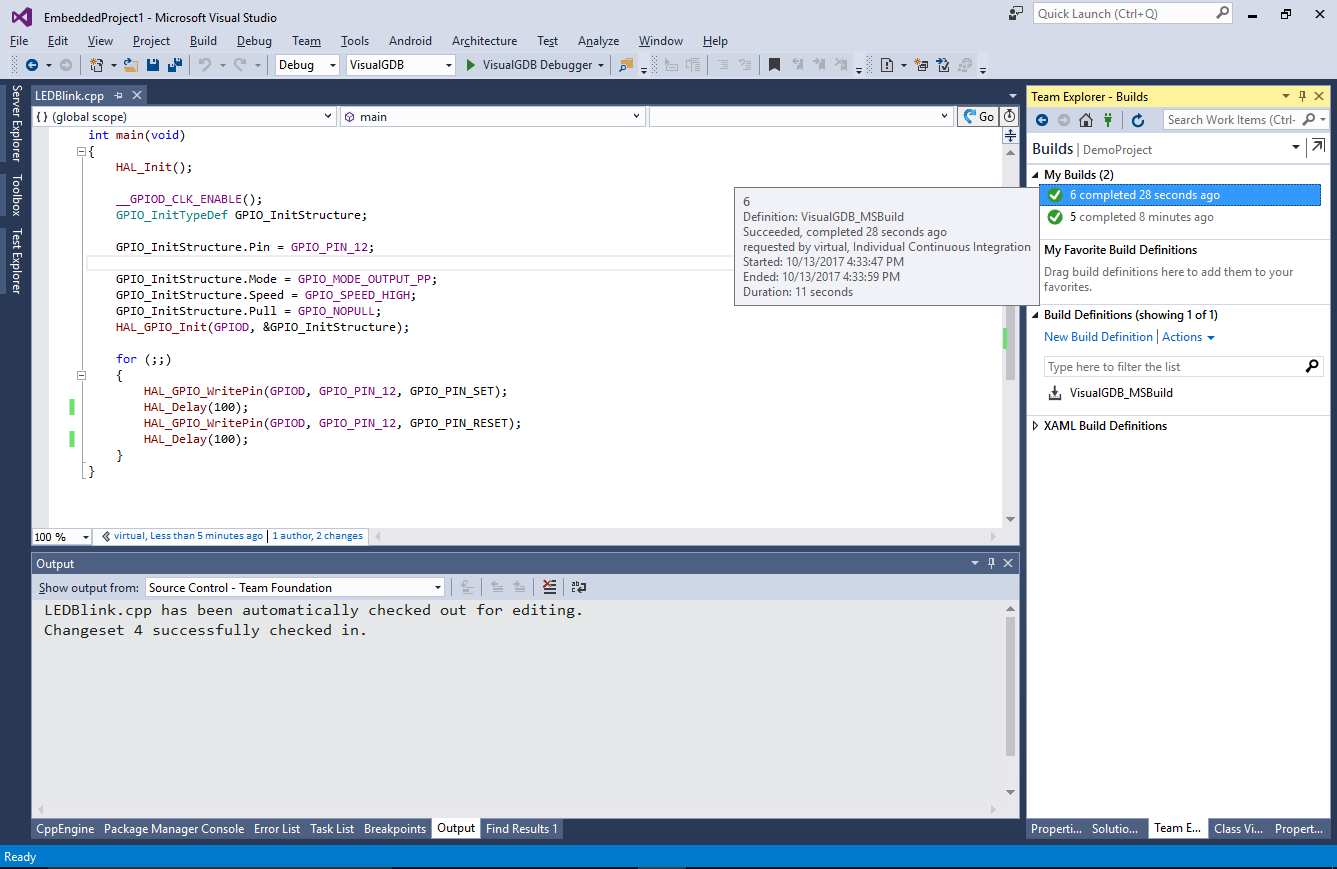
- You can try this out by changing a few lines in the project, checking in the changes and then switching Team Explorer to the Builds mode:
- Once you have configured the build, you can switch the build agent to run as a service. As VisualGDB settings and caches are stored separately for each user account, ensure that you configure it to run from the same user account you used to install VisualGDB:
