Importing CrossWorks projects into VisualGDB
This tutorial describes how to import Rowley CrossWorks projects into VisualGDB. Before you begin, ensure you have installed VisualGDB 5.4R6 or later.
- Create a basic CrossWorks project and build it under CrossWorks:
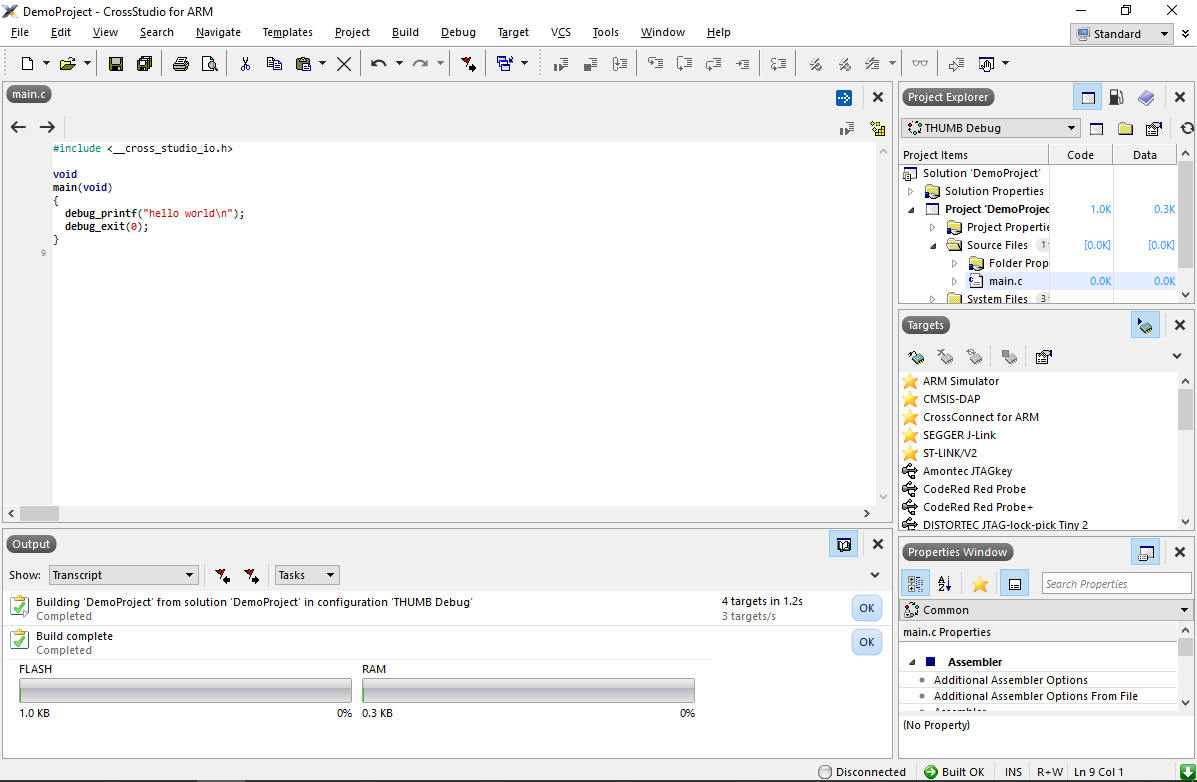 Building the project before importing it is essential, as it will generate the linker scripts and other files that will be used by VisualGDB.
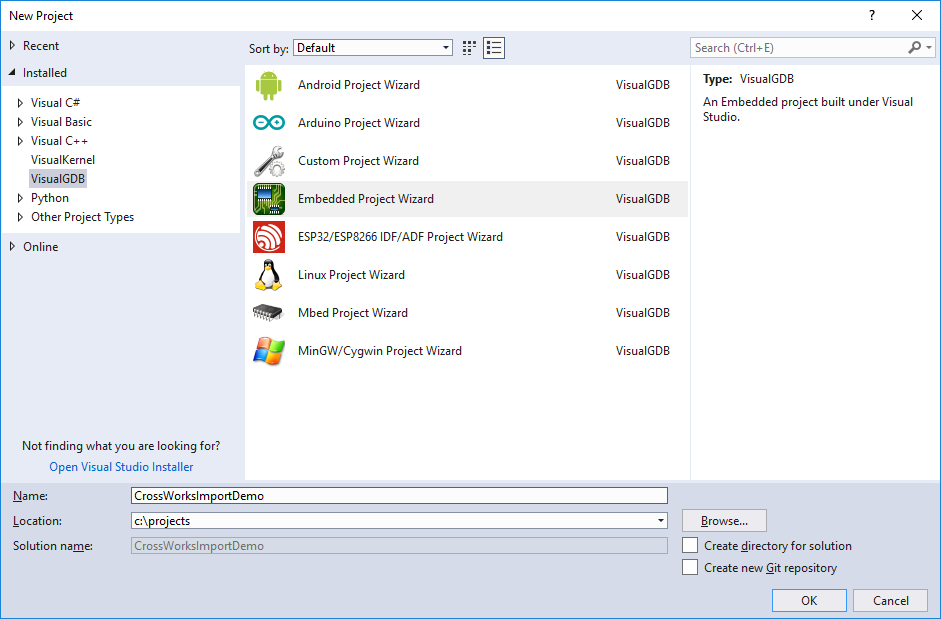
 - Start Visual Studio and open the VisualGDB Embedded Project Wizard:
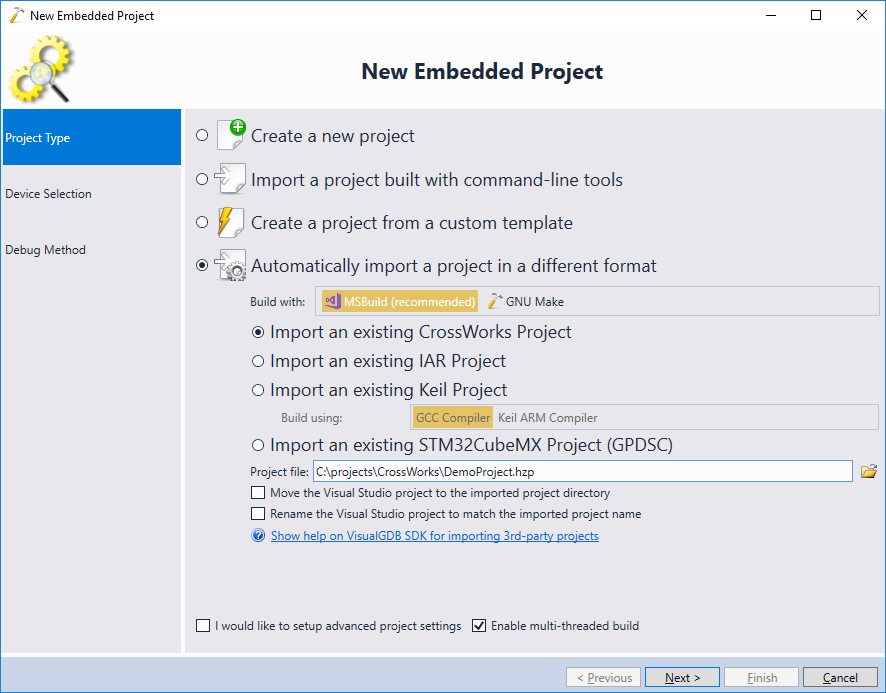
- Select “Automatically import a project in a different format”, choose CrossWorks below and enter the path to the .hzp file you would like to import:
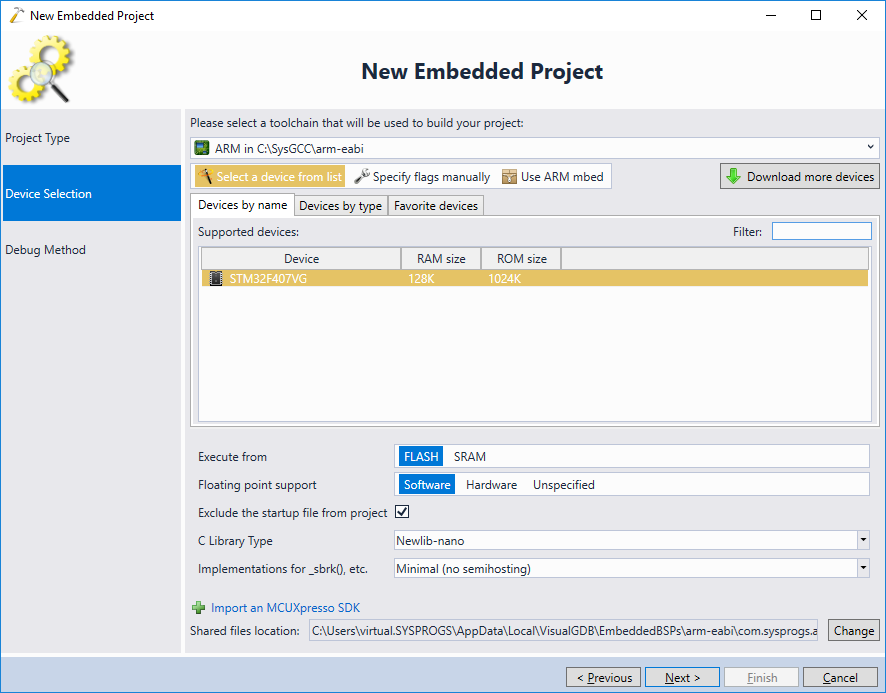
- On the next page select a compatible toolchain and confirm the device type imported from the project:
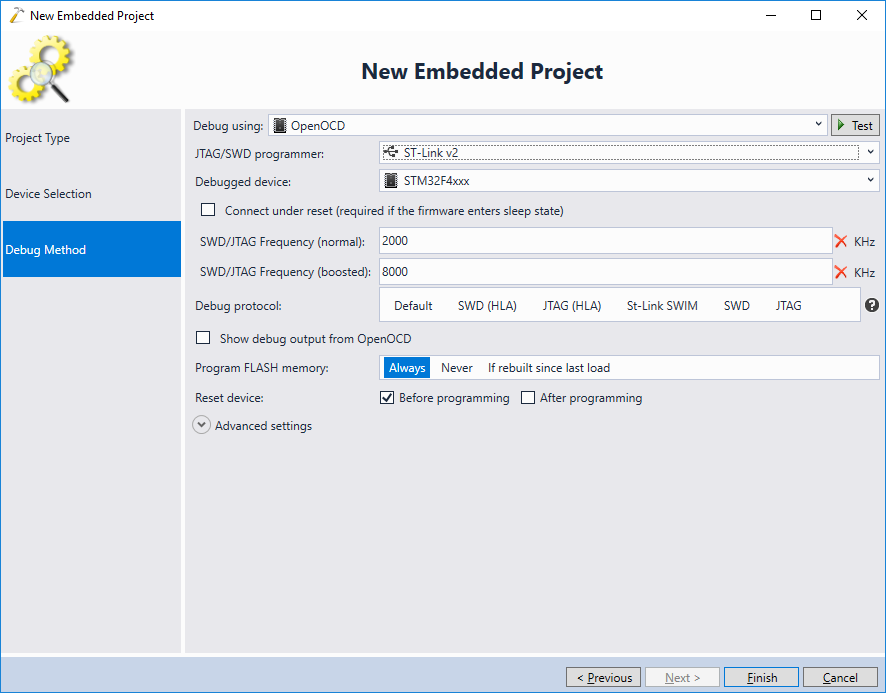
- Finally, choose a debug method compatible with your setup:
- Click “Finish” to generate the project. VisualGDB will automatically import the list of source files and the basic build settings from the CrossWorks project. However, if you try building it as is, the build will fail with errors in the assembly files:
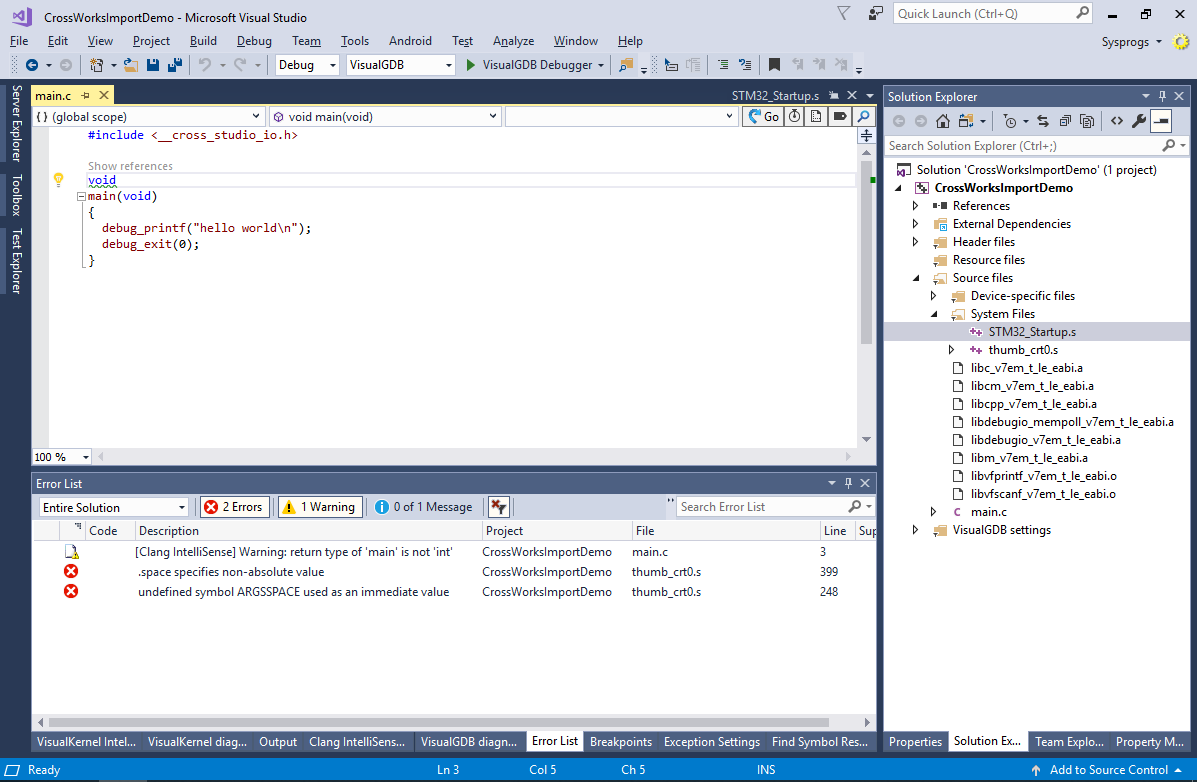
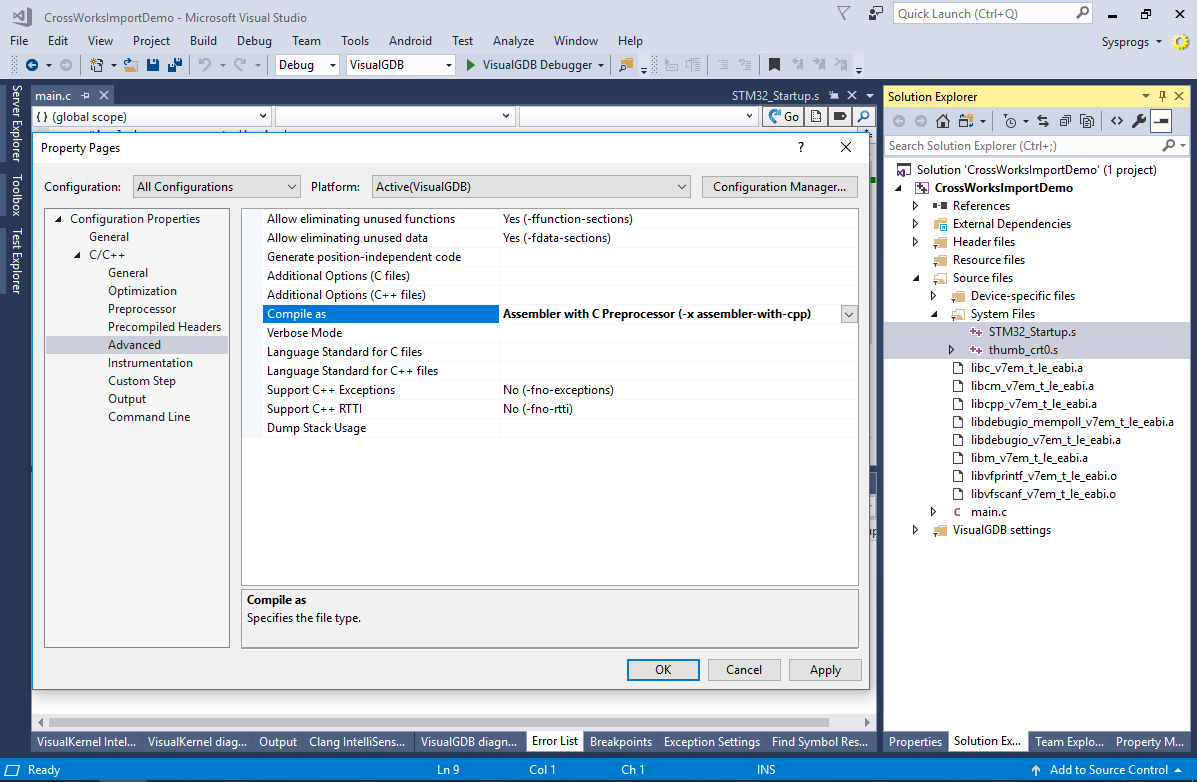
- This happens because the assembly files installed by CrossWorks have the lowercase .s extension, so GCC treats them as non-preprocessed assembly files and hence fails to process the preprocessor directives inside them. This can be easily worked around by selecting the .s files in Solution Explorer and setting the “Compile As” setting for them to “Assembler with C Preprocessor):
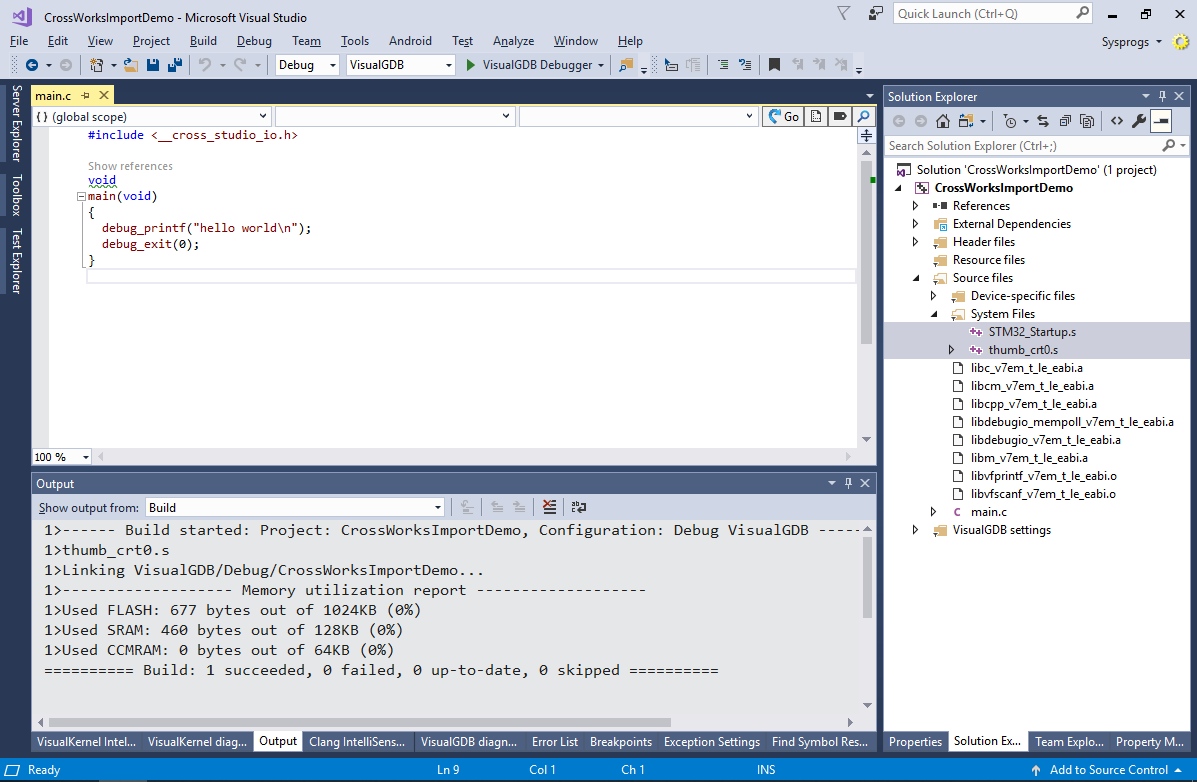
- Once you have enabled the preprocessor for the assembly files, the project will be built as expected:
- If you are planning to build the imported project with VisualGDB without having to build it with CrossWorks first, locate the linker script in VisualGDB Project Properties -> Build Settings and ensure it’s checked into your version control system (CrossWorks would normally generate the linker script during the project build):
 You can also move it directly to the project directory to avoid checking in the directory with other generated files