Using the target_link_libraries() statement to control the linked libraries
This tutorial shows various ways to use CMake’s target_link_libraries() statement and explains the differences between them. We will create a basic Raspberry Pi project using the sqlite3 library and will then show different ways of using target_link_libraries() to reference the necessary libraries.
In this tutorial we will use Visual Studio and VisualGDB, however the steps described below will work with any other CMake-based environment.
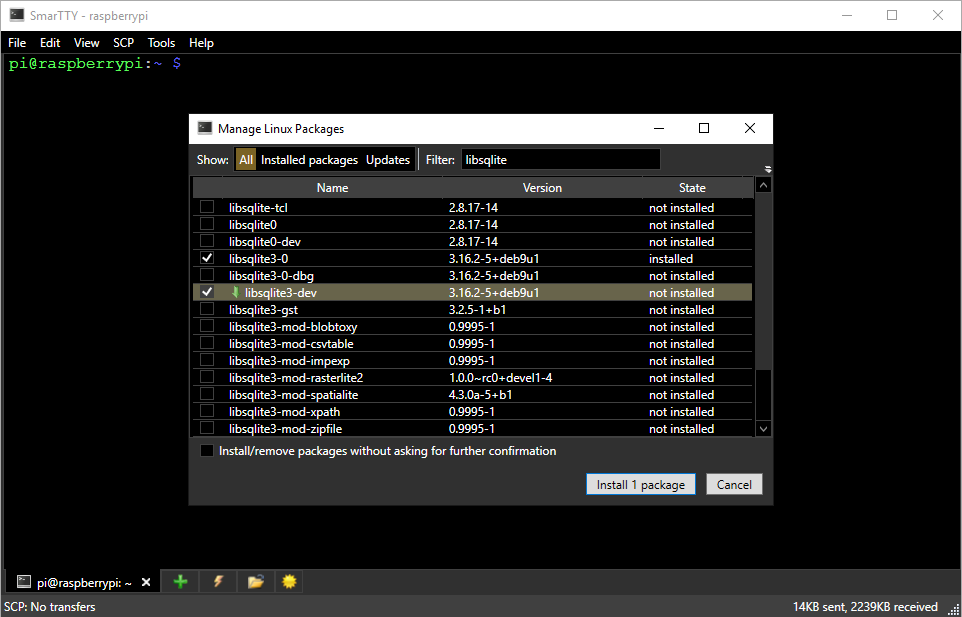
- Connect to your Raspberry Pi via SSH and install the libsqlite3-dev package. If you are using SmarTTY, the Tools->Manage Linux Packages command can help you find the exact package name easier:
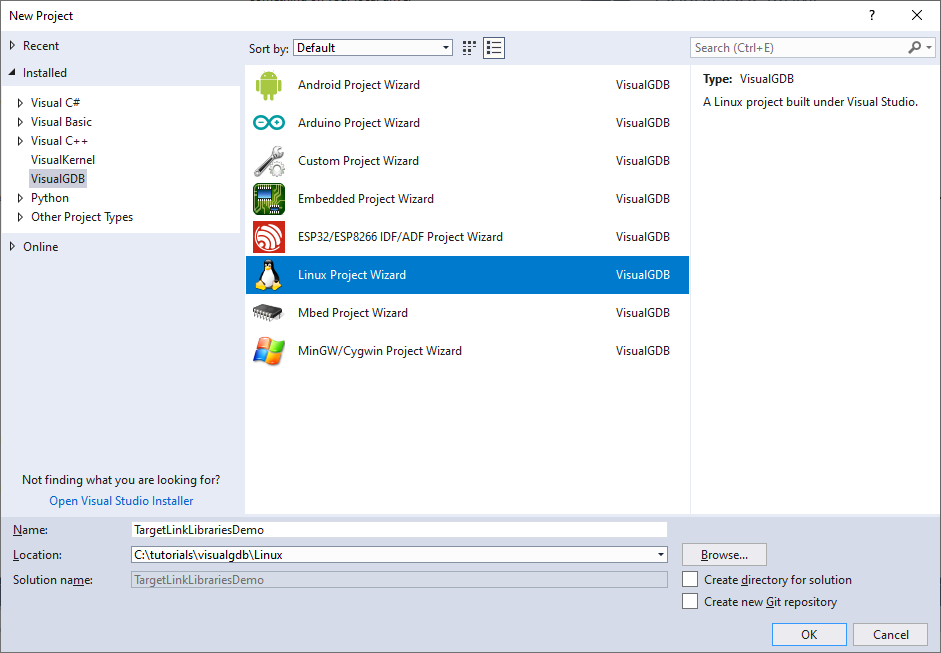
- Start Visual Studio and open the VisualGDB Linux Project Wizard:
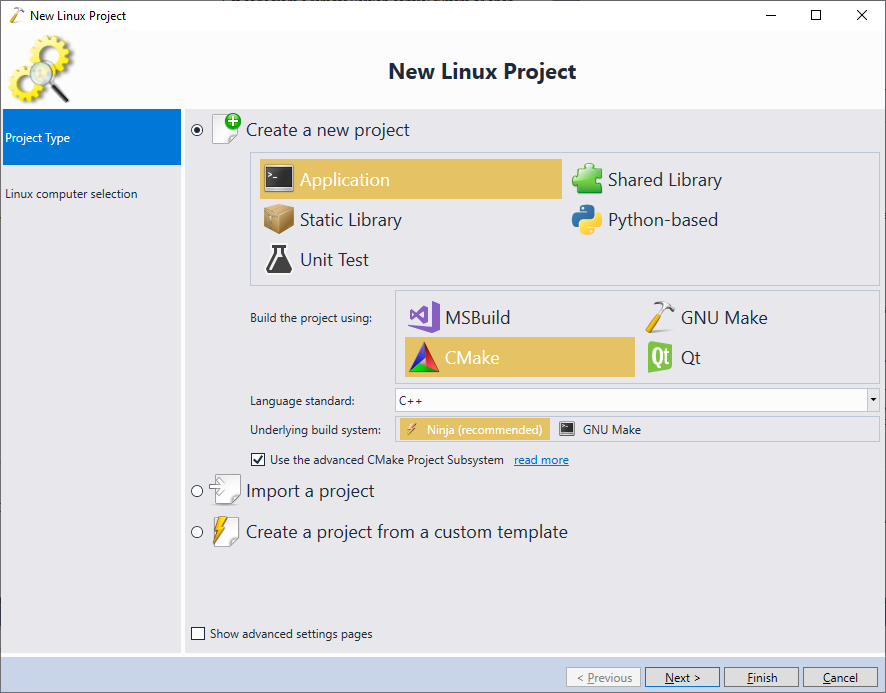
- On the first page select “Create Application -> CMake -> Ninja”:
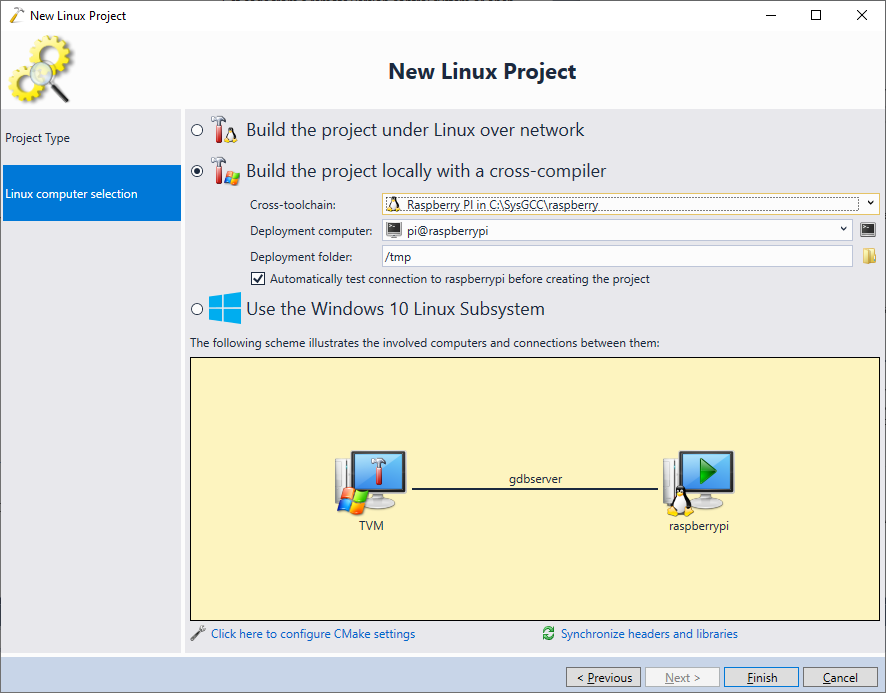
- On the next page select your Raspberry Pi cross-toolchain and pick the SSH connection for your Pi. Ensure the “test connection” checkbox is checked so that VisualGDB can check that all the necessary packages are present:
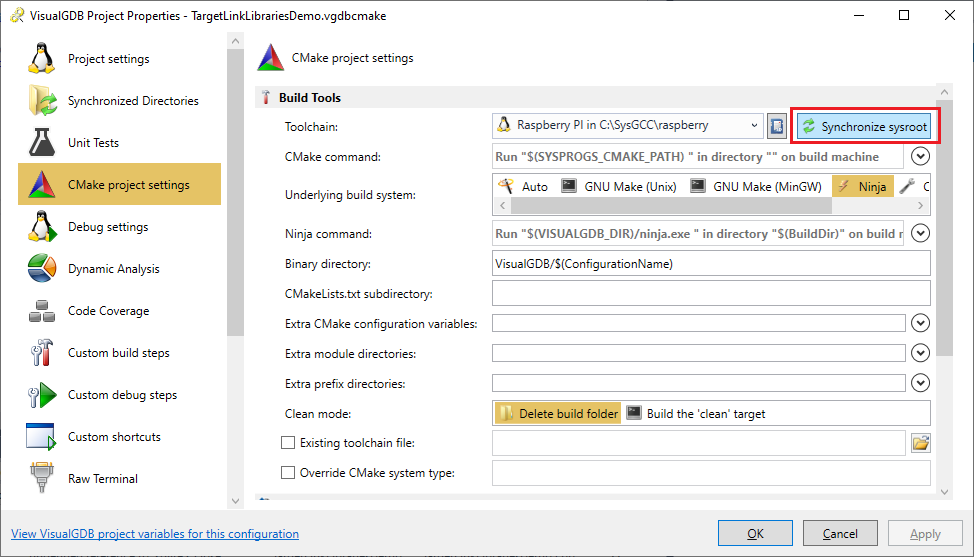
- Press “Finish” to create the project. Once it is created, open VisualGDB Project Properties and click “Synchronize Sysroot” on the CMake project settings page. This will copy the sqlite libraries from the Raspberry Pi into the toolchain so that you can reference them from the projects built with that toolchain:
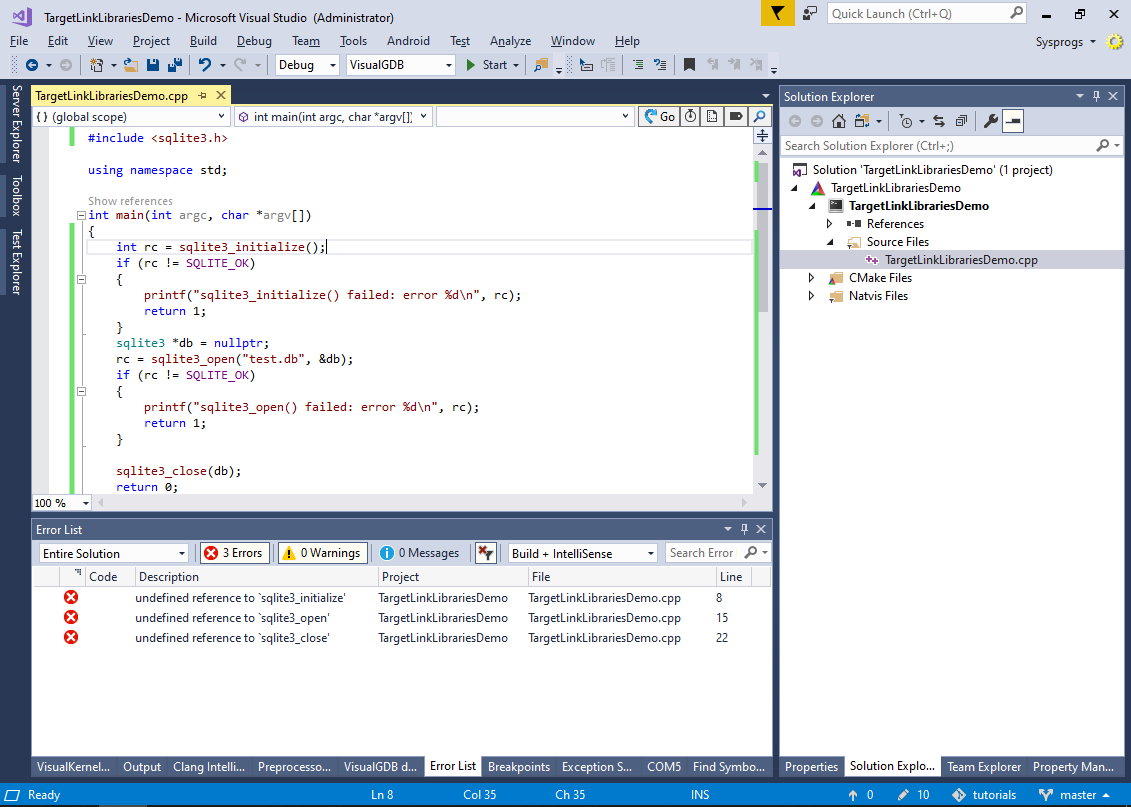
- Replace the contents of the main source file with the following basic project demonstrating the use of sqlite3:
#include <iostream>
#include <sqlite3.h>

using namespace std;

int main(int argc, char *argv[])
{
    int rc = sqlite3_initialize();
    if (rc != SQLITE_OK)
    {
        printf("sqlite3_initialize() failed: error %d\n", rc);
        return 1;
    }
    sqlite3 *db = nullptr;
    rc = sqlite3_open("test.db", &db);
    if (rc != SQLITE_OK)
    {
        printf("sqlite3_open() failed: error %d\n", rc);
        return 1;
    }

    sqlite3_close(db);
    return 0;
}
- Try building the project. As we have included the header files (that provide the definitions for sqlite3_xxx() functions), but have not referenced the library defining them, the linker will fail due to missing definitions for the sqlite3 functions:
- In order to fix the “undefined reference to ‘sqlite3_initialize’” errors, we need to locate the library that defines those symbols. This can be done by either checking the sqlite3 documentation, or searching for all libraries on Raspberry Pi for the name of the missing symbol (sqlite3_initialize):

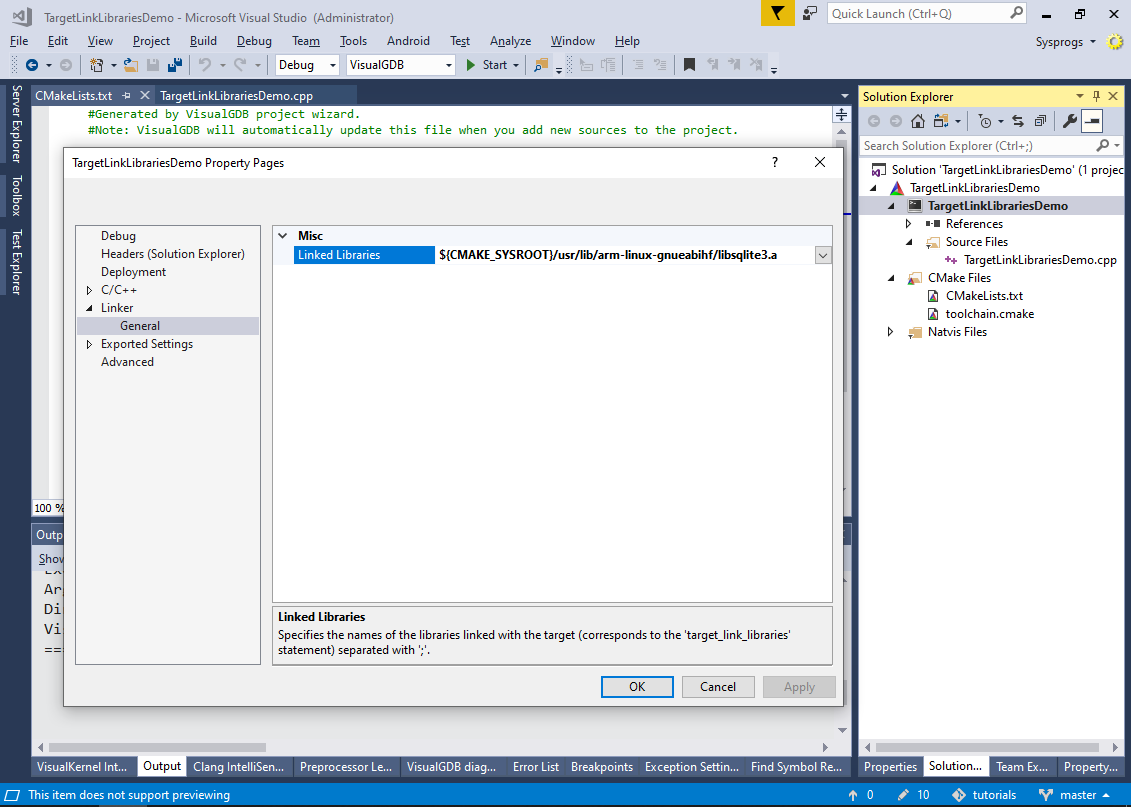
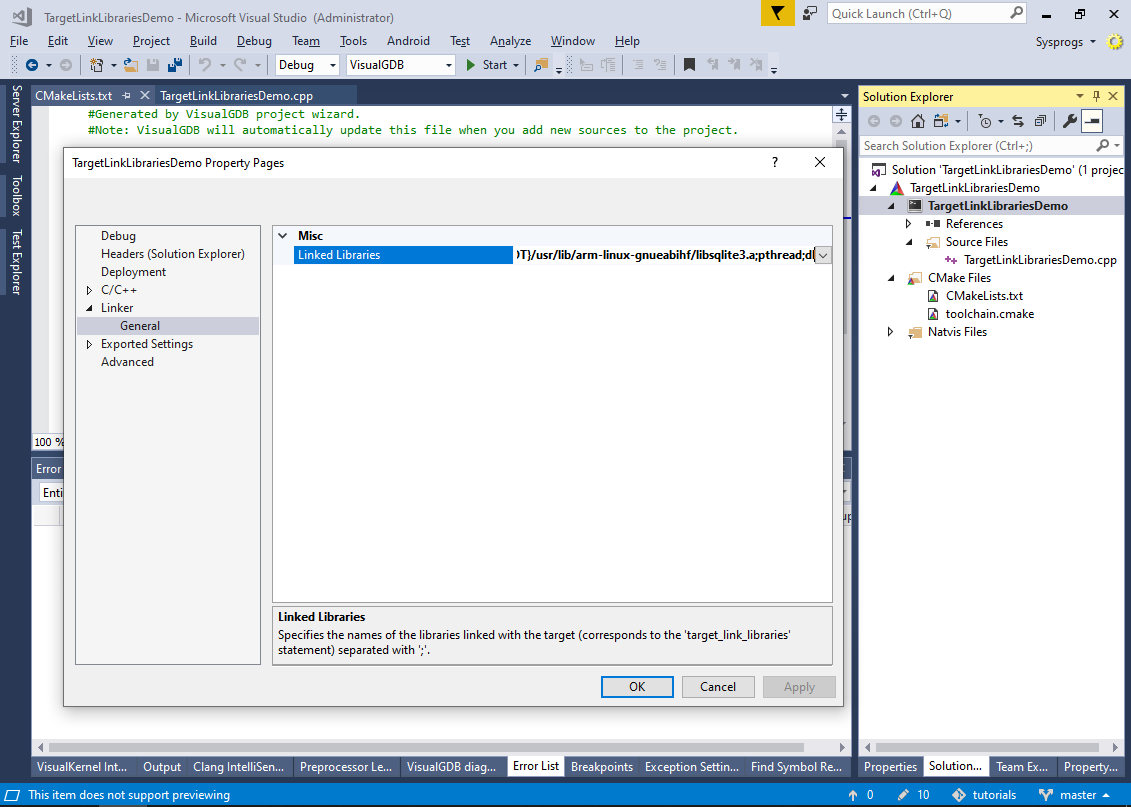
- Once you have located the library, add its full path to the Linked Libraries field under the VS properties for your main CMake target. Note that if the project is built on the Windows side, you would need to use the ${CMAKE_SYSROOT} prefix to refer to the sysroot directory (a copy of the Raspberry Pi’s file system that is bundled with the toolchain). In this example the library path would be ${CMAKE_SYSROOT}/usr/lib/arm-linux-gnueabihf/libsqlite3.a:
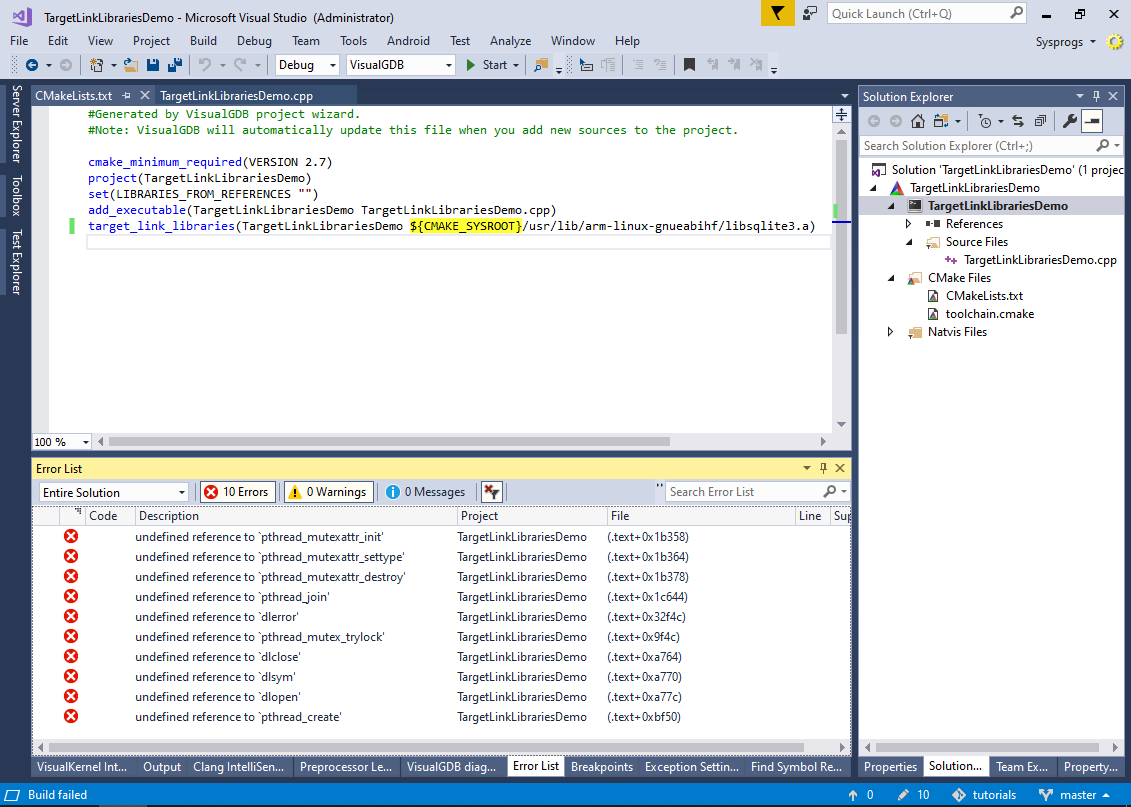
- Alternatively, simply edit the target_link_libraries() statement for your library manually. Now the build will fail due to missing pthread and dl functions:
- You could locate the library names for pthread and dl functions using similar steps as we used for libsqlite3, however in this tutorial we will use just the short names for simplicity (we will explain the differences between the short names and full paths inside target_link_libraries() later):
- Press F5 to start debugging and ensure the program runs successfully:

- Open the CMakeLists.txt file and locate the target_link_libraries() statement. It will normally have the following contents:
target_link_libraries(TargetLinkLibrariesDemo
	${CMAKE_SYSROOT}/usr/lib/arm-linux-gnueabihf/libsqlite3.a
	pthread
	dl)
 Each Linux library normally comes with 2 versions: a static and a dynamic one. The static library is typically called lib<name>.a, while the dynamic library is called lib<name>.so or lib<name>.so.<version>. If you are using a static library, the code from it will be copied to your executable during the linking, so you won’t need to have a copy of the library on the target. This is particularly useful for devices with limited storage.
 - The target_link_libraries() statement allows specifying both full library paths and just library names (without the lib prefix). Change the statement to use the syntax below and build your project again:
target_link_libraries(TargetLinkLibrariesDemo
    sqlite3
    pthread
    dl)

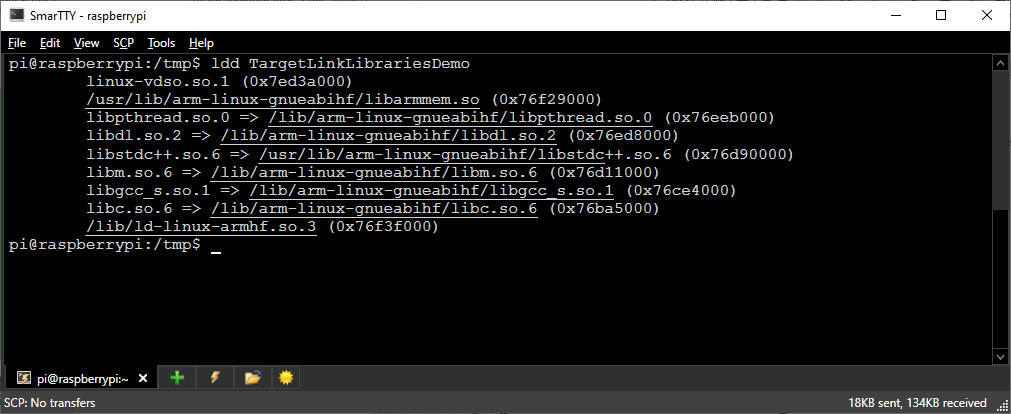
- Try running the project so that it gets deployed to Raspberry Pi and then show the dynamic library dependencies for it using the ‘ldd’ tool:
 As you can see, CMake has automatically picked the dynamic version of the library instead of the static one, so the program will expect the libsqlite3.so.0 file to be present on the target.
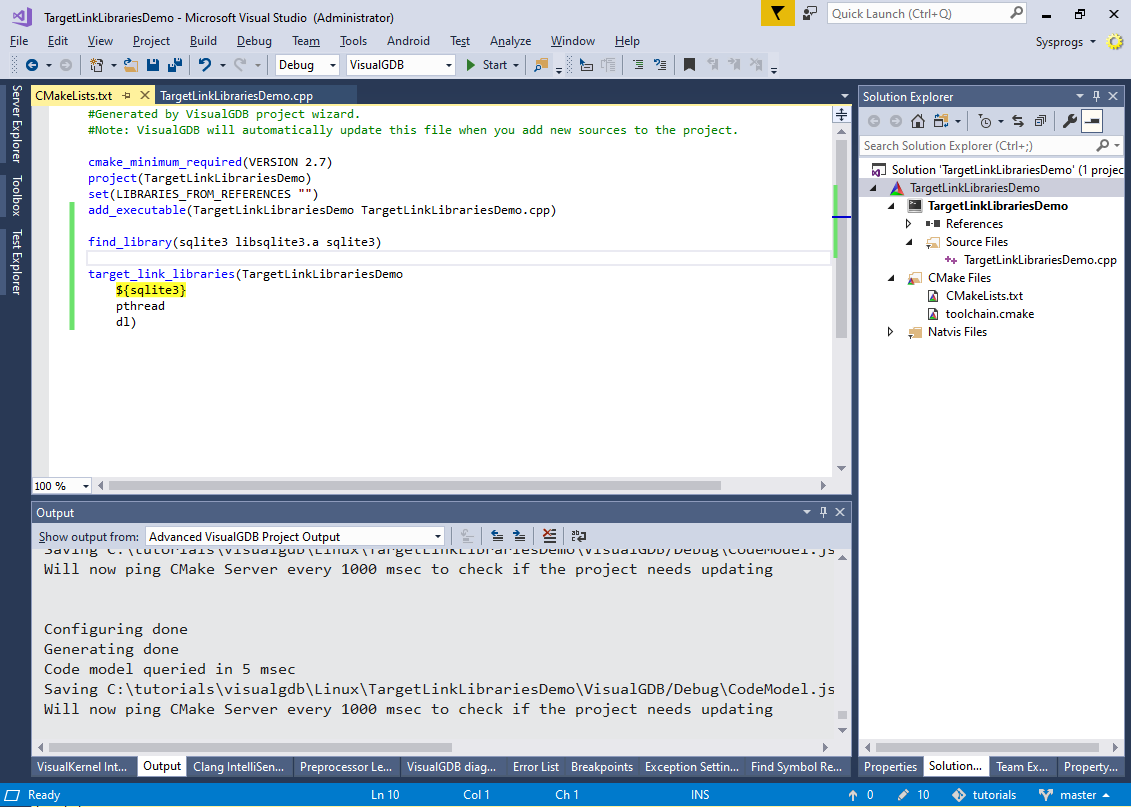
 - We can instruct CMake to prefer the static version of libsqlite3 without hardcoding the full path by using the find_library() command. Replace the target_link_libraries() statement with the following code:
find_library(sqlite3 libsqlite3.a sqlite3)
target_link_libraries(TargetLinkLibrariesDemo
    ${sqlite3}
    pthread
    dl)
 The find_library() statement will try to find a library with the specified names (first trying libsqlite3.a, then libsqlite3.*) and will remember the path of the library in the sqlite3 variable. Note that “${sqlite3}” in target_link_libraries() means “the library pointed by the sqlite3 variable” and “sqlite3” would mean “libsqlite3.*“.
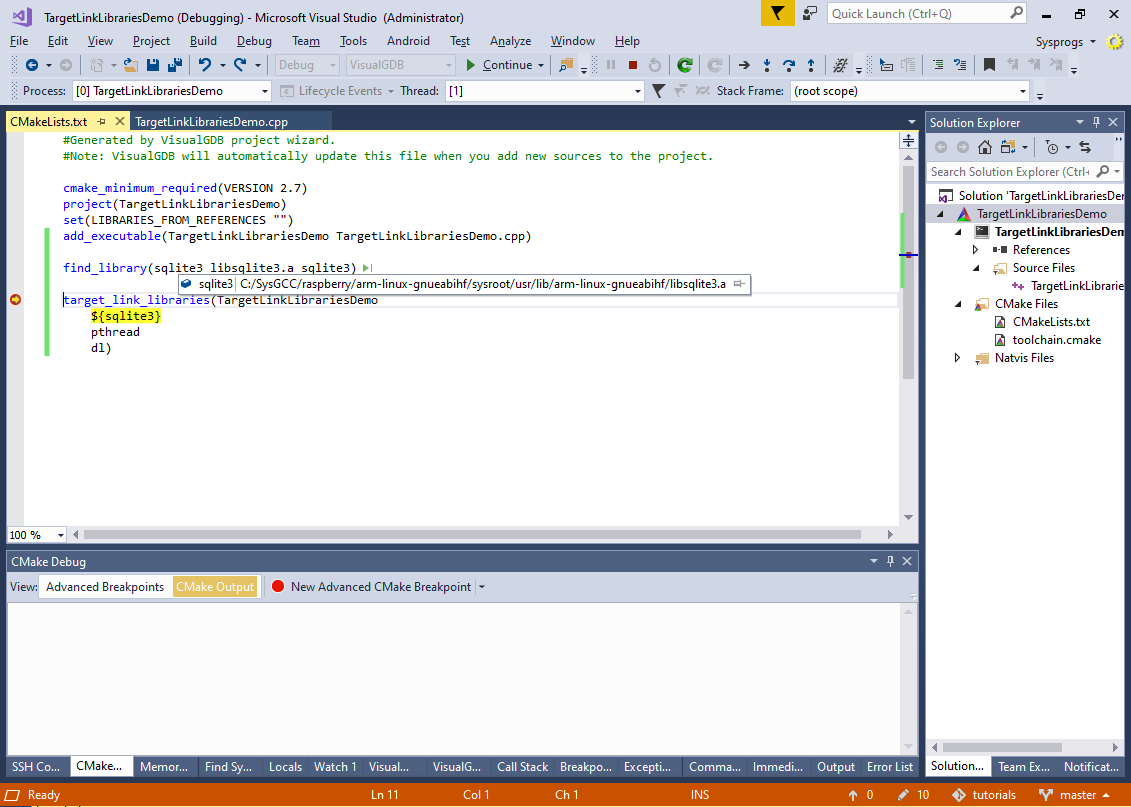
 - You can see what exactly is going on by using VisualGDB’s CMake debugger. Right-click on the project in Solution Explorer and select “Launch CMake Debugger”:

- Step to the target_link_libraries() line and check the sqlite3 variable. It will display the path of the library found by CMake:
- You can double-check that the program produced by CMake no longer has a dependency on libsqlite3.so by running ldd again:
- One last way to improve this example would be to tell CMake that the libsqlite3.a library also needs dl and pthread. This could be done in 3 steps:
- Finding the exact location of libsqlite3.a
- Registering it with CMake as an imported library
- Adding dl and pthread to the INTERFACE part of its own target_link_libraries() statement.
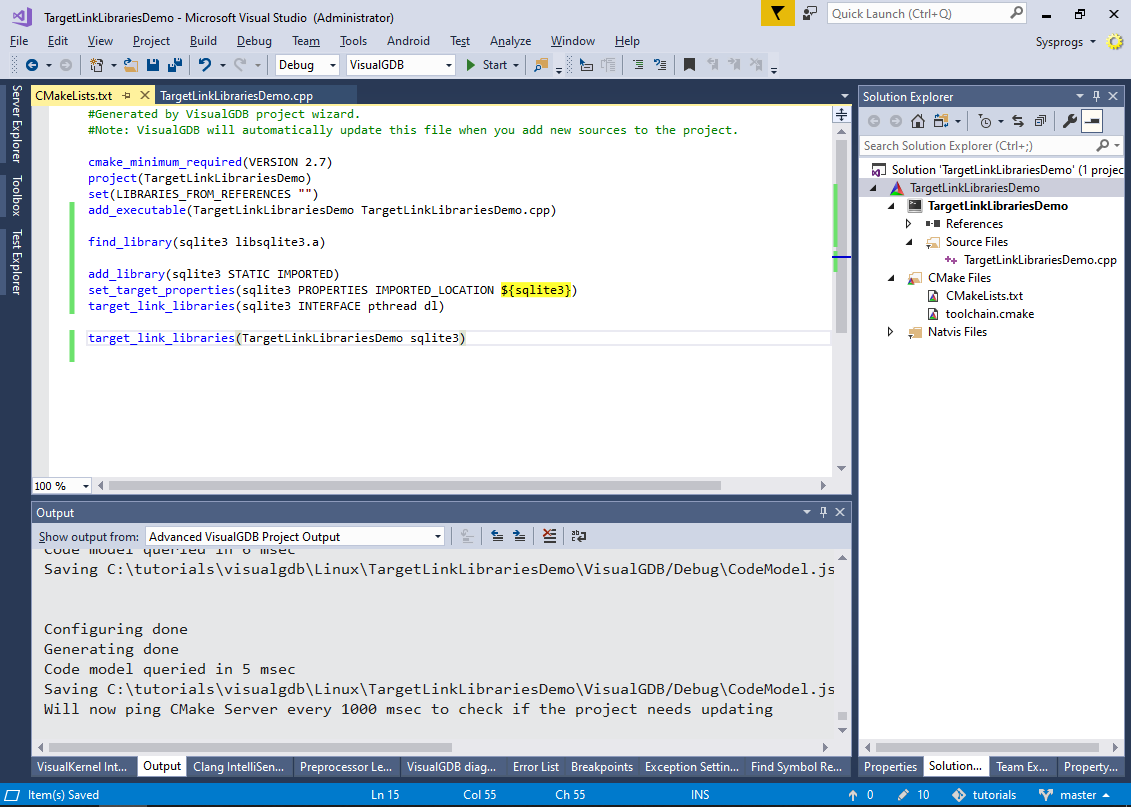
The following CMake statements will do what we have described above:
find_library(sqlite3 libsqlite3.a)

add_library(sqlite3 STATIC IMPORTED)
set_target_properties(sqlite3 PROPERTIES IMPORTED_LOCATION ${sqlite3})

target_link_libraries(sqlite3 INTERFACE pthread dl)

target_link_libraries(TargetLinkLibrariesDemo sqlite3)
Now the project will link with both pthread and dl without referencing them explicitly:
 This happens because the main application references the imported sqlite3 library that has pthread and dl in its interface (i.e. settings that are applied to all targets that reference a certain target). If your project had multiple applications, you would only need to reference the sqlite3 library from each of them and the libraries required by it would be automatically added to each of the built applications.
For more complex projects involving multiple libraries, consider using CMake’s package system described in our find_package() tutorial.