Connecting the Nordic nRF52 chip to IPv6 networks via 6LoWPAN
This tutorial shows how to create a basic 6LoWPAN (IPv6 over Bluetooth) device using the Nordic nRF5x IoT SDK, connect it to an IPv6 network using Raspberry Pi 3 as a Bluetooth-to-Ethernet router and access the device from a PC connected to Ethernet or WiFi.
The Bluetooth LE-powered NRF52 device cannot directly connect to a WiFi network, so it requires a device like Raspberry Pi 3 that will communicate to it via Bluetooth LE and forward the traffic from it to other Ethernet devices: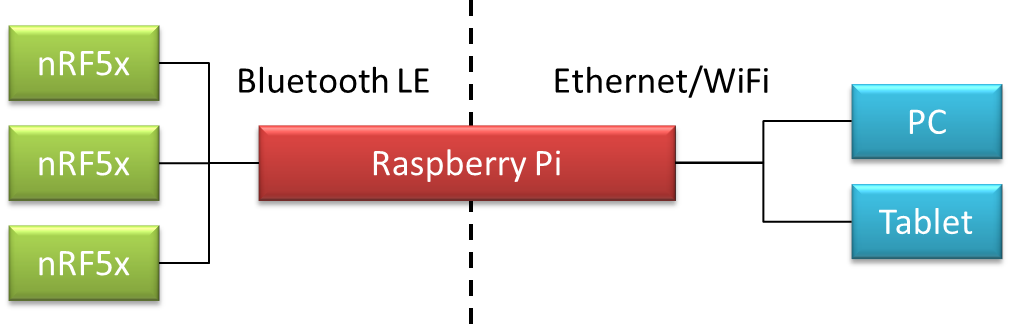 We will show how to create a basic firmware that responds to the ‘ping’ packets and how to configure Raspberry Pi to do the necessary routing. Instead of Raspberry Pi 3 you can use any other Linux board that supports Bluetooth LE (or use a USB-to-Bluetooth LE dongle).
Before you begin, install Visual Studio and VisualGDB.
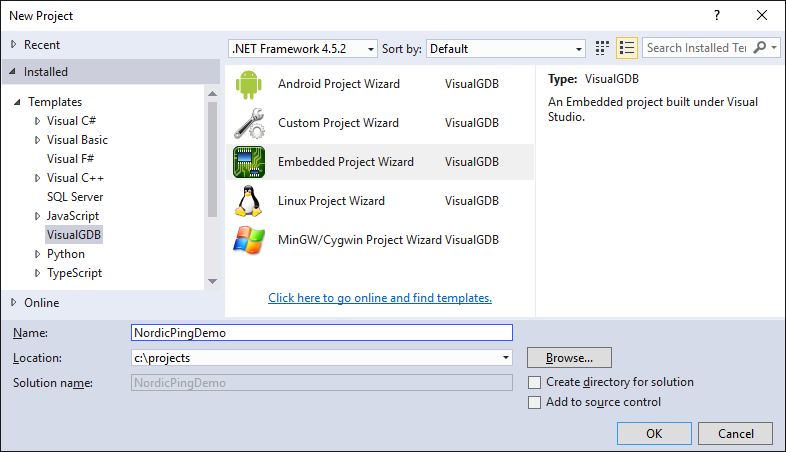
- Open Visual Studio and launch the VisualGDB Embedded Project Wizard:
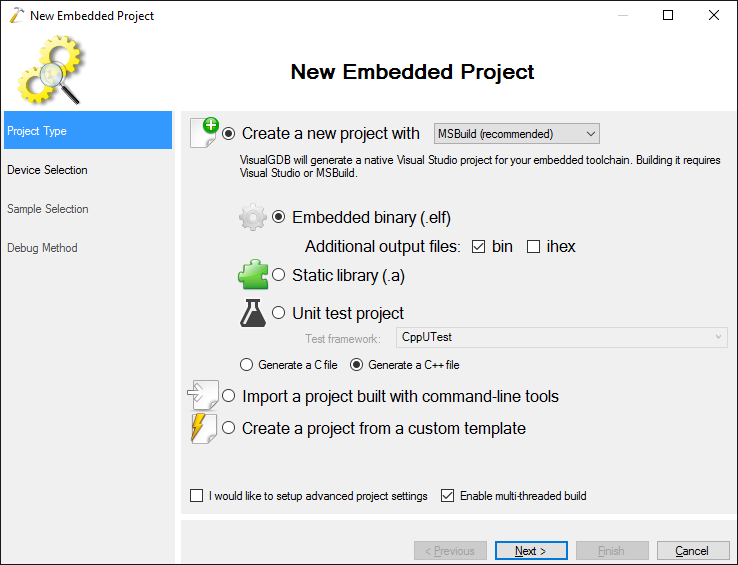
- Proceed with the default MSBuild subsystem:
- Select your ARM toolchain and the nRF52832_XXAA (IoT) device. Note that the regular nRF52832_XXAA device will create a project based on the regular nRF5x SDK that does not support IPv6-over-Bluetooth functionality:
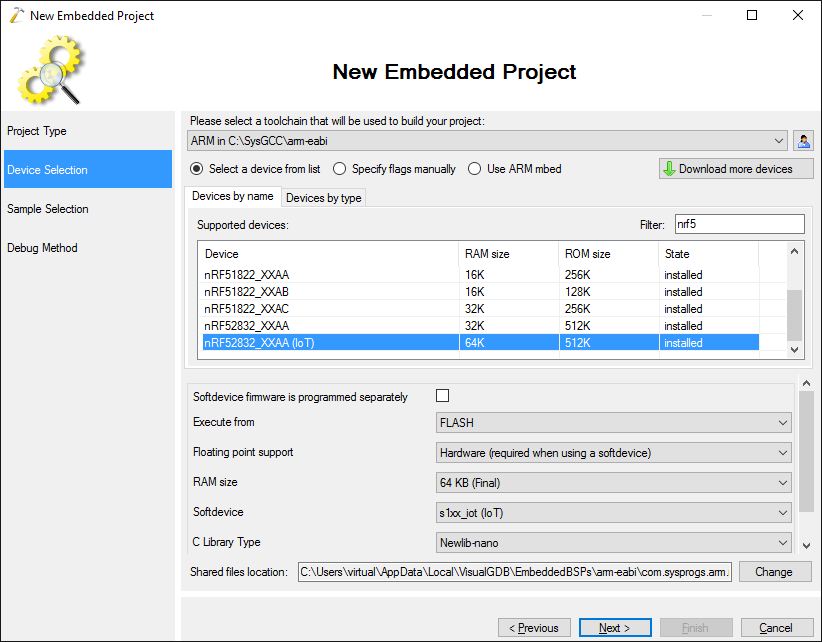
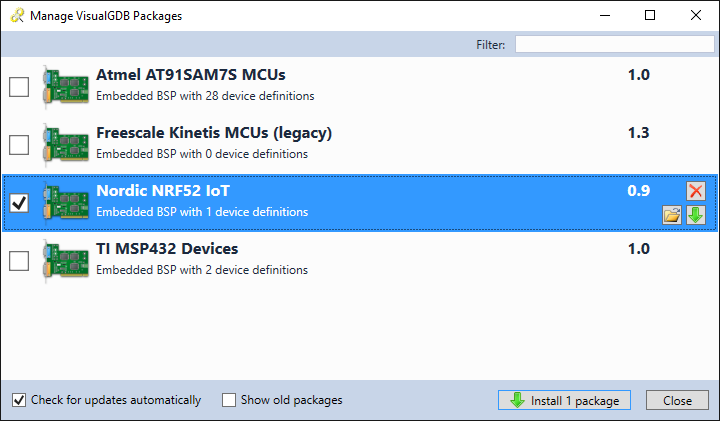
- If you don’t see the IoT device in the device list, click “Download more devices” and install the Nordic nRF52 IoT BSP:
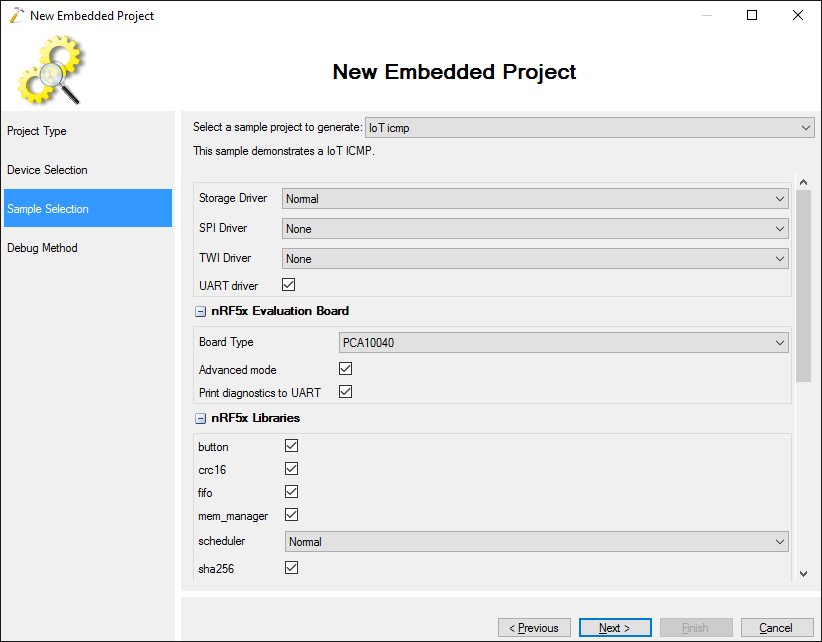
- On the Sample Selection page proceed with the default IoT ICMP sample:
- Select your debug interface on the last page. The nRF52-DK board comes with an on-board Segger J-Link, so we will use it in this tutorial:
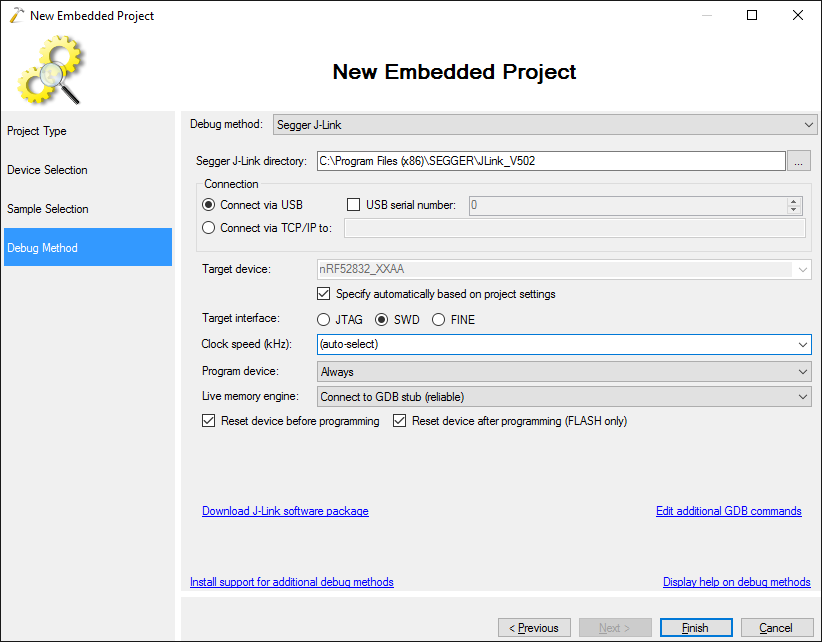
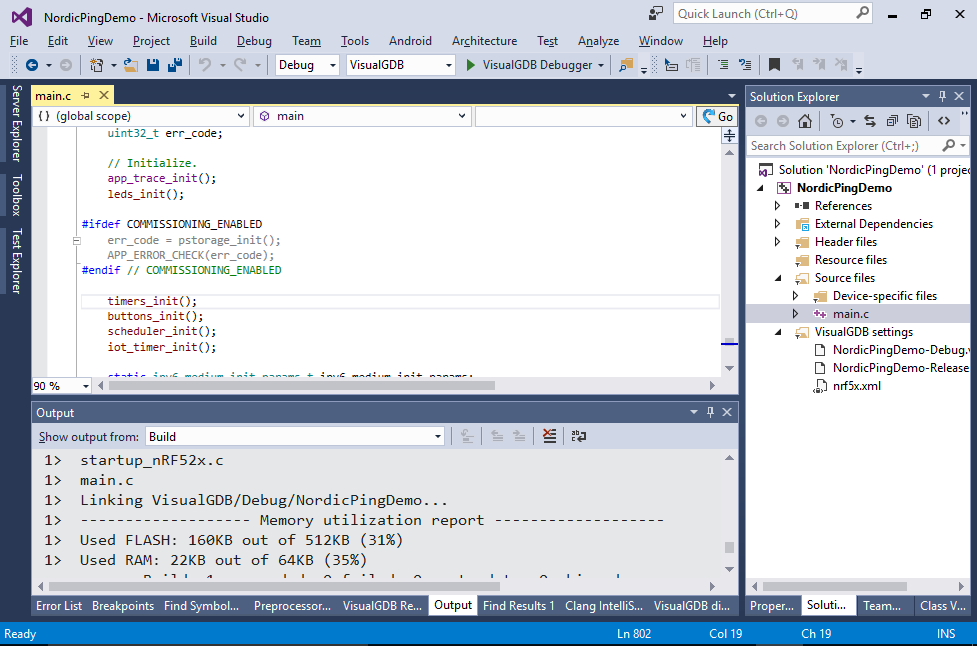
- Press “Finish” to generate the project and build it via Build->Build Solution:
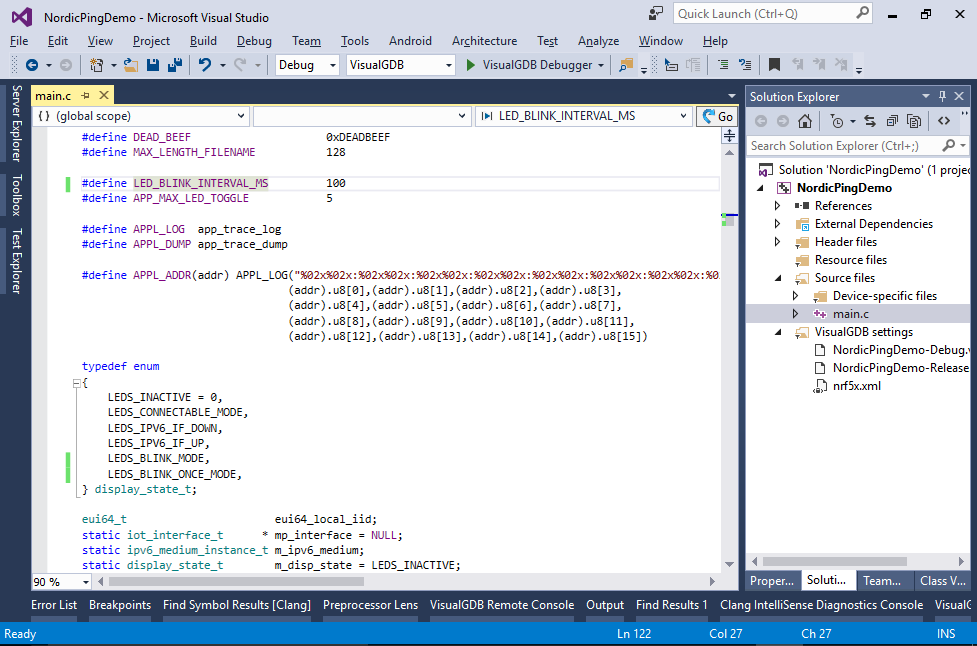
- Now we will modify the sample project to blink the LEDs each time it receives an ICMP echo (ping) packet. First of all, reduce the LED_BLINK_INTERVAL_MS to 100 and add a new member called LEDS_BLINK_ONCE_MODE to display_state_t:
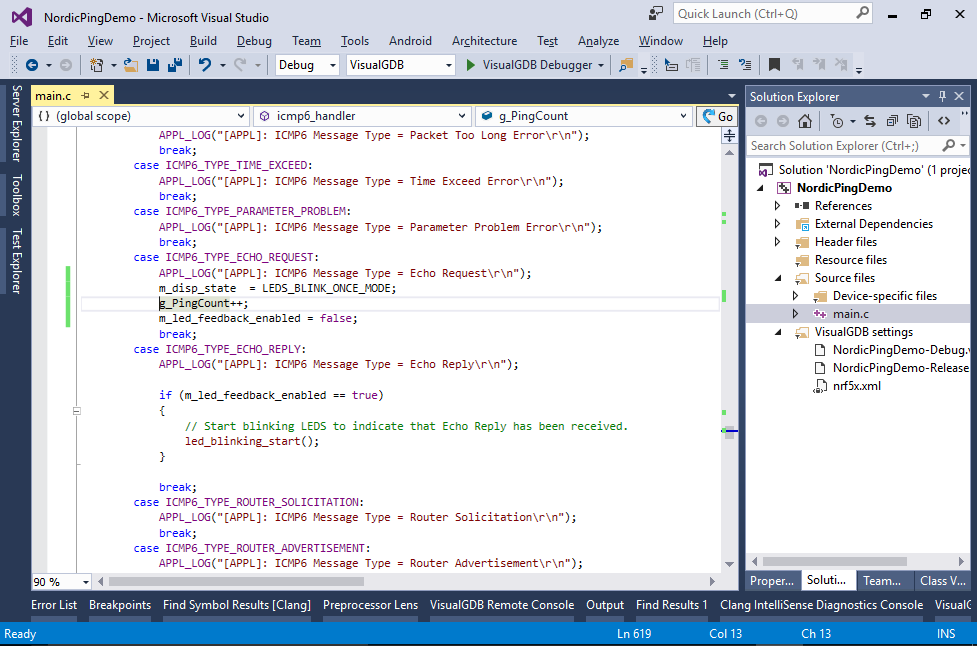
- Then add a global g_PingCount variable and insert the following code to the ICMP_TYPE_ECHO_REQUEST handler to initiate the LED blinking:
            m_disp_state  = LEDS_BLINK_ONCE_MODE;
            g_PingCount++;
            m_led_feedback_enabled = false;
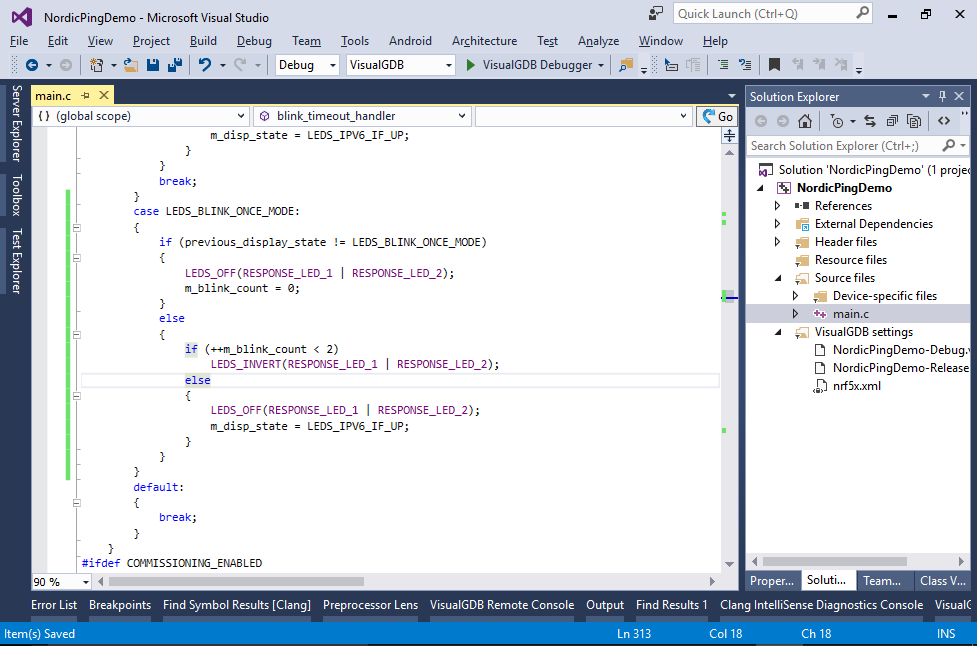
- Finally locate the LEDS_BLINK_MODE case inside blink_timeout_handler() and add a similar handler for LEDS_BLINK_ONCE_MODE:
        case LEDS_BLINK_ONCE_MODE:
        {
            if (previous_display_state != LEDS_BLINK_ONCE_MODE)
            {
                LEDS_OFF(RESPONSE_LED_1 | RESPONSE_LED_2);
                m_blink_count = 0;
            }
            else
            {
                if (++m_blink_count < 2)
                    LEDS_INVERT(RESPONSE_LED_1 | RESPONSE_LED_2);
                else
                {
                    LEDS_OFF(RESPONSE_LED_1 | RESPONSE_LED_2);
                    m_disp_state = LEDS_IPV6_IF_UP;
                }
            };
        }
- Press F5 to start debugging your program. If you have not tried your Raspberry Pi yet, follow this tutorial to prepare the SD card and ensure that the board is accessible via network. Otherwise connect to your Raspberry Pi using SmarTTY and run the following commands:
sudo su
modprobe bluetooth_6lowpan
echo 1 > /sys/kernel/debug/bluetooth/6lowpan_enable
hcitool lescan
The first 2 commands load and enable the IPv6-over-Bluetooth support on Raspberry Pi. The last command scans for the nearby Bluetooth LE devices. It should show your nRF52 board with the IPv6ICMP name:
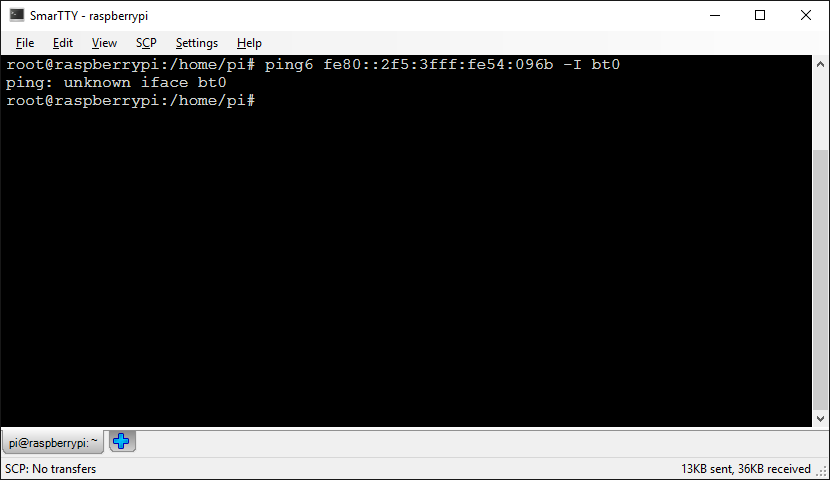
 If the board does not appear in the hcitool output, try resetting it while hcitool is running.
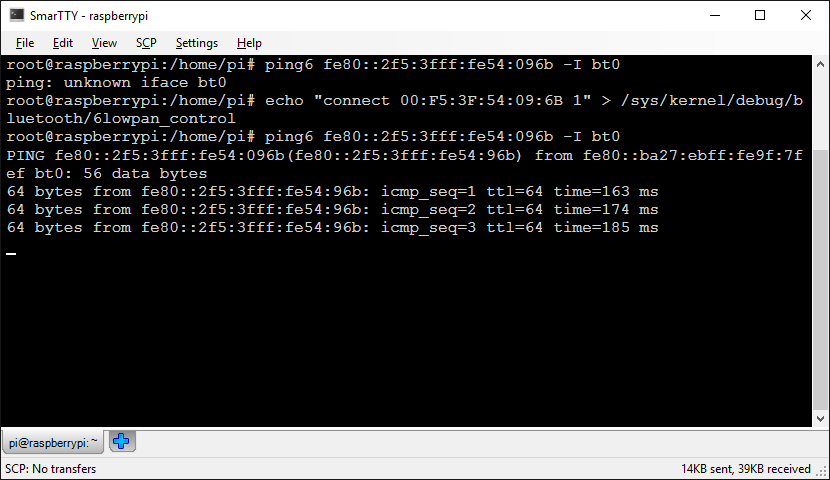
 - Now you should be able to connect to your nRF52 firmware. Run the following command in the ‘sudo’ prompt:
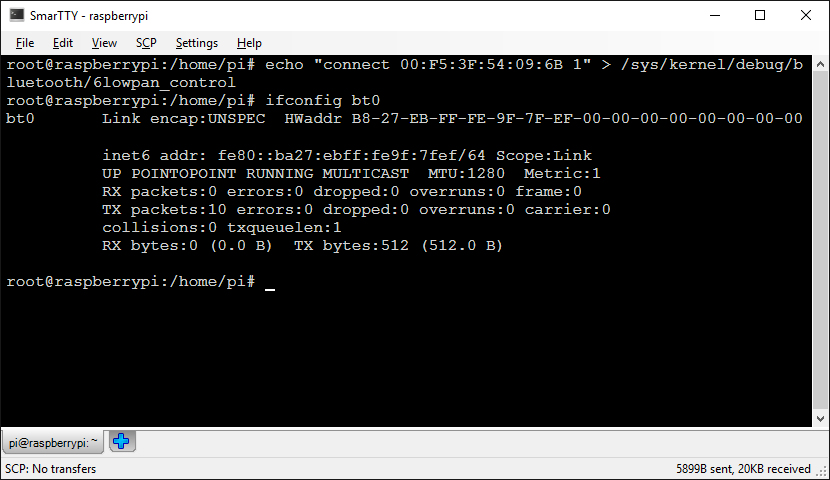
echo "connect <mac address from hcitool output> 1" > /sys/kernel/debug/bluetooth/6lowpan_control
Once the connection is complete, a new network interface called ‘bt0’ should appear on your Raspberry Pi. You can check this by typing “ifconfig bt0”:
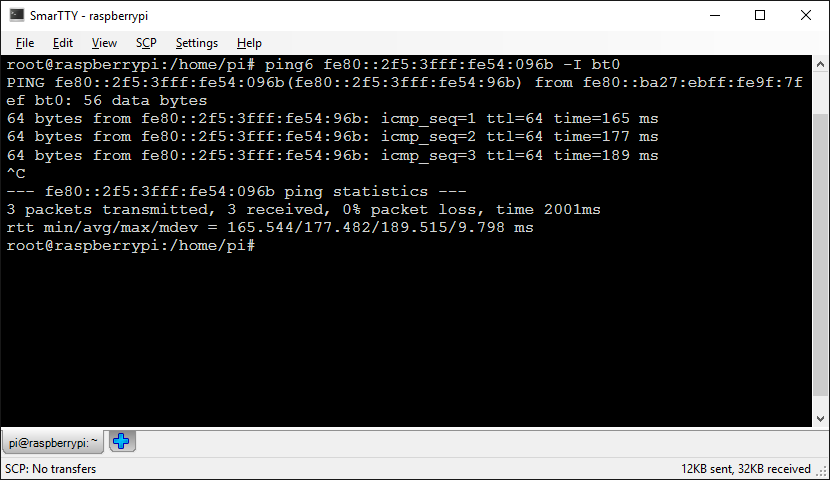
- Now we will try to ping the Bluetooth LE device from Raspberry Pi. As we have not configured any routing yet, this needs to be done using the link-local IPv6 address of the nRF52 device derived from its MAC address. For a MAC address of <XX>:<#1>:<#2>:<#3>:<#4>:<#5> the link-local IPv6 address will be fe80::02<#1>:<#2>ff:fe<#3>:<#4><#5>. E.g. for the MAC address of 00:F5:3F:54:09:6B the ping command will be the following:
ping6 fe80::2f5:3fff:fe54:096b -I bt0
Note that IPv6 addresses starting with fe80 are special link-local addresses that are not globally unique are not routed between network interfaces. In order to ping a device based on its link-local address, you need to specify the bt0 interface in the ‘ping6’ command explicitly (-I bt0).
- The pings should now succeed and the LEDs on the board should blink each time a packet is received by the board:
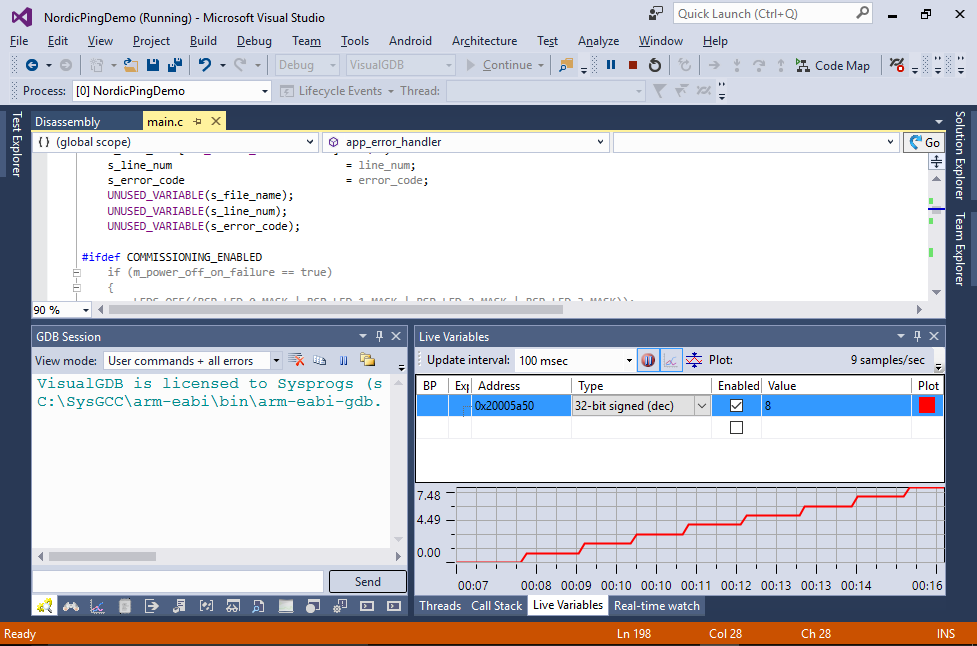
- You can observe how the device receives the ping packets via the Live Variables window in VisualGDB. Simply add g_PingCount to Live Variables and try pinging the board again. Note that most likely stopping the debugger to add a variable will cause an internal overflow in the nRF52 softdevice and the connection will be dropped:
- To fix that, reset the firmware via the ‘reset device’ button in the GDB Session window and reconnect to your device from Raspberry Pi:
- Observe how the g_Pings value is increasing each time a ping packet reaches the device:
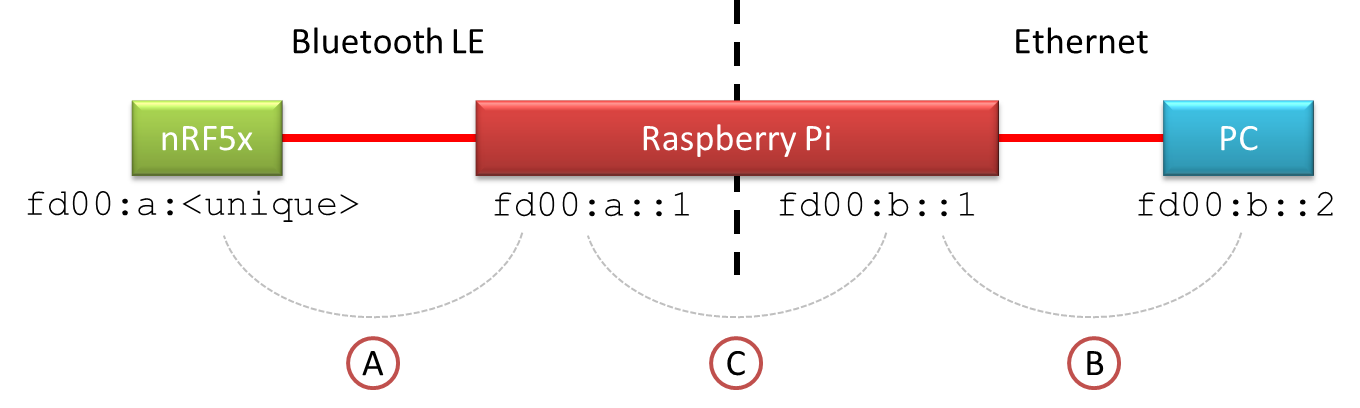
- Now we will show how to configure your Raspberry Pi to route packets between the nRF52 board and normal network devices like your PC. This consists of 3 steps:
- Configuring an IPv6 network connecting your Raspberry Pi and the nRF52 device (fd00:a::… addresses)
- Configuring an IPv6 network connecting your PC and Raspberry Pi (fd00:b::… addresses)
- Configuring routing between networks A and B
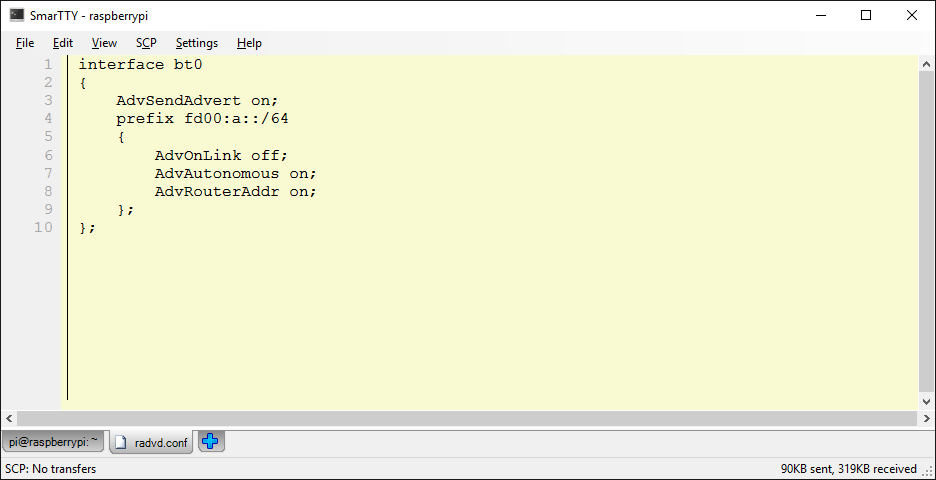
- First of all we will setup a network between Raspberry Pi and the nRF52 board (Network A). We will configure Raspberry Pi to give global (not link-local) IPv6 addresses to the connected Bluetooth devices. Install the radvd package (sudo apt-get install radvd) and put the following contents to the /etc/radvd.conf file:
interface bt0
{
    AdvSendAdvert on;
    prefix fd00:a::/64
    {
        AdvOnLink off;
        AdvAutonomous on;
        AdvRouterAddr on;
    };
};
 To get a global address for your nRF52 board, replace the “fe80” prefix in the local-link address with the prefix of your network A. E.g. a node that has a link-local address of fe80::2f5:3fff:fe54:096b, will have a global address of fd00:a::2f5:3fff:fe54:096b in the fd00:a::… network.
 - Before we can access the nRF52 board using the new address, we need to do several extra configuration steps. First we need to enable IPv6 forwarding:
echo 1 > /proc/sys/net/ipv6/conf/all/forwarding
Then we need to assign a static address from the network A (e.g. fd00:a::1) to the bt0 interface so that Raspberry Pi can be on the same network with the Bluetooth devices and communicate to them:
ifconfig bt0 add fd00:a::1/64
Finally we need to restart the radvd service so that Raspberry Pi can assign an IP address to the nRF52 board:
service radvd restart
Now try pinging your nRF52 device using the global address:
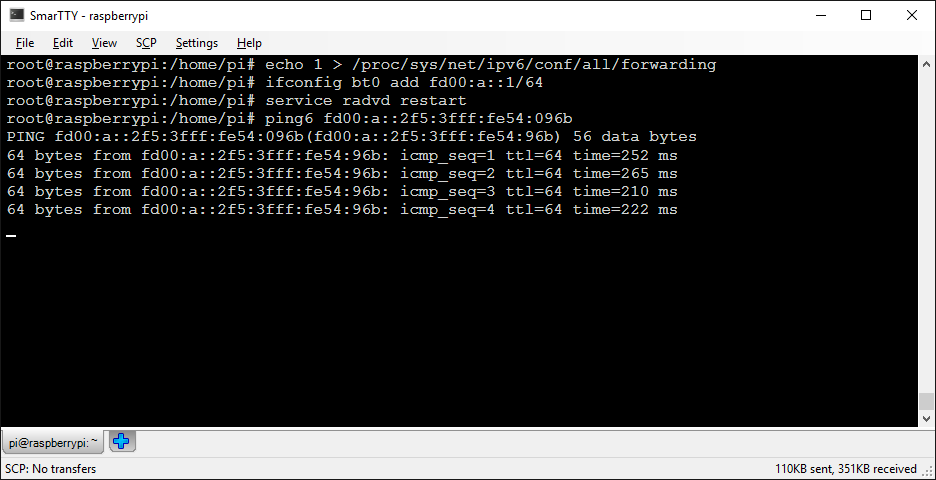 Note that the “-I” parameter is no longer required as we are no longer using the link-local addresses.
 - Now we will setup the network between Raspberry Pi and your PC (network B). Enable IPv6 for your network interface on Windows and run the “ipconfig” command to find out the IP address:

- If the only IP address you see starts with fe80, it the link-local IPv6 address that cannot be routed to the Bluetooth device on the network B. You can fix this by adding a static address using the following command:
netsh interface ipv6 add address <connection name> <address>/<mask>
You can use any addresses starting with fd00 for your private networks (fd00 addresses are roughly equivalent to 192.168.x.y in IPv4) . In this tutorial we will use fd00:b::1 for the Ethernet interface of Raspberry Pi and fd00:b::2 for the Windows PC:
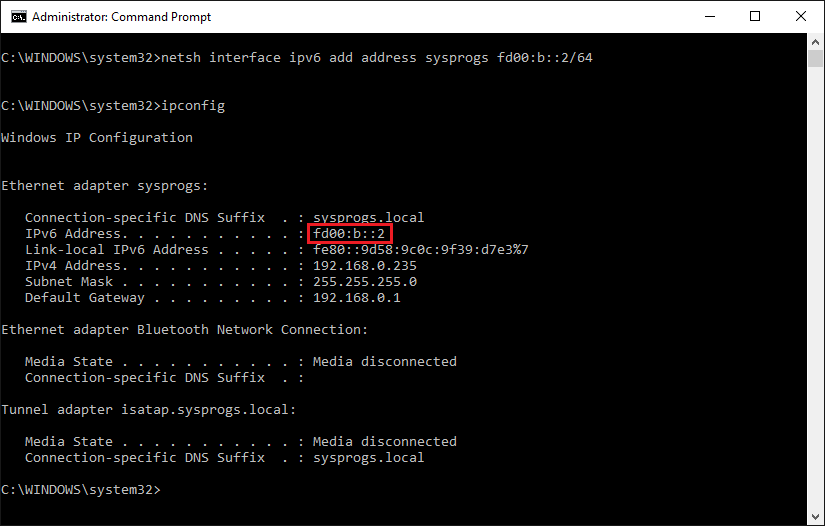 The fd00:b::2/64 expression corresponds to a network containing fd00:000b:0000:0000:xxxx:xxxx:xxxx:xxxx addresses. Both fd00:b::1 and fd00:b::2 belong to it, but fd00:a::1 and the nRF52 addresses starting with fd00:a do not.
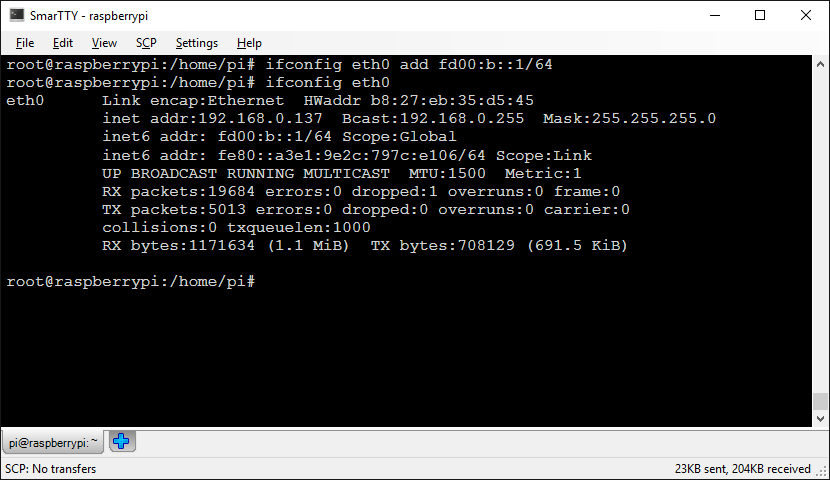
 - Now assign a static IPv6 address from the same network to your Raspberry Pi:
ifconfig eth0 add <address>/<mask>
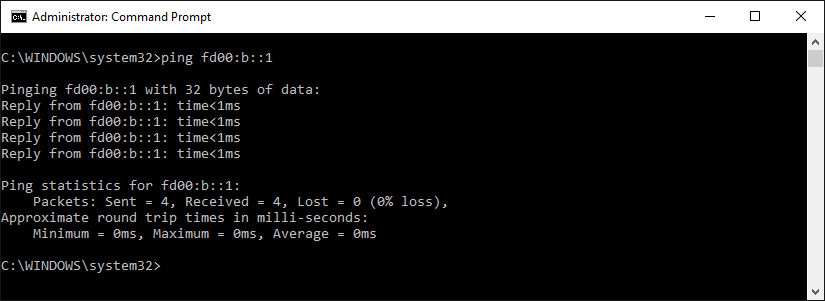
- Finally test the IPv6 connection between Raspberry Pi and your PC by pinging Raspberry Pi from Windows:
ping <IPv6 address of Raspberry Pi>
- Now that have configured both Network A and Network B, we can setup routing between them. Try pinging the Network A address of Raspberry Pi from your PC:

- The pings will not go through because Windows does not know how to send packets to network A. You can fix that by adding a static route:
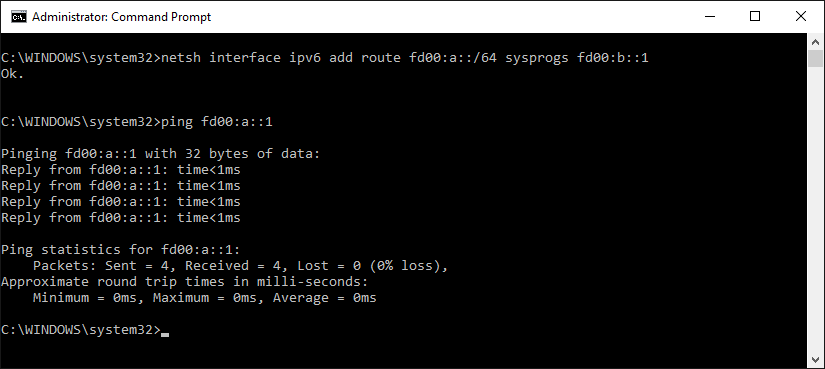
netsh interface ipv6 add route <Network A address>/<Network A mask> <connection name> <Network B address of Raspberry Pi>
In our example the command will look like this:
netsh interface ipv6 add route fd00:a::/64 <connection name> fd00:b::1
- This instructs Windows to send packets addressed to fd00:a:… directly to fd00:b::1 (that is on the same network as the PC) expecting that it will forward them properly. Try pinging the Raspberry Pi address from Network A again:
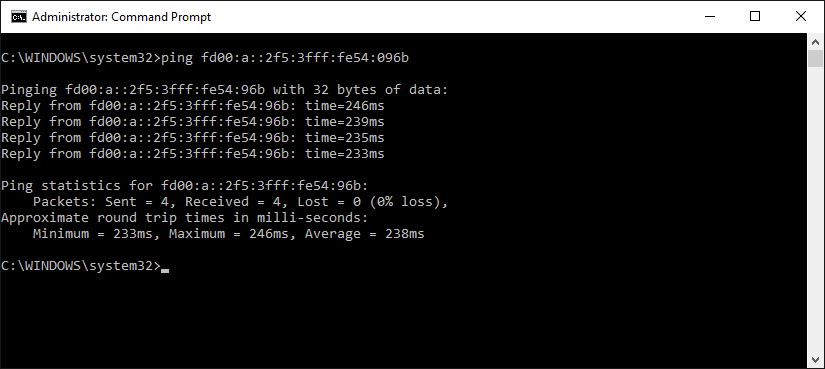
- Now you can try pinging the global IPv6 address of the nRF52 board from Windows:
- If the ping packets don’t reach the board, try enabling forwarding on Raspberry Pi explicitly:
ip6tables -A FORWARD -i eth0 -o bt0 -j ACCEPT -d fd0:a::/64
ip6tables -A FORWARD -i bt0 -o eth0 -j ACCEPT
This will explicitly forward all packets addressed to Network A from eth0 to bt0 and all packets from bt0 to eth0.
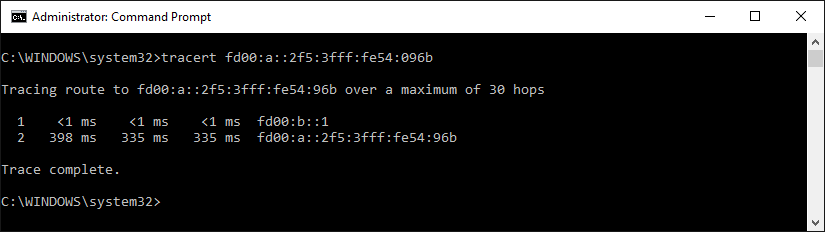
- You can check how the packets are routed by running the ‘tracert’ command on Windows. It will show that the packets to the nRF52 board are sent through your Raspberry Pi:
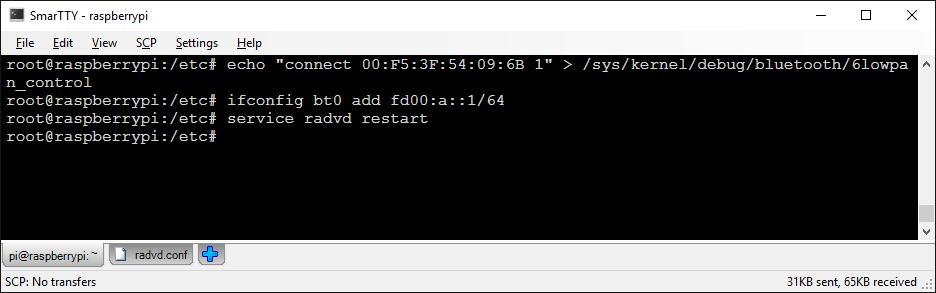
- If you restart your nRF52 firmware, the Bluetooth connection will be lost and the bt0 interface will disappear. To reconnect it and setup routing again, run the following commands:
echo "connect <MAC address> 1" > /sys/kernel/debug/bluetooth/6lowpan_control
ifconfig bt0 add fd00:a::1/64
service radvd restart