Developing a Raspberry PI app with Visual Studio
This tutorial demonstrates how to build and debug a simple Raspberry PI application using Visual Studio. The same steps will also work with Raspberry Pi 2.
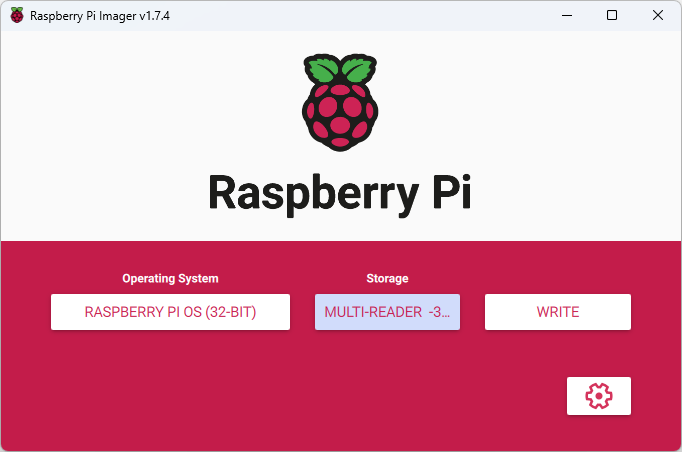
- If you have not prepared your SD card yet, download and start the Raspberry Pi Imager:
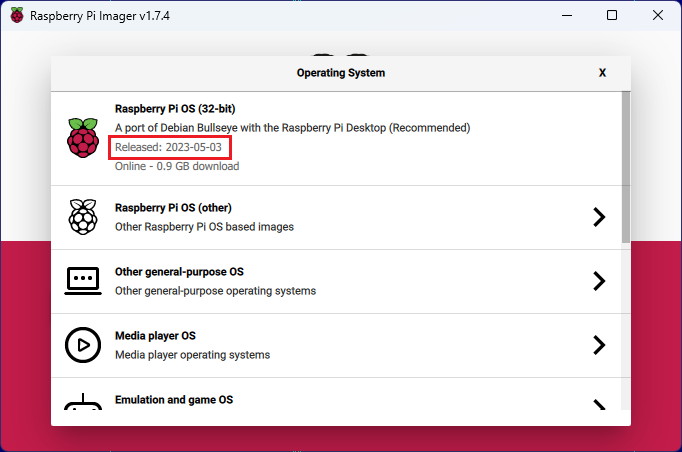
- Select a Raspberry Pi OS version to program and take a note of the exact release date:
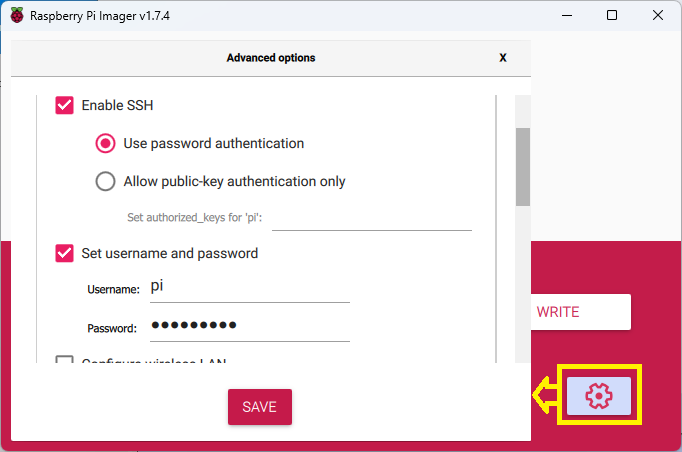
- Use the Settings button to enable SSH on the programmed image, and provide the user name/password you would like to use:
- Start your Raspberry PI and connect a network cable to it.
- Download and install Visual Studio and the latest VisualGDB release.
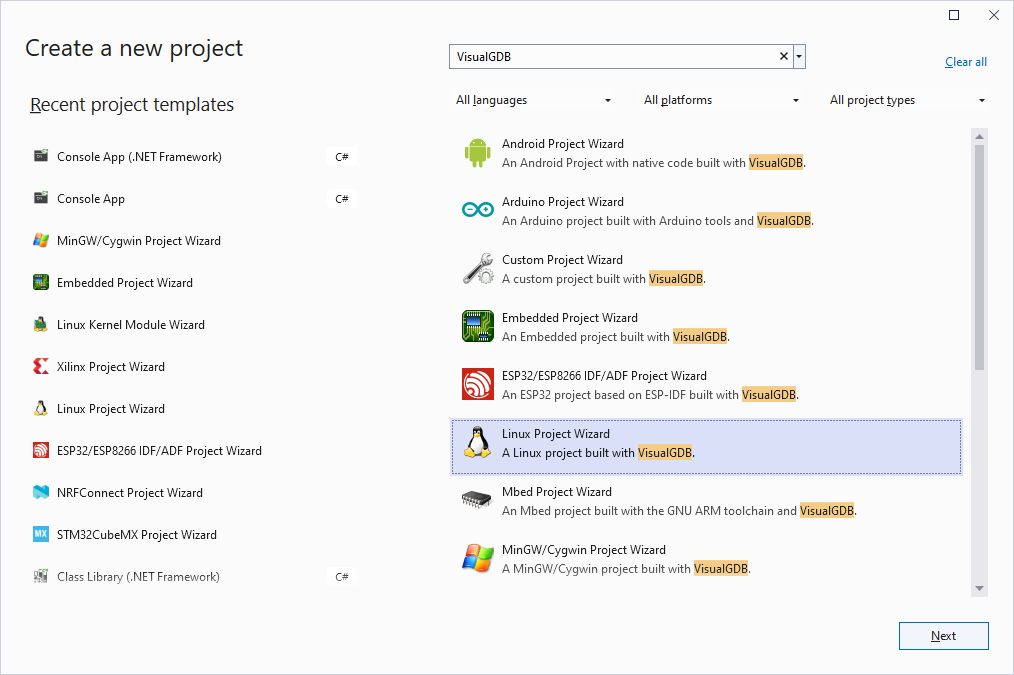
- On your Windows machine start Visual Studio, select “File->New project”. Then select locate the VisualGDB Linux Project Wizard and press “Next”:
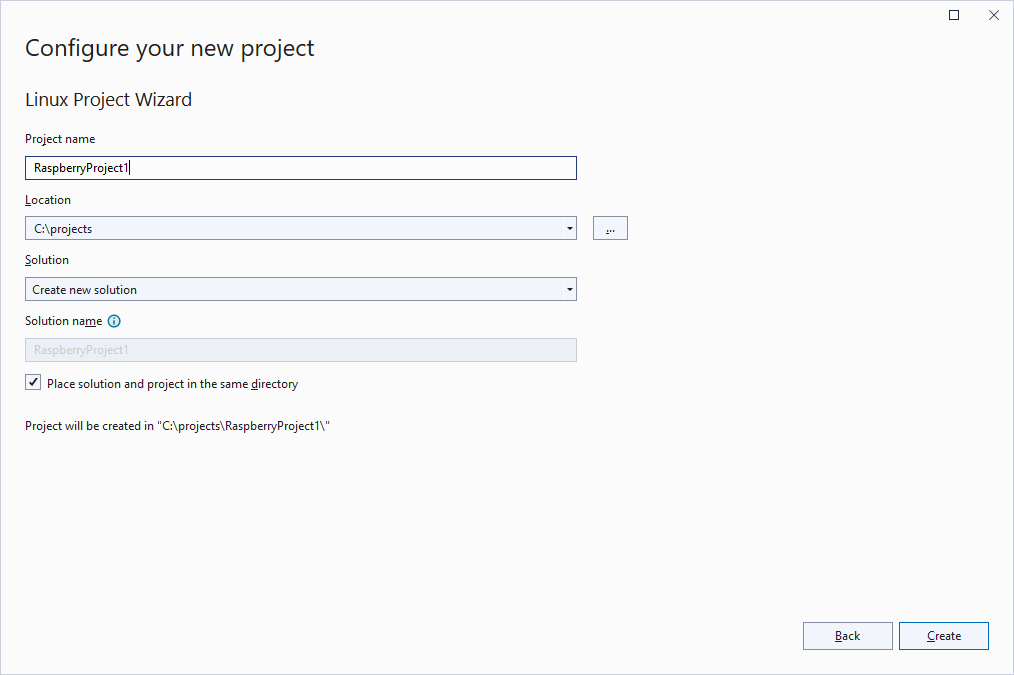
- Enter the name and location of the project you are creating and click “Create”:
- The VisualGDB Linux Project Wizard will start. As we are making a simple “Hello, World” application, keep “Create a new project” selected and press “Next”.
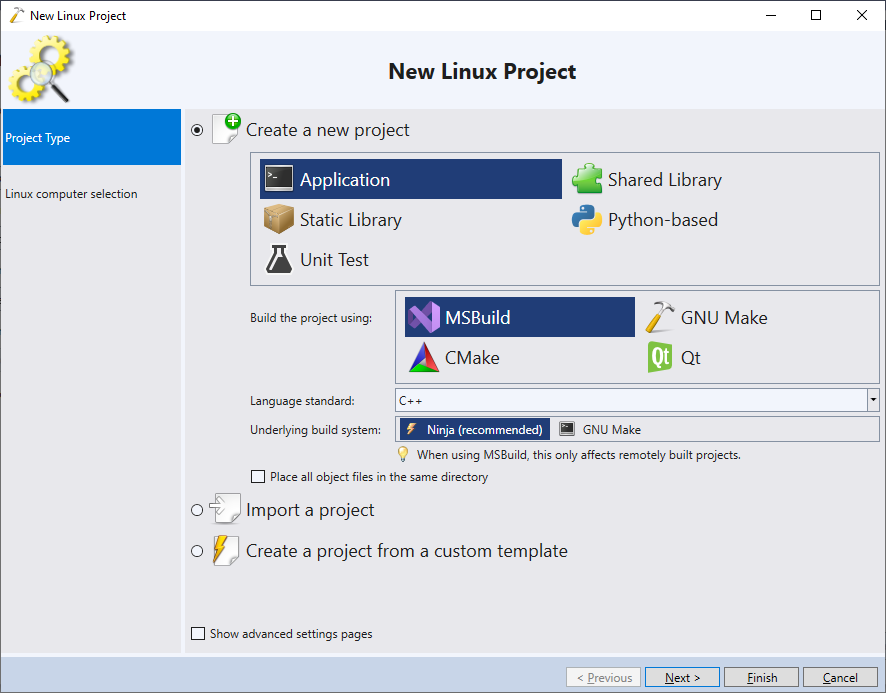 If you are familiar with the classical Visual Studio projects, we advise selecting the MSBuild system. Otherwise, consider using Advanced CMake.
 - If you have not created any Raspberry PI projects before, select “Create a new SSH connection” on the next page:
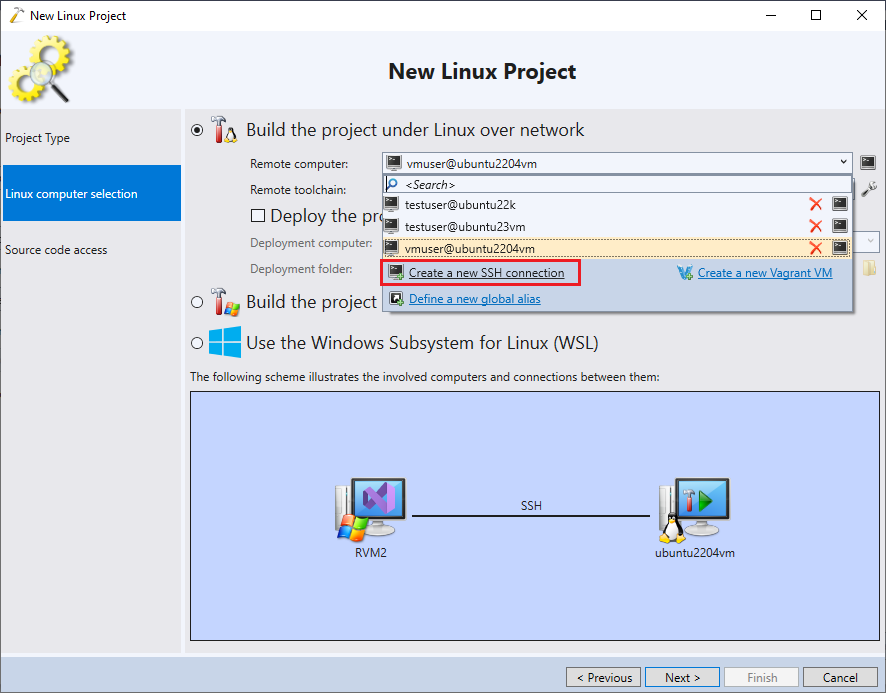
- Provide the host name or IP address of your Raspbery PI box, and the user name/password selected in the Raspberry Pi imager. It is recommended to check the “setup public key” checkbox, so that VisualGDB will automatically generate an public/private keypair, store it in your Windows account’s key container and setup the Raspberry PI box to use it:
 If you don’t enable public key authentication, VisualGDB will remember your password for this connection. The stored passwords are encrypted using a key stored in your Windows account. Thus, the password will only be available once you login using your Windows account.
 - You could use 2 options to build your first Raspberry PI app: build it on Windows with a cross-compiler or build it on the Raspberry PI itself. The first option is faster, while the second is easier to setup. In this tutorial we will use the second option:
 Use the diagram at the bottom of the page to check the correctness of your setup:
- The hammer icon corresponds to the machine
where the compiler is run. - The “play” icon corresponds to the machine where the debugged program is launched.
- The hammer icon corresponds to the machine
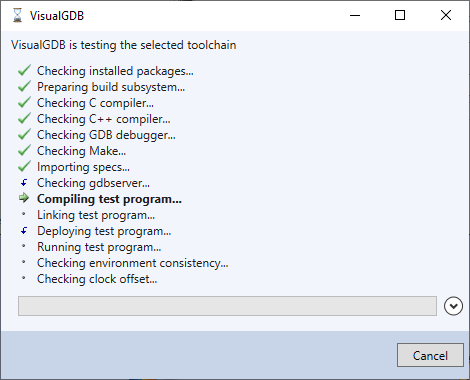
- When you press “Next”, VisualGDB will test your toolchain by trying to compile and run a trivial program. If any errors are detected at this stage, you will see a detailed error log with further troubleshooting information.
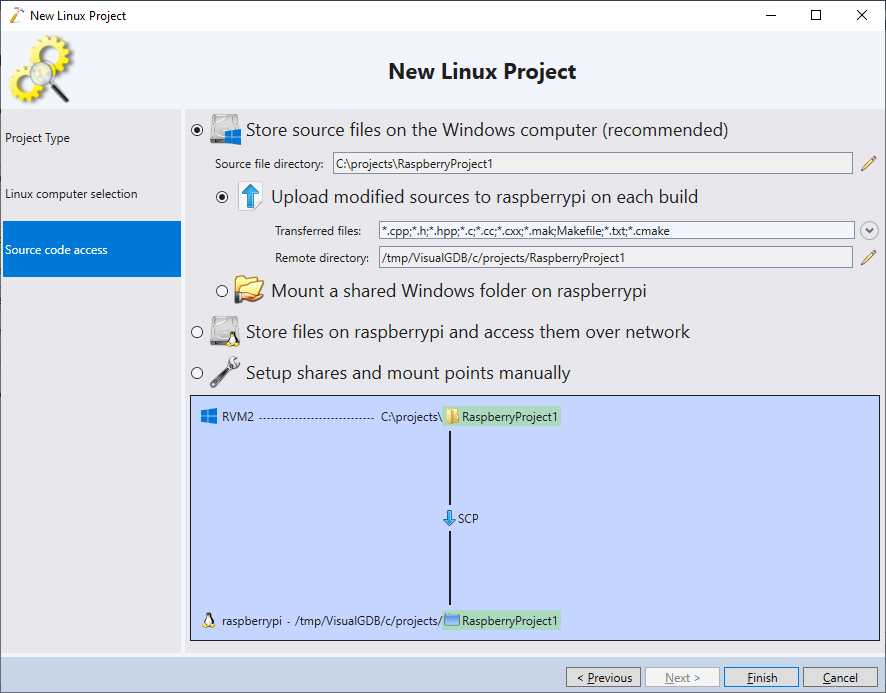
- As the same source code will be edited under Windows and then compiled under Linux, VisualGDB will need to keep the sources synchronized. The easiest way is to use automatic file uploading via SSH:
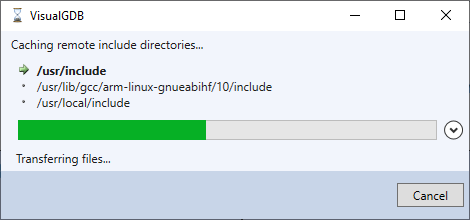
- Press Finish to complete the wizard. If this is your first project for Raspberry PI, VisualGDB will cache the include directories to make them available through IntelliSense.
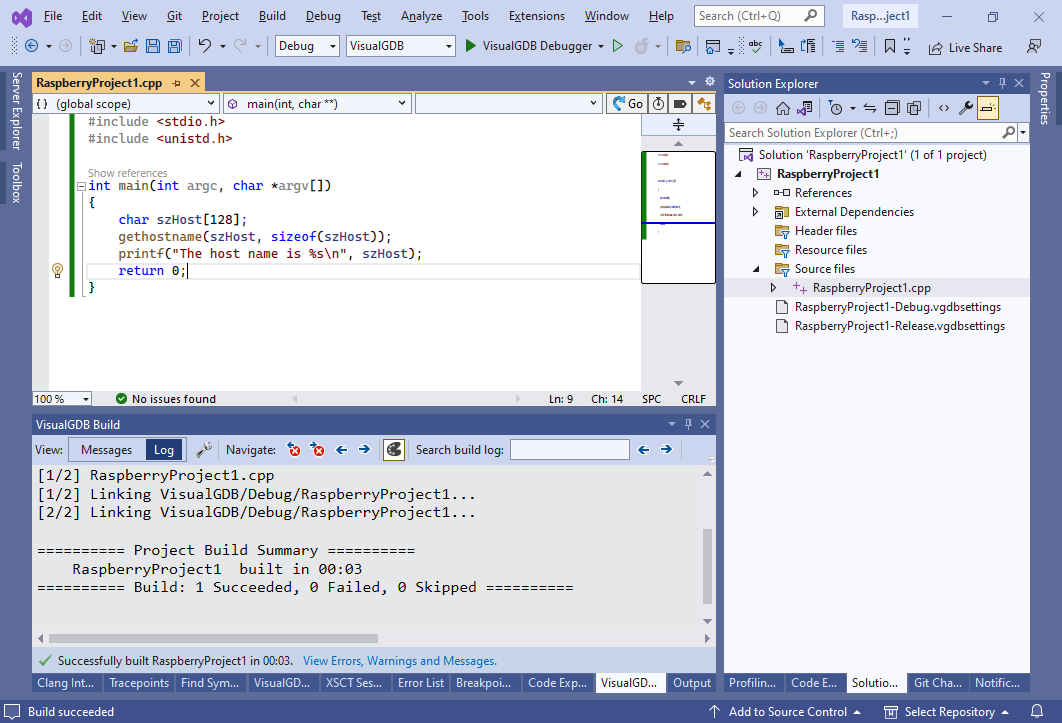
- Replace the contents of the main source file with the following:
#include <stdio.h>
#include <unistd.h>

int main(int argc, char *argv[])
{
    char szHost[128];
    gethostname(szHost, sizeof(szHost));
    printf("The host name is %s\n", szHost);
    return 0;
}
- Build the solution. You will see how the source files are transferred to Raspberry PI and compiled there:
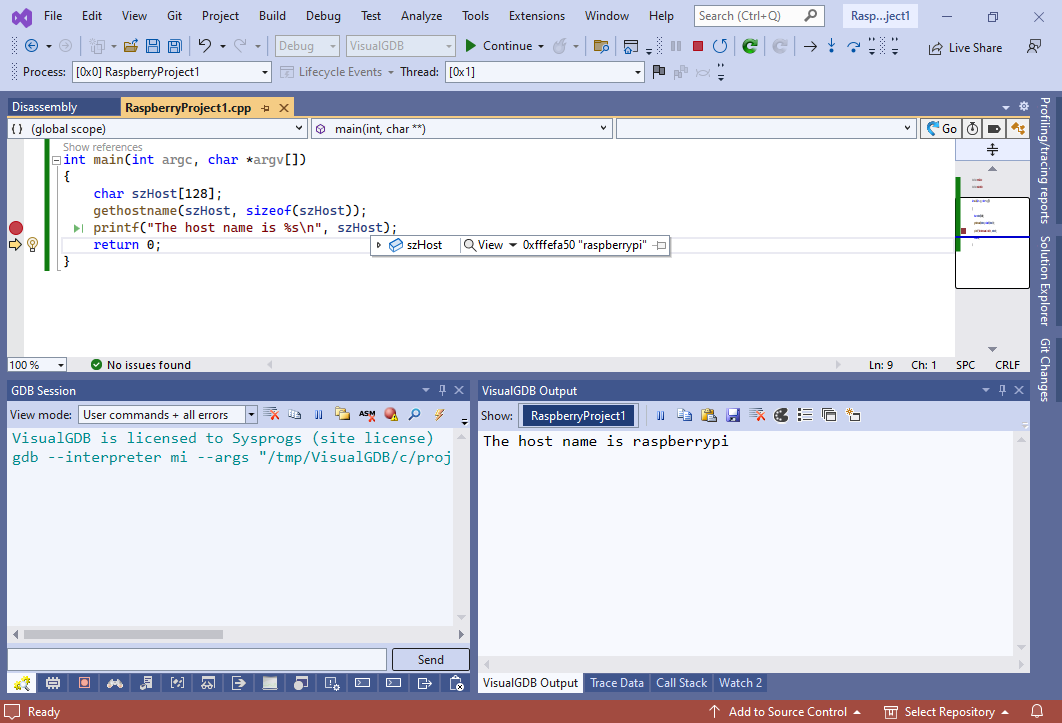
- Set a breakpoint on the printf() line and press F5 to start debugging. The breakpoint will trigger:
- VisualGDB provides an advanced Clang-based IntelliSense engine that is fully compatible with GNU language extensions and provides advanced features like refactoring, Code Map and auto completion in the Watch windows. E.g. you can click the link above “main” to quickly visualize the calls from and to this function:

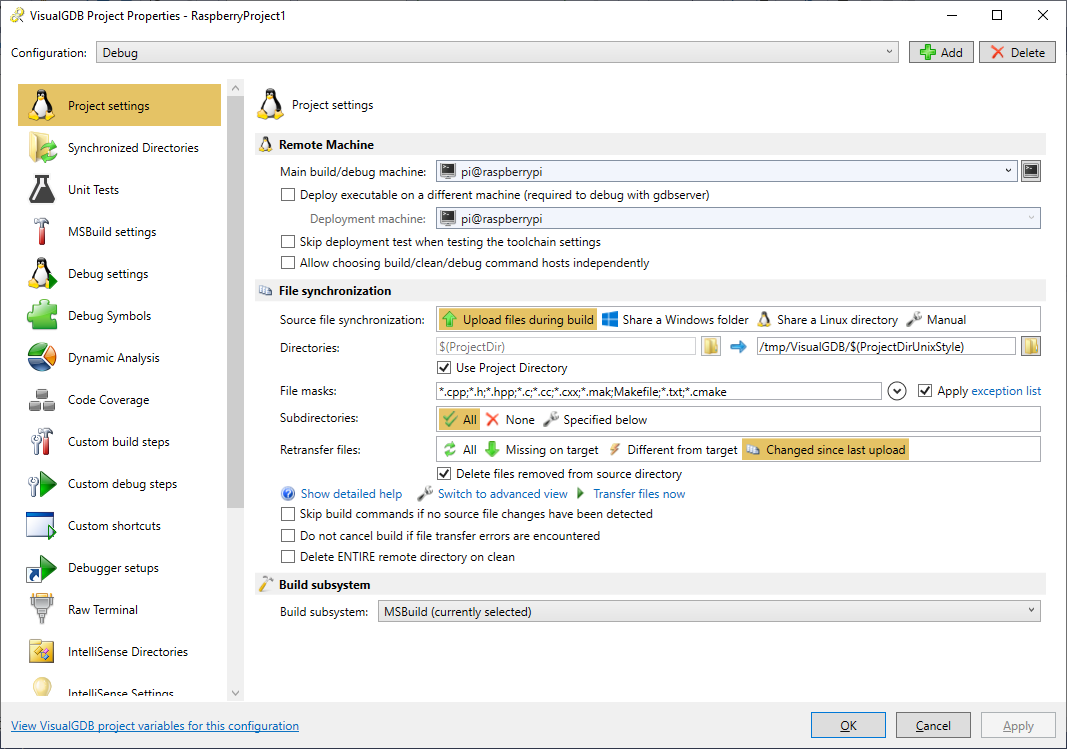
- You can customize various project settings by right-clicking on the project in Solution Explorer and selecting VisualGDB Project Properties:
- You can now use all normal Visual Studio techniques to debug your app. If you want more examples, check out the following tutorials:
If you want to develop a kernel module for Raspberry PI an debug it over JTAG, follow this tutorial.