Debugging C/C++ code in Docker containers with VisualGDB
This tutorial shows how to debug applications running in Docker containers using Visual Studio and VisualGDB.
WARNING: this tutorial features older versions of Docker and VisualGDB. For more recent instructions, please refer to the following tutorials:
- Using Docker Containers to Manage Toolchains
- Building Projects with Toolchains from Docker Containers
Before we begin with the debugging part, we will show why the Docker containers are needed and how they work based on a simple example. Assume we have two Linux machines, one having glibc (Standard C library) version 2.13 and another one having glibc 2.14. Let’s create a very simple C program using the memcpy() function:
#include <stdio.h> #include <memory.h> void CopyMemory(volatile void *pDest, volatile void *pSrc, volatile int size) { memcpy((void *)pDest, (void *)pSrc, (int)size); } int main() { char str1[256] = "Hello", str2[sizeof(str1)]; CopyMemory(str2, str1, sizeof(str2)); puts(str2); return 0; } |
If we compile and run it on the machine with glibc 2.14, it will run properly: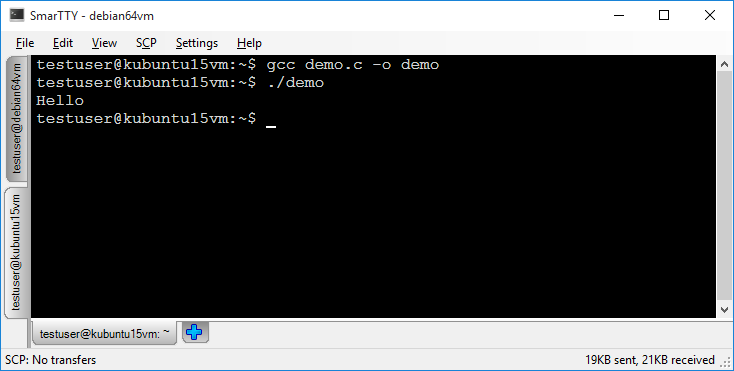 However if we try to run the same binary without recompiling on a machine with glibc 2.13, it will complain that glibc 2.14 was not found. Dumping the symbols imported from the application will show that the memcpy() function explicitly requires glibc 2.14 or later:
This happens because the behavior of memcpy() has slightly changed and the glibc maintainers wanted to ensure that programs compiled against the new versions of glibc will not run with the previous incompatible versions of the library. In this simple example we could update glibc on the second machine or recompile our program with the older version, however for bigger programs depending on multiple libraries, especially if they are not backward-compatible, could make shipping Linux binaries nearly impossible.
Docker allows packing an application together with all its dependencies into a single independent container and running it on any other machine with docker. You can view docker containers as lightweight virtual machines that have an independent set of user-mode components, but share the kernel resources of your host Linux machine.
In this tutorial we will use Visual Studio with VisualGDB to create a simple application, place it into a docker container and debug it inside the container.
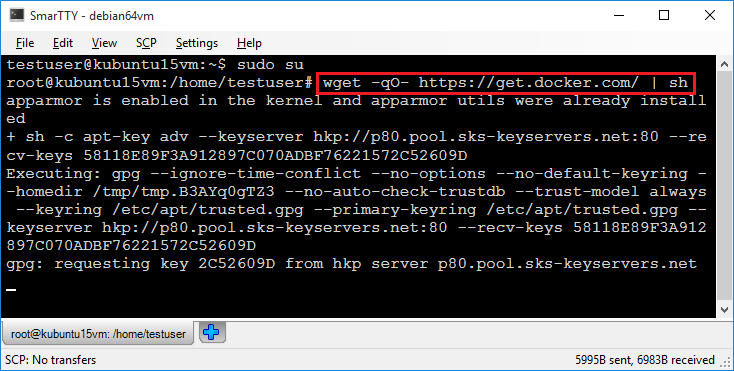
- The first step will be to install the latest version of docker. This can be done by running the following commands:
sudo su
wget -qO- https://get.docker.com/ | sh
- Wait until the installation completes and ensure it completes without errors:
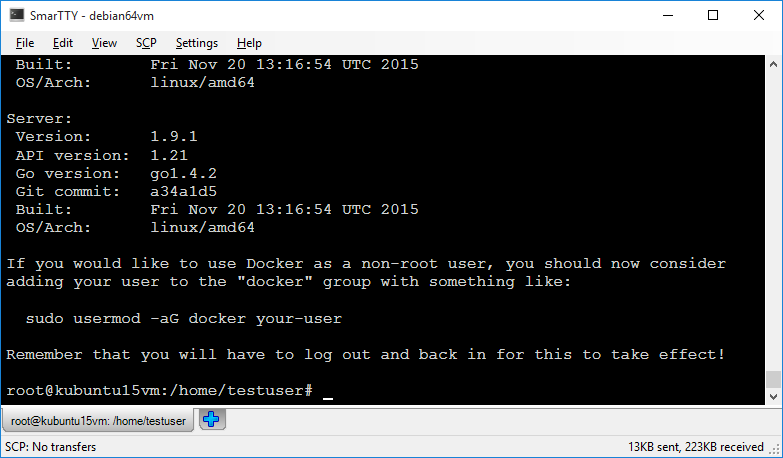
- Add the current user to the docker group by running the following command from a root shell:
usermod -aG docker <user name>
Restart the Linux machine afterwards to ensure that the new permissions are applied.
- Now we will create a simple container and test it out. The container is a separate environment containing your application and a set of libraries it needs. Docker comes with a set of pre-configured containers that can be useful as starting points. In order to ship the container with your application, we will need to compile it inside the container against the libraries in the container and then delete the source code, only preserving the binaries:
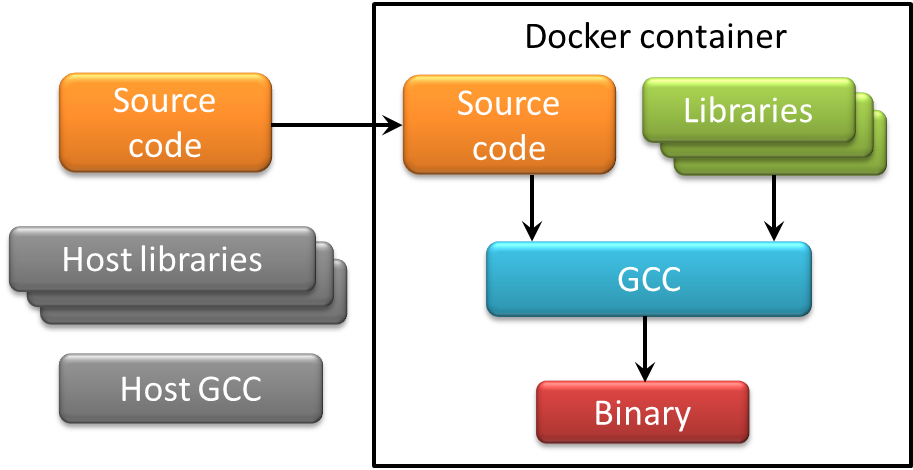 The host libraries and GCC will not be used in our compilation process.
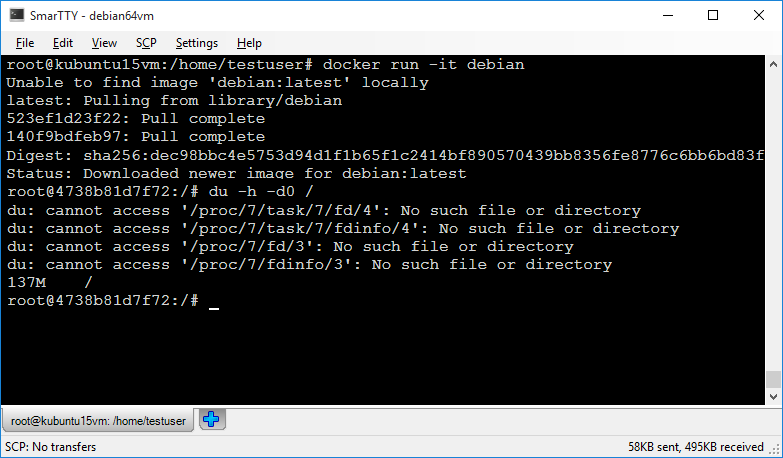
 - The easiest way to get started with a container is to download one of the existing ones. Run the following command:
docker run -it debianIt will download an image called ‘docker’ from the docker site and start a new container with it. The -i and -t flags will create an interactive shell into that container. You can run the “du -h -d0 /” command to check the size of the entire container contents:
 Note that the distro inside the container does not have to be the same as your host distro. E.g. you can run a centos container inside Debian or vice versa.
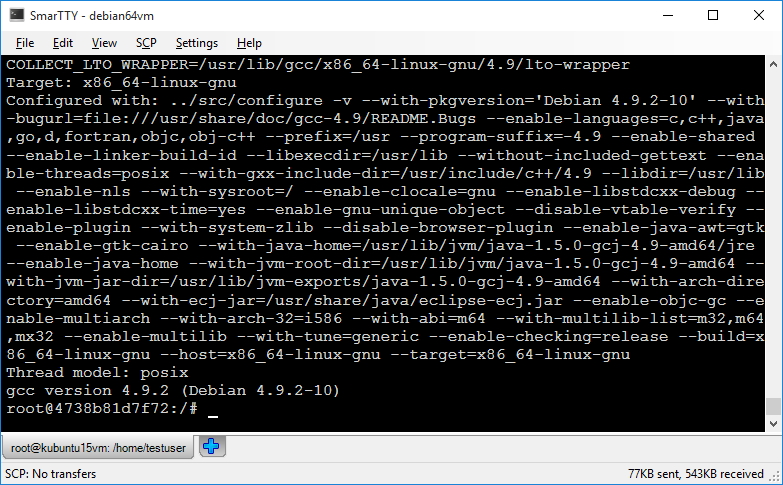
 - Now we can install gcc into the container by running the following commands inside the container:
apt-get update
apt-get install -y gcc
Then check the gcc version by running ‘gcc -v’:
- Now we are almost ready to compile and debug our application inside the container. However if you exit the container shell and start it again, you will see that the changes done by installing gcc have been reverted and gcc is no longer available:
- This can be fixed by creating a file called Dockerfile (the name is case-sensitive) with the following contents:
FROM debian
RUN apt-get update
RUN apt-get install -y g++ gdbserver make
- Then run the following command in the directory containing Dockerfile:
sudo docker build -t demo-base .
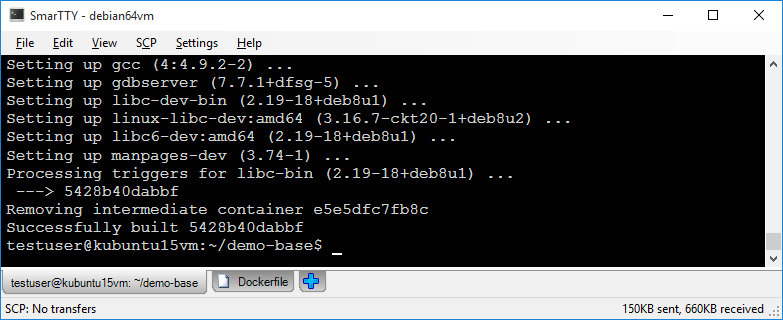 This will take the original ‘debian’ image, install gcc and gdbserver on it and save the resulting image under the demo-base name. We will use the demo-base image as a reference point for building containers with our demo application.
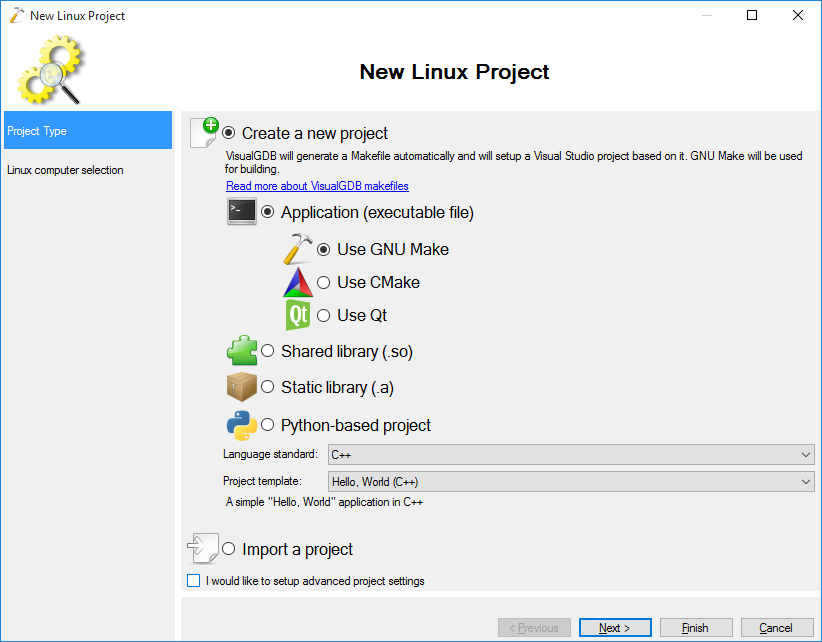
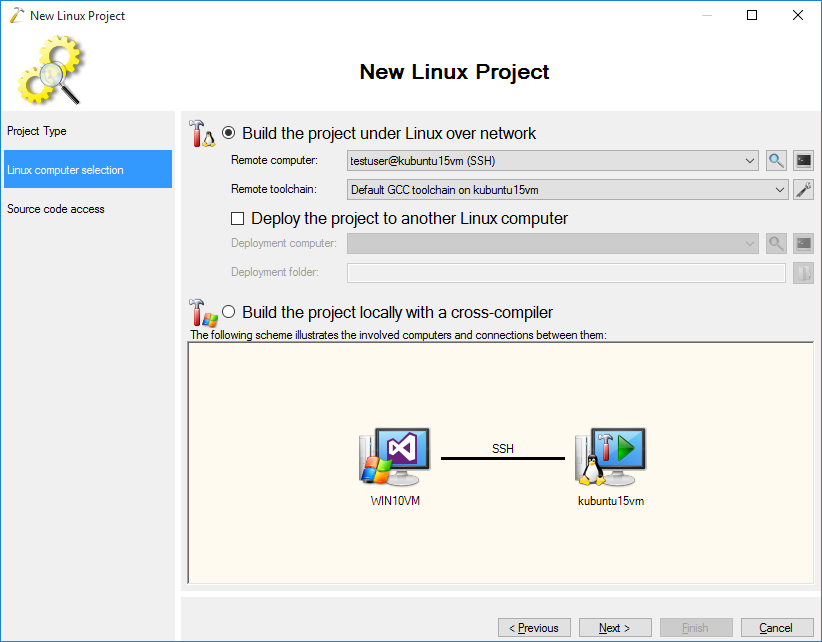
 - Start Visual Studio and begin creating a new project with the VisualGDB Linux project wizard:

- Proceed with the default “Application” setting:
- Select the machine running Docker in the “Remote computer” field:
- On the last page of the wizard add “Dockerfile” (mind the case) to the list of transferred files:
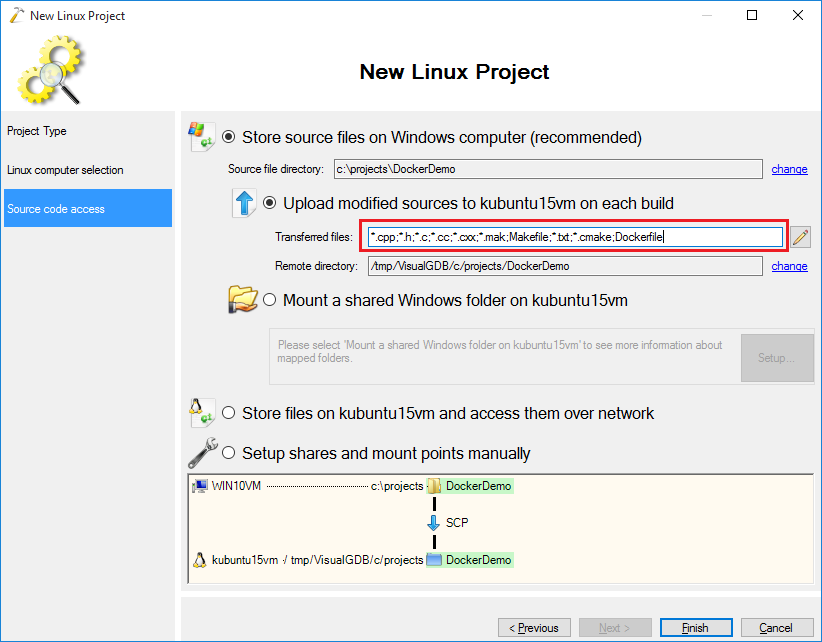
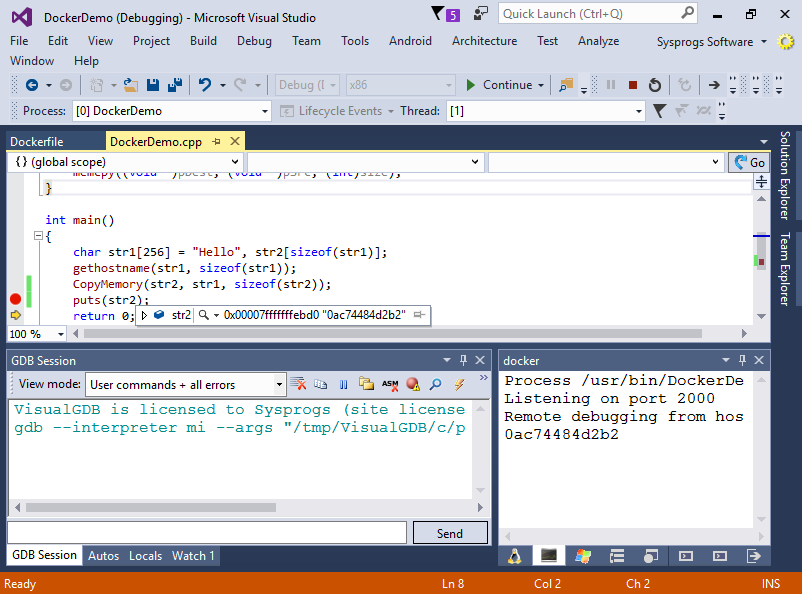
- Click “Finish” to create the project. Replace the contents of the main file with the example from the beginning of this tutorial and add a call to gethostname() to replace the ‘Hello’ string with the name of the current host:
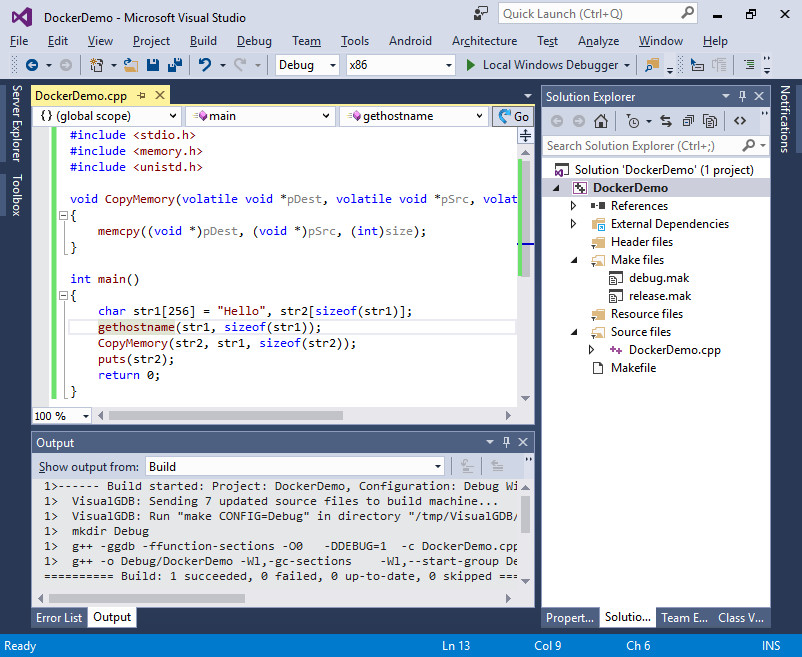
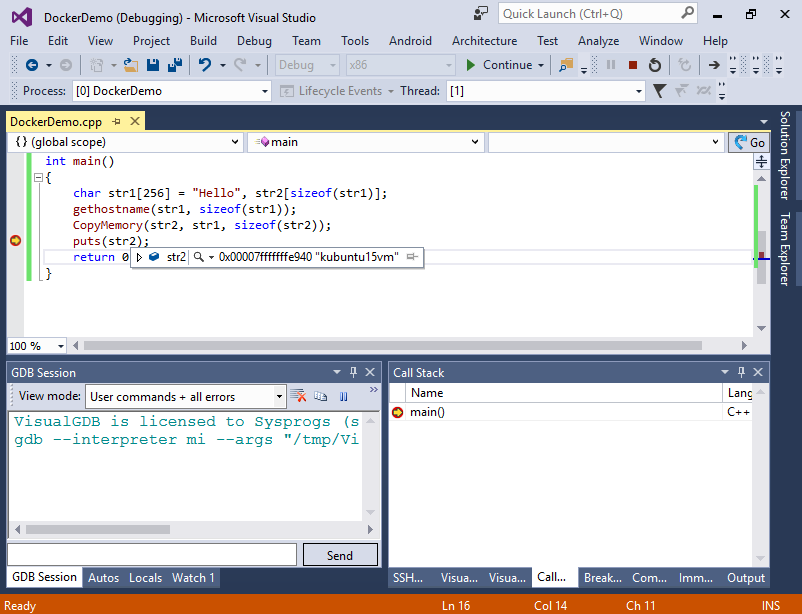
- Set a breakpoint on the puts() line and press F5 to run the program. We are not yet running from a docker container, so the gethostname() function will return the host name of your Linux machine:
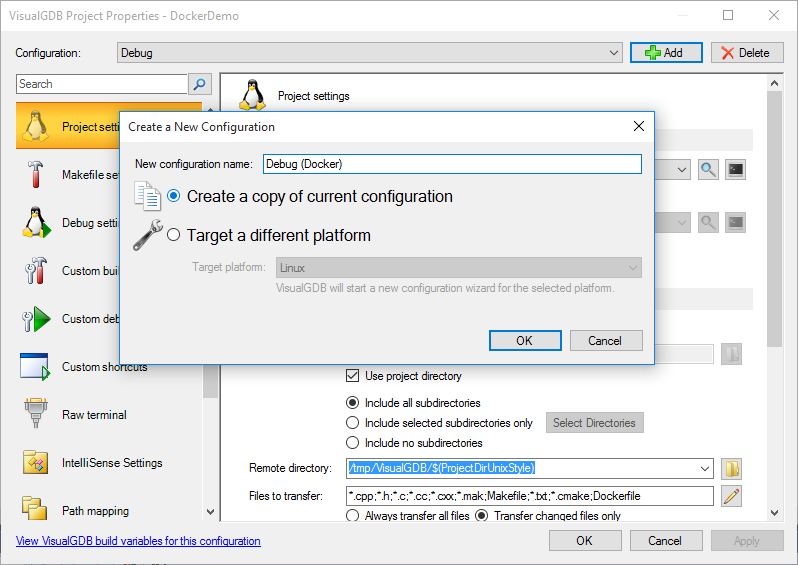
- Now we will create a separate configuration to build our application in a Docker container and debug it there. We will do this by copying the sources to the container, building them there and removing them afterwards. First open VisualGDB Project Properties and copy the current configuration to a new one called “Debug (Docker)”:
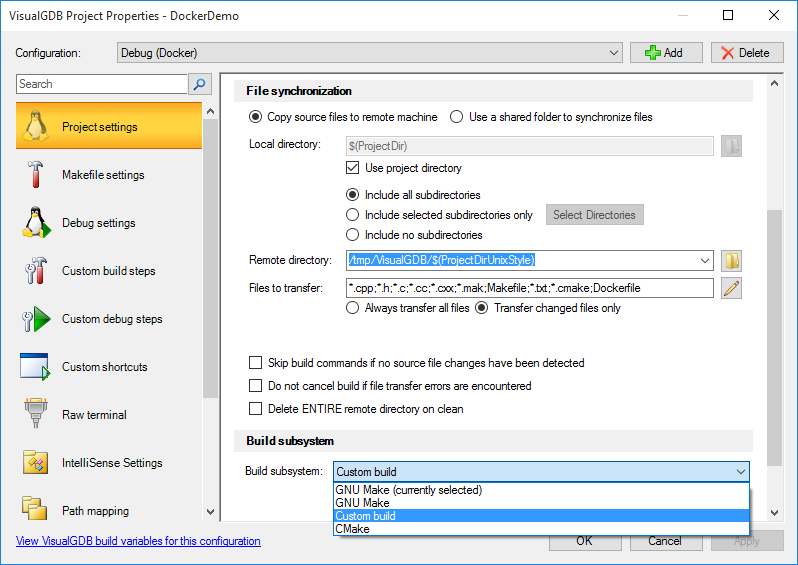
- As we won’t be building the code on the build machine, change the build system from GNU Make to Custom Build:
- Press “Apply” and go to the new “Build Settings” page and set the build command to be “docker build -t demo .” launched in $(BuildDir):
 This command will build a new docker container called “demo” based on the rules from the Dockerfile in your project directory (we have not created it yet!).
 - Go to the Debug Settings page and select “Debug with a custom gdb stub”. Then specify port 2000 and use the following command to run the stub:
docker run -it -p 2000:2000 demo
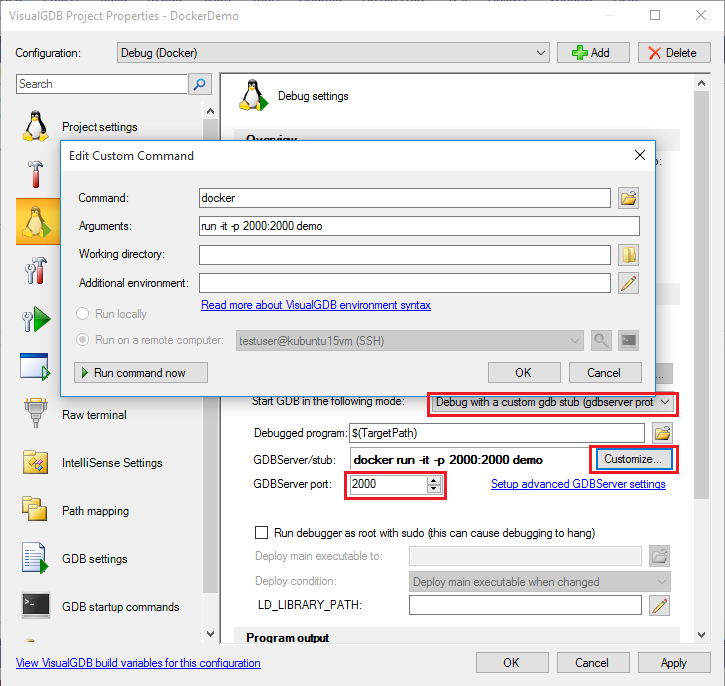 The command will launch Docker with the “demo” container built during the build phase and redirect port 2000 to the host machine. We will later configure docker to run gdbserver on port 2000 inside the container.
 - Finally go to the GDB Startup Commands page and enter the following commands in the “AFTER selecting a target” field:
remote get /usr/bin/DockerDemo /tmp/DockerDemo
symbol-file /tmp/DockerDemo
set sysroot remote:/
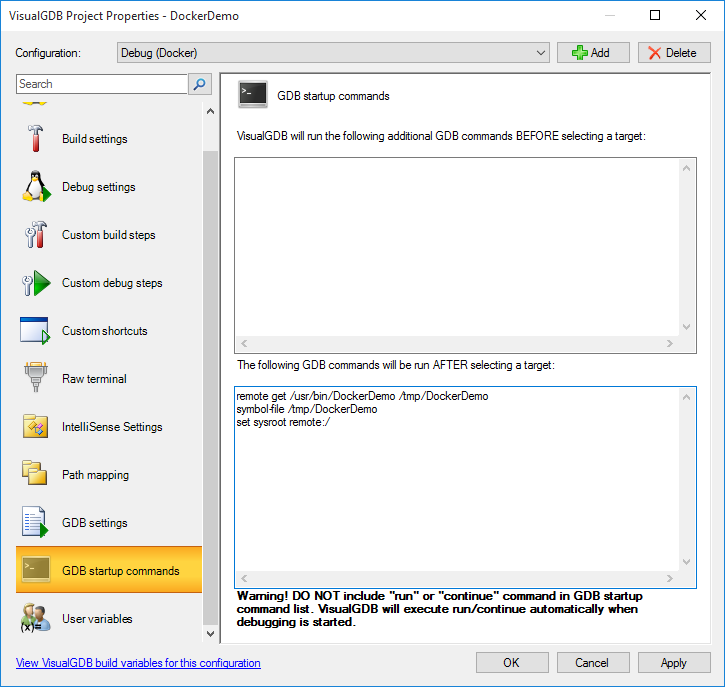 This will save the DockerDemo binary from the container to /tmp/DockerDemo on the host machine (gdb supports transferring files from the gdbserver machine), load the symbols from it and configure gdb to automatically download shared libraries from the target machine in order to read their symbols.
 - Now it’s the time to create our Dockerfile. Add a new text file to the project and change its name from Dockerfile.txt to just Dockerfile. Then add the following contents to it and build the project:
FROM demo-base
COPY * /usr/src/DockerDemo/
WORKDIR /usr/src/DockerDemo
RUN make CONFIG=Debug
RUN cp Debug/DockerDemo /usr/bin
RUN rm -rf /usr/src
EXPOSE 2000
CMD gdbserver :2000 /usr/bin/DockerDemo
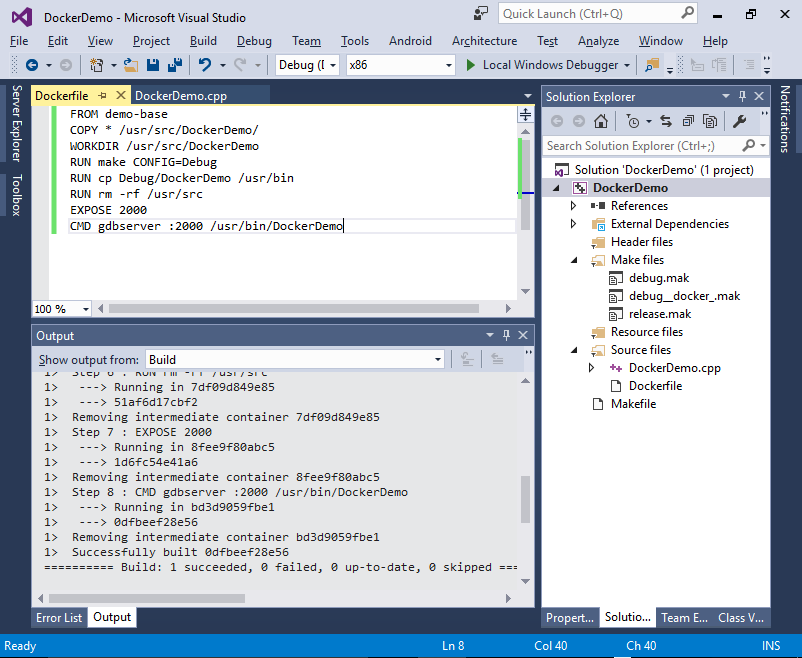 This script file tells docker make a new image based on the demo-base image (created earlier by adding gcc, gdbserver and make to the debian image) and do the following:
- Copy the source code into the container
- Build the source code inside the container using container’s gcc
- Install the binary
- Remove the source code
- Run gdbserver inside the container on port 2000 and make the port exportable so that gdb from the host machine can connect to it. Note that just making the port exportable does not automatically map it and you need to add the ‘-p 2000:2000’ argument when running docker to actually make it accessible for the host-side gdb.
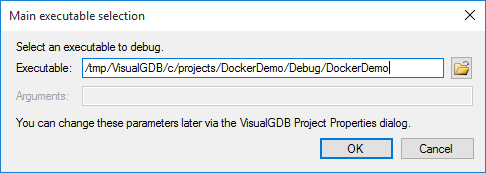
- Press F5 to start debugging. VisualGDB will ask for the main binary. Enter any arbitrary binary there (e.g. the previous non-docker build) as it will be overridden by the symbol-file command anyway.
- VisualGDB will report that gdbserver has exited prematurely and the log will complain about insufficient permissions:

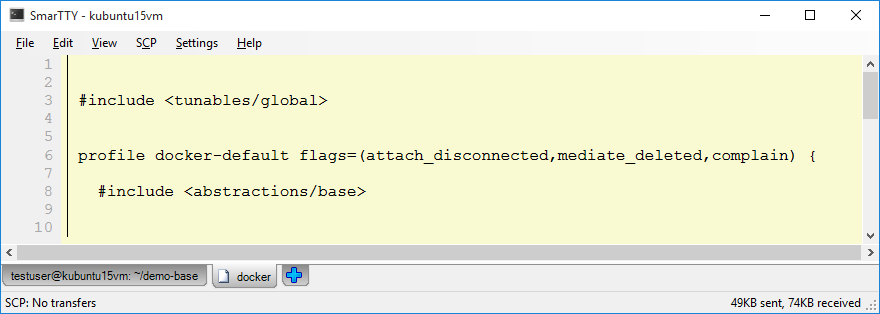
- This happens because docker restricts the permissions to the code running inside it. In order to fix it, open the /etc/apparmor.d/docker file and add the “complain” flag to the default profile:
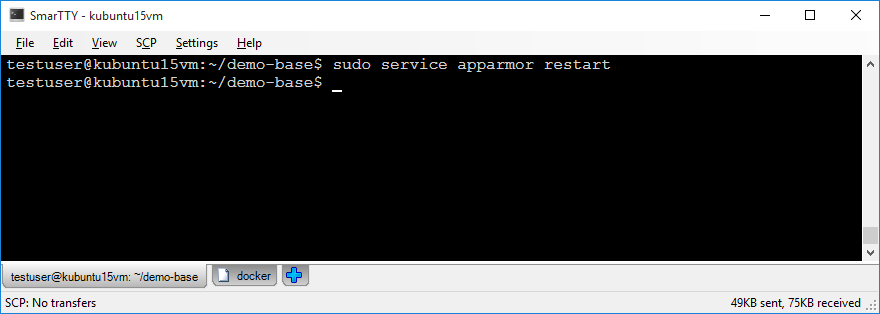
- Save the file and run “sudo service apparmor restart” to apply the new settings:
- Now you will be able to debug your application by pressing F5. Note that the gethostname() now returns the name of the docker container as our application is running inside it:
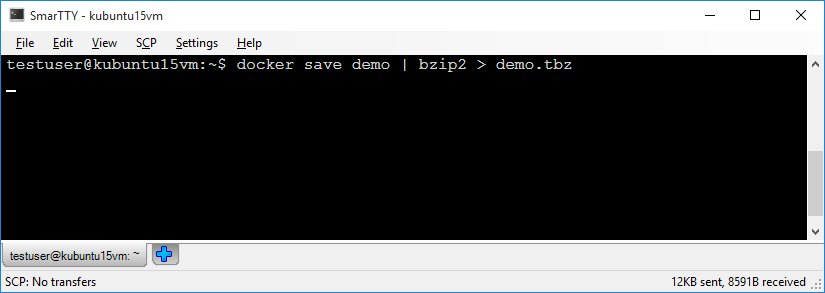
- If you want to save the docker image with your app to a file that can be opened on a another machine, replace the “CMD gdbserver :2000 /usr/bin/DockerDemo” line in your Dockerfile with simply “CMD /usr/bin/DockerDemo”, build your project and run “docker save demo | bzip2 > demo.tbz” to save the ‘demo’ container to a file:
- You can now load the container on another machine and run it there:
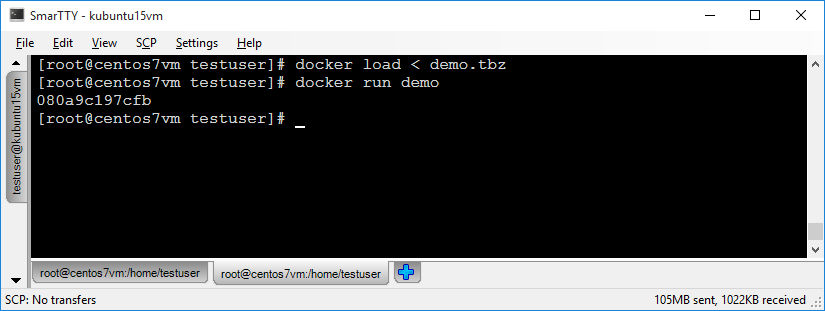 Your app with all the dependencies will be automatically launched in an isolated container requiring no extra modifications on the host side.
 - Finally, if you are using VisualGDB Custom edition or higher, you can create a shortcut to build and download the image to your Windows machine:
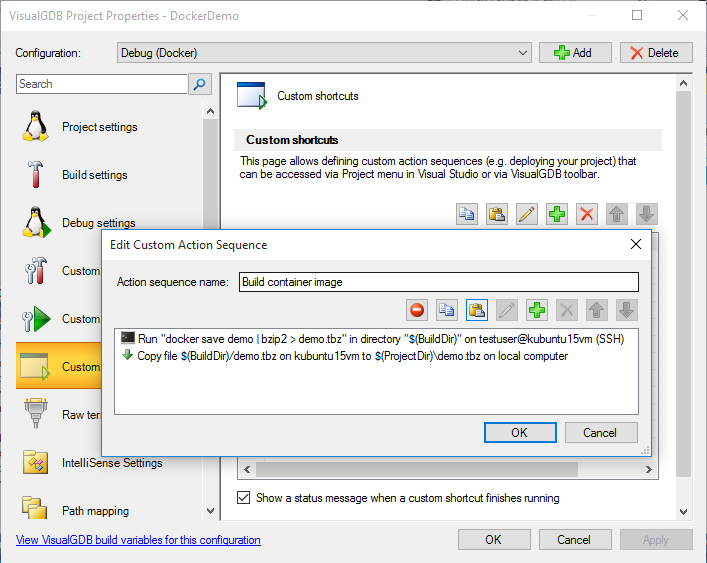
- Then each time you want to rebuild the package, you can invoke the custom action via the Project menu:
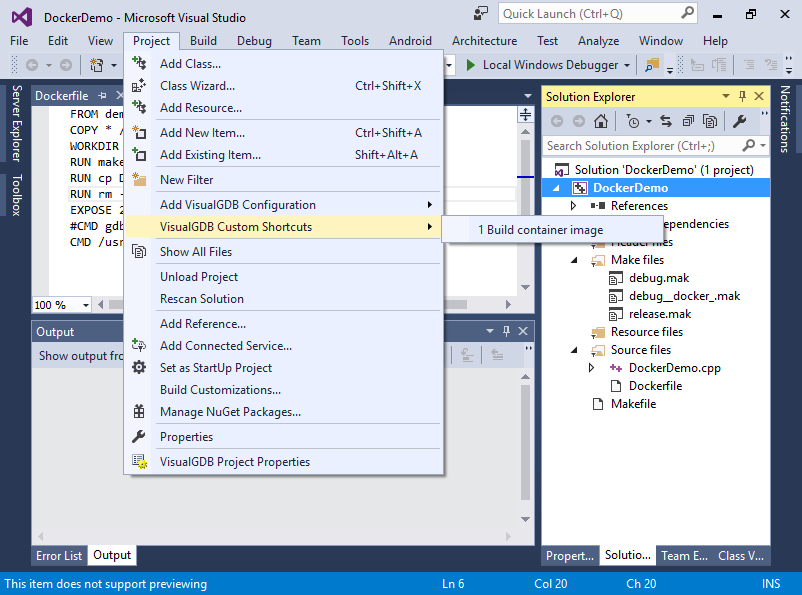 This will save the container to a file image download this file to your project directory. You can create another custom shortcut to deploy the image on a different machine and even test it out.


