Using Docker Containers to Manage Toolchains
This tutorial shows how to use the Docker containers to manage cross-compilation toolchains, easily porting them between different host machines. Once configured, the container can be easily copied to a different host machine (possibly running a different Linux version) without causing any dependency issues: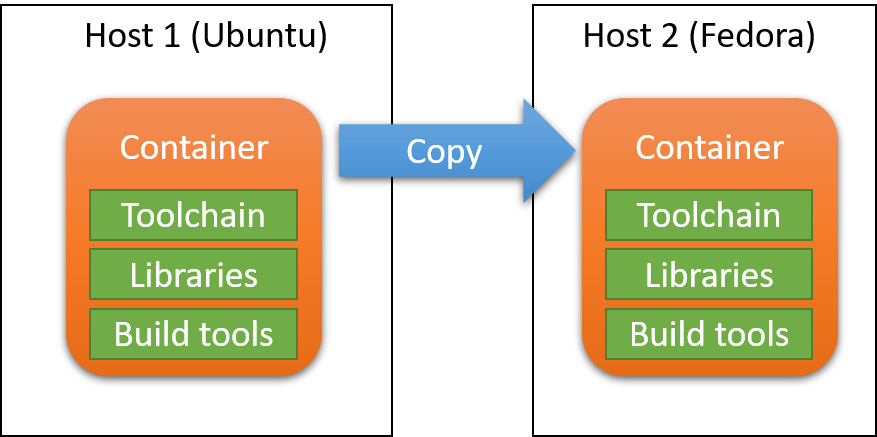 We will show how to create a new container based on the Debian distro inside a Linux machine, install the ARM cross-toolchain inside it, and use it to build applications for the Raspberry Pi board.
Before you begin, make sure you install Docker on your Linux machine (e.g. sudo apt install docker.io).
- The easiest way to start using Docker is to clone an existing container image from the Docker registry. Run the following command to clone the latest image using the Debian distro:
sudo docker run -it --name raspibuild debian
It will create a new container called raspibuild based on the publicly available image called debian (we will explain the differences between container and images below):
 Note the following arguments we used:
- The “-it” argument (equivalent to “-i -t”) starts an interactive terminal, i.e. runs the shell instead of just starting the container in the background.
- The “–name raspibuild” argument assigns a name of the new container. The name can be used later to do various operations with the container.
- Once the container is running (note the root@<ID> prompt), run the command below to install the ARM cross-toolchain and a few other tools:
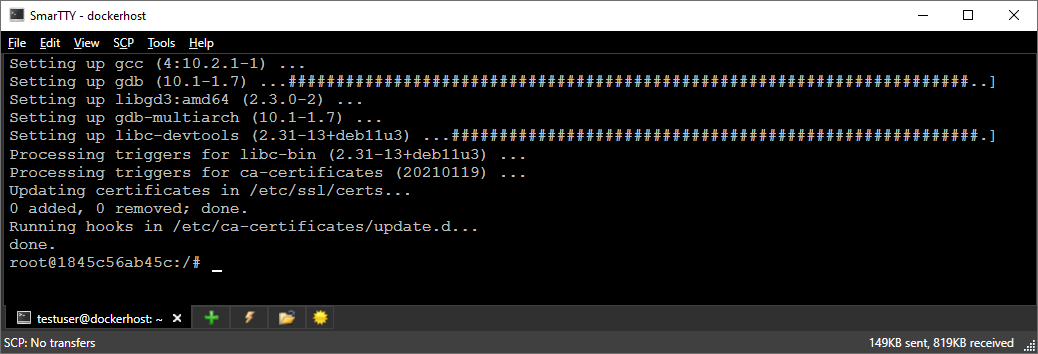
apt update && apt install -y g++-arm-linux-gnueabihf gdb-multiarch cmake ninja-build openssh-server nano
Make sure the tool installation succeeds and does not fail due to network or other issues:
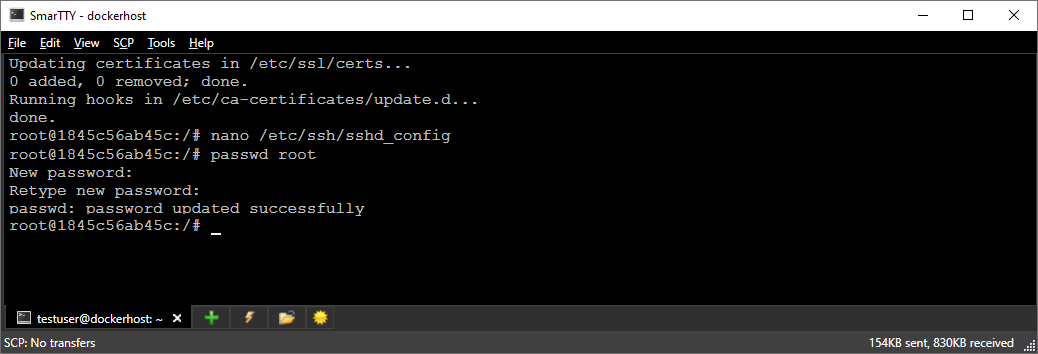
- In this tutorial we will configure the container to run an SSH server, so that we could connect to it like it was a regular Linux machine. To facilitate that, you would need to either add a new user (with the “adduser” command) or configure the SSH server to allow connections from root. Since this is an isolated container anyway, we will proceed with the second option. Open the /etc/ssh/sshd_config file in nano:
nano /etc/ssh/sshd_config
then uncomment the PermitRootLogin line and set it to yes:

- Finally, change the password for the root user by running “passwd”:
 When done, exit the container by pressing Ctrl-D.
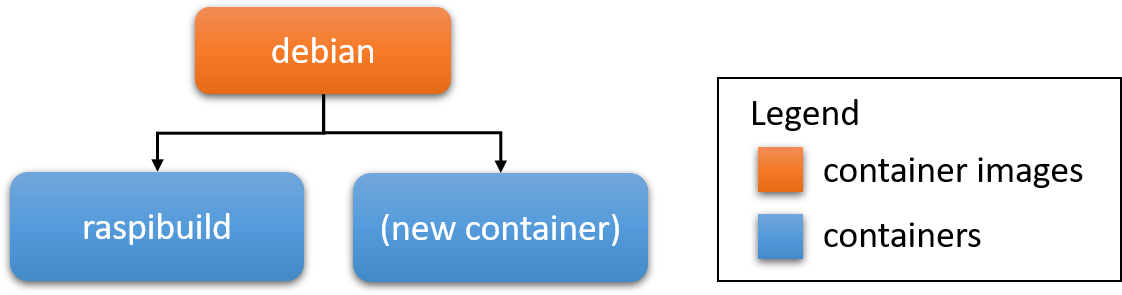
 - If you try using the “docker run -it debian” command again now, you will find that all the changes you have made since starting the container are seemingly lost. This is because the changes we made were applied do the raspibuild container, while keeping the debian image used by it intact. Running “docker run -it debian” again would simply create another container side-by-side with raspibuild:
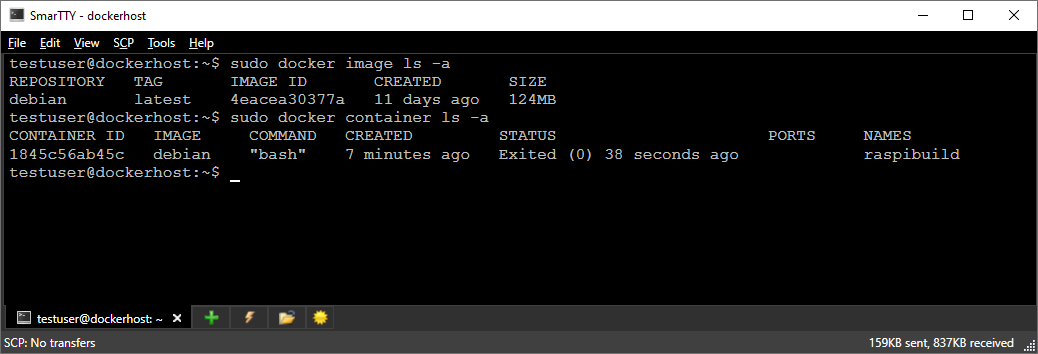
- You can get the exact list of containers and images on your host by running the following commands:
sudo docker image ls -a
sudo docker container ls -a
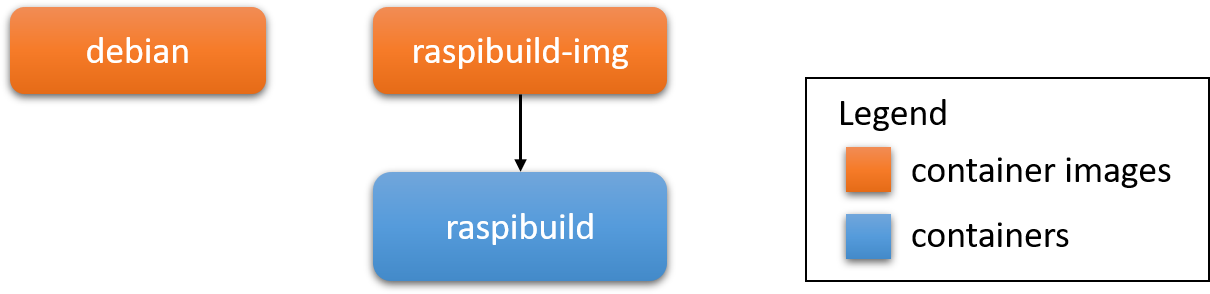
 As shown in the diagram above, the raspibuild container is using the debian image, but is itself a separate entity.
 - We could run the existing raspibuild container via the following command:
sudo docker start -i raspibuild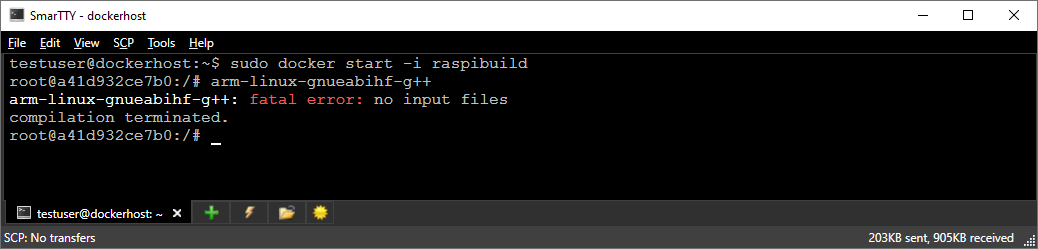 Note that it will not allow changing any container parameters (e.g. mapping the SSH port to one of the host ports).
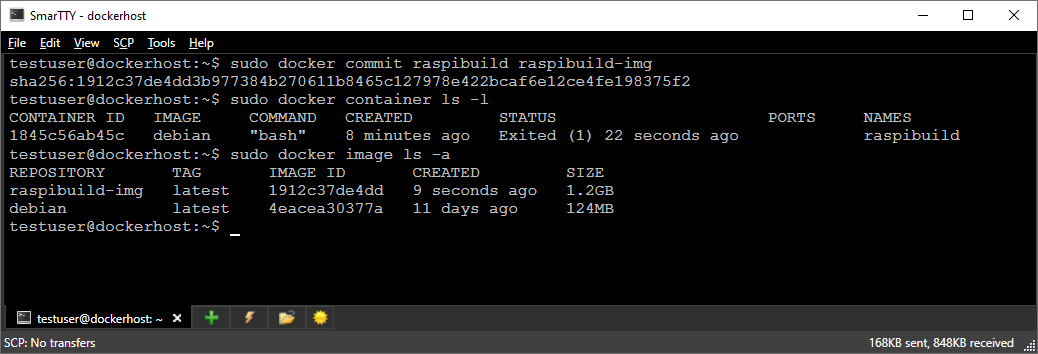
 - A better solution would be to create a new image based on the manually modified container, detaching it from the original debian image:
- This can be accomplished with the following command:
sudo docker commit raspibuild raspibuild-imgYou can then verify that the new image has been created by running “sudo docker image ls -a” again:
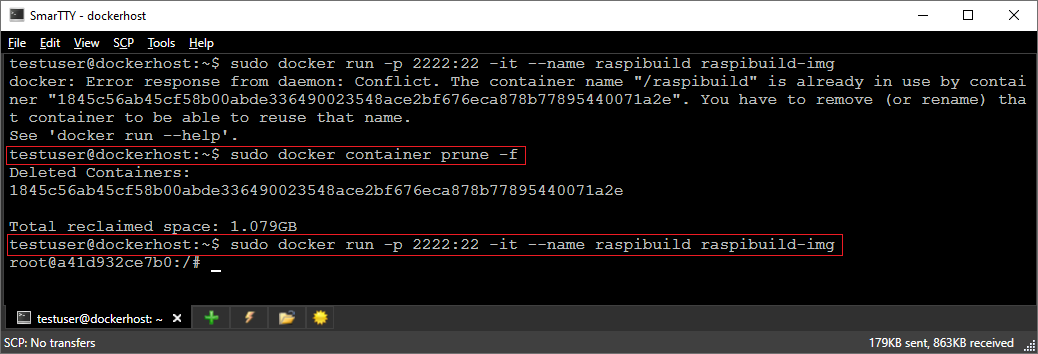
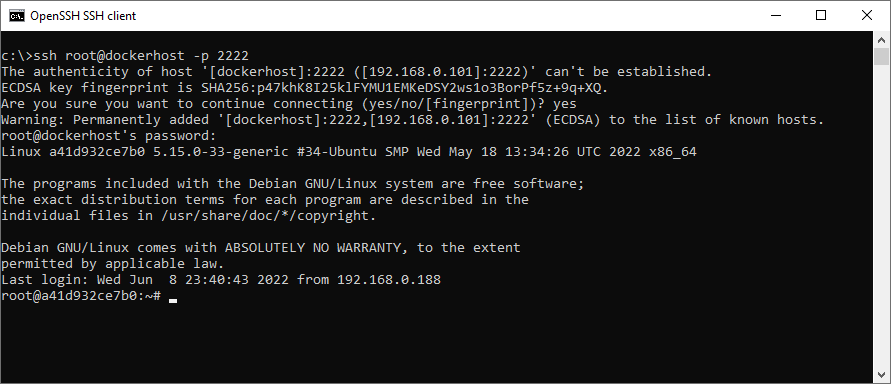
- Now we can delete the old container (since it was converted to an image) and create a new one based on the new image and having the SSH port redirected to port 2222 on the host:
sudo docker container prune -f
sudo docker run -p 2222:22 -it --name raspibuild raspibuild-img
- Now you can start the SSH server inside the container:
service ssh start
Once it has been started, you can connect to the redirected SSH port from any other machine:
- We can eliminate the need to start the SSH service manually by creating the following script inside the container (e.g. /usr/sbin/run-ssh):
#!/bin/sh
service ssh start

term_handler() {
   exit 1
}

trap term_handler TERM
sleep infinity &
wait
The term_handler() function is needed to handle the “docker stop” command properly (see here).
- Make the script runnable by running “chmod +x /usr/sbin/run-ssh” inside the container, then exit the container and commit it with the following command:
sudo docker commit --change='CMD ["/usr/sbin/run-ssh"]' raspibuild raspibuild-img
The “–change=’CMD <…>’” part configures the new image to automatically run our script each time the container is started.
- You can test it out by running the following command:
sudo docker run -p 2222:22 -d --name raspibuild raspibuild-img
The container will run in the background and will be accessible via SSH immediately. You can start it at any moment by running this command:
sudo docker stop raspibuild
Note that if you get the “name already in use” error while trying to start a container, you will need to remove the previous instance first. You can use the following command to remove all containers that are not currently running:
sudo docker container prune -f - You can easily move a Docker image to another host machine by saving it to a tar file:
sudo docker save raspibuild-img > raspibuild.tar
Use the command below on a different host to import the saved image:
sudo docker load < raspibuild.tar
- Finally, you can let the container access a specified directory on the host machine (e.g. source repository) by passing the “–mount” option to “docker run”, e.g.:
sudo docker run -p 2222:22 --mount type=bind,source=/home/testuser/source,target=/source -it --name raspibuild raspibuild-img
This will mount the /home/testuser/source directory on the host to /source inside the container, so you won’t lose any changes to it when the container is deleted.
Now that you have successfully installed the toolchain in the container, follow this tutorial to use this toolchain to build and debug applications for the target.