Creating Mbed Unit Tests with VisualGDB
This tutorial shows how to create, build and debug unit test for Advanced Mbed Projects with Visual Studio and VisualGDB. We will create a basic project consisting of the main application and a library and will show how to use VisualGDB to create unit tests and selectively run subsets of them.
Before you begin, install VisualGDB 5.5 or later.
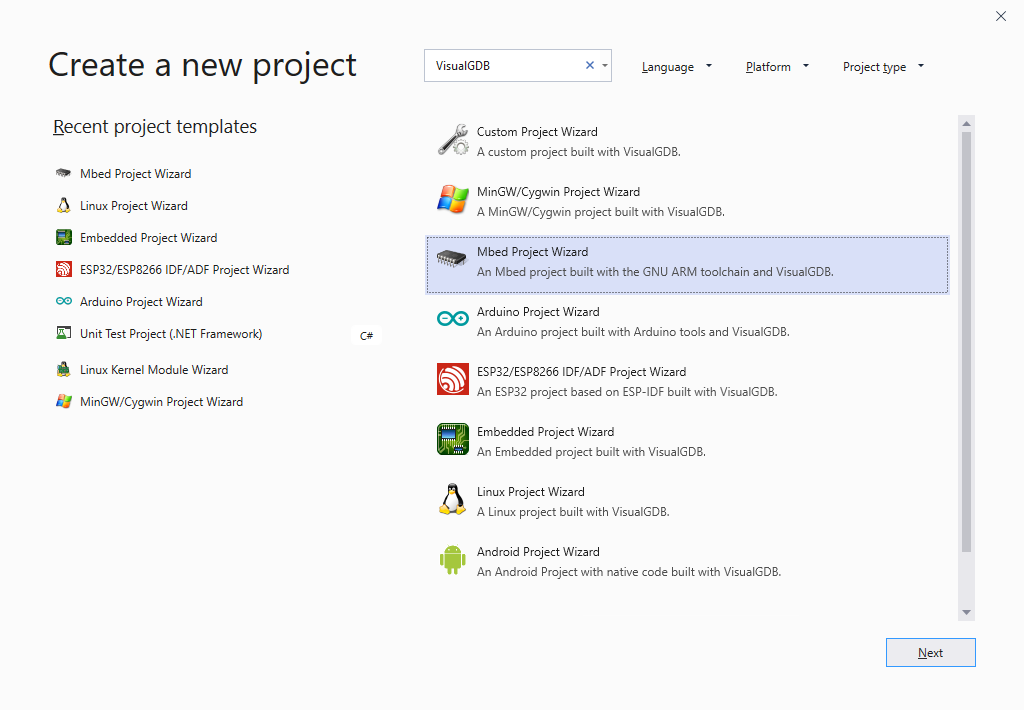
- Start Visual Studio and launch the VisualGDB Mbed Project Wizard:
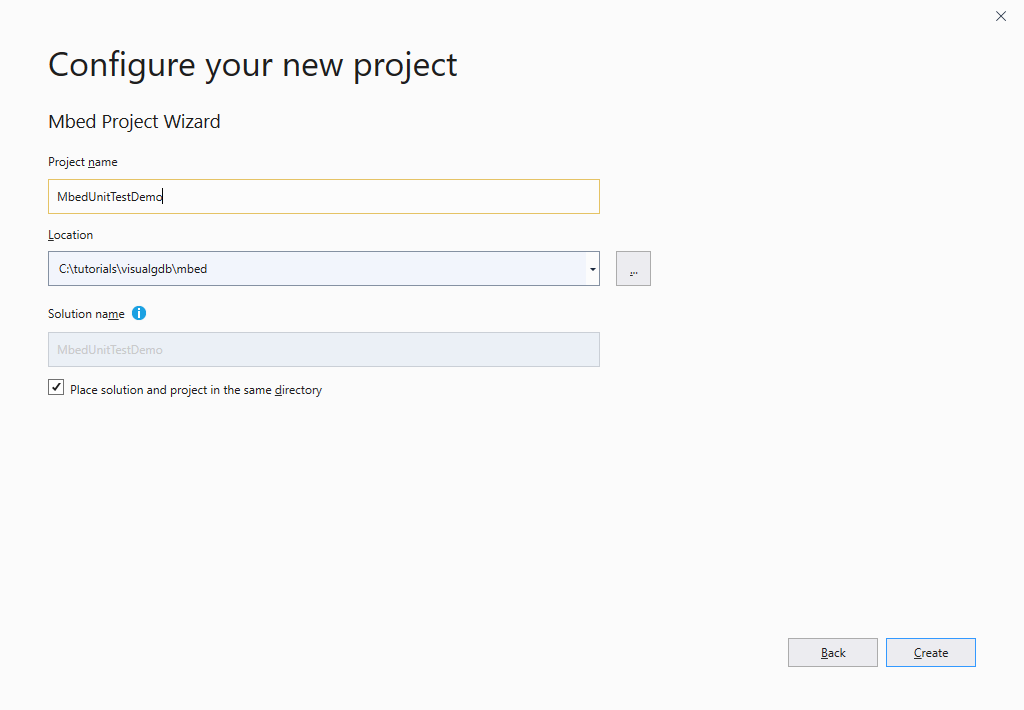
- Enter the name and location for the created project:
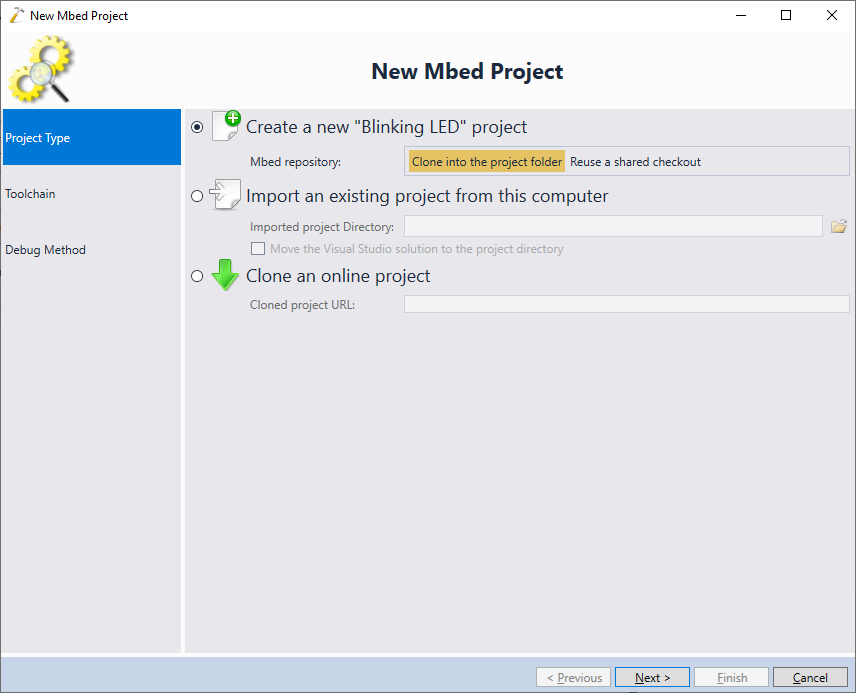
- On the first page of the wizard select “Create a new Blinking LED project”:
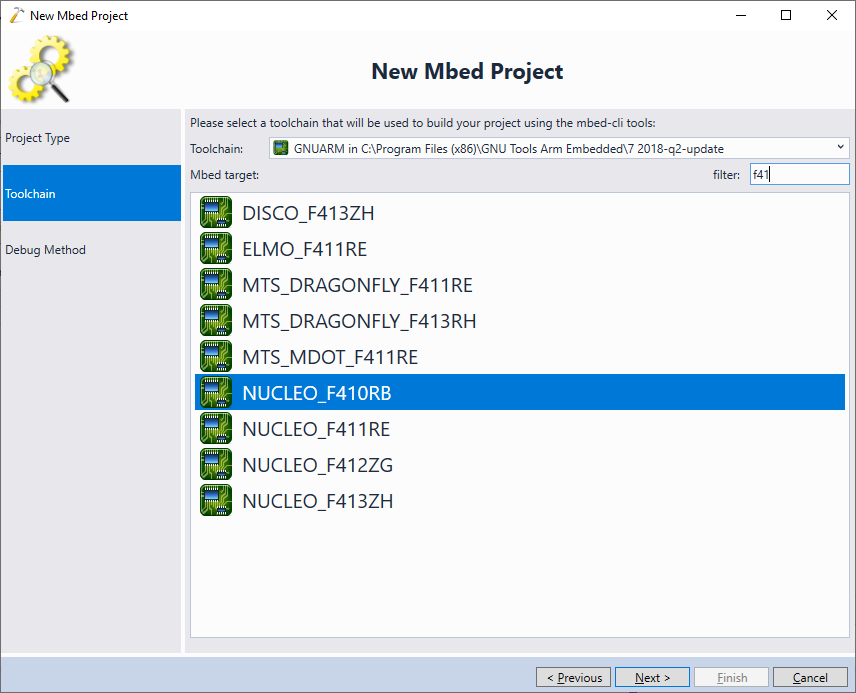
- On the next page select the ARM toolchain and the targeted board:
 Warning: mbed unit tests report the test results via an on-board serial port. If your target (e.g. STM32F4Discovery) does not have a primary serial port accessible from the computer, use an external USB-to-COM adapter and make sure you can see the serial port output from the board before proceeding with unit tests.
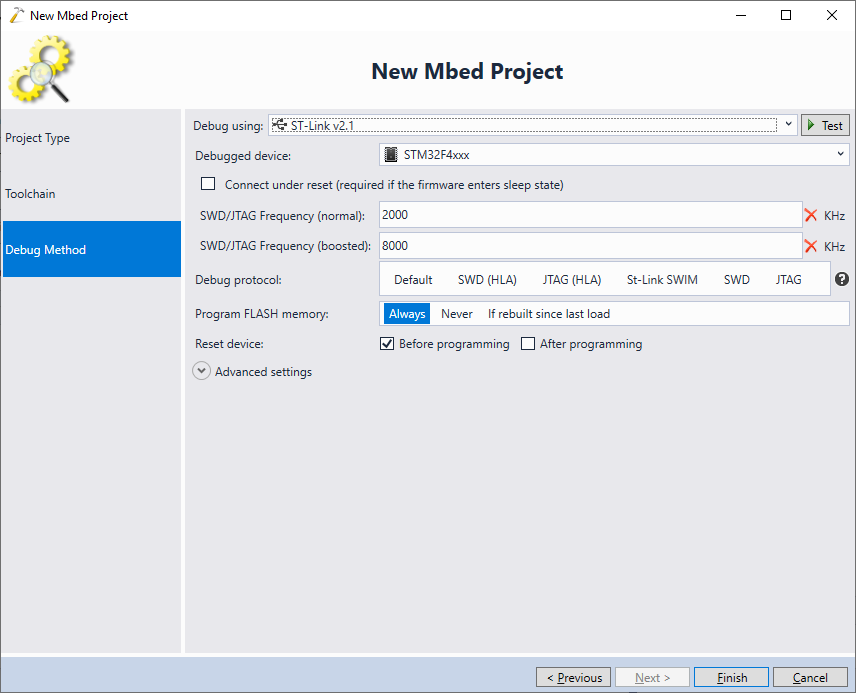
 - Connect your board to the USB port and let VisualGDB detect the debug configuration. You can use the “Test” button to automatically verify the debug settings:
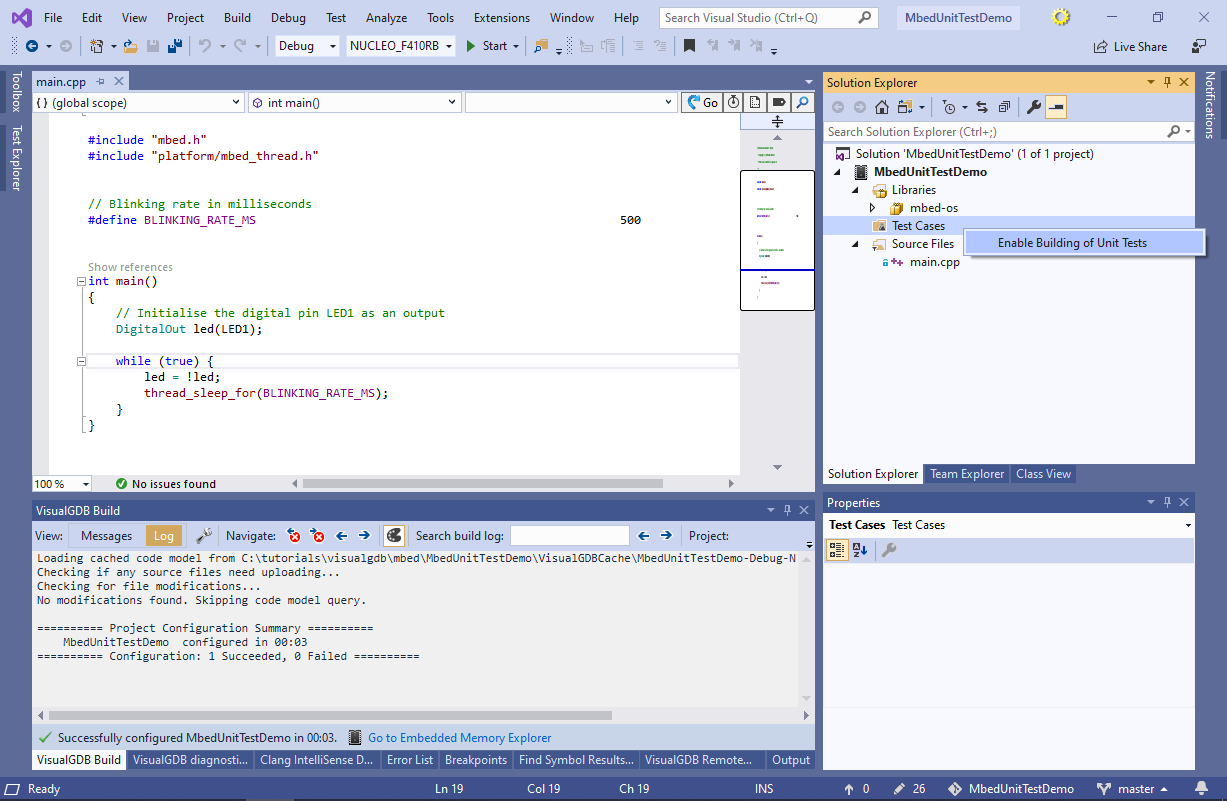
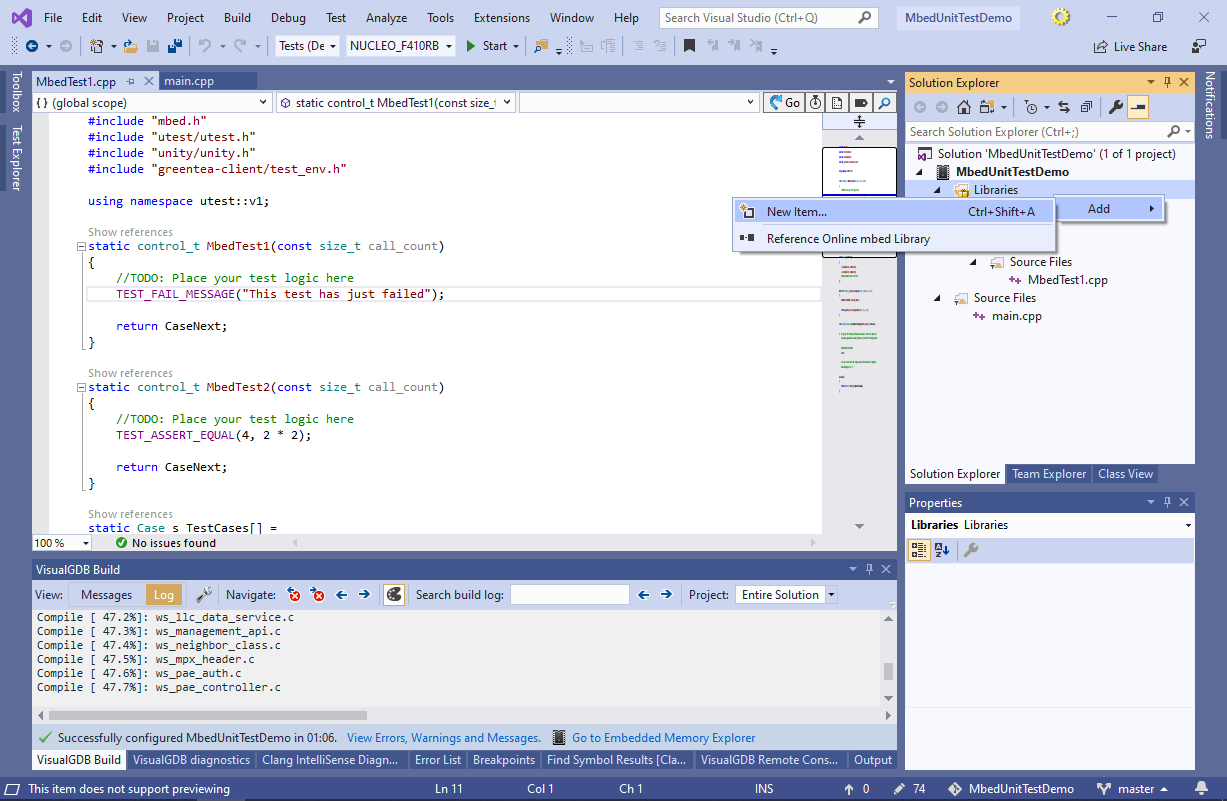
- Press “Finish” to create the project. VisualGDB will generate a very basic “Blinking LED” project consisting of one source file. Locate the “Test Cases” item in Solution Explorer, right-click on it and select “Enable Building of Unit Tests”:
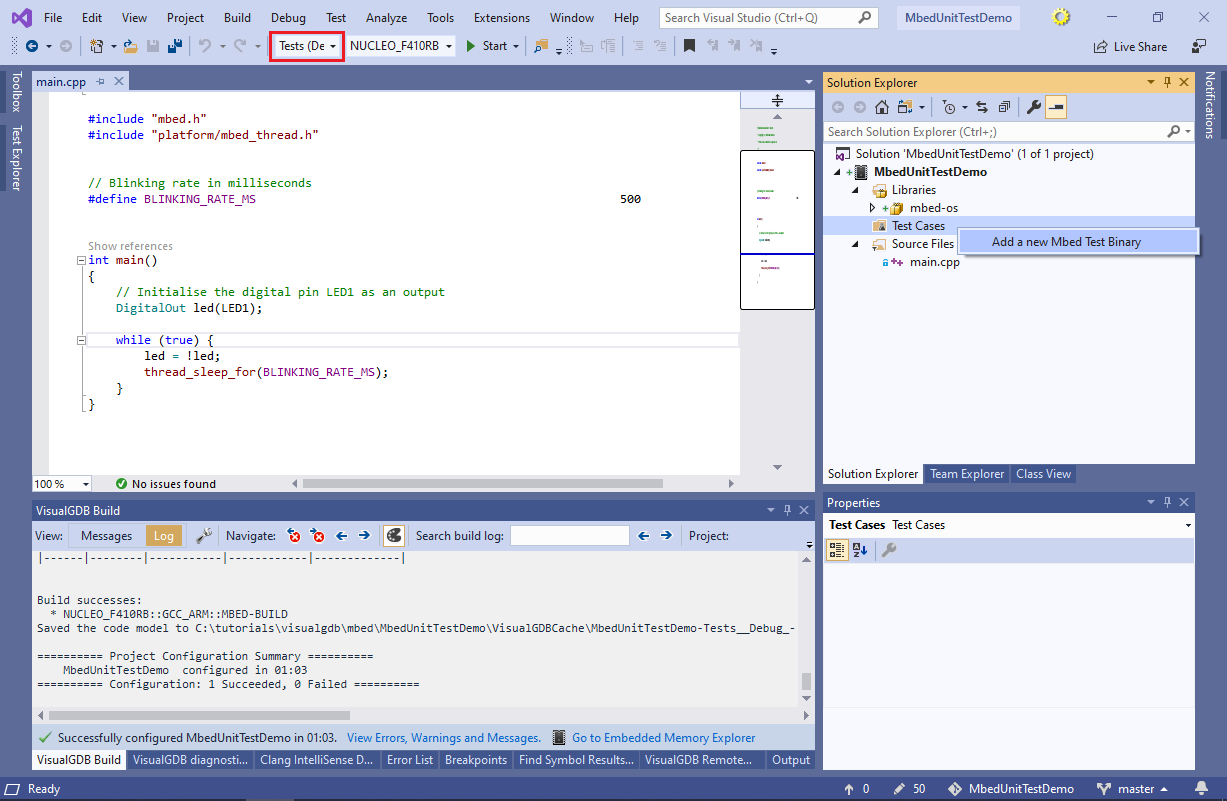
- This will switch the solution to a separate “Tests (Debug)” configuration and will allow managing mbed unit test binaries via Solution Explorer. Discovering and building mbed tests increases the build time of the project, so you can switch back to the regular “Debug” configuration when you are done running the tests. Right-click on the “Test Cases” item again and select “Add a new Mbed Test Binary”:
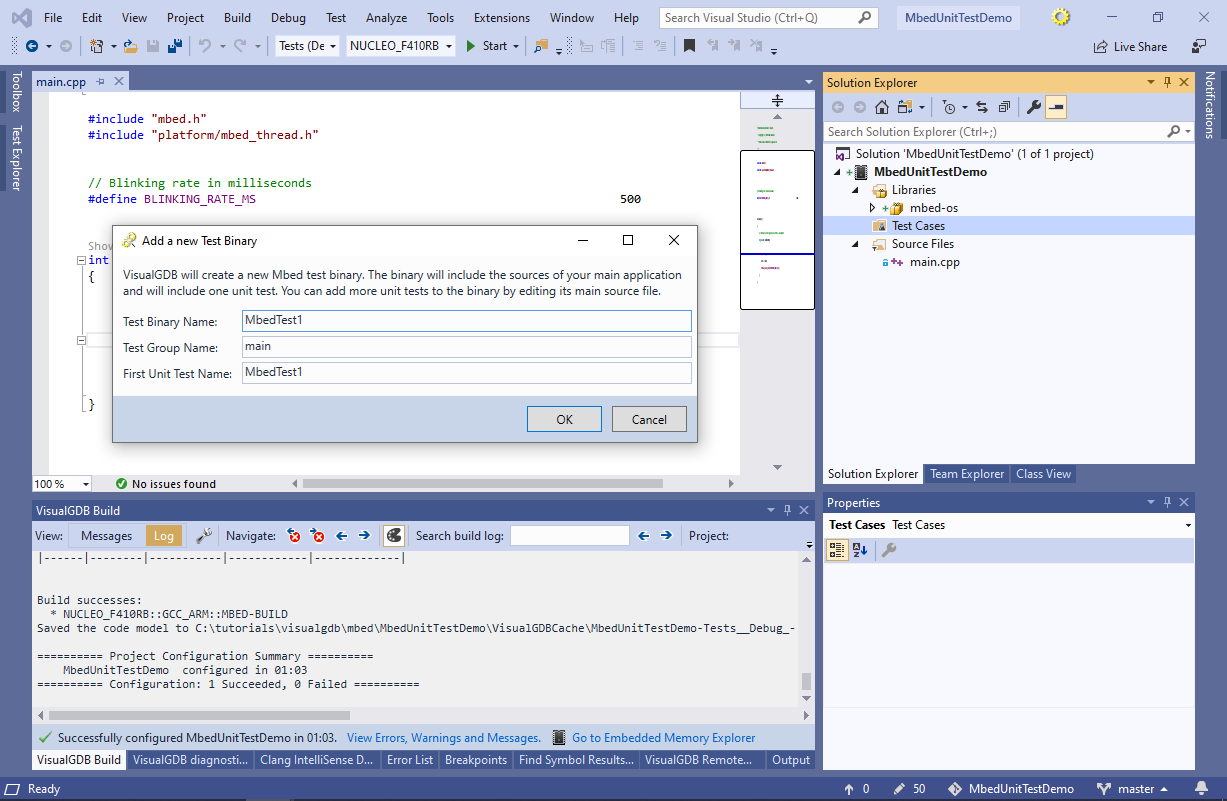
- Mbed test binaries are organized in groups and are stored in the TESTS\<group>\<binary> folders. Furthermore, each binary can contain one or more unit tests. VisualGDB will ask for the binary, group and test names when creating a new test binary. Proceed with the default values:
- Once the binary has been created, press Ctrl-Shift-B to build the solution. Initially it will fail due to a multiple definition of main():
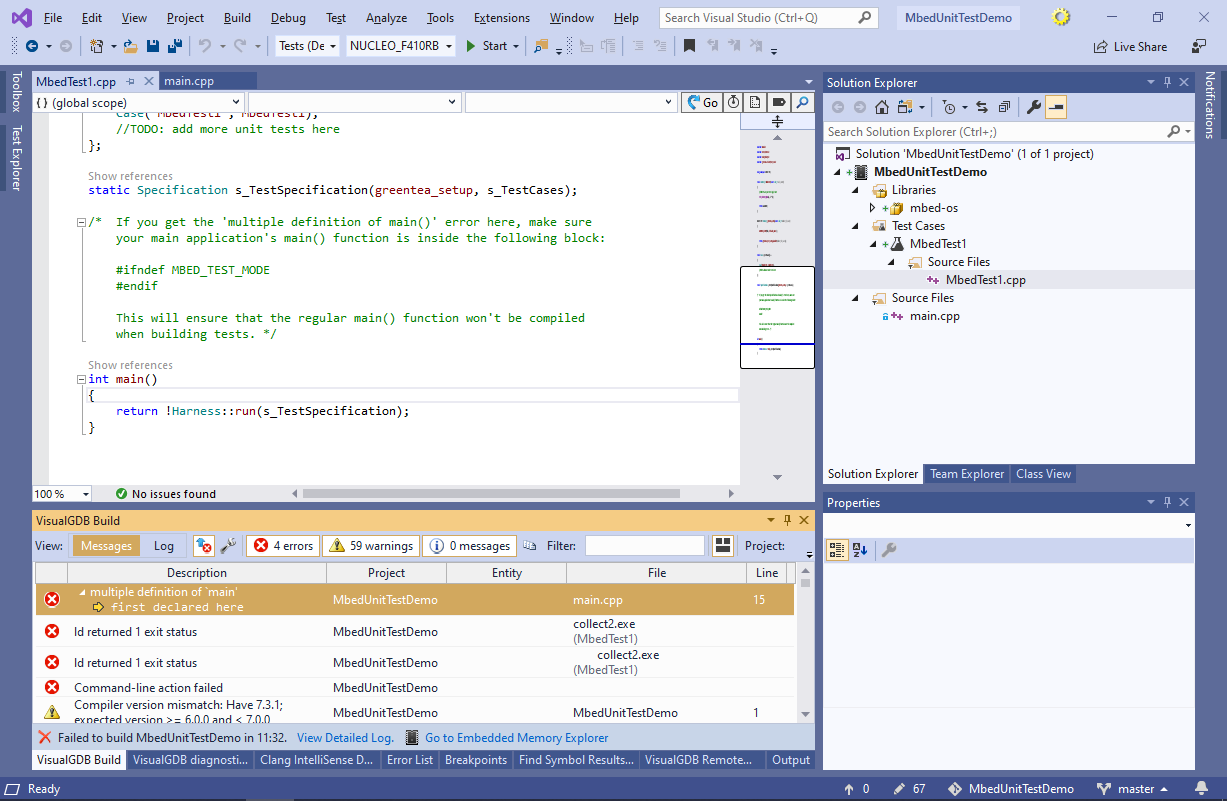
- In order to fix it, locate the normal main() function of your application and surround it with #ifndef MBED_TEST_MODE. This will make sure that it will not get included into the unit test binaries and the build will now succeed:

- Before you can run mbed tests with VisualGDB, you would need to select the COM port connected to the board. This can be done on the Unit Tests page of VisualGDB Project Properties:
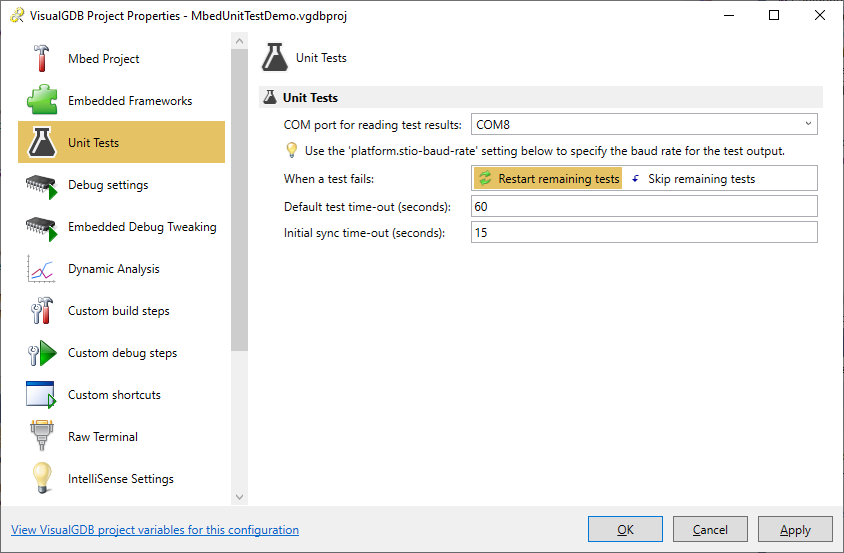 Note that VisualGDB will automatically pick up the baud rate from the mbed settings on the Mbed Project page.
 - Add another unit test to the test binary as shown below:
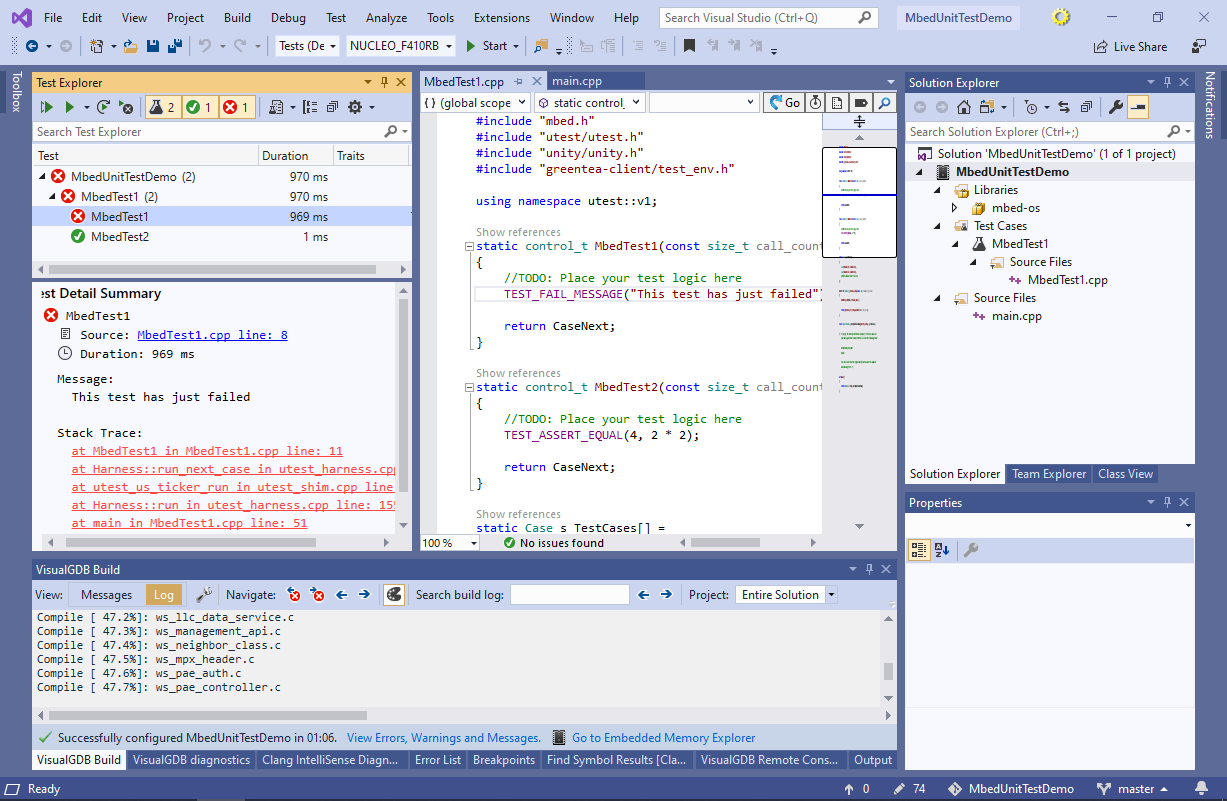
static control_t MbedTest1(const size_t call_count)
{
    //TODO: Place your test logic here

    TEST_FAIL_MESSAGE("This test has just failed");
    return CaseNext;
}

static control_t MbedTest2(const size_t call_count)
{
    //TODO: Place your test logic here

    TEST_ASSERT_EQUAL(4, 2 * 2);
    return CaseNext;
}

static Case s_TestCases[] =
{
    Case("MbedTest1", MbedTest1),
    Case("MbedTest2", MbedTest2),
	//TODO: add more unit tests here
};
- Build the project again and open the Test->Windows->Test Explorer window. VisualGDB will discover the tests inside the binary and will allow using the regular Visual Studio GUI to run them. Select any subset of tests, right-click on them and select “Run Selected Tests“:
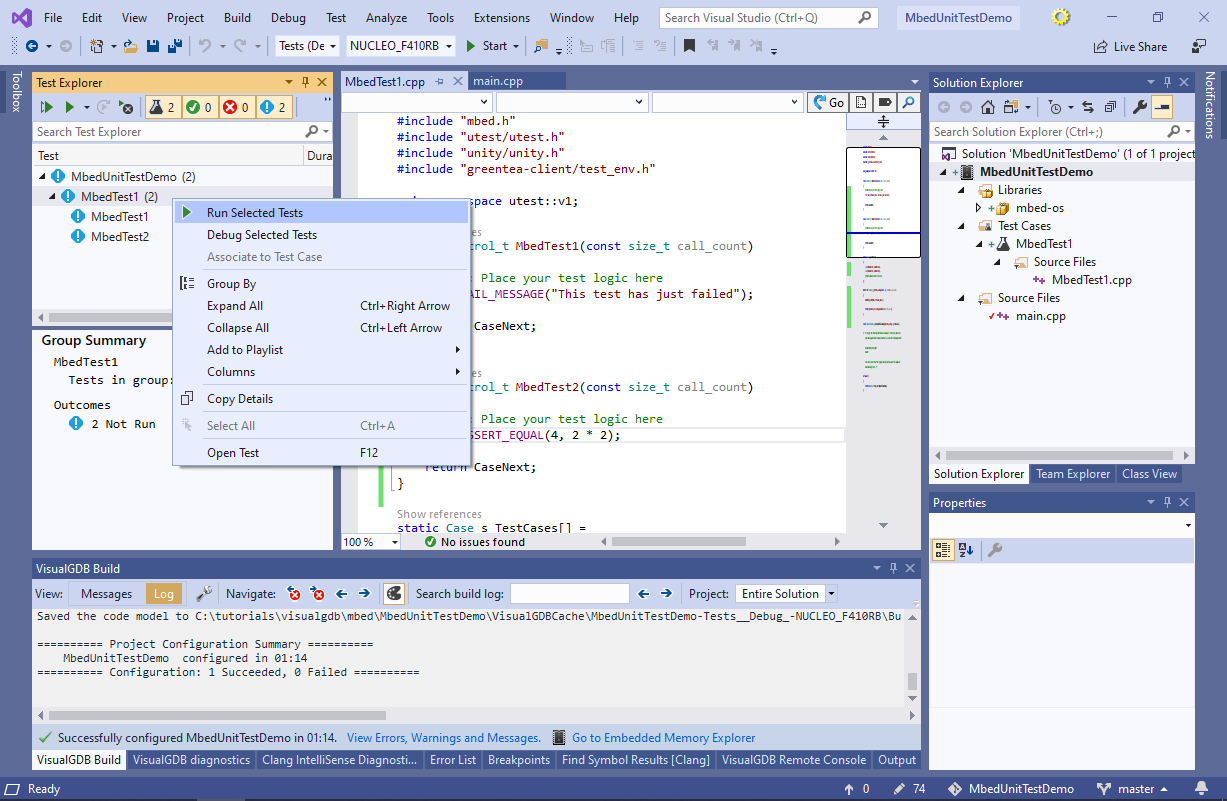
- VisualGDB will automatically program the necessary test binary, patch it to only run the selected tests and will display the test results in the Test Explorer window. If you have selected tests from multiple test binaries, VisualGDB will automatically program each of the binaries, run the selected tests from it and combine the results together. Unlike the regular mbed test runs, if one of the tests fails, VisualGDB will automatically reset the target and restart the remaining tests:
- Now we will show how to create unit tests for an mbed library. Right-click on the Libraries item in Solution Explorer and select “Add->New Item“:
- Enter the name of the library and click “OK”. Once the library has been added, right-click on it and select “Add a new Mbed Test Binary” again:

- Build the project one more time and see how VisualGDB now shows the tests from both binaries in the Test Explorer window:
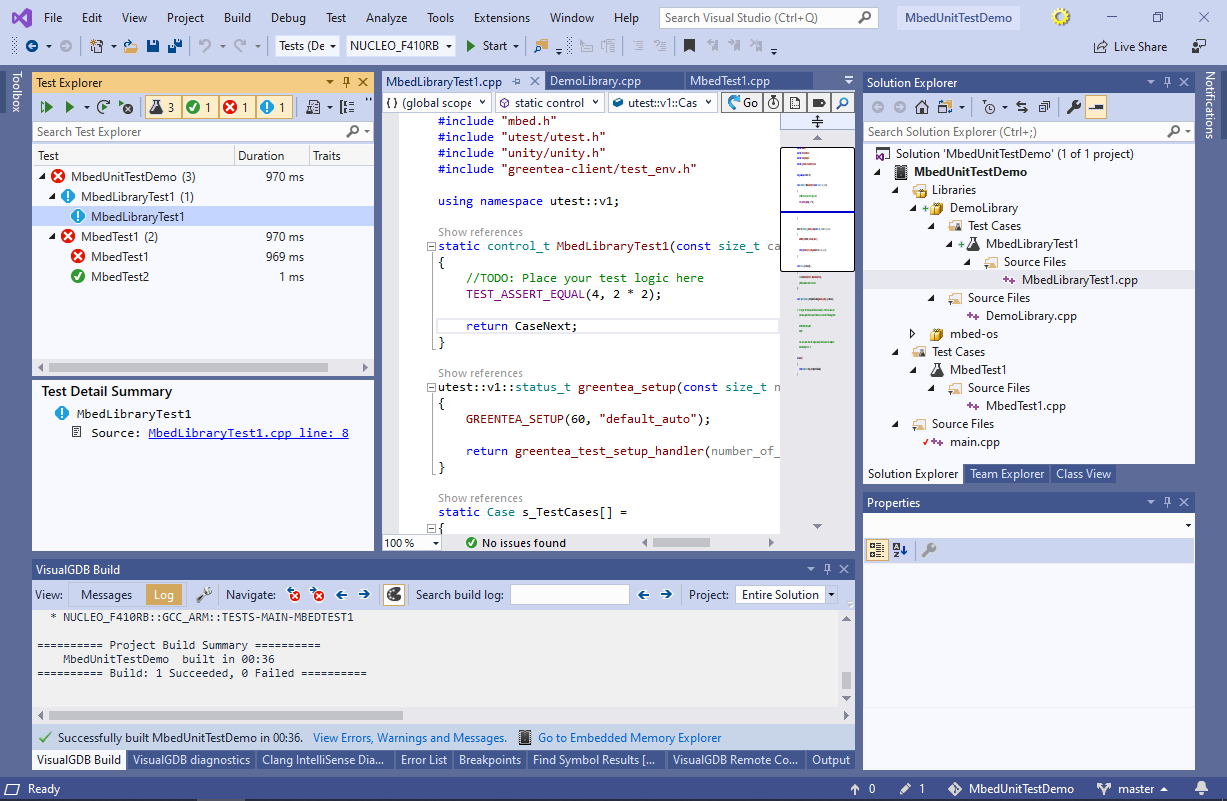
- Set a breakpoint in the new test method, right-click on the test in Test Explorer and select “Debug Selected Tests“:
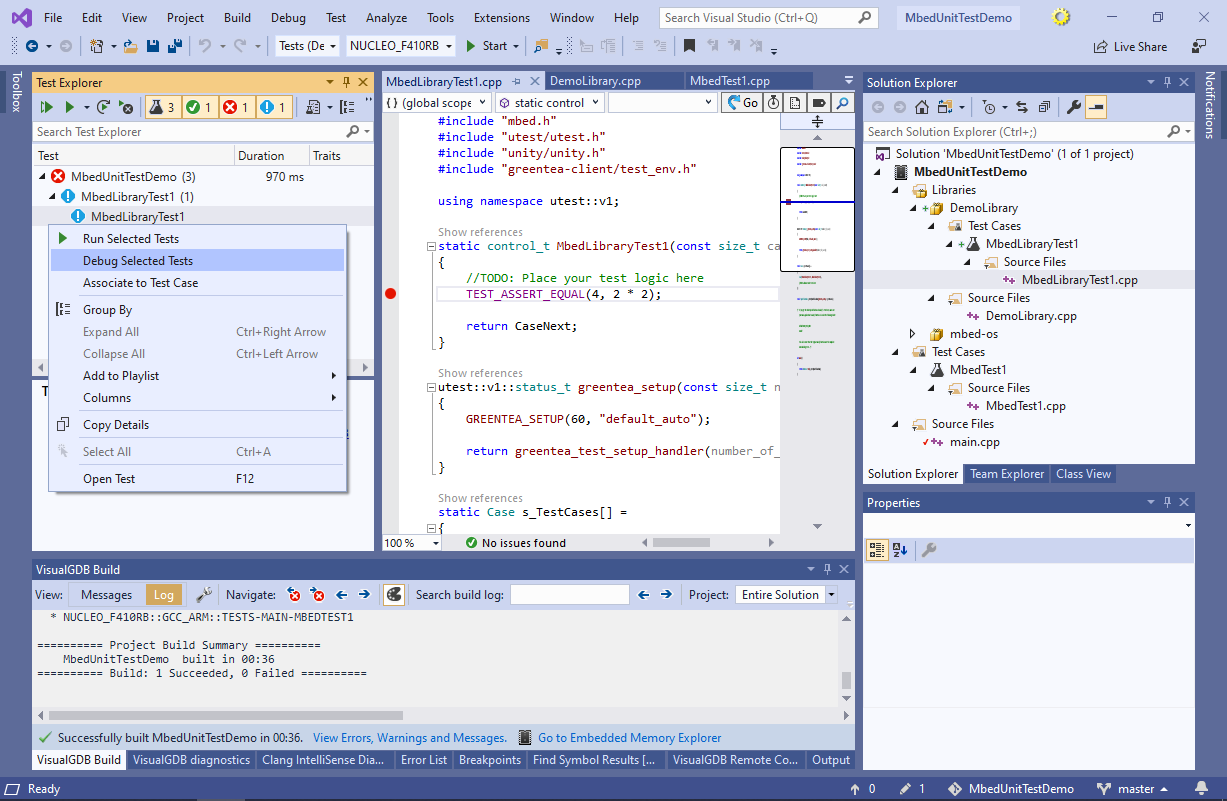
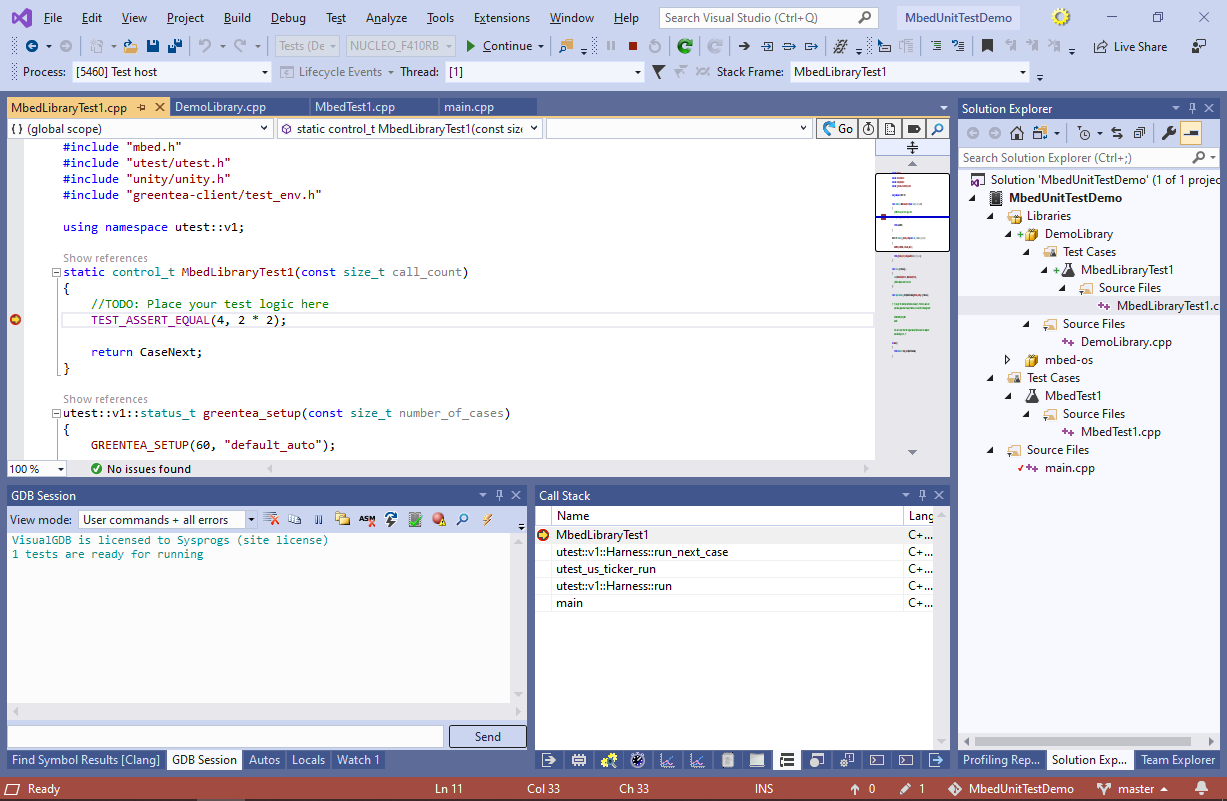
- VisualGDB will automatically launch the corresponding test binary in the debugger, patch it to only run the selected test(s) and the breakpoint will trigger:
 If a test fails during a debug run, VisualGDB will automatically stop the target, letting you examine the context of the failure.
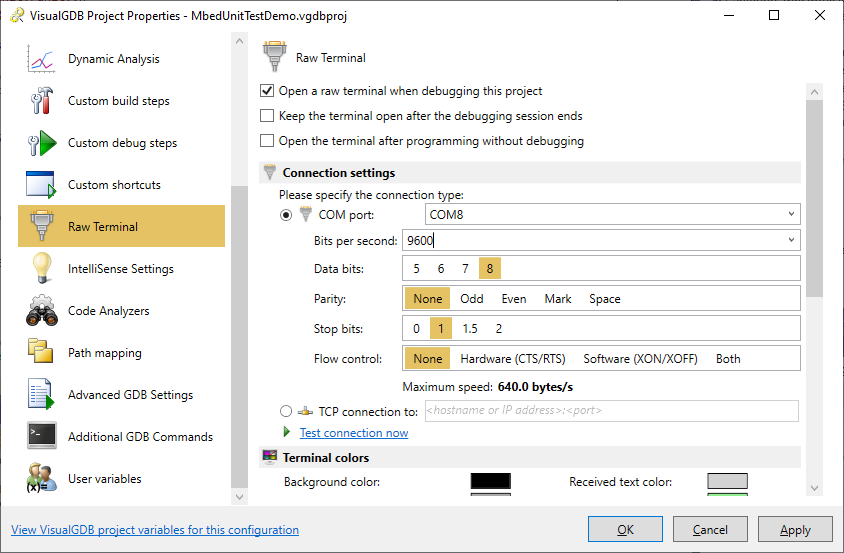
 - Now we will show how to troubleshoot communication issues with mbed tests. Open the Raw Terminal page of VisualGDB Project Properties and enable the raw terminal on the mbed COM port. Ensure you specify the correct baud rate, as it won’t get automatically applied here:
- Right-click on the test binary in Solution Explorer and select “Debug Selected Test Case“:

- Once the debugging starts, use the Debug->Break All command to stop the target and switch to the Call Stack window to see what is going on:
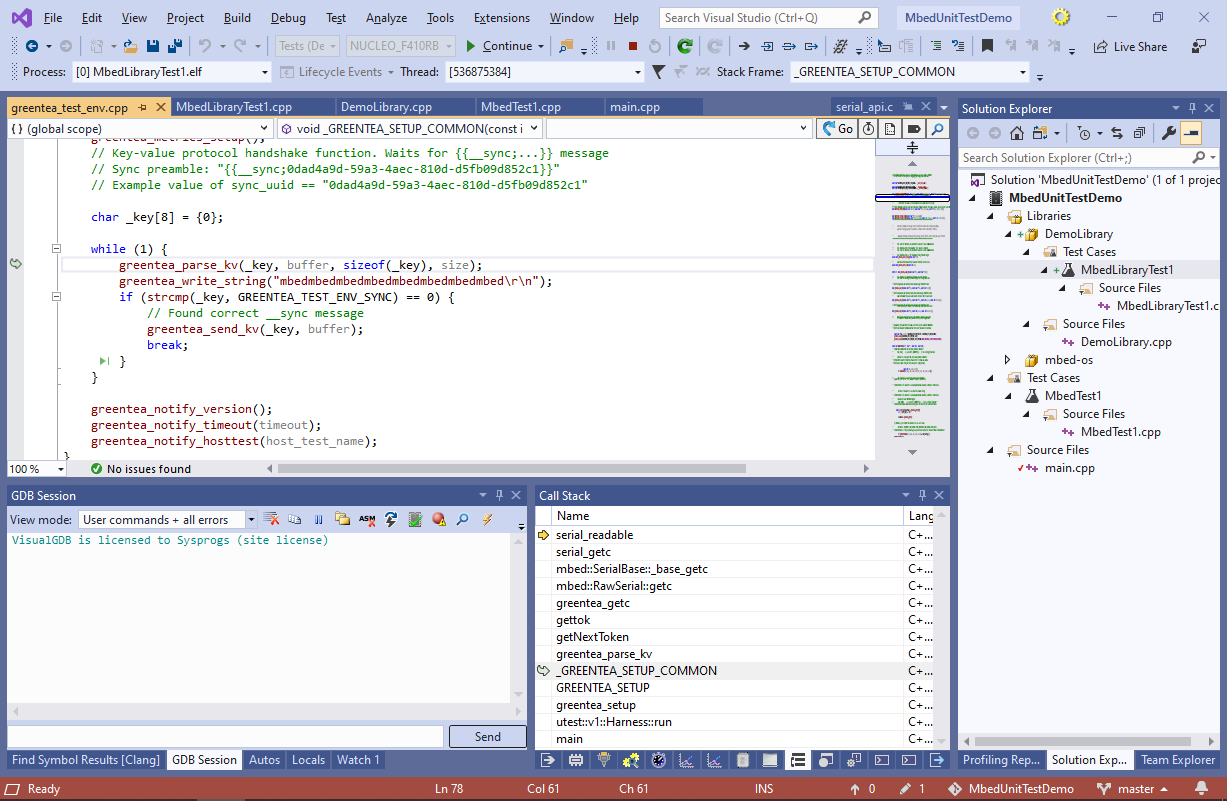
- The mbed’s Greentea test framework will be waiting for the “sync” token on the primary serial port. Copy the following text to the Raw Terminal window:
{{__sync;test123}}
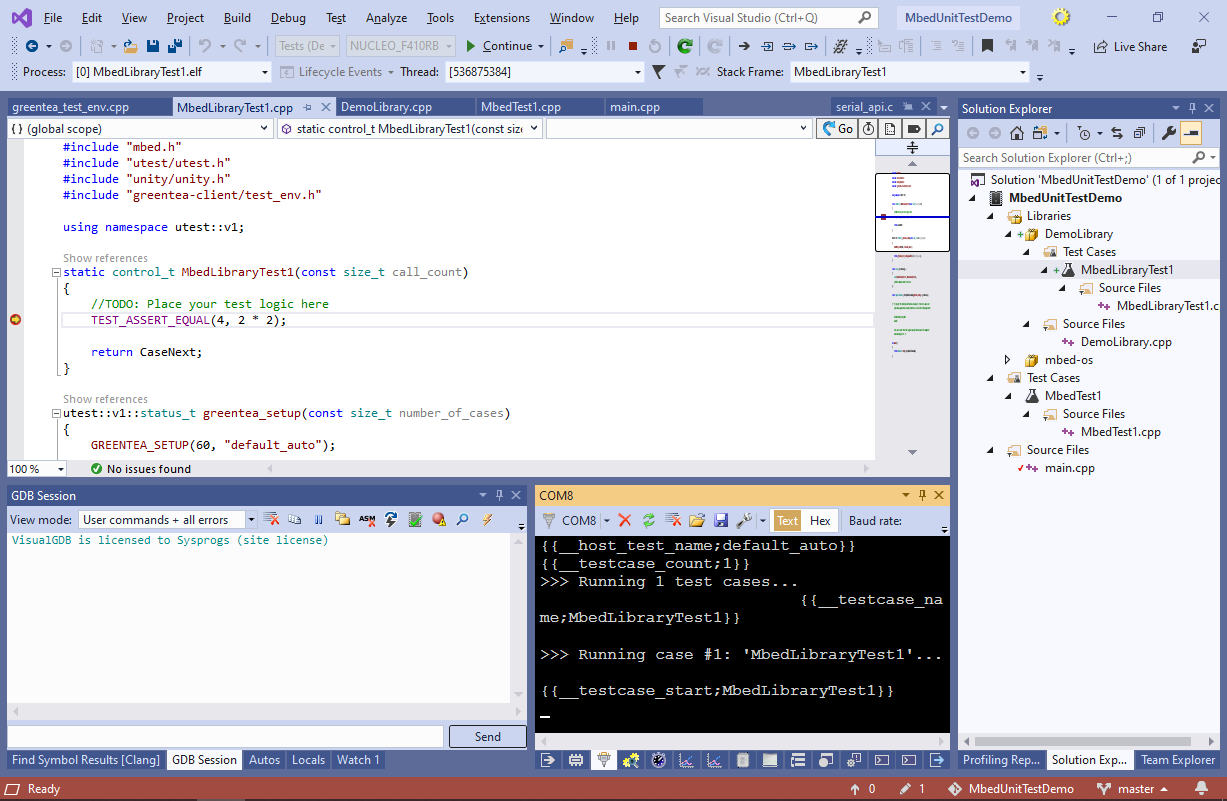
Mbed will begin running tests, printing the test output to the serial port:
- If this doesn’t happen, double-check that the COM port used by mbed (defined as the USBTX and USBRX pins) is connected to your computer and that you are using the correct baud rate:
- As building/scanning each test binary takes additional time, you can disable individual test binaries via Solution Explorer to speed up the project rebuilds:
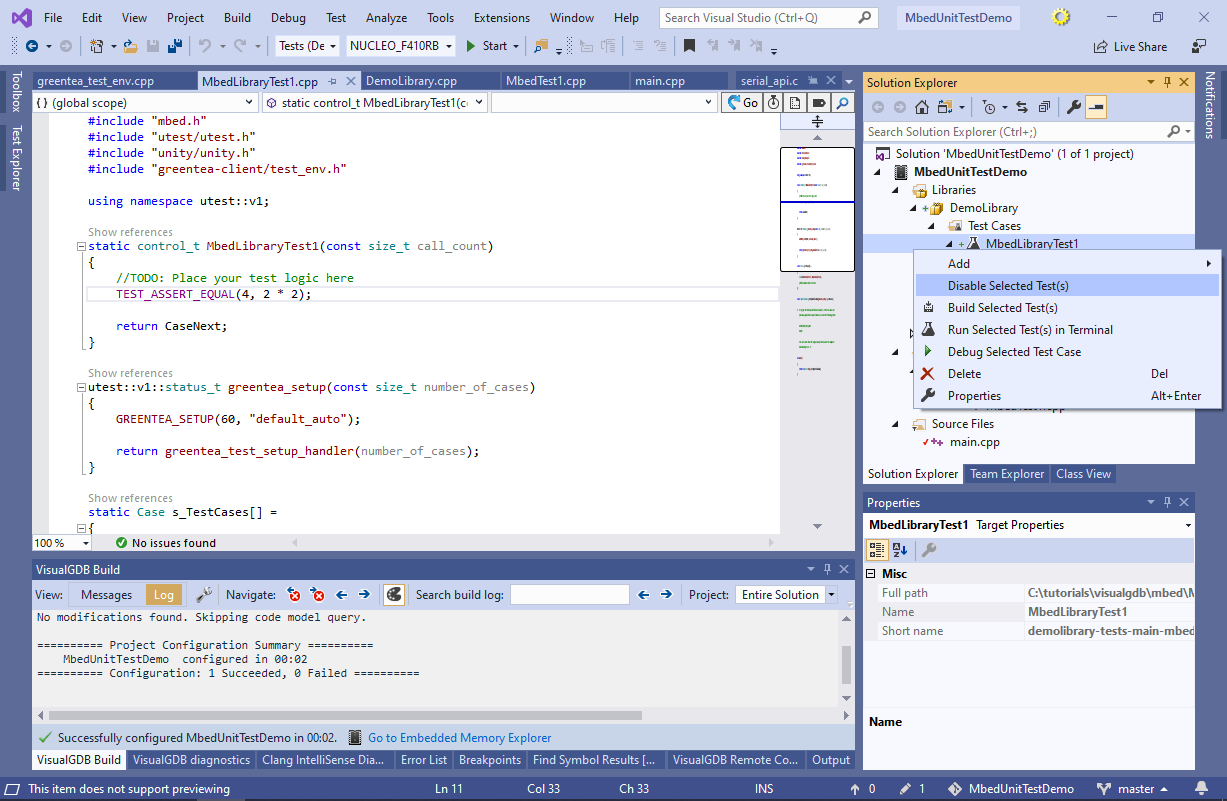
- Once a binary is disabled, it will not be built in response to the “Build Solution” command and tests from it will not appear in Test Explorer:

- When you are done testing, simply switch the configuration back to Debug or Release and VisualGDB will stop querying and building the unit tests for this project. Any changes to tests made via Solution Explorer window will be preserved and applied next time you switch to the Tests configuration:
