Using the nRF51 device in a Bluetooth LE Central role
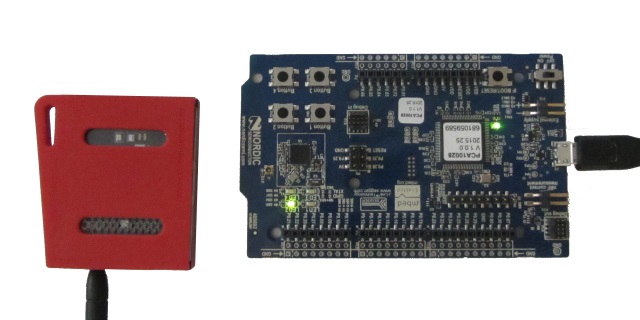
This tutorial shows how to use the nRF51 devices in the Bluetooth LE Central role, communicating to the peripheral devices. We will create a simple firmware that will query the button state from the TI CC2650 SensorTag and display it using the on-board LEDs.
We will show how to extract the relevant data from the SensorTag attribute table and how to modify the Nordic examples to communicate with a previously unsupported device like the SensorTag. Before you begin, install VisualGDB 5.0, get a CC2650 SensorTag and follow the basic nRF51 tutorial to ensure you can program your board.
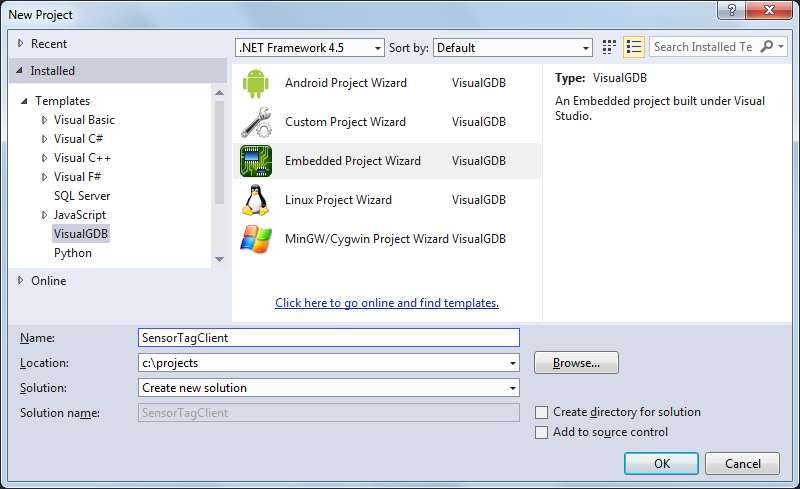
- Begin with launching the VisualGDB Embedded Project Wizard and specifying the project name and path:
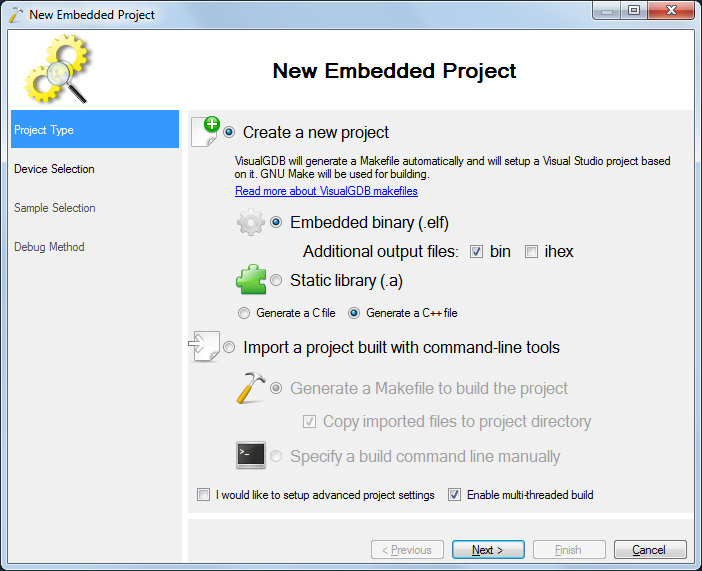
- By default, the wizard will create an embedded binary from a sample. Continue with that setting:
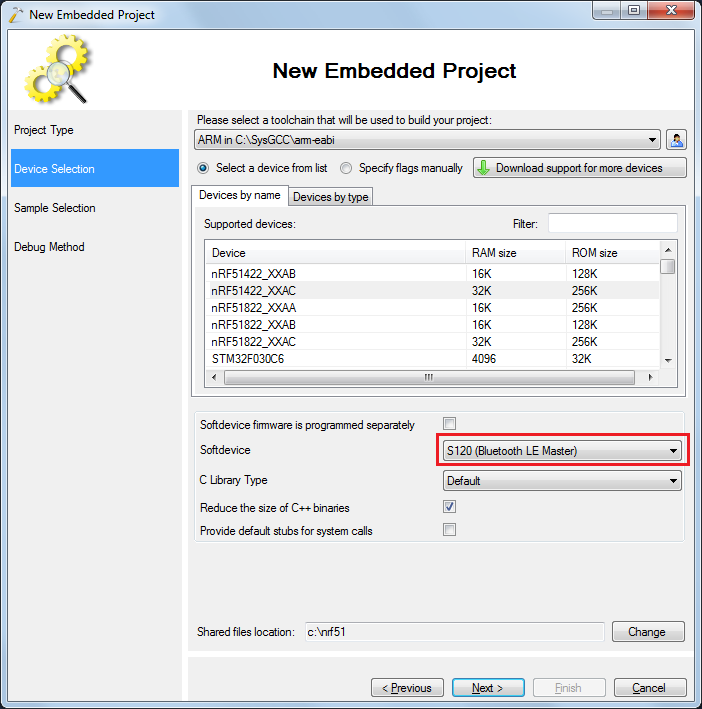
- On the next page select your nRF51 device from the list:
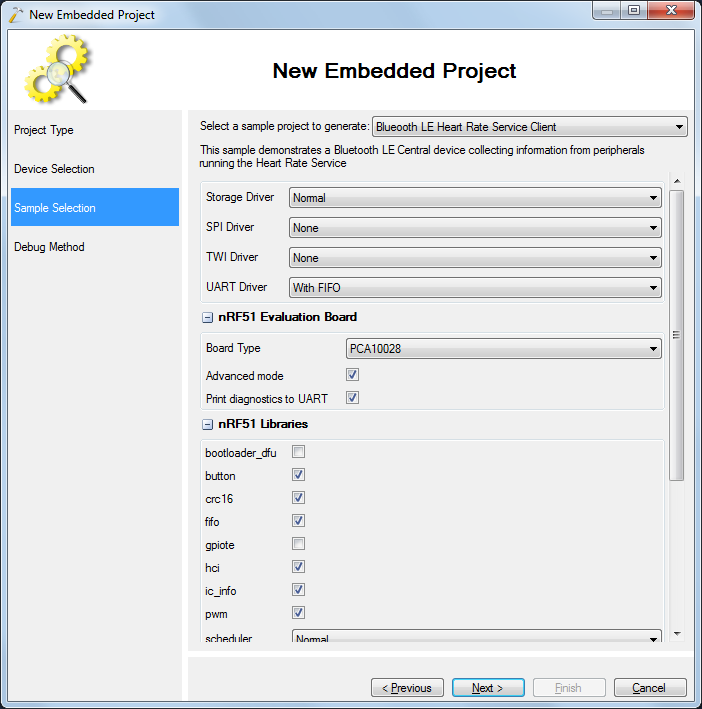
- On the Sample page select the Bluetooth LE Heart Rate Service Client sample (don’t confuse it with the Heart Rate Service Device) and specify your board type that can be found on a sticker on the board:
- Select a debugging method for your board. In this example we will use the on-board Segger J-Link with the Segger software package. Enable the “reset device after programming” checkbox, as otherwise the softdevice initialization code will be skipped resulting in strange crashes:

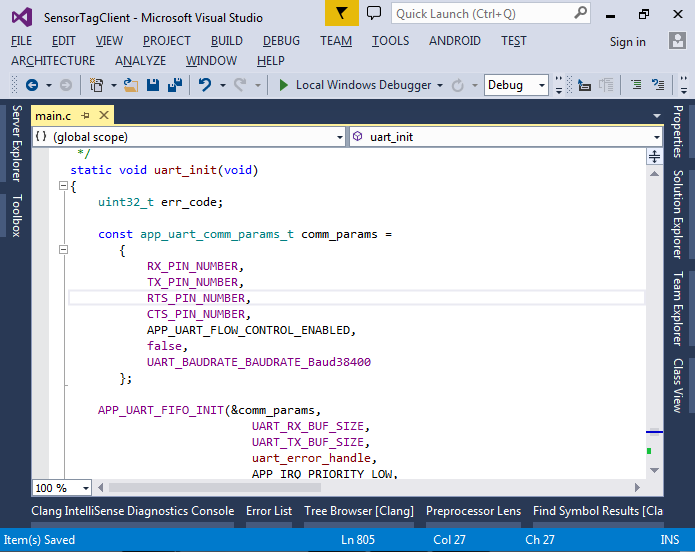
- Press “Finish” to create the project. As stopping the Bluetooth-enabled nRF51 firmware on a breakpoint would result in loss of packets and a reset, we will use debug logging to report various events happening in the firmware. Find the uart_init() function to see the UART parameters used by the sample. By default the baud rate is 38400 and the hardware flow control is enabled.
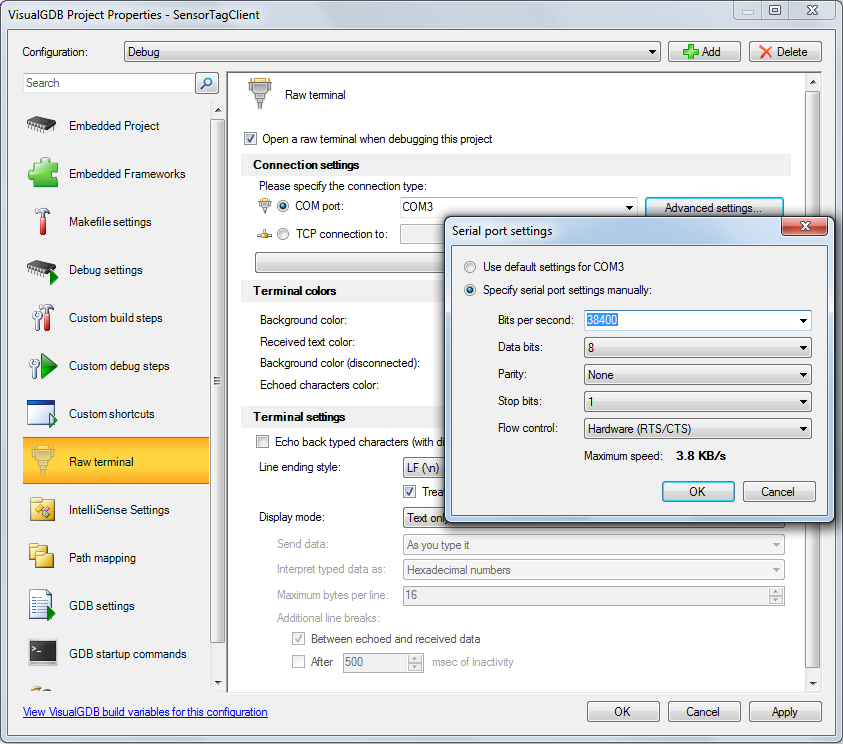
- Open VisualGDB Project Properties and enable the Raw Terminal on the COM port connected to your board. In this tutorial we will use the port provided by the on-board Segger J-Link. Follow this tutorial for more details:
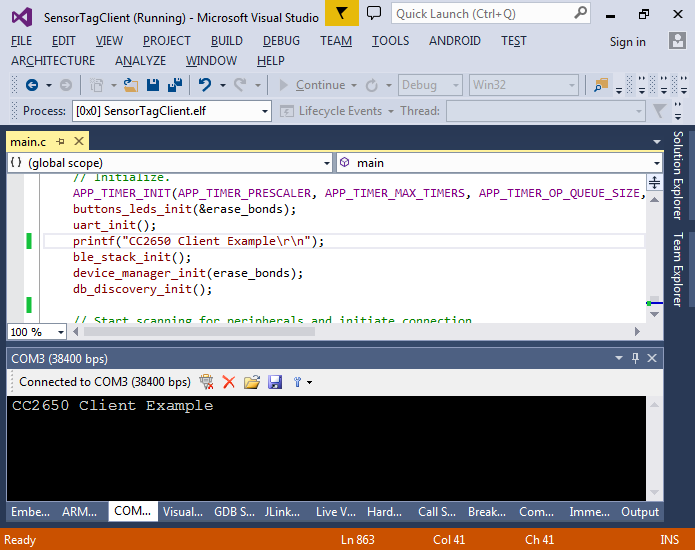
- The HRS client sample registers clients for 2 Bluetooth LE services: heart rate service and battery level service. As the Nordic Bluetooth LE framework has a limit on the maximum client count, remove the calls to brs_c_init() and bas_c_init() from main() before adding a new client. You can also update the welcome message to indicate the new function of the example. Then press F5 to ensure that the firmware is successfully programmed into nRF51 and started:
- We will now modify the sample to report information about all nearby Bluetooth LE devices. First of all, change the scan_start() function to scan without white lists:
static void scan_start(void)
{
    uint32_t              err_code;
    m_scan_param.active       = 0;            // Active scanning set.
    m_scan_param.selective    = 0;            // Selective scanning not set.
    m_scan_param.interval     = SCAN_INTERVAL;// Scan interval.
    m_scan_param.window       = SCAN_WINDOW;  // Scan window.
    m_scan_param.p_whitelist  = NULL;         // No whitelist provided.
    m_scan_param.timeout      = 0x0000;       // No timeout.

    err_code = sd_ble_gap_scan_start(&m_scan_param);
    APP_ERROR_CHECK(err_code);

    err_code = bsp_indication_set(BSP_INDICATE_SCANNING);
    APP_ERROR_CHECK(err_code);
}
- Also replace the BLE_GAP_EVT_ADV_REPORT handler in on_ble_evt() with the code that prints the contents of the advertising packet:
            printf("ADV report: (size=%d)\n", p_gap_evt->params.adv_report.dlen);
            for (int i = 0; i < p_gap_evt->params.adv_report.dlen; i++)
                printf("%02x ", p_gap_evt->params.adv_report.data[i]);
            printf("\n");
            for (int i = 0; i < p_gap_evt->params.adv_report.dlen; i++)
                printf("%c  ", p_gap_evt->params.adv_report.data[i]);
            printf("\n");
            break;
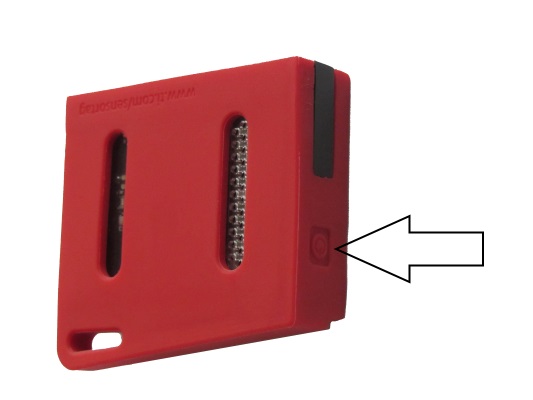
- Press F5 to build the code and start debugging. Insert the battery into the CC2650 SensorTag or press the power button on it if the battery is already inserted:
- Observe the output in the COMx window in Visual Studio. It should show the advertising packets received from the SensorTag:
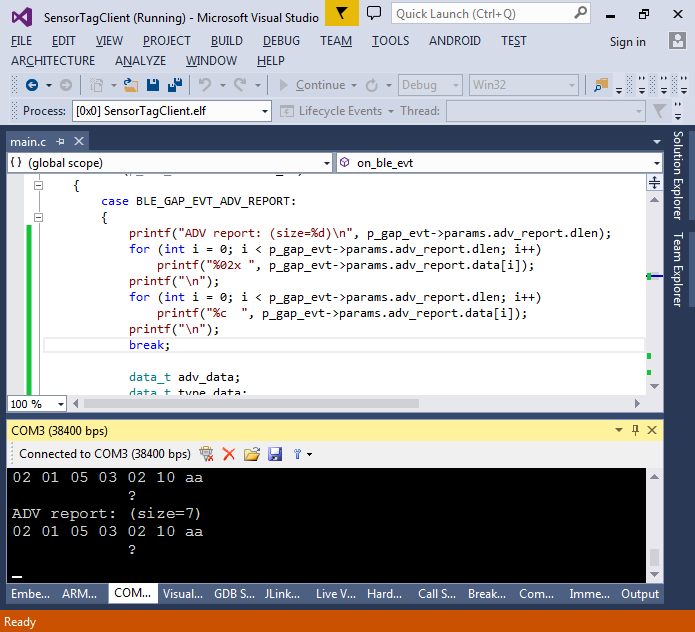
- A typical advertising packet contains one or more fields in the following format: <field length> <field type><field data>. The list of field types can be found here and the field length includes the field type field. The advertising packet in the example contains 2 fields: “Flags = 0x05” and “Incomplete UUID List = 0xAA10 (accelerometer service)”. To see more details from the SensorTag, we need to actively request them by sending scan requests. This is done by setting m_scan_param.active = 1 in scan_start(). Update the scan_start accordingly() and start the new firmware:
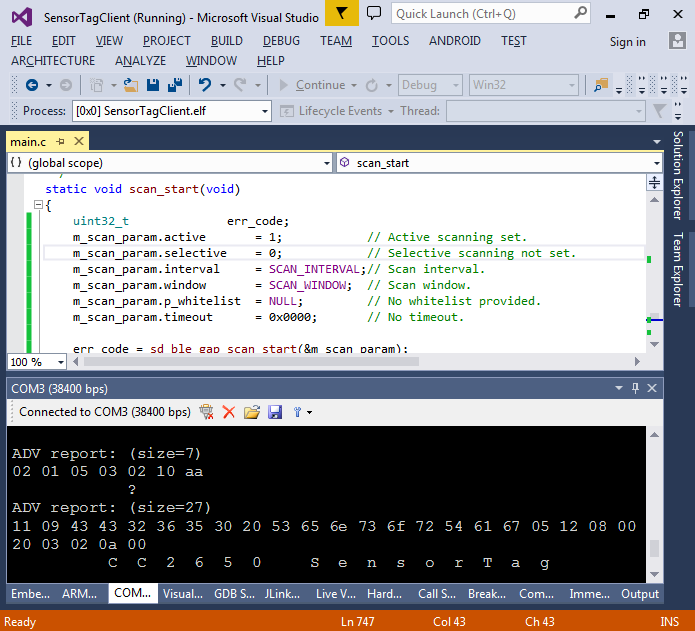
- The extended advertisement packet send in response to our active scan requests contains the SensorTag name in the LOCAL_NAME field (type=09). We will now change the BLE_GAP_EVT_ADV_REPORT handling code to connect to the devices that report their name as “CC2650 SensorTag”:
        {
            data_t adv_data;
            data_t type_data;

            adv_data.p_data = (uint8_t *)p_gap_evt->params.adv_report.data;
            adv_data.data_len = p_gap_evt->params.adv_report.dlen;

            err_code = adv_report_parse(BLE_GAP_AD_TYPE_COMPLETE_LOCAL_NAME,
                                        &adv_data,
                                        &type_data);

            const char expectedName[] = "CC2650 SensorTag";

            if (err_code != NRF_SUCCESS ||
                type_data.data_len != sizeof(expectedName) - 1 ||
                strncmp((const char *)type_data.p_data, expectedName, sizeof(expectedName) - 1))
            {
                printf("Unknown device\n");
                break;
            }

            err_code = sd_ble_gap_scan_stop();
            APP_ERROR_CHECK(err_code);

            err_code = bsp_indication_set(BSP_INDICATE_IDLE);
            APP_ERROR_CHECK(err_code);

            err_code = sd_ble_gap_connect(&p_gap_evt->params.adv_report.peer_addr,
                &m_scan_param,
                &m_connection_param);

            APP_ERROR_CHECK(err_code);
            printf("Connected to device, status %d\n", (int)err_code);
            break;
        }
- If you start the new firmware, you will see that it is constantly resetting itself because we have not registered any clients:

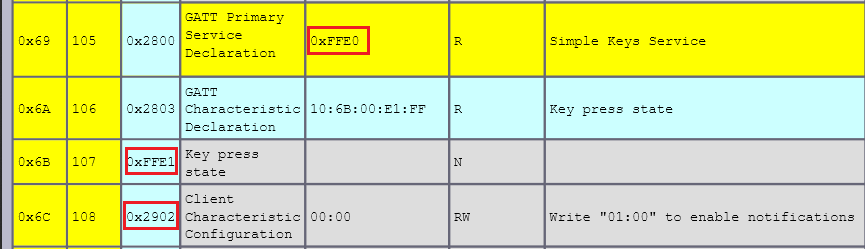
- To register a client to the Simple Keys service (see the SensorTag profile for details) we need to call the ble_db_discovery_evt_register() function for the service with a UUID of 0xFFE0 (which is a shortcut for 0000FFE0-0000-1000-8000 00805F9B34FB as defined by the Bluetooth LE specification):
static void button_service_client_init()
{
    ble_uuid_t btn_uuid;

    btn_uuid.type = BLE_UUID_TYPE_BLE;
    btn_uuid.uuid = 0xFFE0;

    ble_db_discovery_evt_register(&btn_uuid, btnsrv_discover_handler);
}
- Create an empty btnserv_discover_handler() function and set a breakpoint inside it:
static void btnsrv_discover_handler(ble_db_discovery_evt_t * p_evt)
{
    asm("nop");
}
- Finally call button_service_client_init() from main() after the call todb_discovery_init() and run the new firmware. Once the breakpoint is hit, use the Watch window to explore the contents of p_evt:
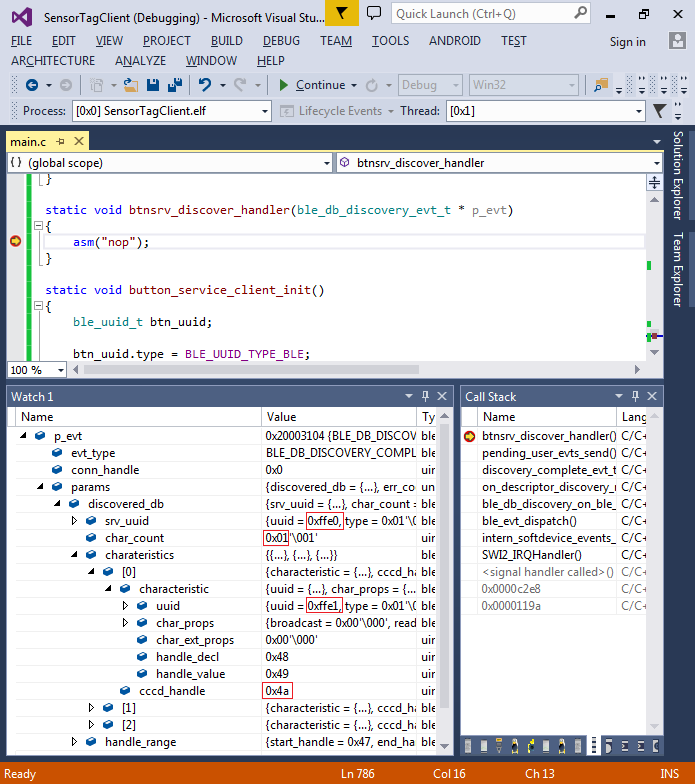
- The contents of p_evt shows that the discovery logic has discovered a service with a UUID of 0xffe0 with 1 characteristic (UUID=0xffe1) and the characteristic configuration descriptor value is 0x4a. This matches the information from the SensorTag profile:
- To start receiving notifications when a button is pressed, we need to write the values of 01:00 to the CCCD register. This is done by modifying the btnsrv_discover_handler() as follows:
void btnsrv_discover_handler(ble_db_discovery_evt_t * p_evt)
{
    static uint8_t enable_notifications[2] = { 1, 0 };

    ble_gattc_write_params_t wparams;
    wparams.handle   = p_evt->params.discovered_db.charateristics[0].cccd_handle;
    wparams.len      = sizeof(enable_notifications);
    wparams.p_value  = enable_notifications;
    wparams.offset   = 0;
    wparams.write_op = BLE_GATT_OP_WRITE_REQ;

    int rc = sd_ble_gattc_write(p_evt->conn_handle, &wparams);
    if (rc != NRF_SUCCESS)
    {
        asm("bkpt 255");
    }
}
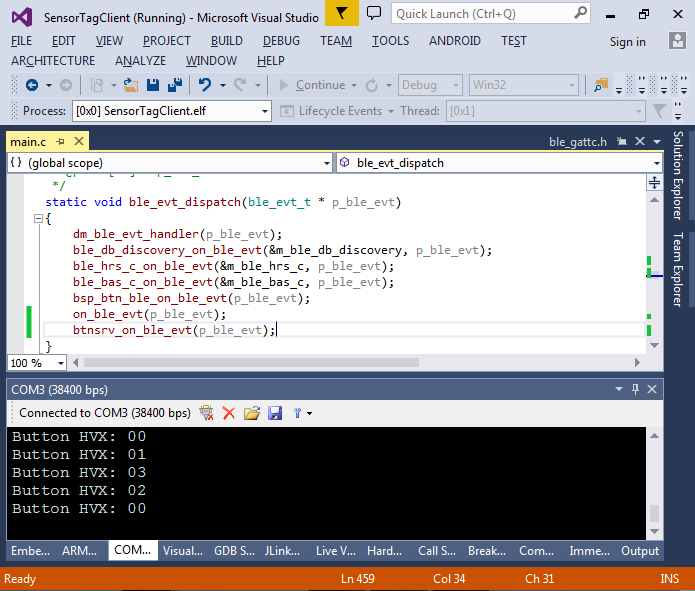
- Finally we need to handle the HVX notifications that the CC2650 SensorTag will send. Create the following function and call it from ble_evt_dispatch() after all other calls:
static void btnsrv_on_ble_evt(ble_evt_t * p_ble_evt)
{
    switch (p_ble_evt->header.evt_id)
    {
    case BLE_GATTC_EVT_HVX:
        if (p_ble_evt->evt.gattc_evt.params.hvx.len == 1)
        {
            int data = p_ble_evt->evt.gattc_evt.params.hvx.data[0];
            printf("Status %02x\n", data);
            if (data & 1)
                LEDS_ON(1 << LED_1);
            else
                LEDS_OFF(1 << LED_1);
            if (data & 2)
                LEDS_ON(1 << LED_2);
            else
                LEDS_OFF(1 << LED_2);
        }
        break;
    }
}
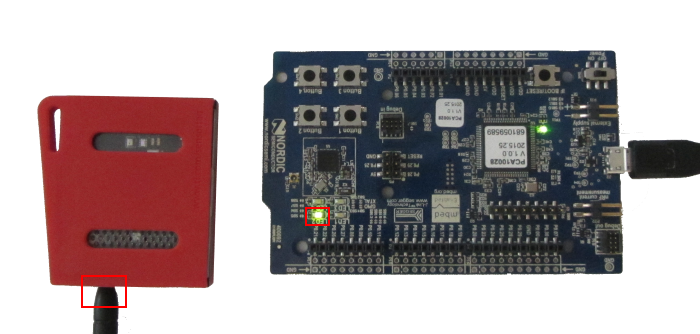
- Build and start the new firmware and see how pressing buttons on the SensorTag turns on the LEDs on nRF51:
- The COMx window in Visual Studio should show the “Button HVX” messages produced by the HVX event handler:
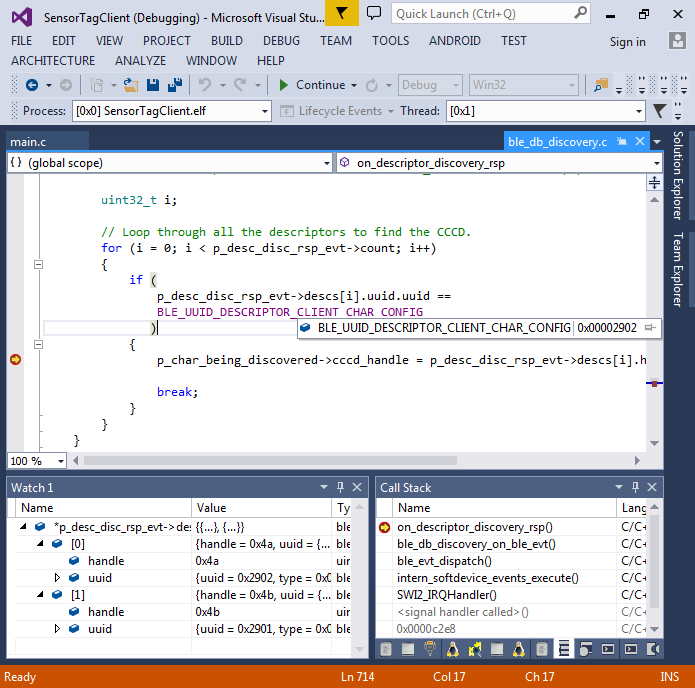
- You can use the “Show on Code Map” and “Find All References” commands to find the code in the Nordic Bluetooth LE stack that accesses certain variables. E.g. search for references to the cccd_handle field:
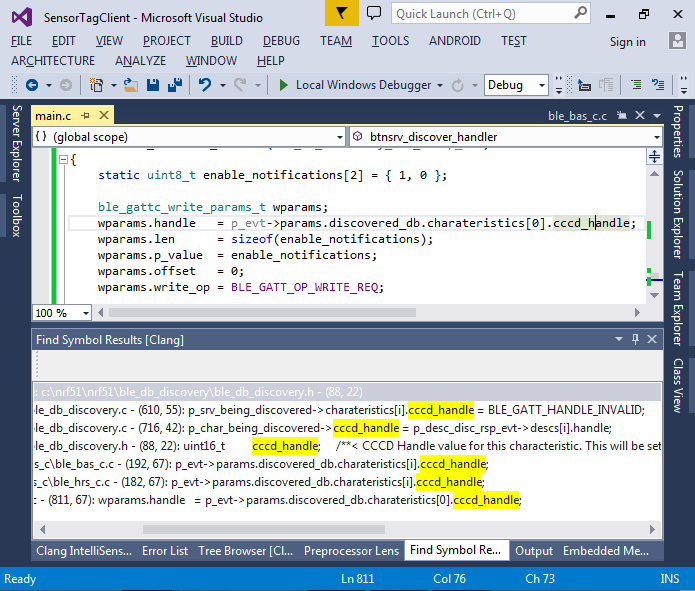
- By putting a breakpoint on the line that assigns it and checking the values of the related variables you can see that the cccd_handle gets the handle to a descriptor with a UUID of 0x2902 that matches the Client Characteristics Configuration Descriptor mentioned in the SensorTag Profile: