Using OpenAMP for Cross-core Communication on STM32MP1
This tutorial shows how to use the OpenAMP library to communicate between multiple cores of the STM32MP1 device. We will start with a basic project that creates a virtual COM port that can be used to send data between the Linux running on the Cortex-A core and the embedded firmware running on the Cortex-M4 core. We will then modify the firmware to respond to basic commands sent from the Linux side.
Before you begin, install VisualGDB 5.4R11 or later.
- Start Visual Studio and select the VisualGDB Embedded Project Wizard:

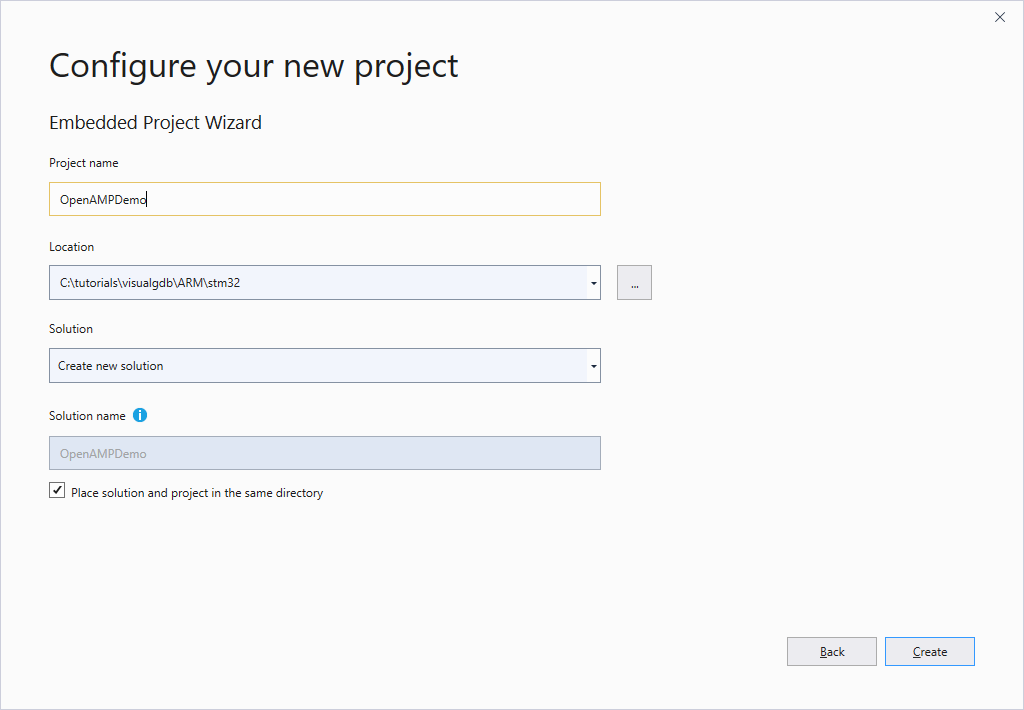
- Enter the name and pick the location of the project that will be created by VisualGDB:
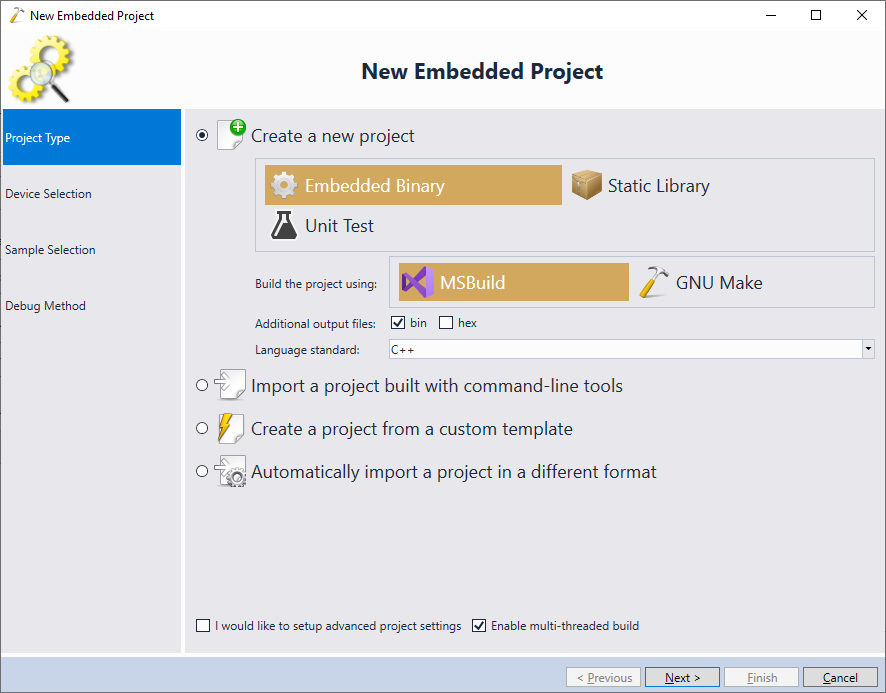
- Proceed with the default settings (Embedded binary -> MSBuild) on the first page of the wizard:
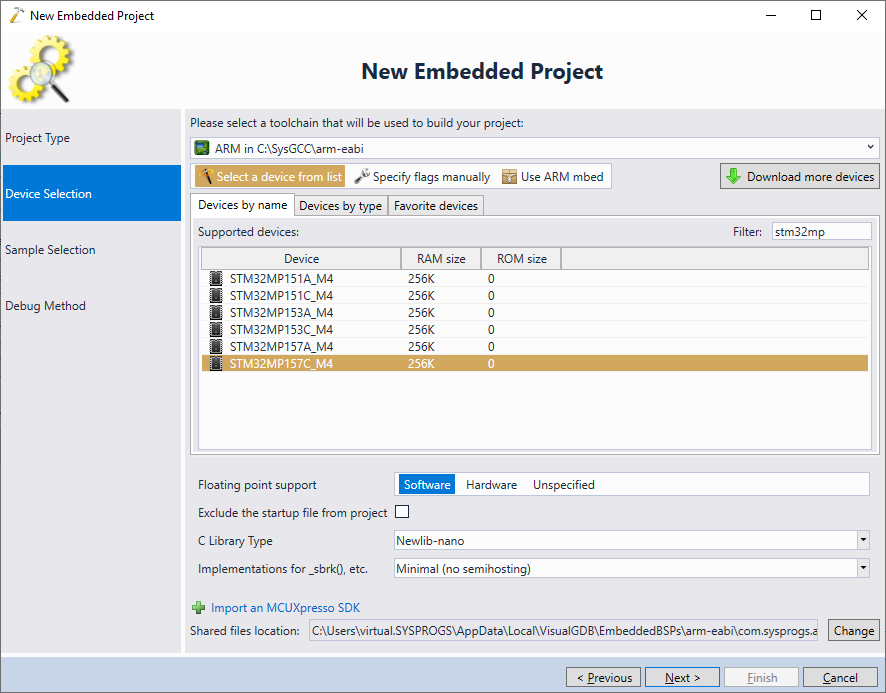
- On the next page of the wizard select the ARM toolchain and pick the STM32MP1 device that is installed on your development board:
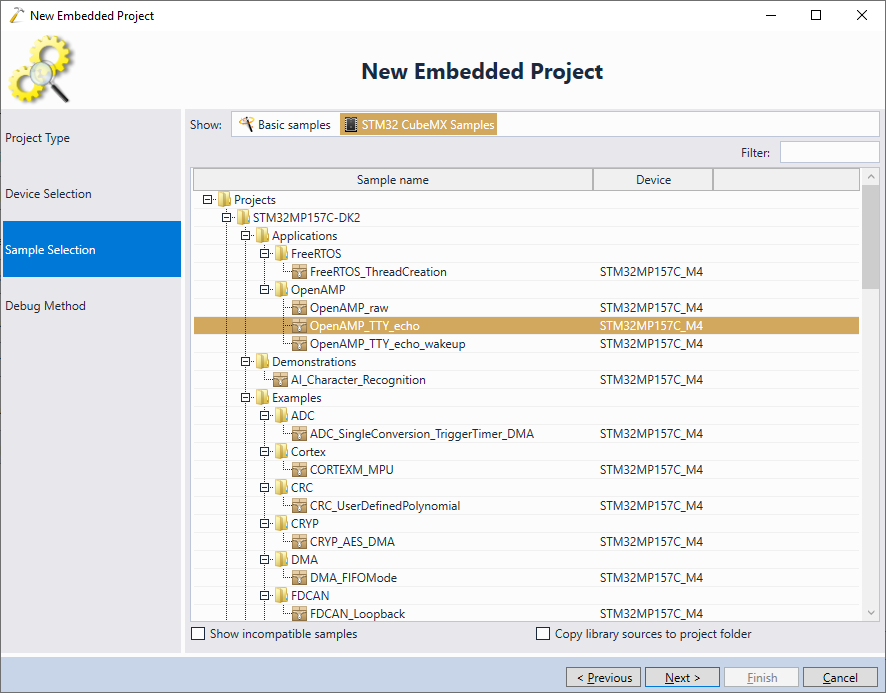
- On the Sample Selection page switch to the “STM32 CubeMX Samples” view and pick the OpenAMP_TTY_echo sample:
- Ensure your board is in the production mode (i.e. boots Linux from the SD card) and connect power, Ethernet and ST-Link (see this tutorial for more details), then let VisualGDB detect the on-board ST-Link and ensure STM32MP1xx (with PMIC) is selected as the debugged device:
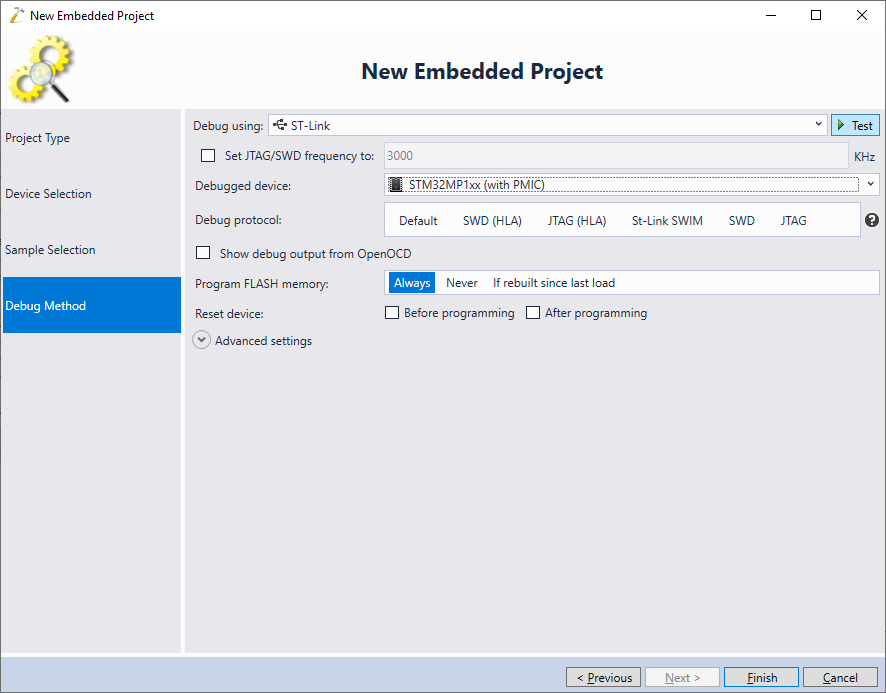
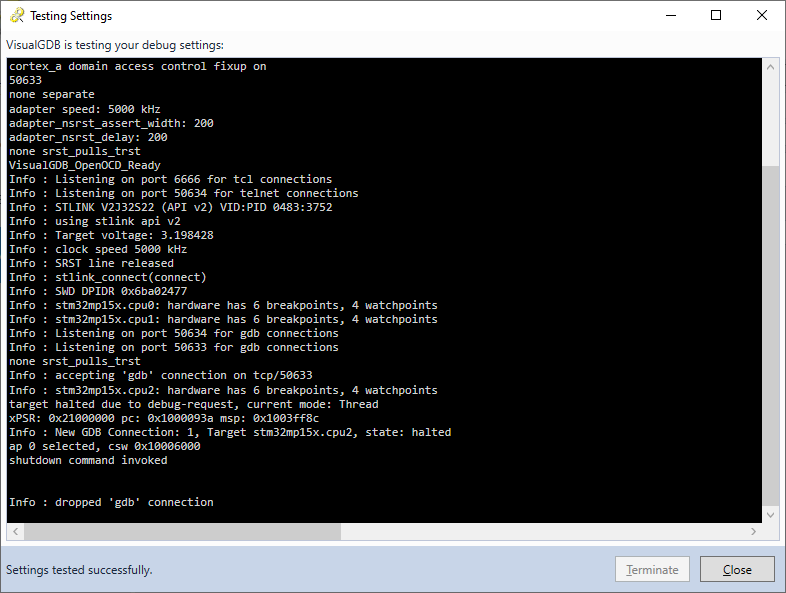
- Press the “Test” button to verify the JTAG connectivity:
- Finally, press “Finish” to create the project. VisualGDB will clone the OpenAMP_TTY_Echo example so that you will be able to build and debug it. Build it via Build->Build Solution and check the outgoing calls from main() to quickly get a list of virtual UART-related functions provided by OpenAMP:
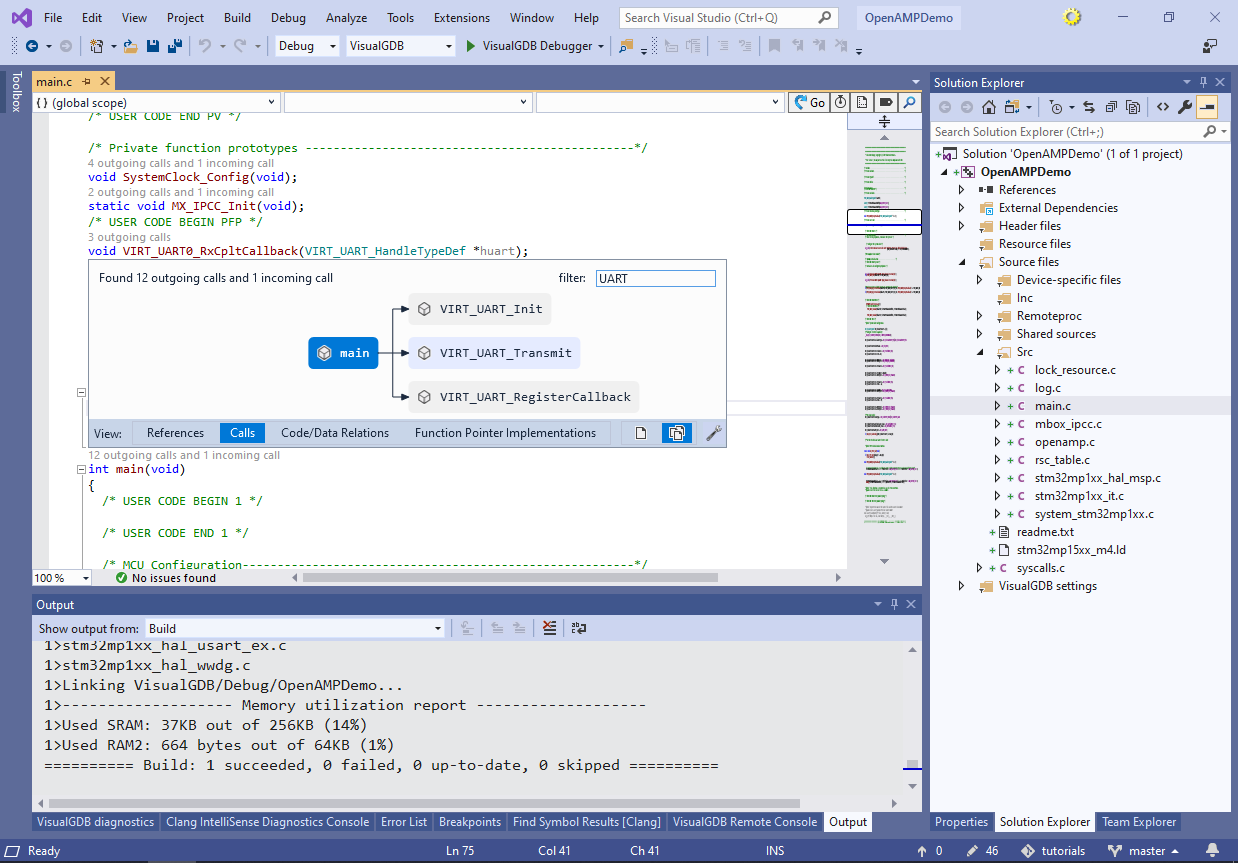
- Sending and receiving packets from Linux running on the Cortex-A core involves calling the following functions from the Cortex-M4 firmware:
- MX_IPCC_Init() needs to be called in order to initialize the inter-core communication hardware.
- MX_OPENAMP_Init() initializes the OpenAMP library.
- VIRT_UART_Init() creates a new virtual UART port (available as /dev/ttyRPMSGx on the Linux side)
- VIRT_UART_RegisterCallback() registers a callback that will be invoked by OpenAMP when Linux-side code sends a message via the virtual UART port.
- VIRT_UART_Transmit() sends a message back to the Linux side.
- OPENAMP_check_for_message() needs to be called from the main loop in order to poll for the incoming messages and call the previously registered RX callbacks.
- Before you can begin debugging the program, it needs to be registered with the Linux system by uploading it to /lib/firmware and writing to virtual files under /sys/class/remoteproc. Follow this tutorial to to understand the necessary steps or simply paste the following custom actions to custom debug steps before launching the debugger (requires the Custom edition of VisualGDB):
<?xml version="1.0" encoding="utf-16"?> <ArrayOfCustomActionBase xmlns:xsi="http://www.w3.org/2001/XMLSchema-instance" xmlns:xsd="http://www.w3.org/2001/XMLSchema"> <CustomActionBase xsi:type="CommandLineAction"> <SkipWhenRunningCommandList>false</SkipWhenRunningCommandList> <RemoteHost> <HostName>stm32mp1</HostName> <Transport>SSH</Transport> <UserName>root</UserName> </RemoteHost> <Command>echo</Command> <Arguments>start > /sys/class/remoteproc/remoteproc0/state</Arguments> <WorkingDirectory>/</WorkingDirectory> <BackgroundMode>false</BackgroundMode> </CustomActionBase> <CustomActionBase xsi:type="FileTransferAction"> <SkipWhenRunningCommandList>false</SkipWhenRunningCommandList> <SourceHost> <HostName>BuildMachine</HostName> <Transport>BuiltinShortcut</Transport> </SourceHost> <DestinationHost> <HostName>stm32mp1</HostName> <Transport>SSH</Transport> <UserName>root</UserName> </DestinationHost> <SourceFilePath>$(TargetPath)</SourceFilePath> <DestinationFilePath>/lib/firmware/$(TargetFileName)</DestinationFilePath> <OverwriteTrigger>Always</OverwriteTrigger> </CustomActionBase> <CustomActionBase xsi:type="CommandLineAction"> <SkipWhenRunningCommandList>false</SkipWhenRunningCommandList> <RemoteHost> <HostName>stm32mp1</HostName> <Transport>SSH</Transport> <UserName>root</UserName> </RemoteHost> <Command>echo</Command> <Arguments>stop > /sys/class/remoteproc/remoteproc0/state || echo "Already stopped"</Arguments> <WorkingDirectory>/</WorkingDirectory> <BackgroundMode>false</BackgroundMode> </CustomActionBase> <CustomActionBase xsi:type="CommandLineAction"> <SkipWhenRunningCommandList>false</SkipWhenRunningCommandList> <RemoteHost> <HostName>stm32mp1</HostName> <Transport>SSH</Transport> <UserName>root</UserName> </RemoteHost> <Command>echo</Command> <Arguments>$(TargetFileName) > /sys/class/remoteproc/remoteproc0/firmware</Arguments> <WorkingDirectory>/</WorkingDirectory> <BackgroundMode>false</BackgroundMode> </CustomActionBase> </ArrayOfCustomActionBase>

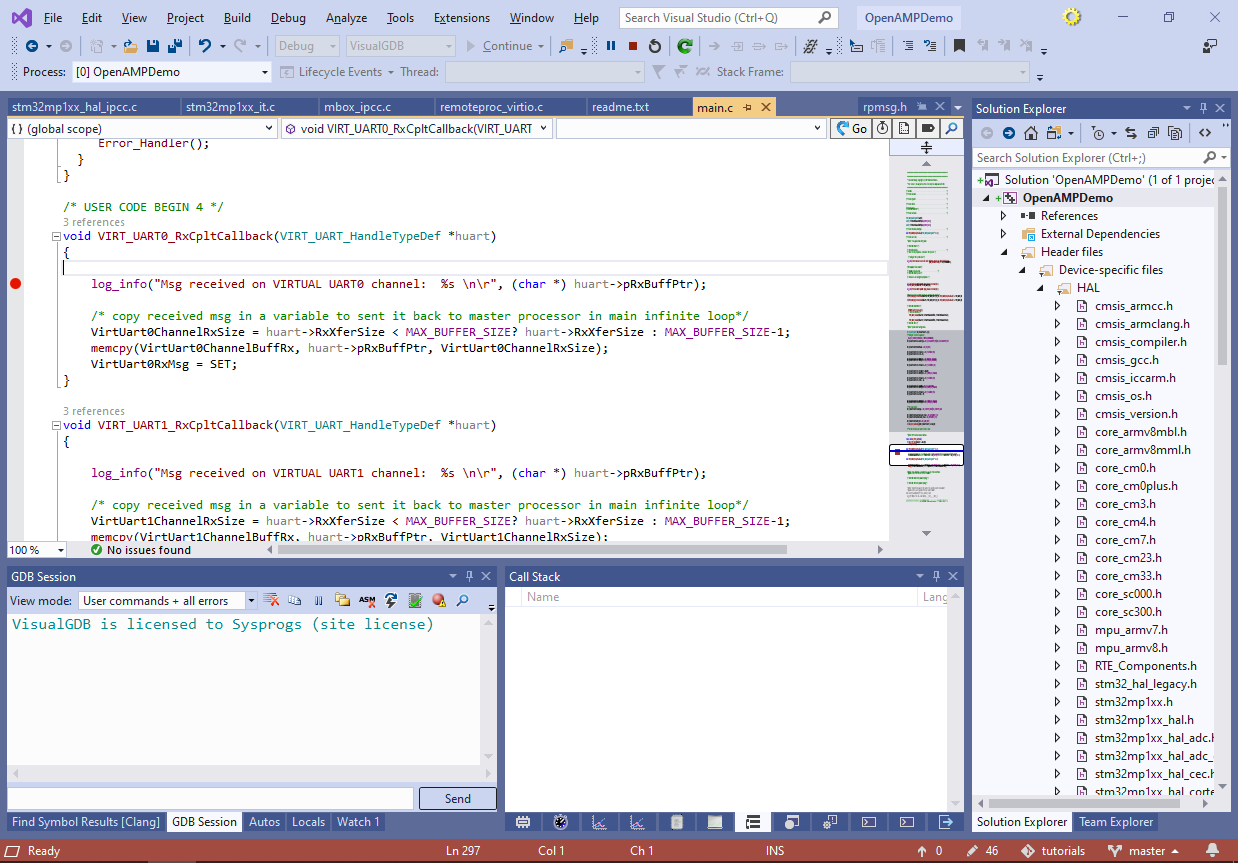
- Set a breakpoint in VIRT_UART0_RxClptCallback() and press F5 to begin debugging the program:
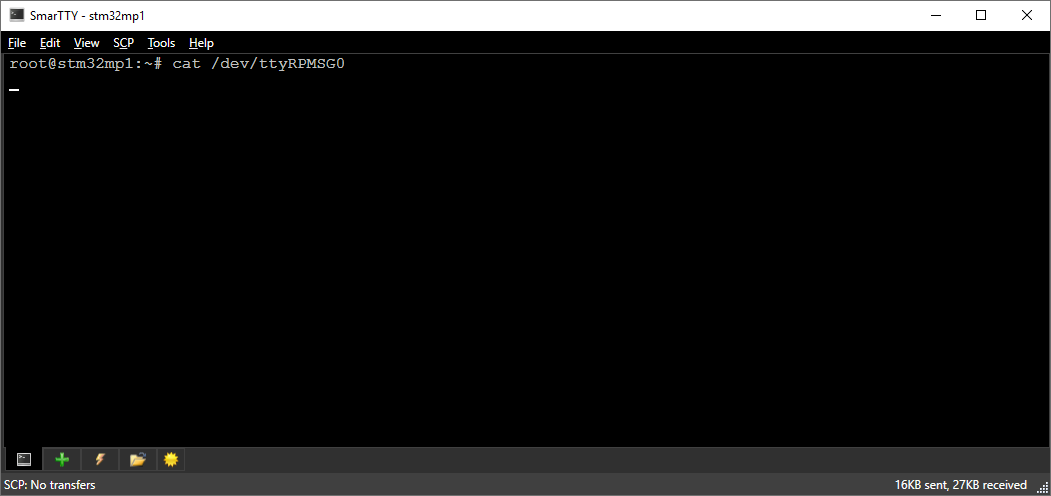
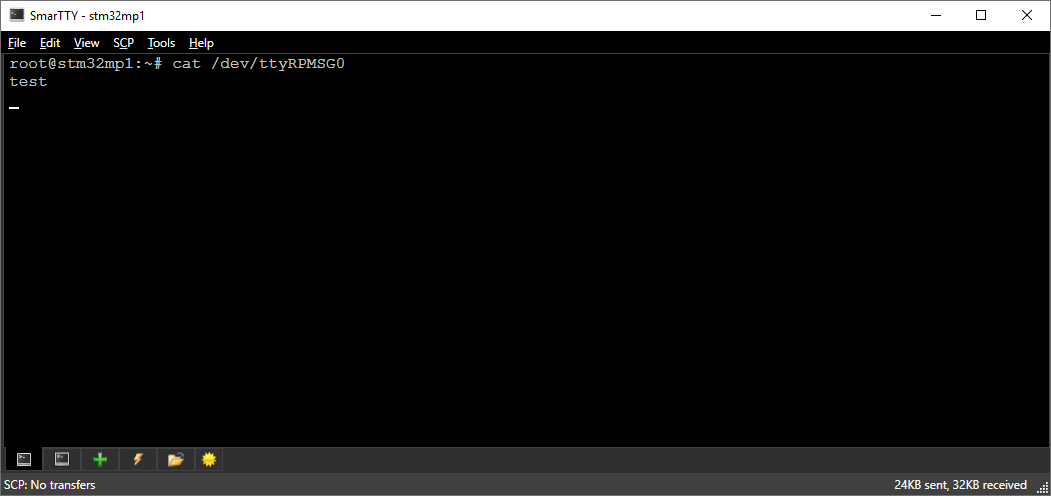
- Connect to the STM32MP1 board via SSH and run the “cat /dev/ttyRPMSG0” command to begin displaying the output from the virtual COM port:
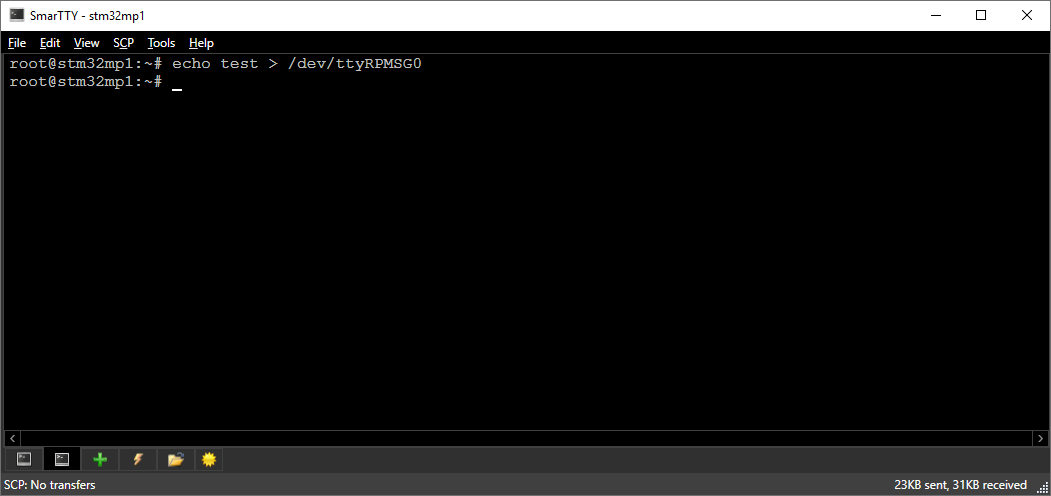
- In another tab run “echo test > /dev/ttyRPMSG0”:
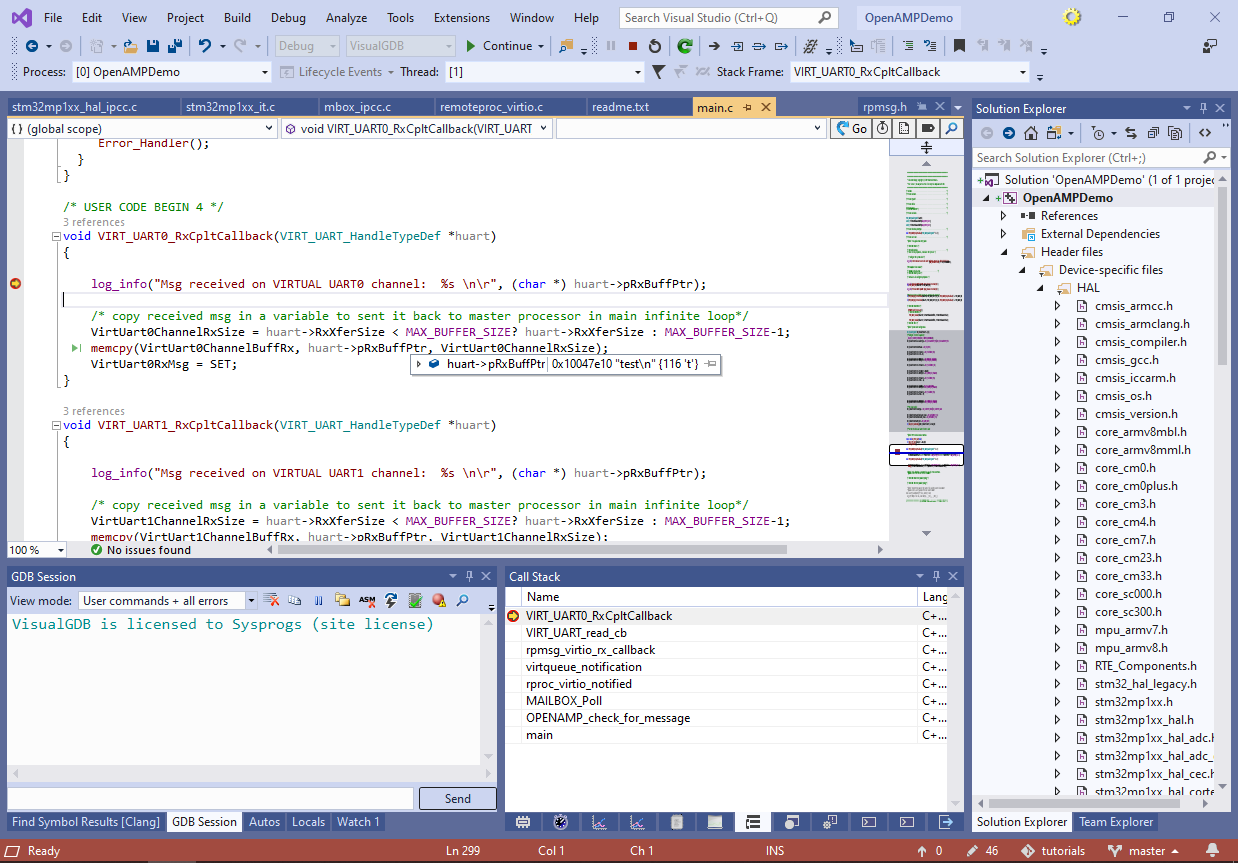
- The breakpoint will trigger, showing the message received from the Linux side:
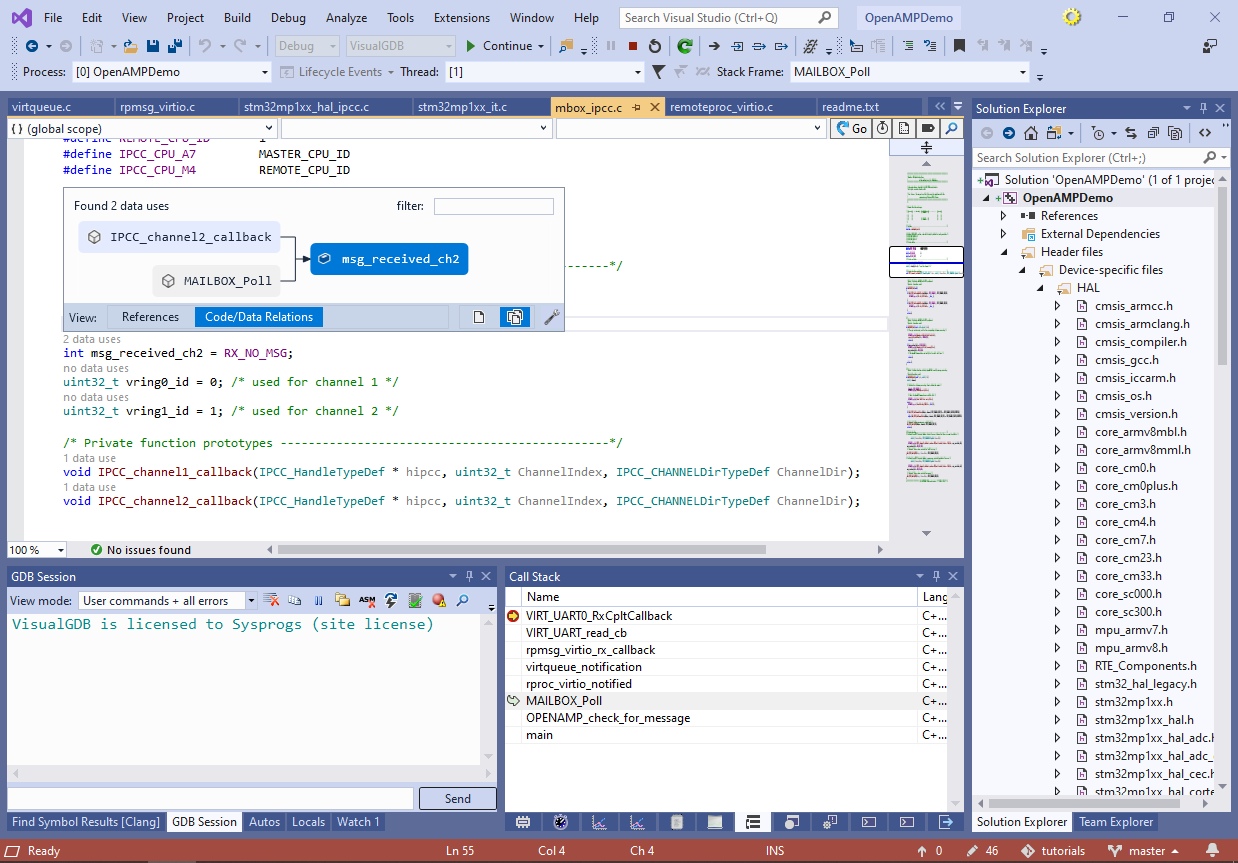
- Use the call stack to navigate to the MAILBOX_Poll() function and take a note of its logic. The function uses the msg_received_ch1 and msg_received_ch2 global variables to detect when a new message has arrived to the mailbox and then calls the previously registered callback function with it:
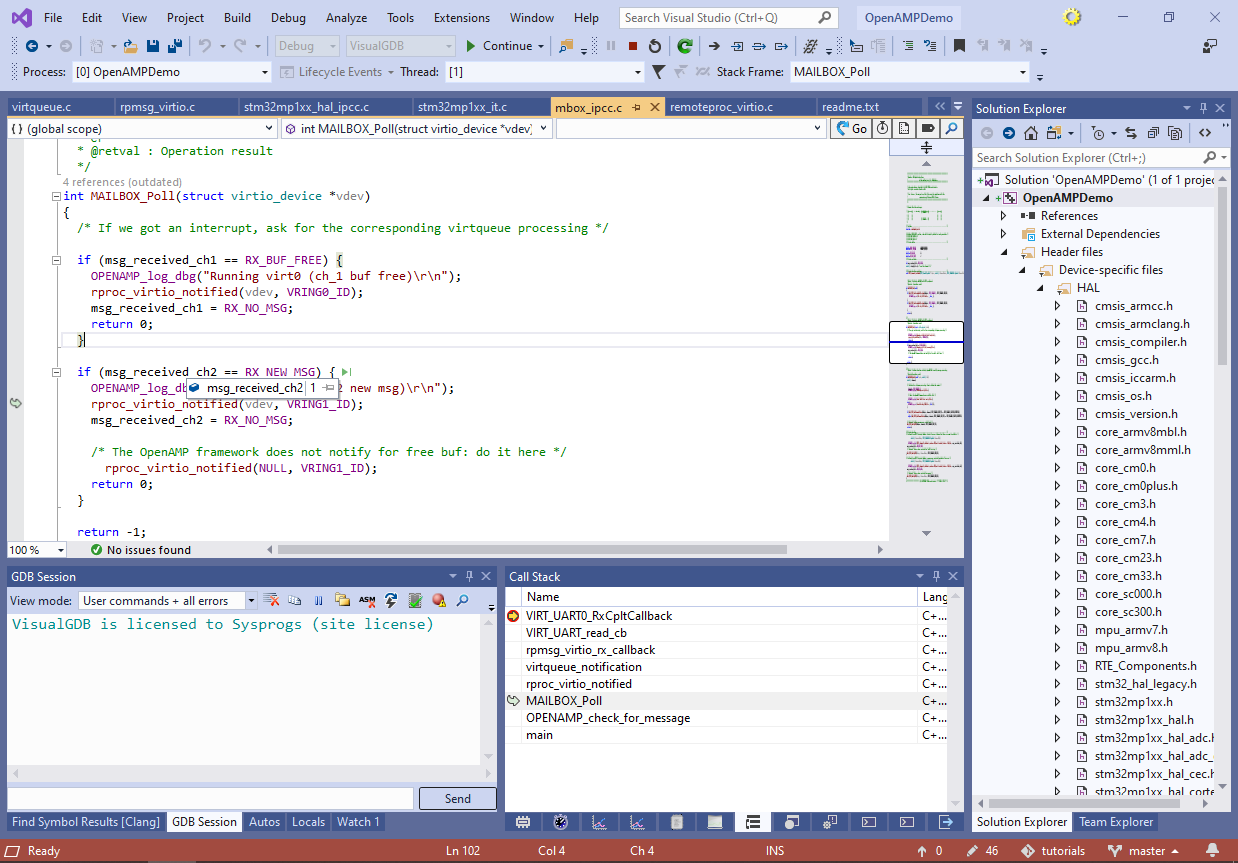
- Go to the definition of msg_received_ch2 and use the Code/Data Relations view of CodeJumps to quickly locate the function that sets the variable:
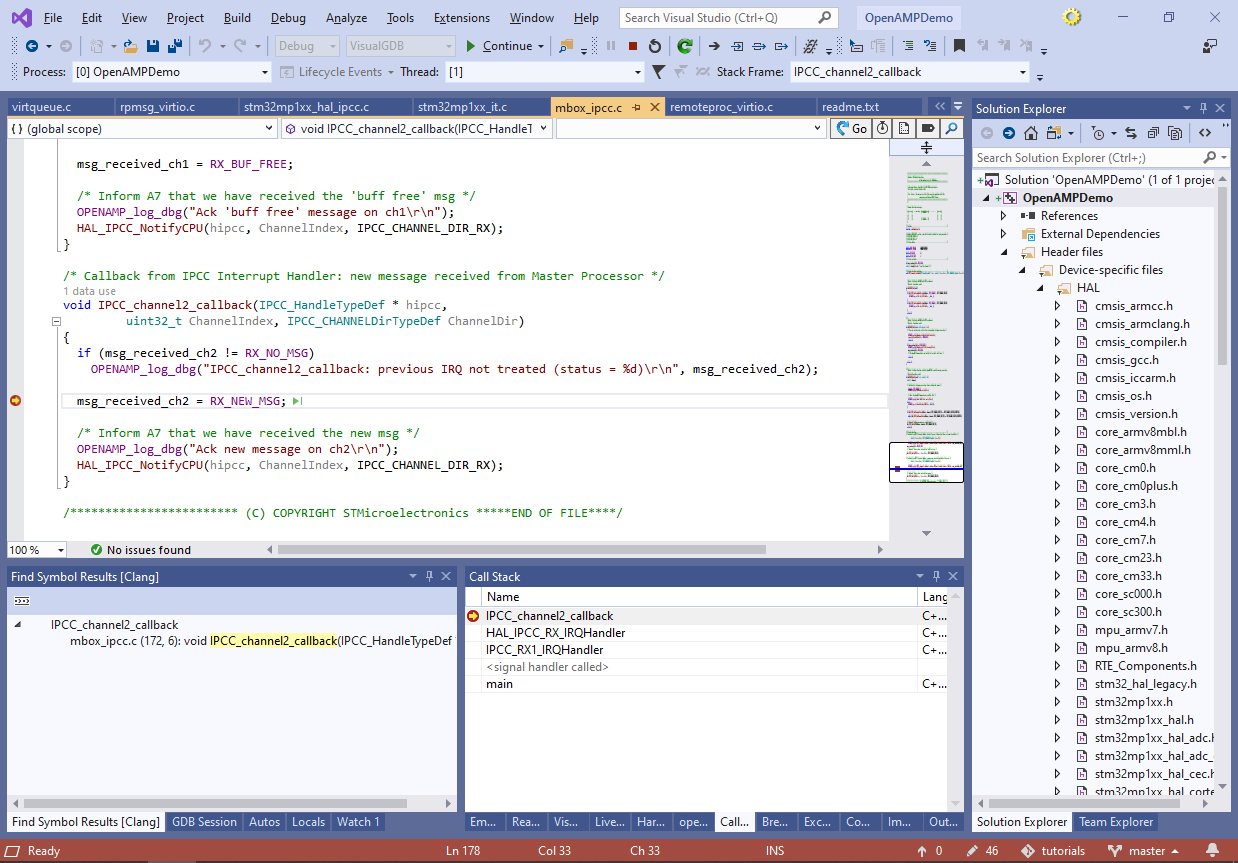
- Go to the IPCC2_channel_callback() function and set a breakpoint there. Then press F5 to continue execution. Check the console running the “cat” command. The message received via the virtual COM port will get echoed there:
- Run the “echo test > /dev/ttyRPMSG0” command again to send another message. The breakpoint in IPCC_channel2_callback() will trigger. Check the call stack to see how the function was invoked by the interrupt handler for the IPCC_RX1 interrupt:
- Now we will modify the Cortex-M firmware to continuously blink the on-board LEDs and update the Linux firmware to change the blinking frequency by writing messages to /dev/ttyRPMSG0. Update the VIRT_UART0_RxCpltCallback() function to append the incoming data to the buffer instead of overwriting it each time:
void VIRT_UART0_RxCpltCallback(VIRT_UART_HandleTypeDef *huart)
{
    log_info("Msg received on VIRTUAL UART0 channel:  %s \n\r", (char *) huart->pRxBuffPtr);
    size_t todo = MAX_BUFFER_SIZE - VirtUart0ChannelRxSize - 1;

    if (todo > huart->RxXferSize)
        todo = huart->RxXferSize;

    memcpy(VirtUart0ChannelBuffRx + VirtUart0ChannelRxSize, huart->pRxBuffPtr, todo);
    VirtUart0ChannelRxSize += todo;
    VirtUart0ChannelBuffRx[VirtUart0ChannelRxSize] = 0;
}
Then add the following function to read the data from the buffer line-by-line:
size_t ReadLineFromVirtualUART(char *pBuffer, size_t maxSize)
{
    OPENAMP_check_for_message();

    int pos = 0;
    for (pos = 0; pos < VirtUart0ChannelRxSize; pos++)
    {
        if (VirtUart0ChannelBuffRx[pos] == '\n')
        {
            size_t todo = pos;
            if (todo >= maxSize)
                todo = maxSize - 1;
            memcpy(pBuffer, VirtUart0ChannelBuffRx, todo);
            pBuffer[todo] = 0;

            pos++;
            memmove(VirtUart0ChannelBuffRx, VirtUart0ChannelBuffRx + pos, VirtUart0ChannelRxSize - pos);
            VirtUart0ChannelRxSize -= pos;
            return pos - 1;
        }
    }

    return 0;
}
Finally, update main() to blink the LED continuously, updating the frequency when a new message is received via ReadLineFromVirtualUART():
  __HAL_RCC_GPIOH_CLK_ENABLE();
  GPIO_InitTypeDef GPIO_InitStructure;
  GPIO_InitStructure.Pin = GPIO_PIN_7;
  GPIO_InitStructure.Mode = GPIO_MODE_OUTPUT_PP;
  GPIO_InitStructure.Speed = GPIO_SPEED_FREQ_HIGH;
  GPIO_InitStructure.Pull = GPIO_NOPULL;
  HAL_GPIO_Init(GPIOH, &GPIO_InitStructure);

  uint32_t toggleTime;
  uint32_t period = 1000;
  char buf[64];

  while (1)
  {
      if (HAL_GetTick() >= toggleTime)
      {
          HAL_GPIO_TogglePin(GPIOH, GPIO_PIN_7);
          toggleTime = HAL_GetTick() + period;
      }

      if (ReadLineFromVirtualUART(buf, sizeof(buf)))
      {
          period = atoi(buf);
      }
  }
- Press F5 to build and start the new version of the program. Observe how the on-board LED is being toggled each second:

- Run “echo 100 > /dev/ttyRPMSG0” from an SSH terminal and observe how the LED blinking frequency changes:

- You can set a breakpoint inside main() to step through the logic responsible for parsing the commands from the Linux side:
