Importing TI HALCoGen Projects into VisualGDB
This tutorial shows how to convert the projects generated by TI HALCoGen into VisualGDB BSPs that can be used to create multiple Visual Studio-based projects.
We will use the HALCoGen tool to generate one barebone and one FreeRTOS-based project for the TMS570LS1224 chip, and will show how to use our open-source HALCoGen project importer to automatically convert it into a VisualGDB-based BSP.
Before you begin, install the following tools:
- Visual Studio and VisualGDB
- TI HALCoGen
- TI CodeComposer (required to program the FLASH memory)
- Clone our open-source HALCoGen project importer
git clone https://github.com/sysprogs/BSPTools/
If you are using Segger J-Link and it directly supports programming the FLASH memory of your device, you can skip the installation of TI CodeComposer.
- Launch TI HALCoGen and select File->New->Project:

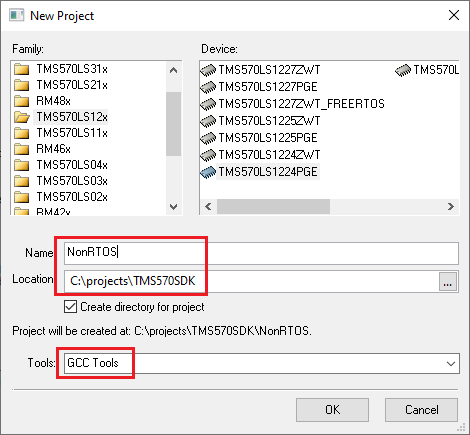
- Select the device you would like to target and pick a directory where HALCoGen should save the generated projects. Make sure the project name NonRTOS as the HALCoGen project importer will expect this name. Also ensure you have GCC Tools selected:
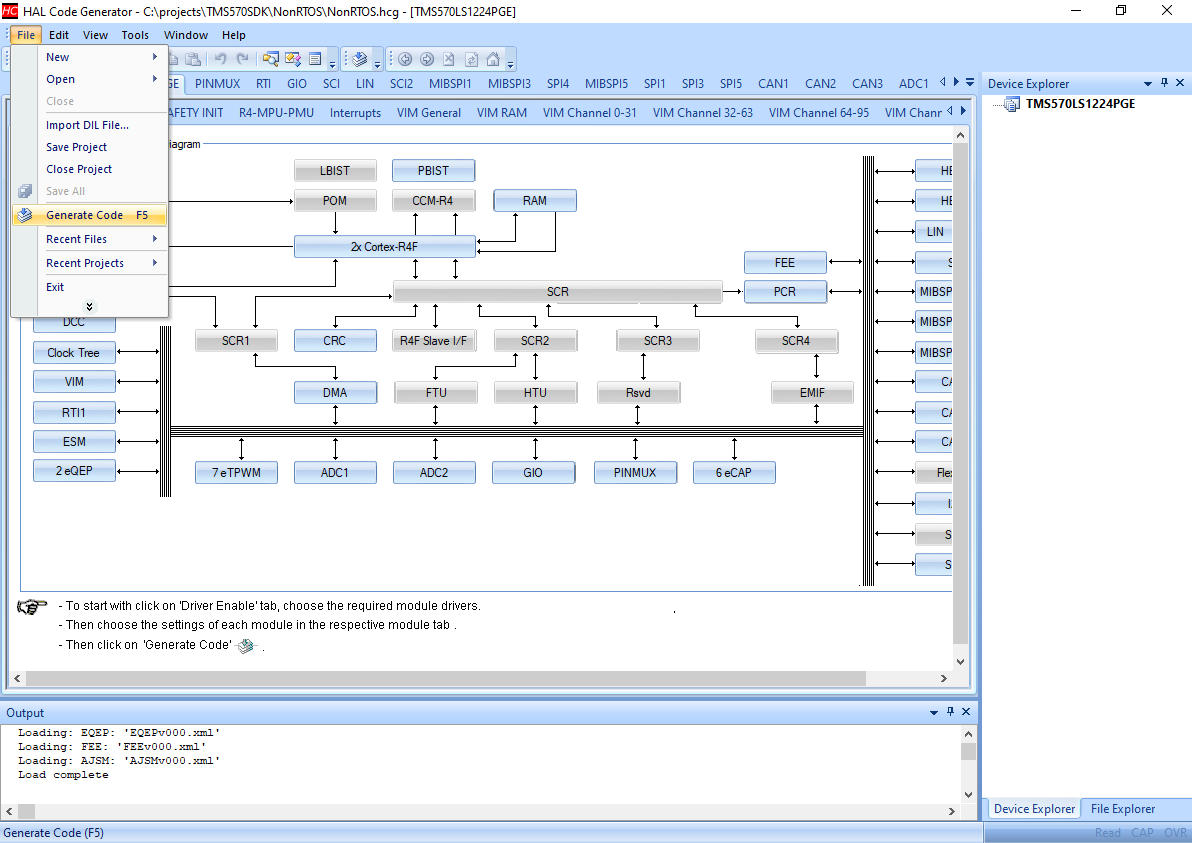
- Once the project is created, generate the code by selecting File->Generate Code:
- If your device supports FreeRTOS, create a FreeRTOS-based project and save it into the FreeRTOS directory:
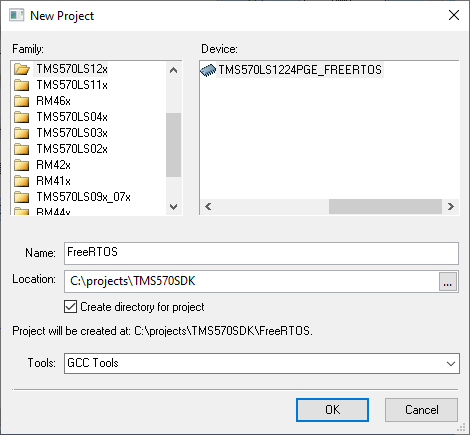 Make sure you generate the code for the second project as well.
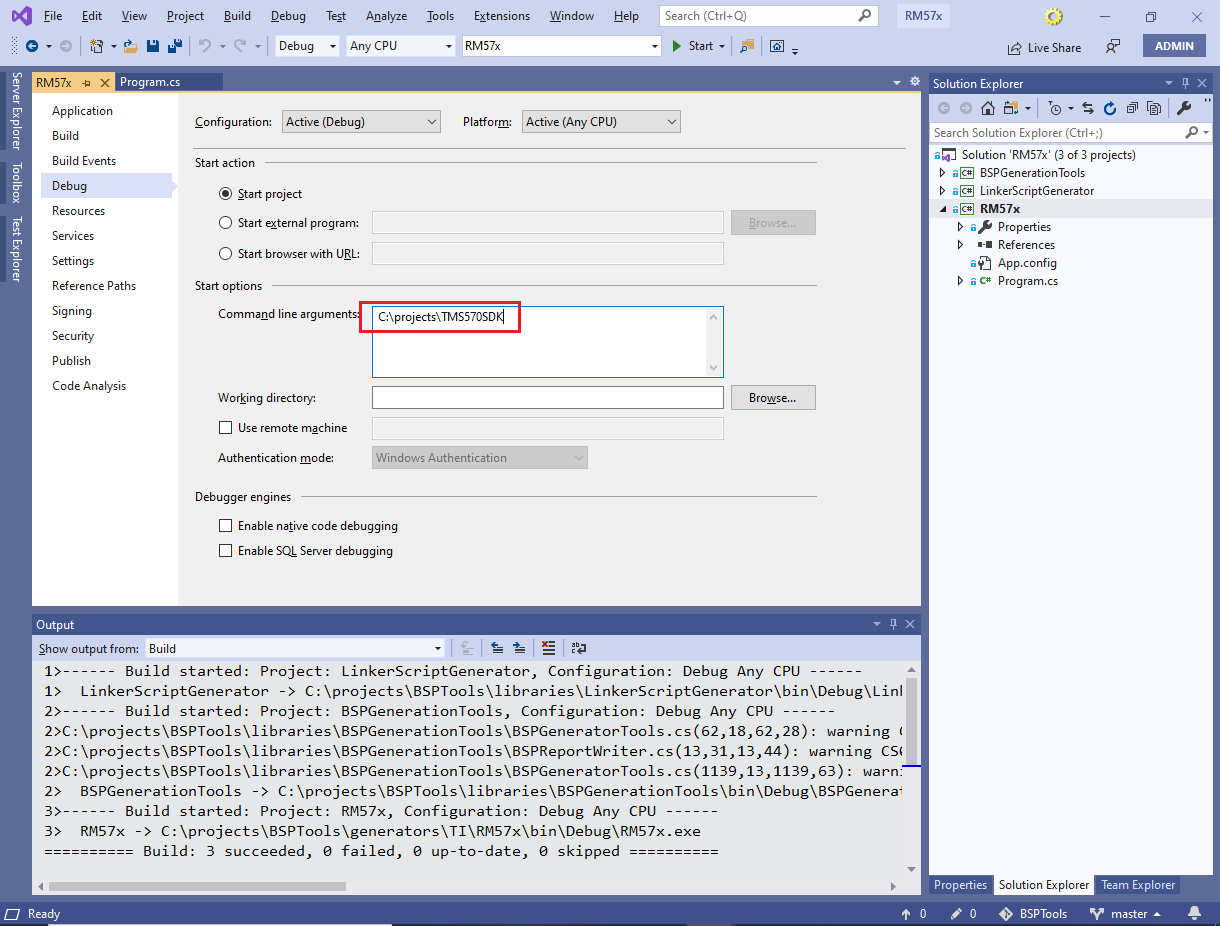
 - Locate the directory where you have cloned the BSPTools repository and open the generators\TI\RM57x\RM57x.sln file in Visual Studio. Then open Debug property page of the RM57 project and specify the directory where you have generated the NonRTOS and optionally FreeRTOS projects via command-line arguments:
 In this example, we use the c:\projects\TMS570SDK directory that contains the following files:
- C:\projects\TMS570SDK\NonRTOS\include\*.h
- C:\projects\TMS570SDK\NonRTOS\source\*.c
- C:\projects\TMS570SDK\NonRTOS\include\*.h
- (equivalent paths for FreeRTOS)
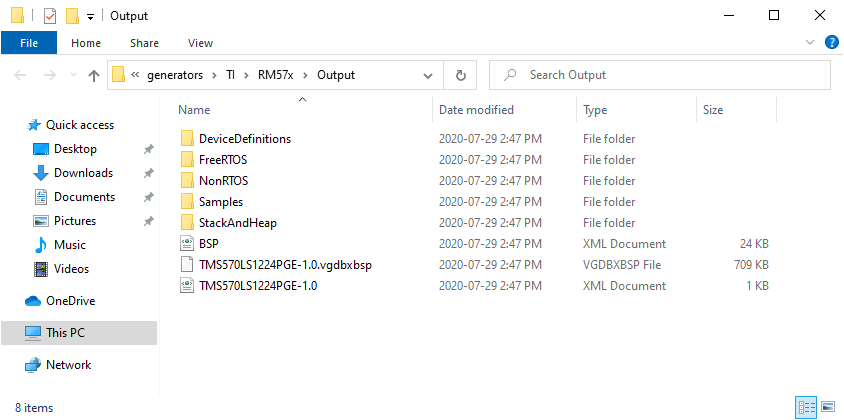
- Run the project importer tool. If you are using a device that was not directly tested with the tool, it will throw an exception, prompting to specify device-specific parameters (e.g. core, FPU) in the code. Otherwise, the tool will exit, producing the generators\TI\RM57x\Output directory:
- Select Tools->VisualGDB->Manage VisualGDB Packages in Visual Studio. Then click “Install a package from file”:
 Point VisualGDB to the .vgdbxbsp file inside the directory with the generated BSP.
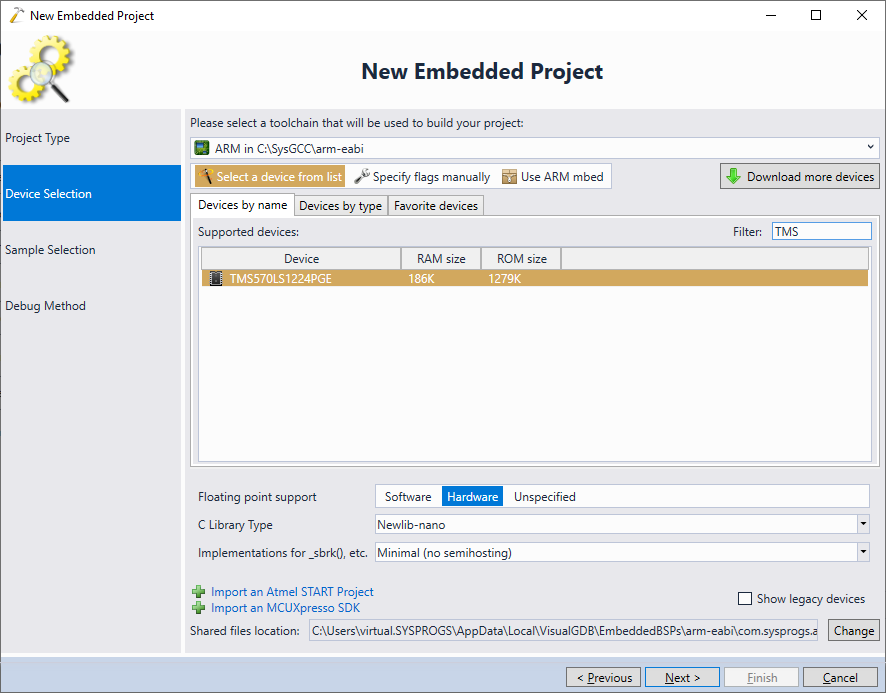
 - Importing the BSP will unpack it under the %LOCALAPPDATA%\VisualGDB\EmbeddedBSPs directory, and registering it with VisualGDB. The device will appear in the VisualGDB Embedded Project Wizard and will work the same way as other devices:
 If you would like to have multiple BSPs based on different HalCoGen-generated projects, simply change the BSP ID and device name in the BSP.XML file.
 - You can install the BSP on another machines by copying the .vgdbxbsp file there and installing it via the VisualGDB Package Manager.
- If you would like to program the FLASH memory using the TI tools, create a new project for your device using CodeComposer and make sure the debug connection works by clicking “Verify”:
 If the connection is working, take a note of the full path of the .ccxml file. We will pass it to the DSLite tool to program the project built with VisualGDB into the FLASH memory:
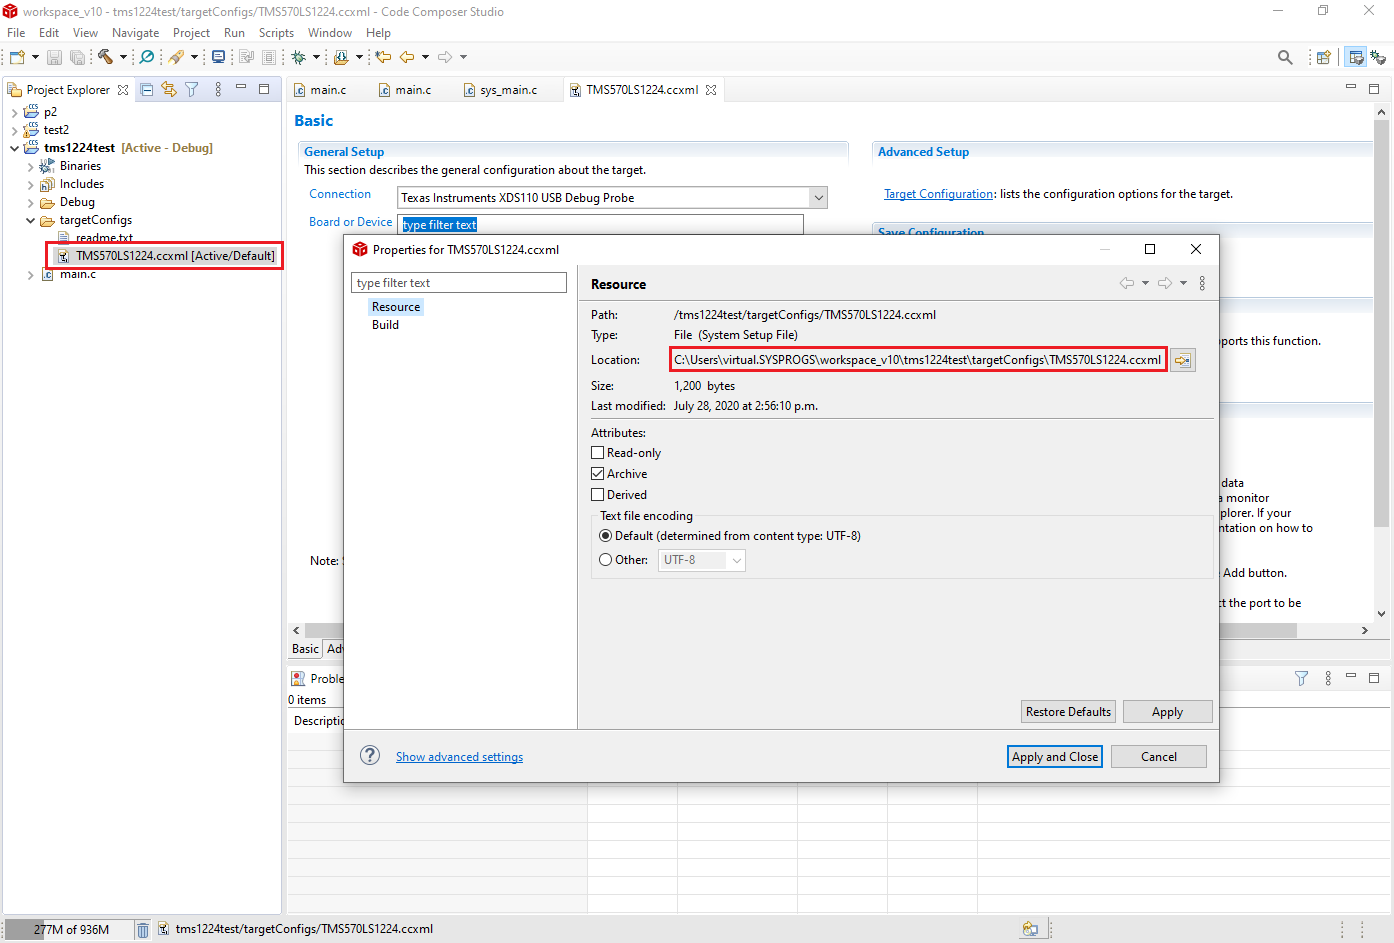
Now that you have have generated the BSP, follow this tutorial to create a basic project based on it.