Building Advanced CMake projects with Team Foundation Server
This tutorial shows how to use Team Foundation Server to build advanced CMake projects. The advanced CMake project subsystem replaces the regular Visual C++ project subsystem and provides seamless integration with CMake. Instead of duplicating settings between the CMakeLists.txt files and the Visual Studio project files, the advanced CMake subsystem lets Visual Studio treat CMakeLists.txt files project files, automatically showing an updating targets, source files and build settings.
In this tutorial we will create a basic project using the Advanced CMake Project System, check it in the TFS source control and will show how to setup a built agent to build this project without installing a Visual Studio instance there. This tutorial will use 2 machines: server machine running TFS and the build agent and the client machine running Visual Studio.
Before you begin, install VisualGDB 5.3R4 or later and follow the TFS Makefile tutorial to get the basic TFS functionality to work.
- Start Visual Studio on the client machine and begin creating a new VisualGDB Linux Project in your TFS checkout directory:

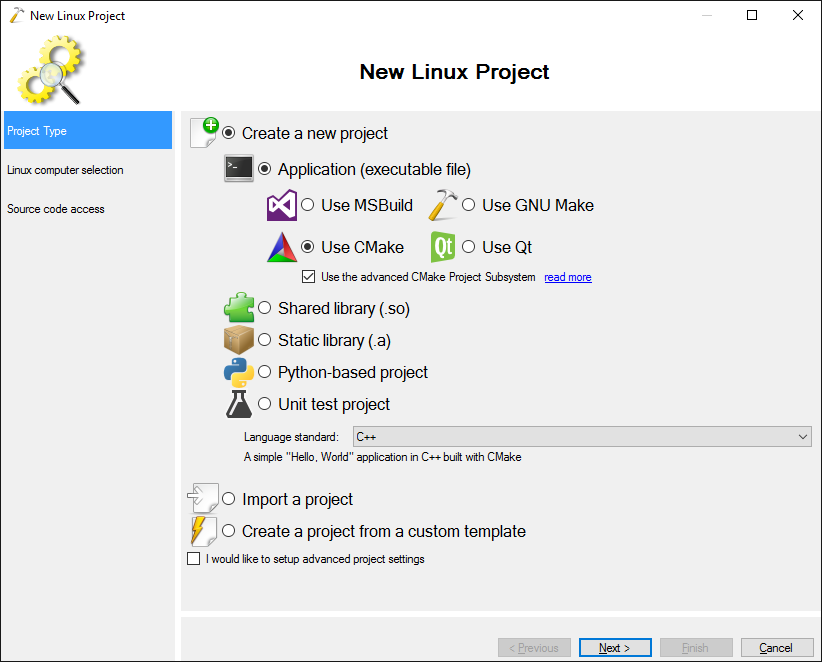
- Select “Create a new project -> Application -> Use CMake -> Use the advanced CMake project subsystem”:
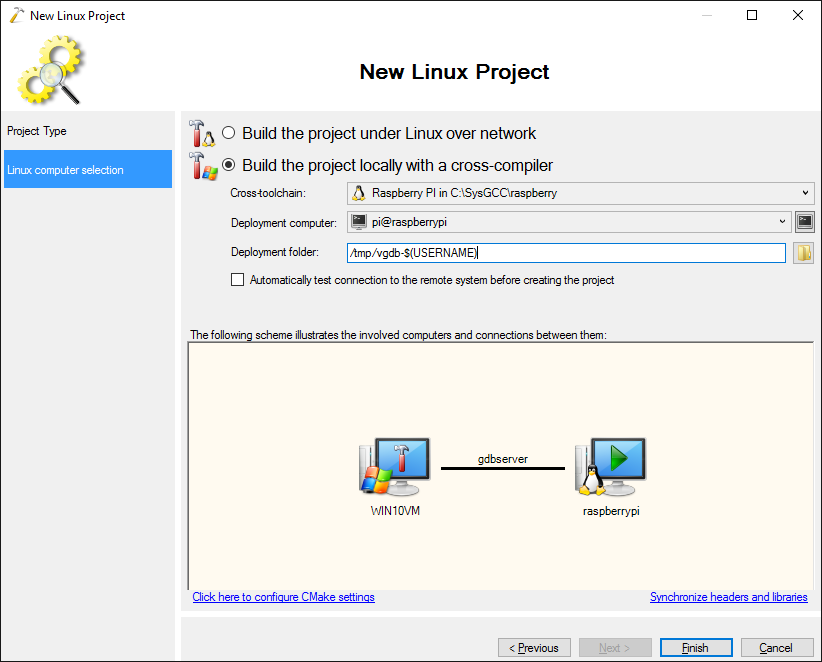
- The steps shown in this tutorial will generally work for both remotely built and locally built projects. However this tutorial will focus on using a cross-toolchain to build the code on the Windows machine. Select your cross-toolchain and the deployment computer and set the deployment folder. If you want to avoid deploying executables built by different users in the same directory, use the $(USERNAME) variable in the deployment folder:
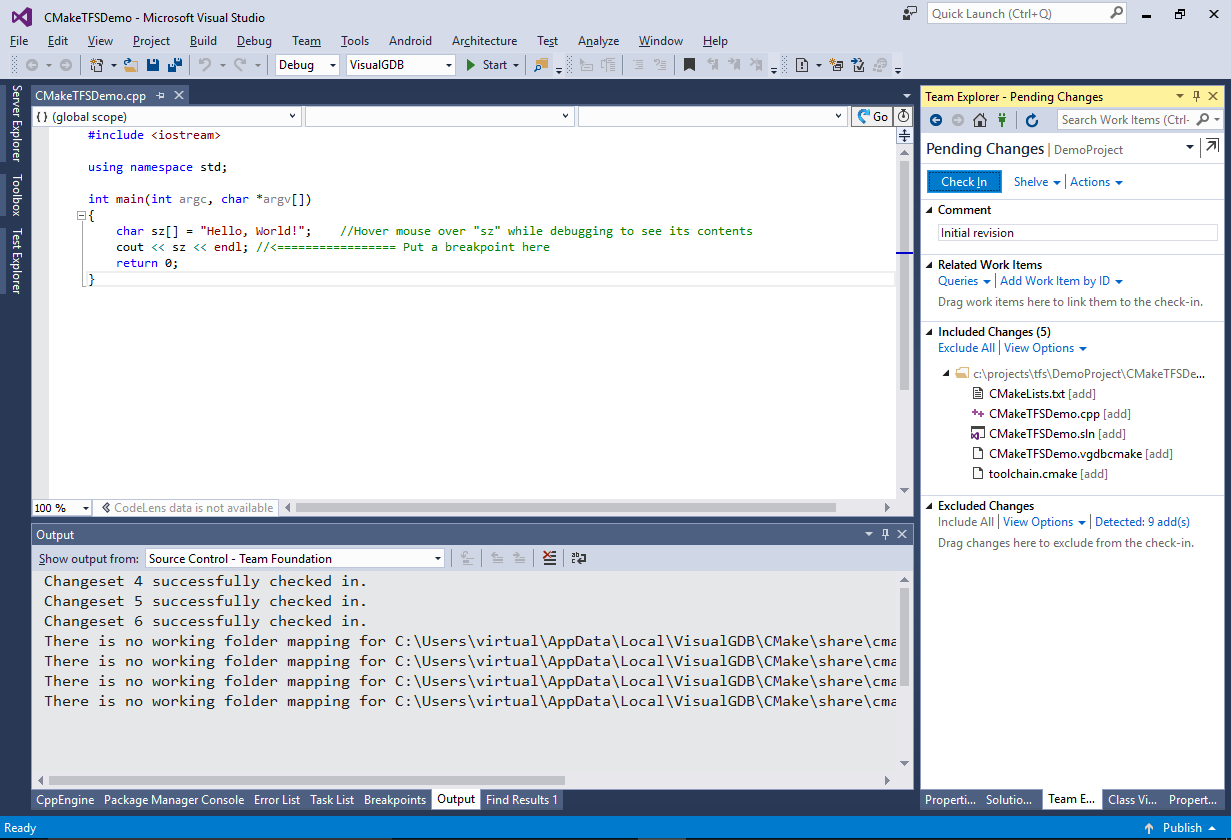
- Press “Finish” to create the project. Then add it to source control via Source Control -> Add Solution to Source Control:

- Go to the Pending Changes view in the Team Explorer window to see the files reported by VisualGDB within the newly created project. Review the file list and click “Check in”:
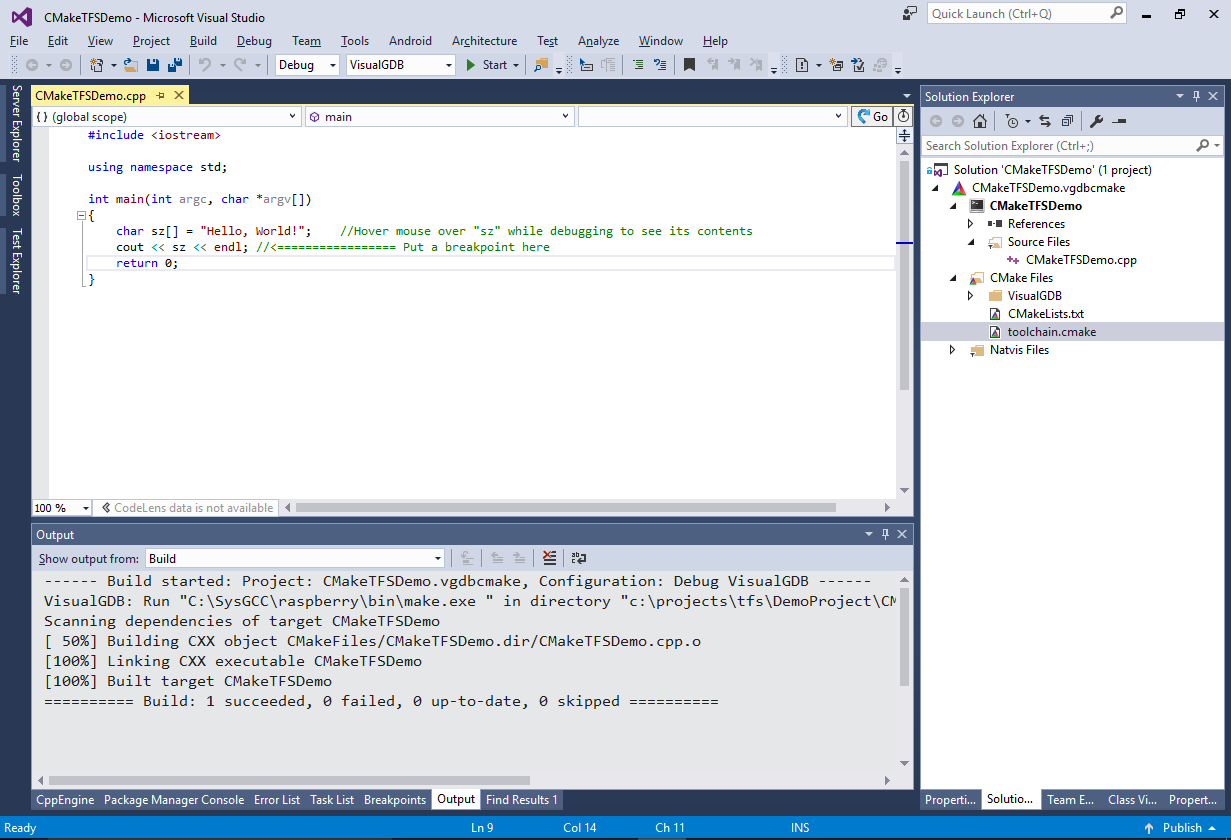
- Build the project on the Windows machine to ensure that no components are missing:
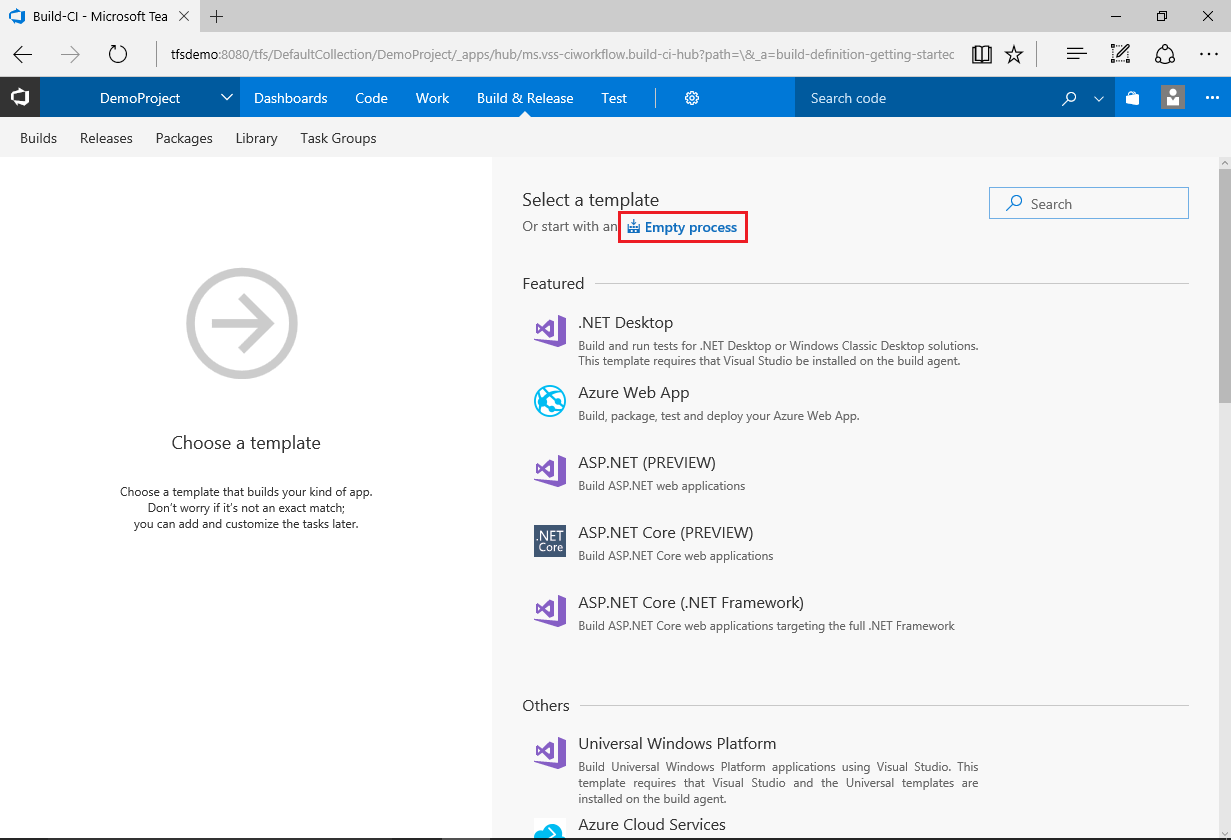
- Now we will setup the automatic build on the build server using TFS. Open the TFS console, go to the “Build & Release” tab and click “New Build -> Empty Process”:
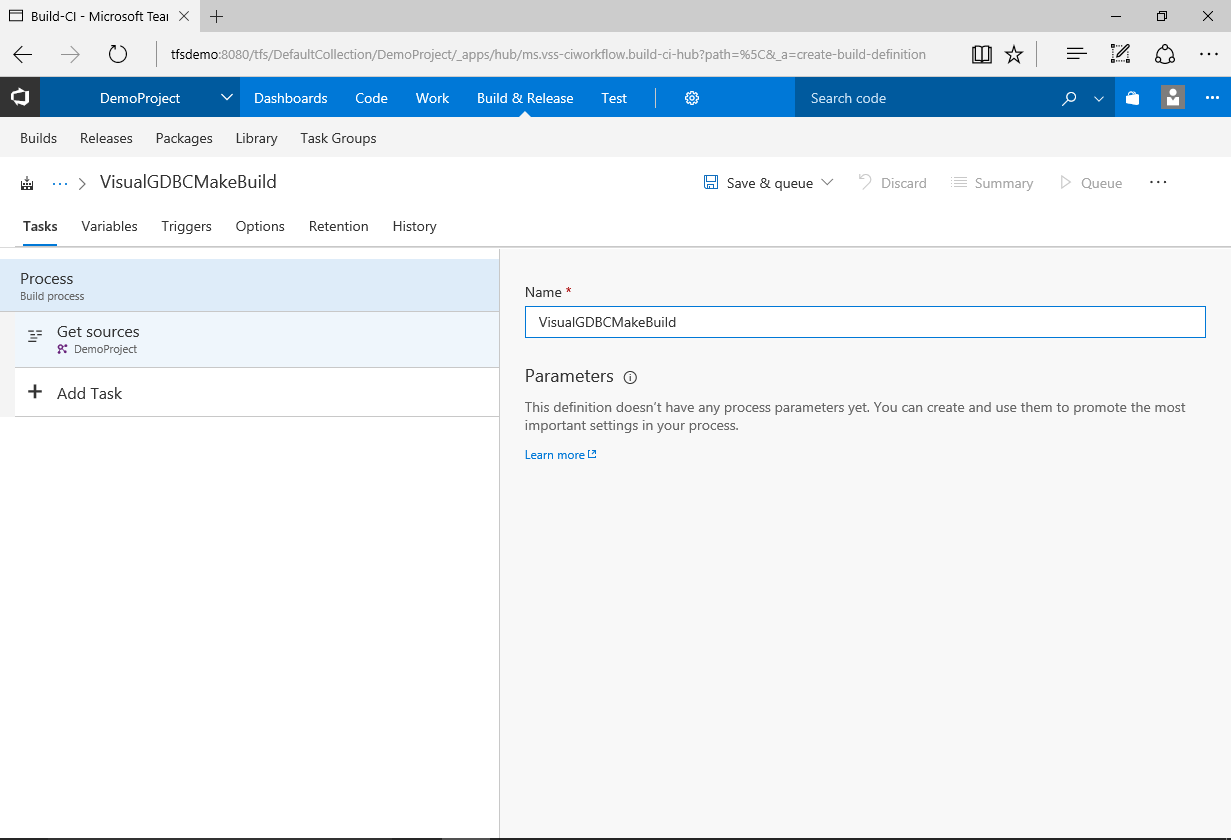
- Pick a name for the new build and click “Add Task”:
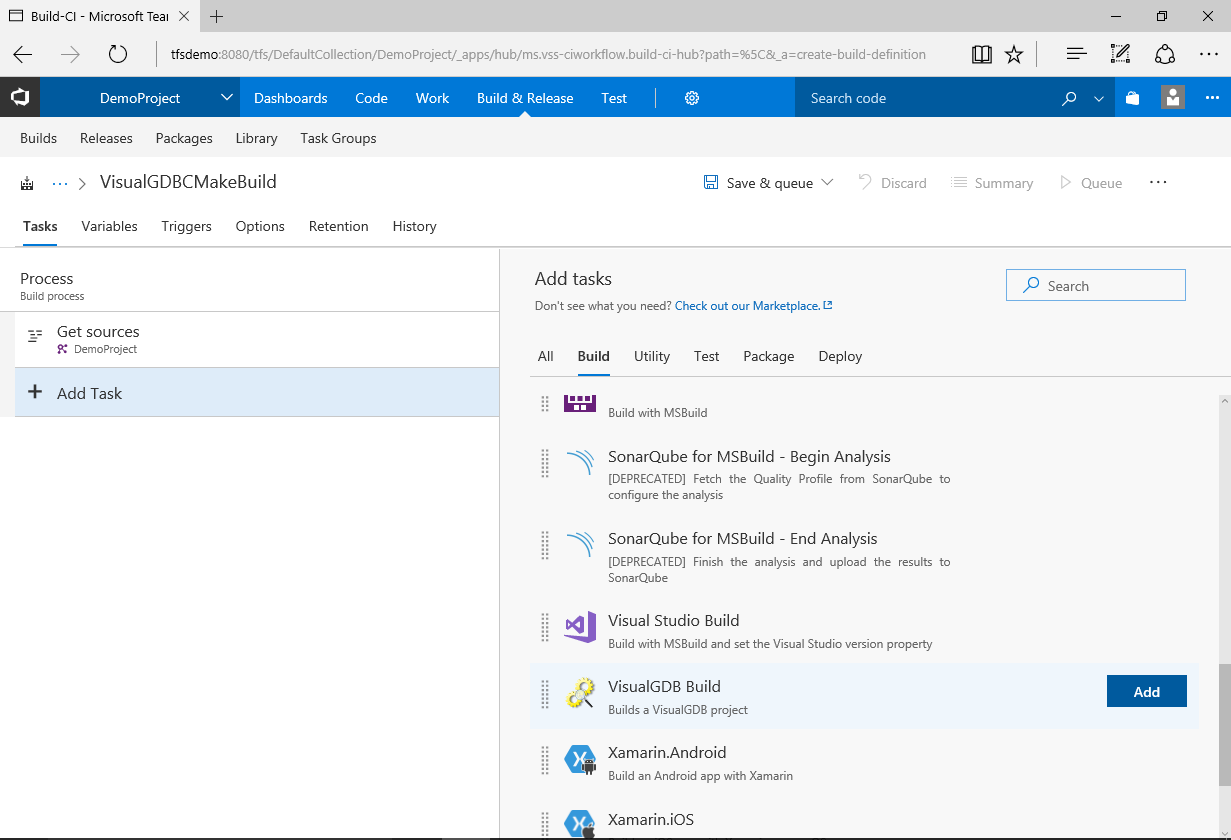
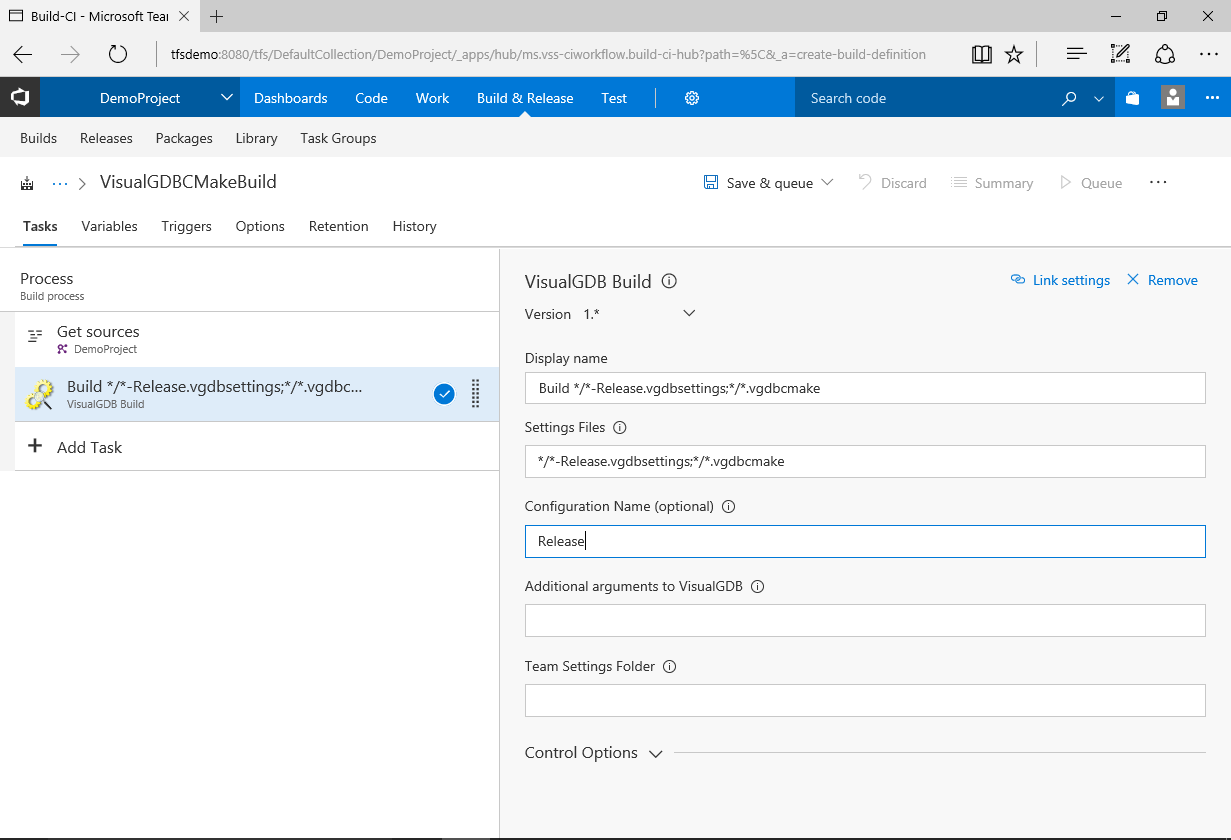
- Ensure you have the VisualGDB TFS extension installed and then add the “VisualGDB Build” task from the “Build” page:
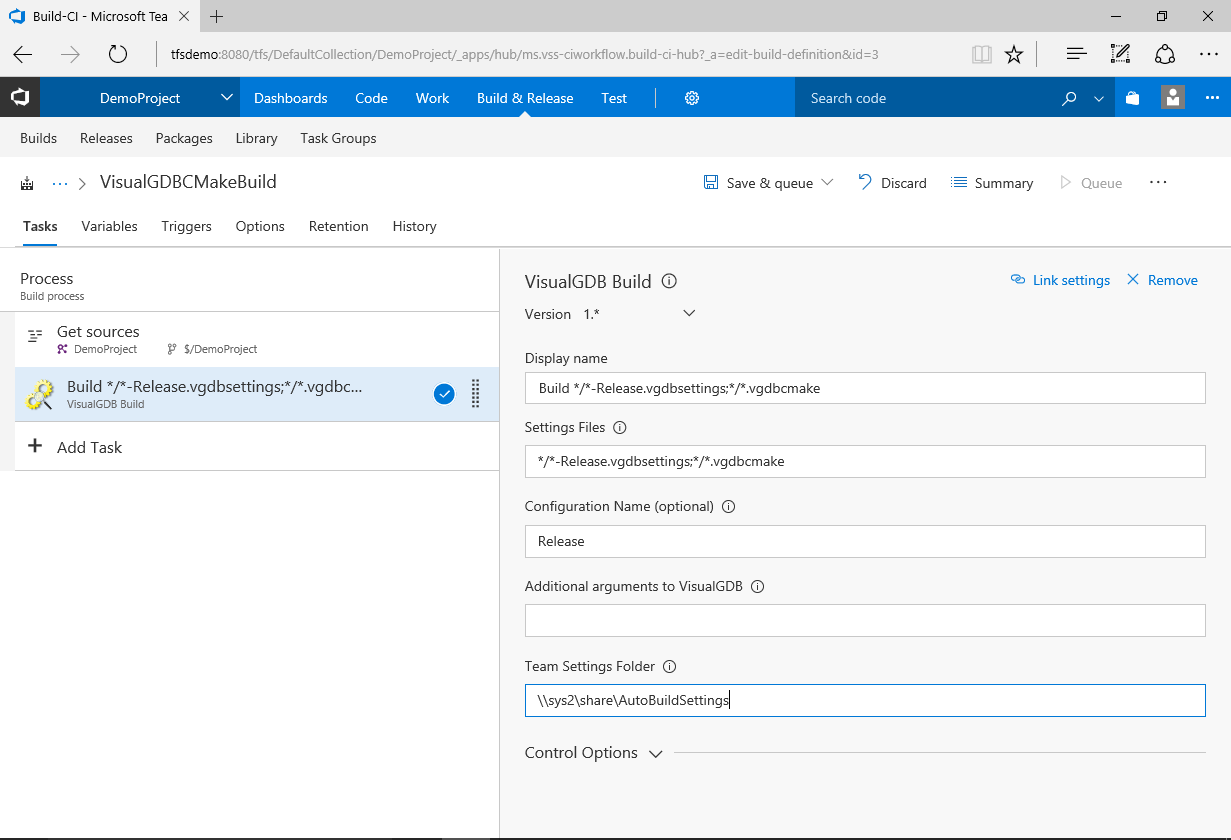
- Review the settings of the “VisualGDB Build” step. By default, VisualGDB will build all .vgdbcmake files in all subdirectories of your project and all .vgdbsettings files (corresponding to regular VisualGDB projects based on the .vcxproj files). Set the configuration name to “Release” as otherwise it will default to “Debug”:
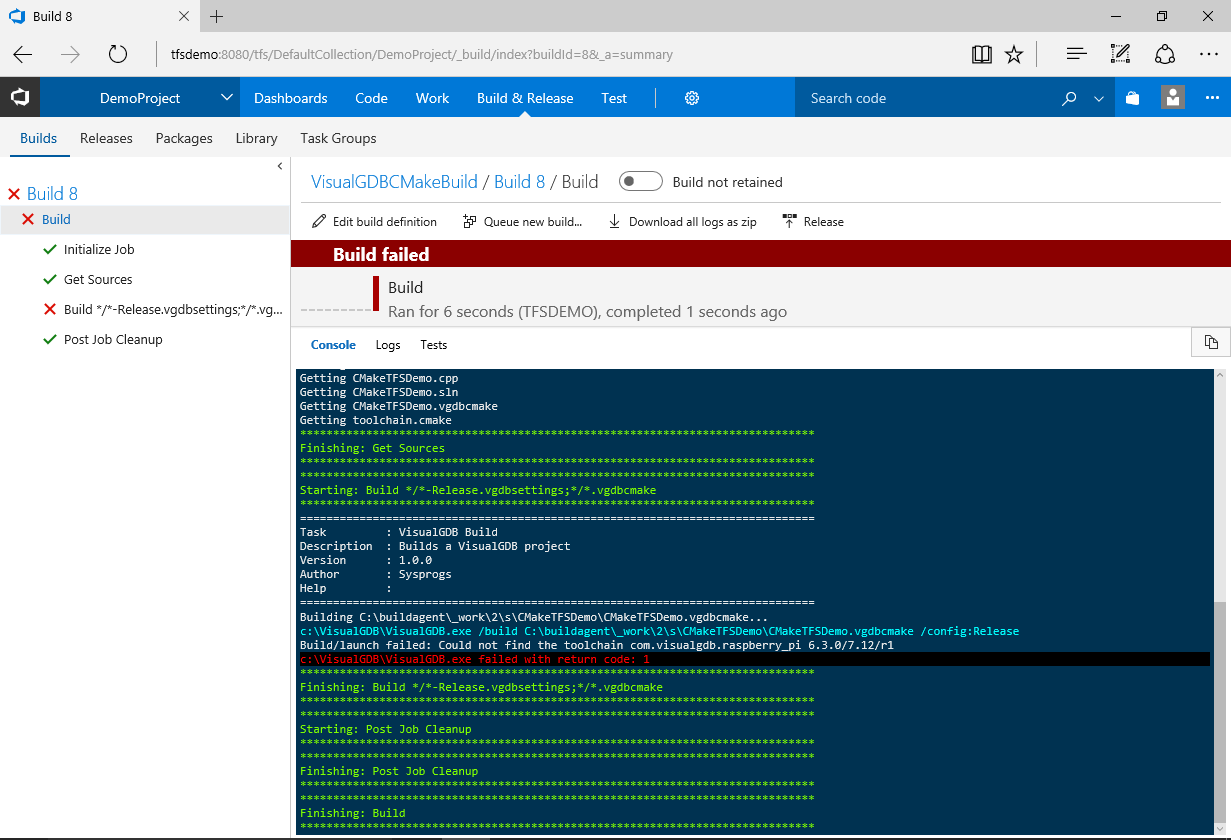
- Ensure you run a build agent on a machine with VisualGDB installed (see this tutorial for more details) and start the build. In this example the build will fail because the server is missing the Raspberry Pi toolchain used when creating the project:
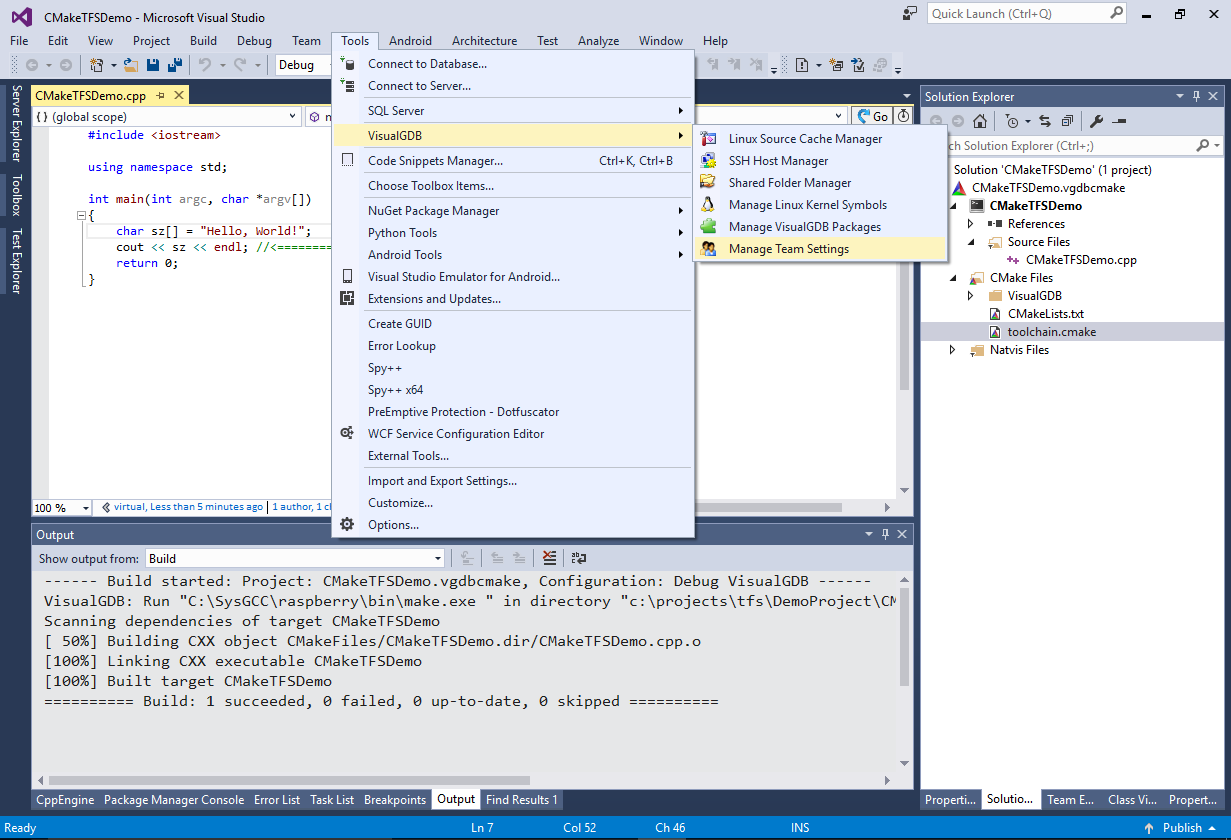
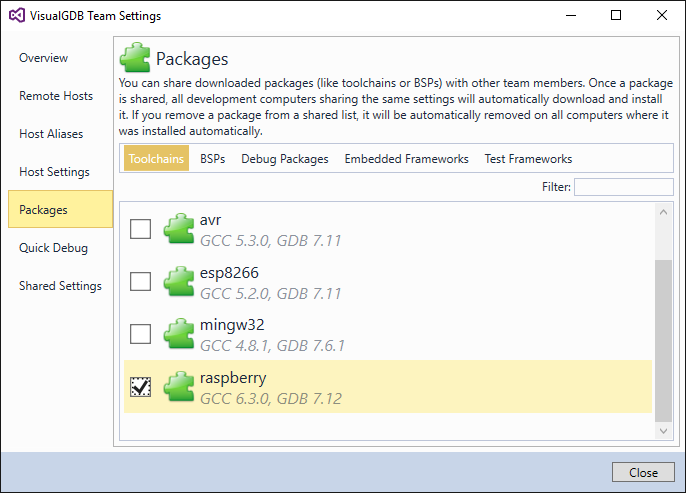
- You can install the toolchain manually from gnutoolchains.com or configure VisualGDB to install it automatically via Team Settings (requires Custom edition). On the client machine click Tools->VisualGDB->Manage Team Settings:
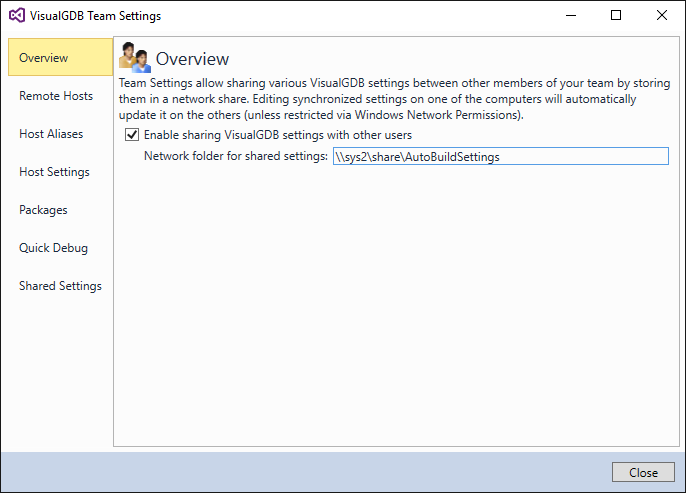
- Select a shared folder visible from both the client and the server that will be used to store shared settings:
- Go to the Packages tab and share your toolchain via team settings:
- Enter the path to the shared settings folder in the build task settings:
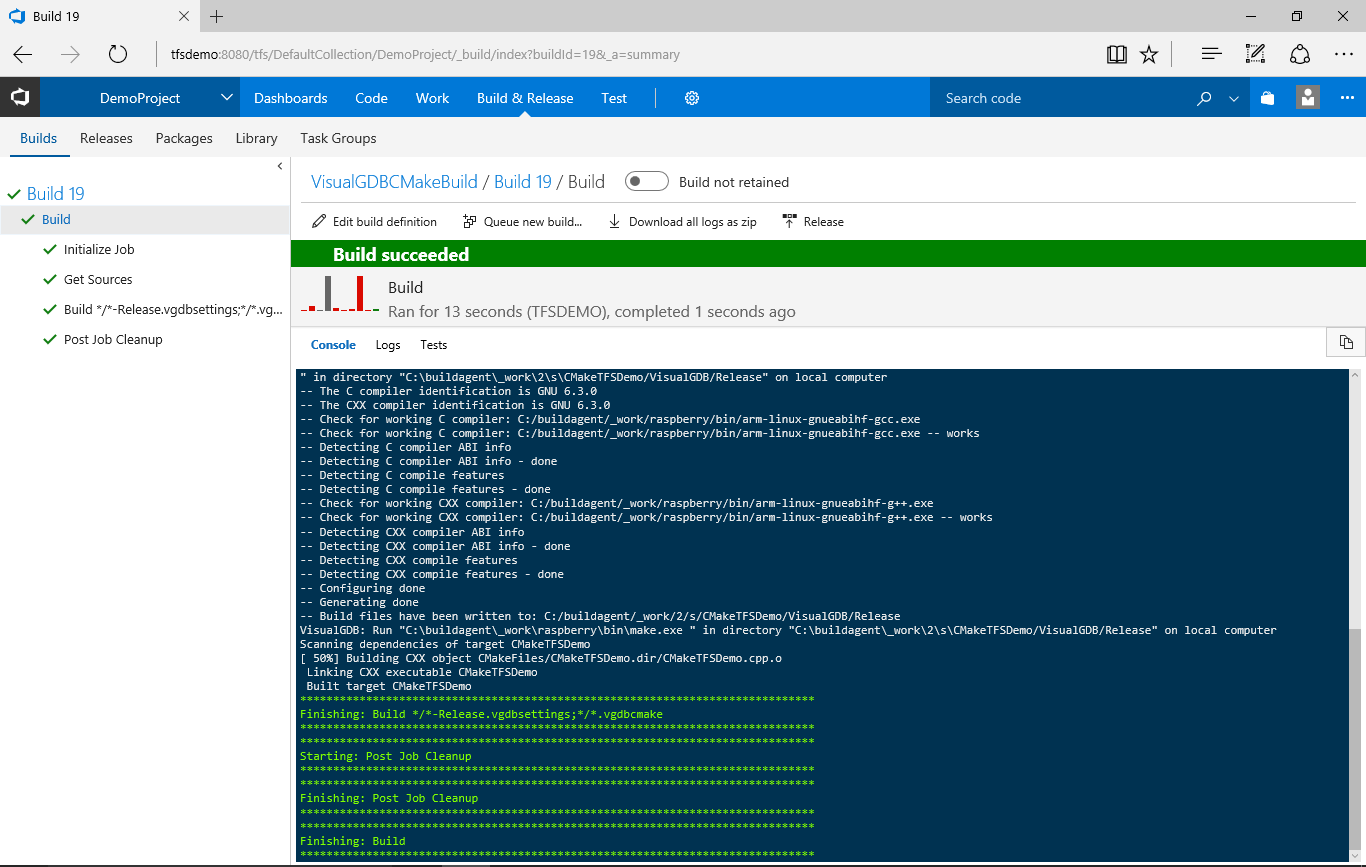
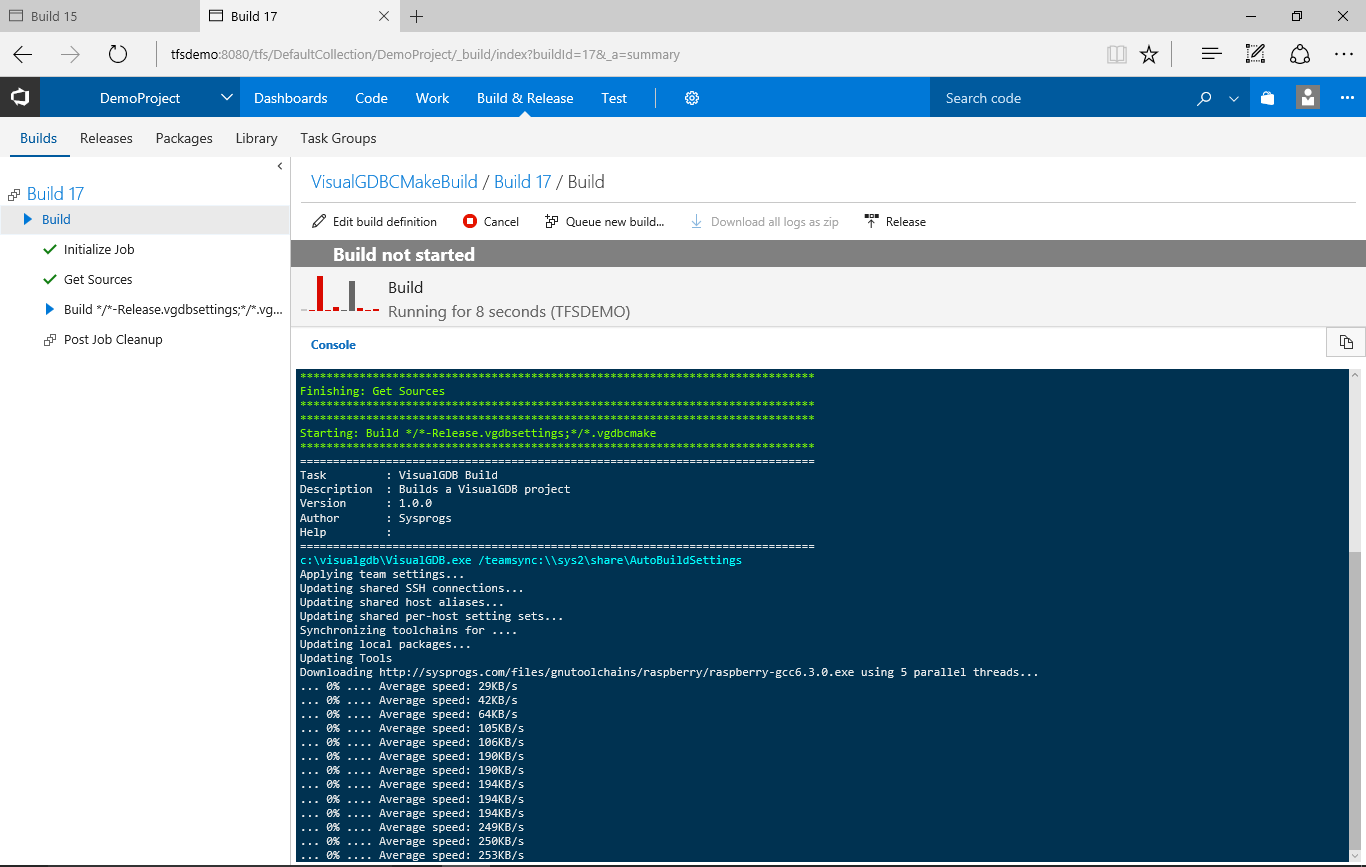
- Run the build again. VisualGDB will begin synchronizing the team settings. It will automatically download and install the toolchain and CMake (if the build runs on the Windows machine):
- The initial build after installing the toolchain/CMake might fail. In this case, simply restart it. The next build should succeed: