Targeting Multiple Platforms with Advanced CMake Projects
This tutorial shows how to target multiple platforms from the same Advanced CMake project. We will create a basic Raspberry Pi project built with a cross-compiler, and will then update it to target 3 other systems:
- Beaglebone board using another cross-compiler
- Ubuntu machine by building the code directly on the target
- Windows machine with a MinGW-based toolchain
Before you begin, install VisualGDB 5.5 Preview 6 or later and make sure you are using the Custom edition or higher.
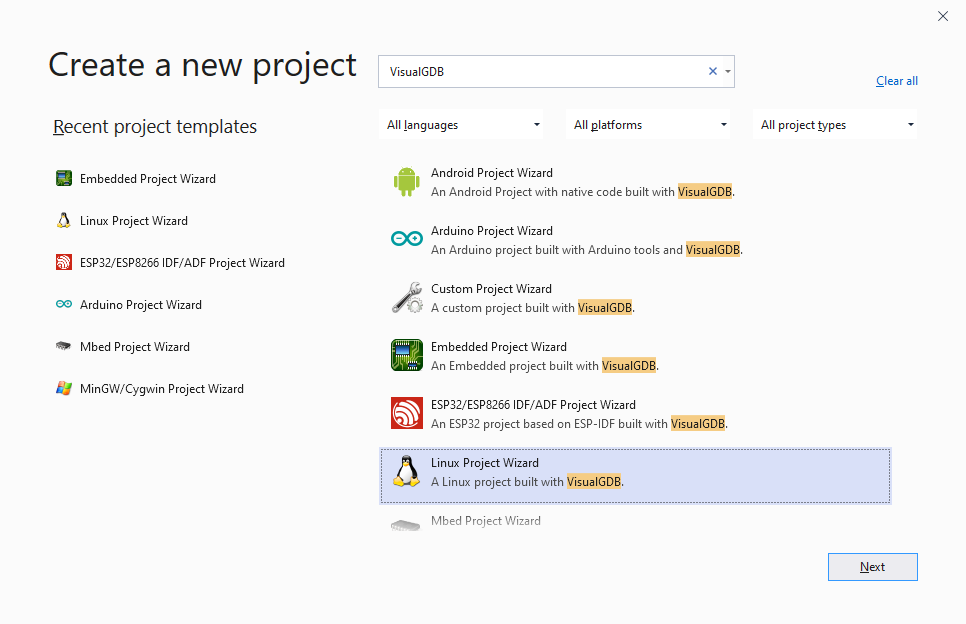
- Start Visual Studio and open the VisualGDB Linux Project Wizard:
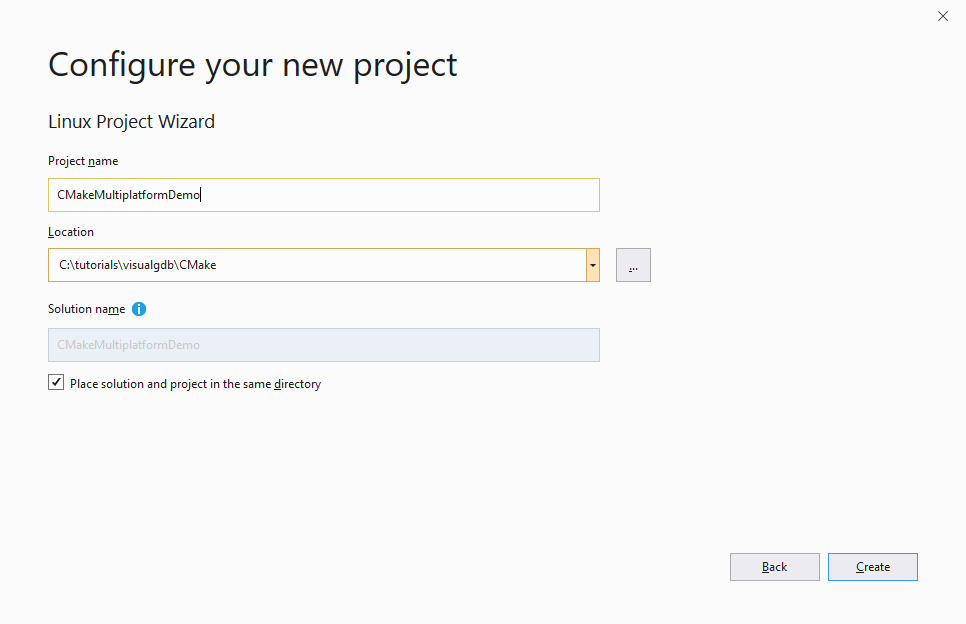
- Pick a name and location for the project, then click “Create”:
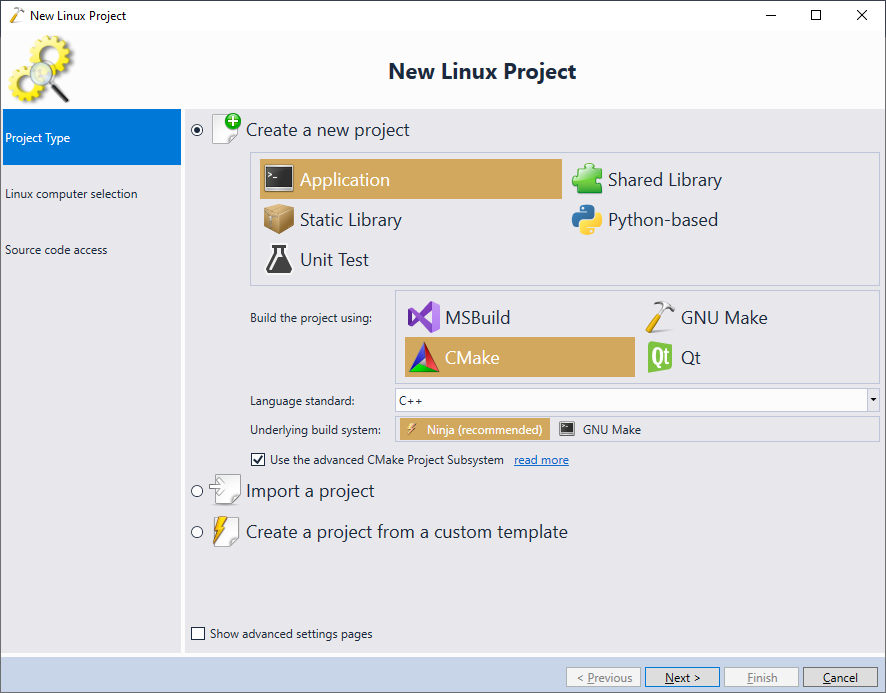
- In the VisualGDB-specific part of the wizard, select “Create a new project -> Application -> CMake -> Use the advanced CMake Project Subsystem”:
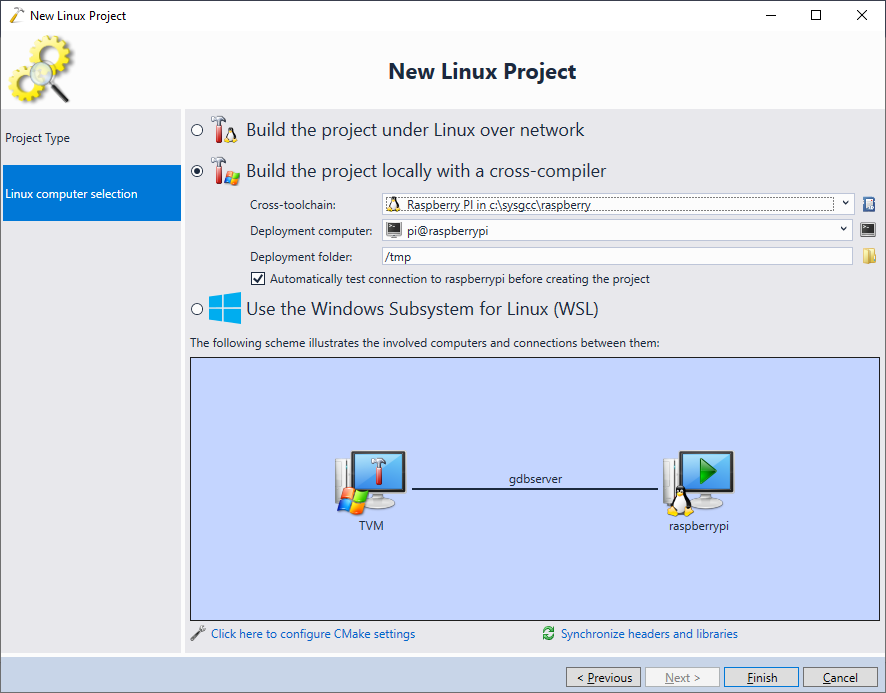
- On the next page of the wizard select the Raspberry Pi toolchain and press “Finish” to create the project:
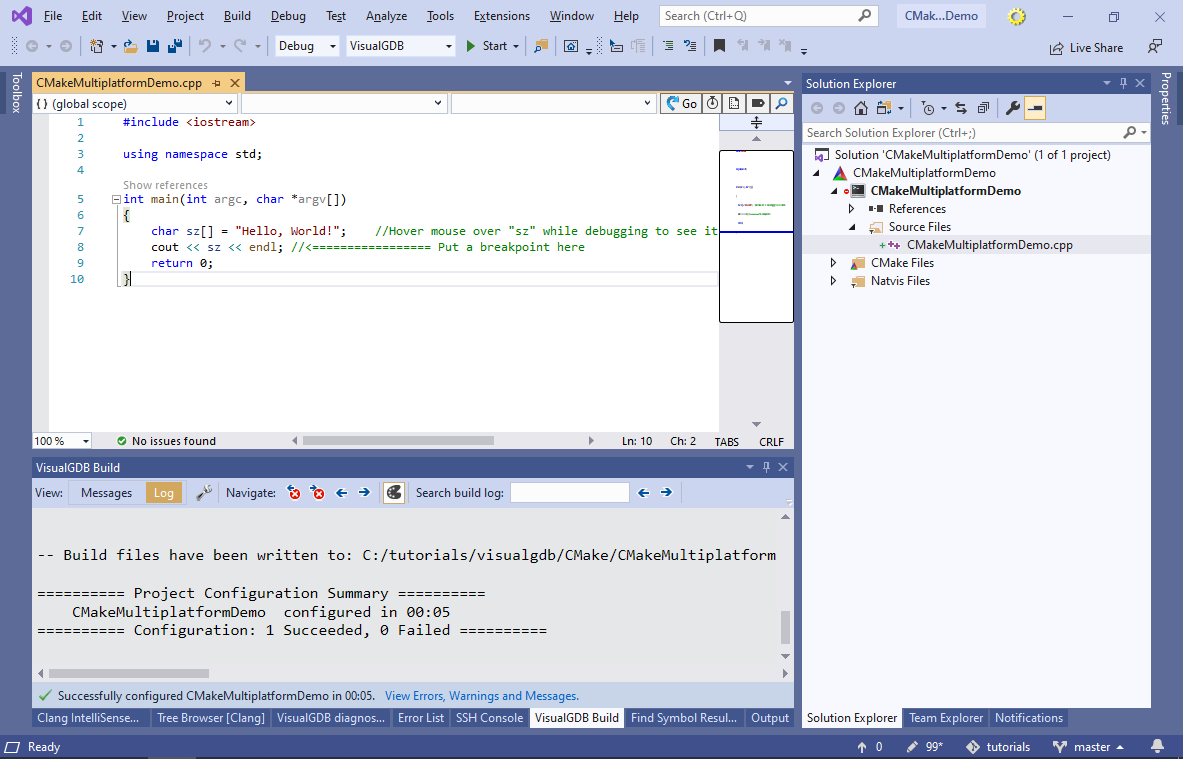
- Once the project is generated, try building it. VisualGDB will use the previously selected Raspberry Pi cross-toolchain to produce the code that can run on the target:
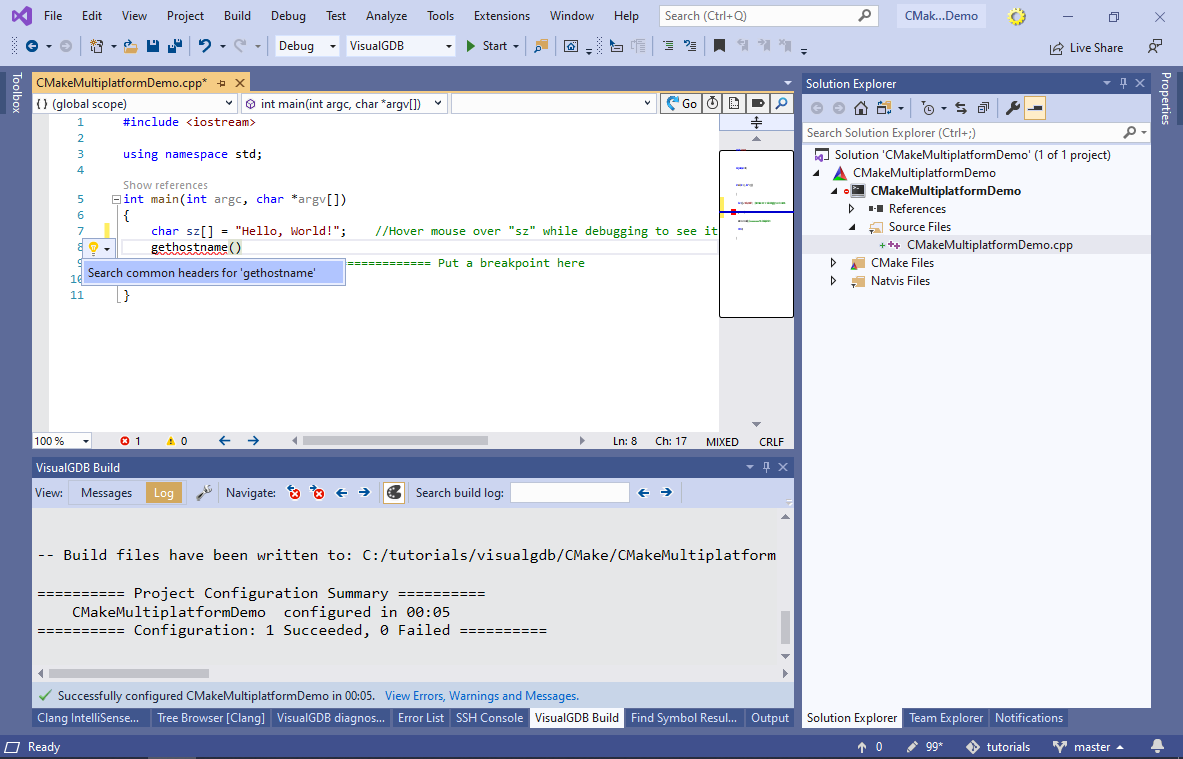
- Now we will update the project to display the host name of the target. Try calling gethostname() from the main() function. When VisualGDB marks it as an error, select “Search common headers for gethostname“:
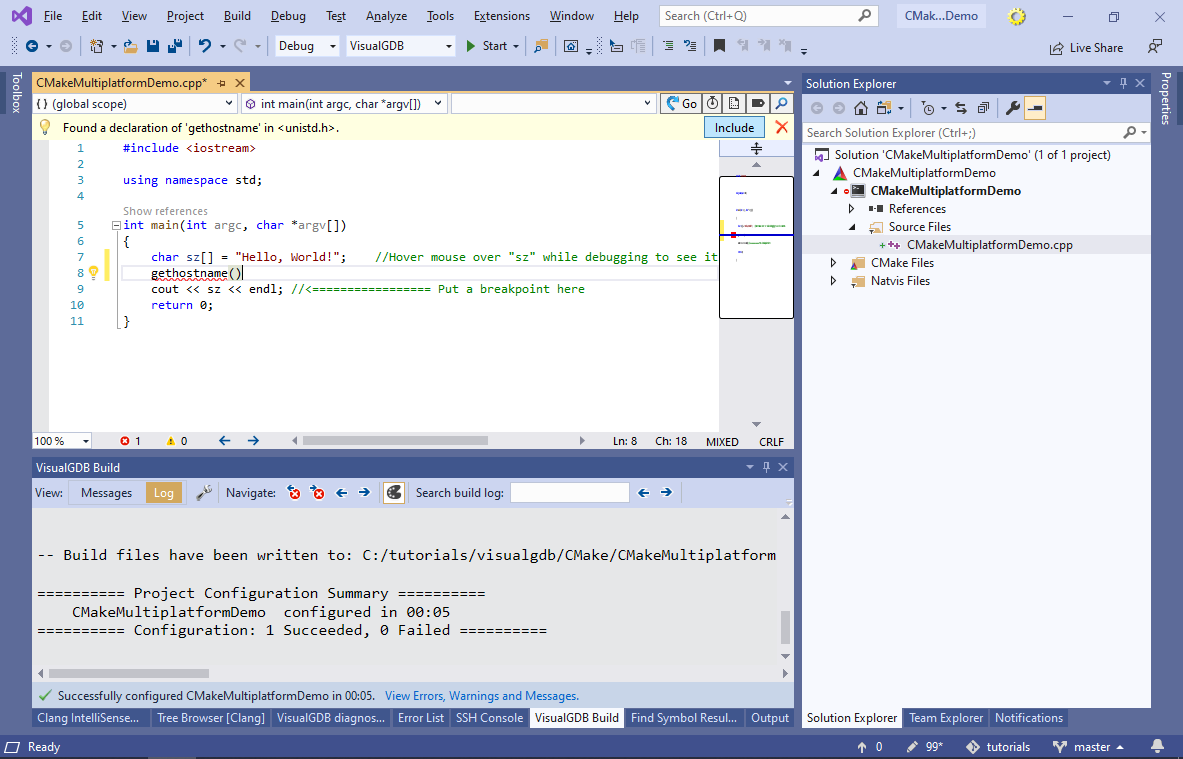
- VisualGDB will find that the gethostname() function is declared in unistd.h, and will allow automatically including it:
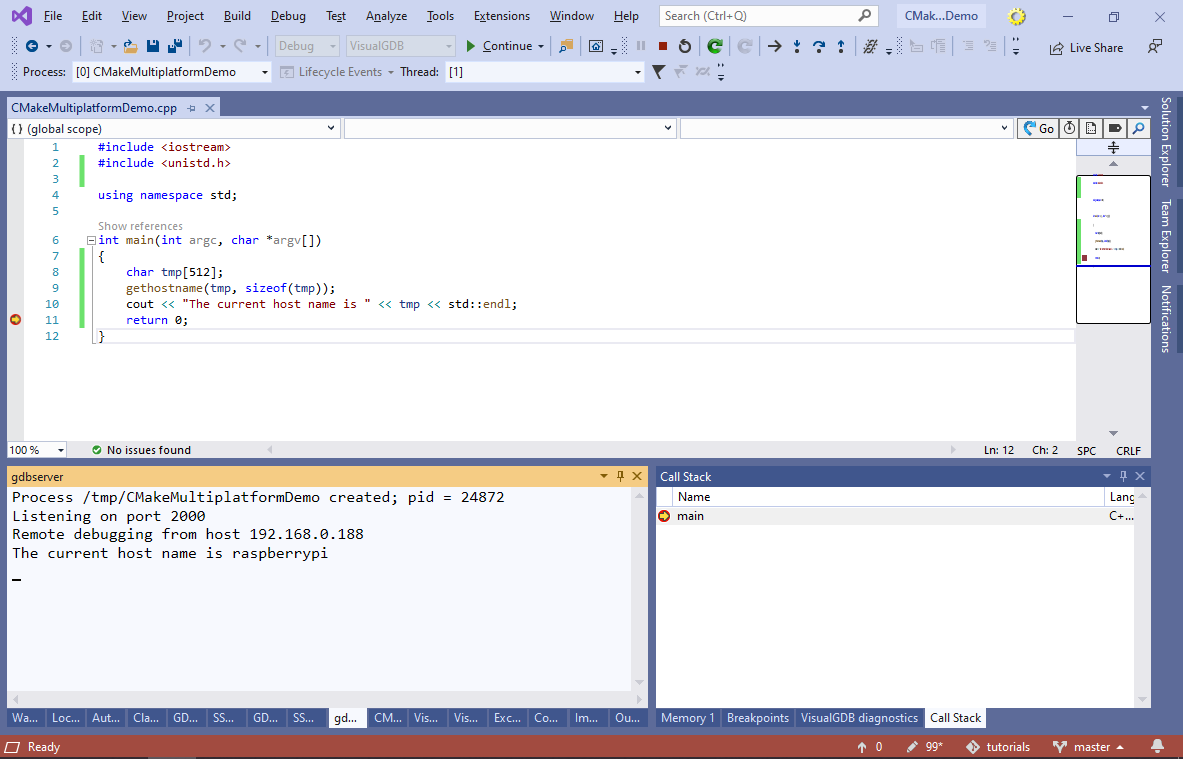
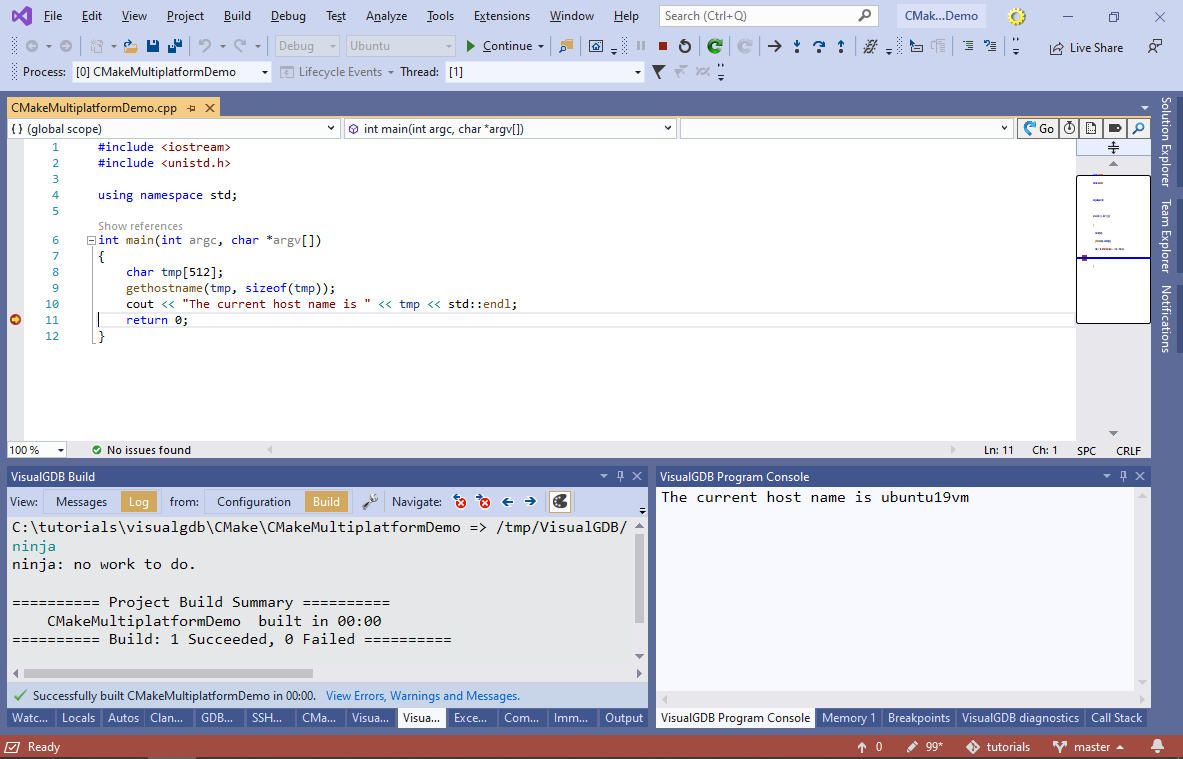
- Update the main() function display the current host name as shown below and press F5 to start debugging:
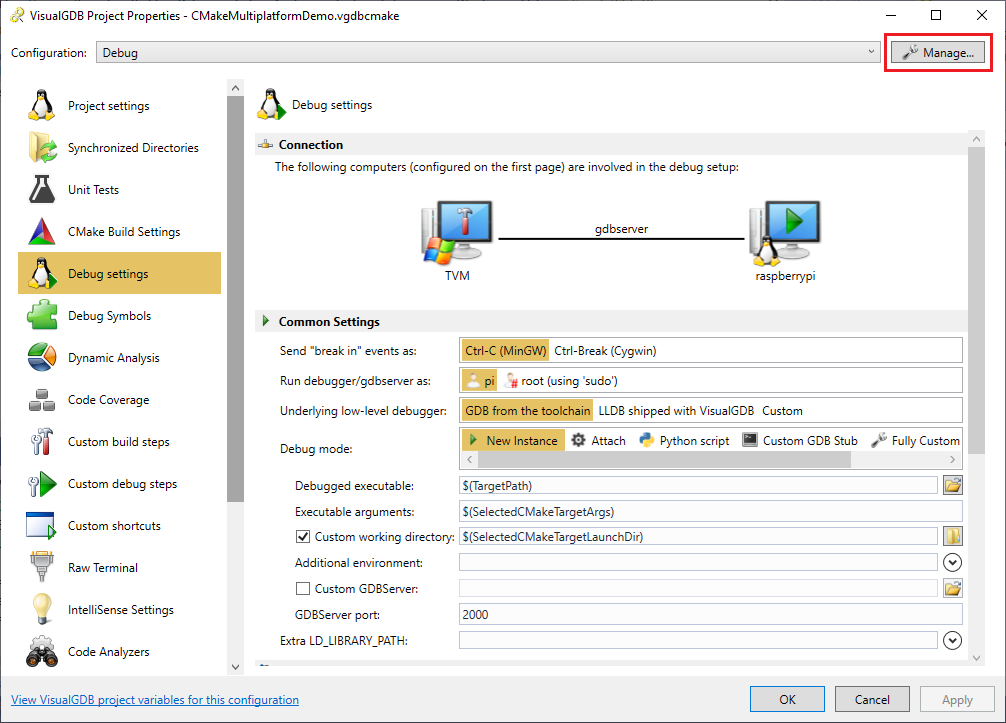
- Now we will update the project to support multiple platforms. Open VisualGDB Project Properties and note the pages in the left part of the window. Each VisualGDB project has 3 main groups of settings:
- Project-Level Settings. They define whether it’s a Windows, or Linux-based project, specify the build and target machines, and control the source synchronization between the Windows machine and the build machine (when building on Linux).
- Build Settings. These settings define a specific toolchain, build system (GNU Make, CMake, MSBuild) and allow tweaking the build process (e.g. add extra parameters to CMake or Ninja).
- Debug Settings. This group of settings controls how the project is deployed and debugged (e.g. whether VisualGDB should start a new instance, or attach to an existing one).
Normally, the same settings are shared between all configurations of an Advanced CMake project. However, you can also define custom platforms/configurations that would override some of the settings groups shown above. Click the “Manage” button next to the configuration list (supported in Custom edition and higher):
- VisualGDB will show the current configurations and platforms supported by the project. Normally, Advanced CMake projects define 1 configuration for each CMAKE_BUILD_TYPE value (Debug, Release, RelWithDebInfo, MinSizeRel) and 1 platform (VisualGDB), all sharing the same settings:
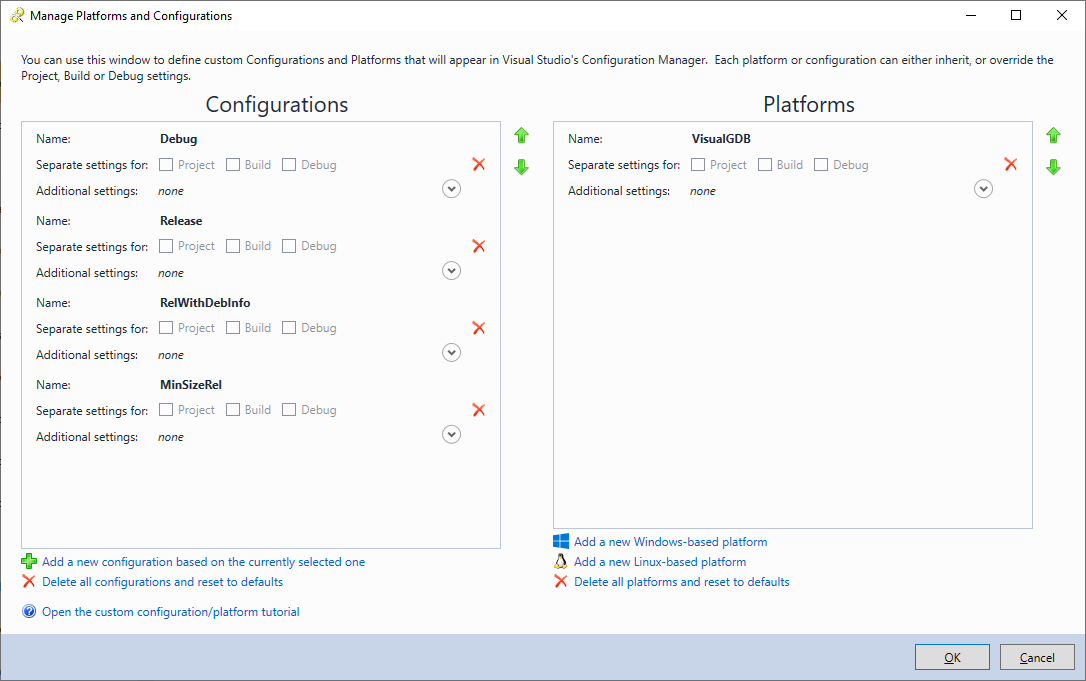
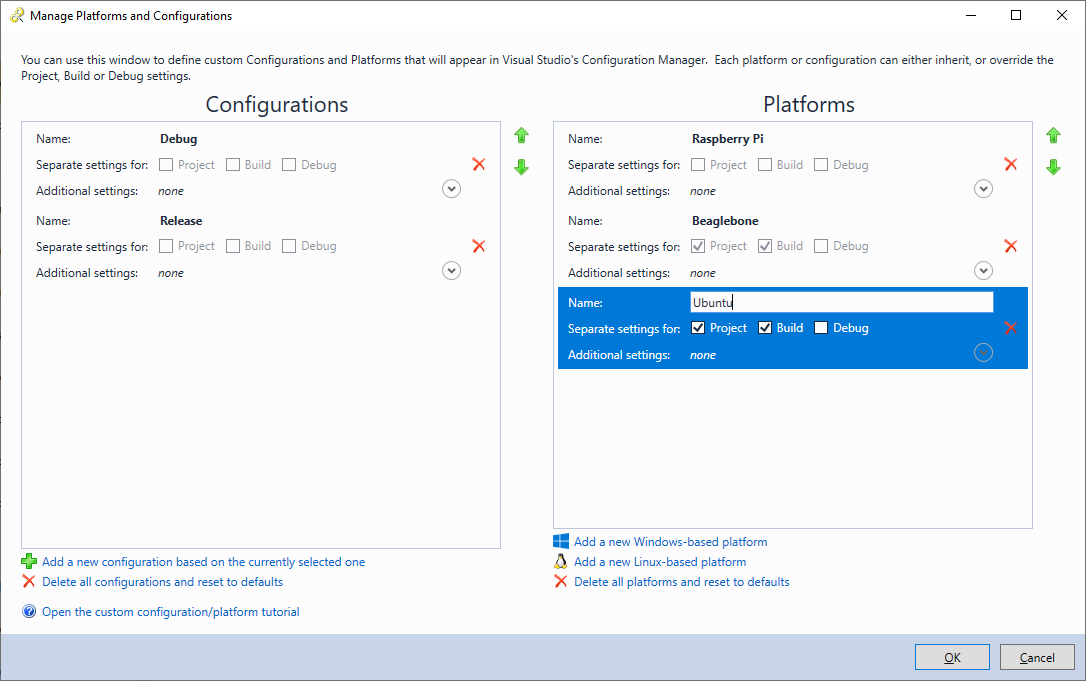
- First, remove the RelWithDebInfo and MinSizeRel configurations and rename the VisualGDB platform to Raspberry Pi. Then click “Add a new Linux-based platform”:

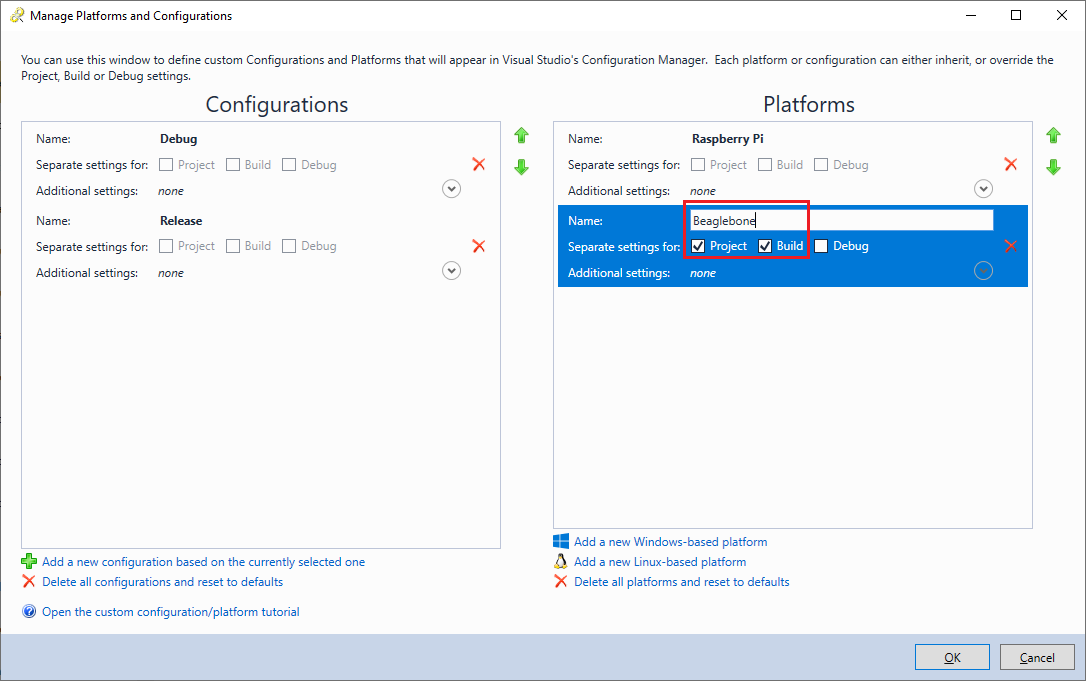
- Make sure that the added platform has separate Project and Build settings. This will allow specifying a different deployment host (Project Settings) and a different toolchain (Build Settings):
 Note that the Debug and Release configurations of the same platform will share the same settings. If you would like to change this behavior, check the “Separate Settings” check boxes for each configuration that should have its own settings. If both a platform and a configuration override the same group of setting (e.g. Build), VisualGDB will keep a separate copy of that setting group for each affected Platform/Configuration combination.
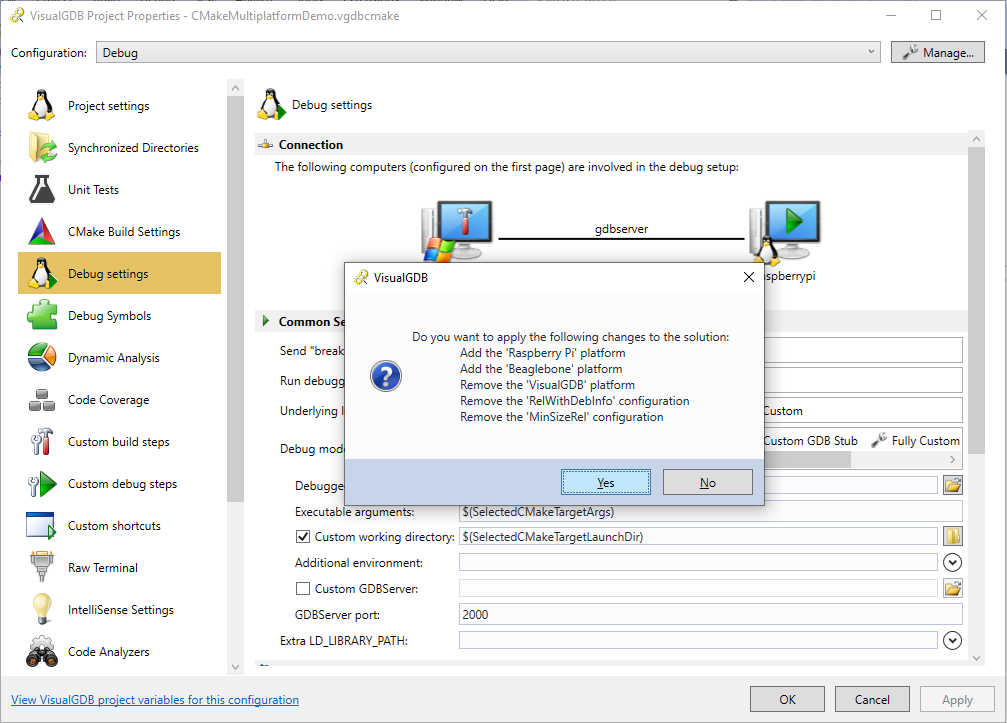
 - Press OK to proceed with updating the configurations. VisualGDB will update the project and will suggest updating the solution configurations/platforms as well. Click “Yes” to proceed:
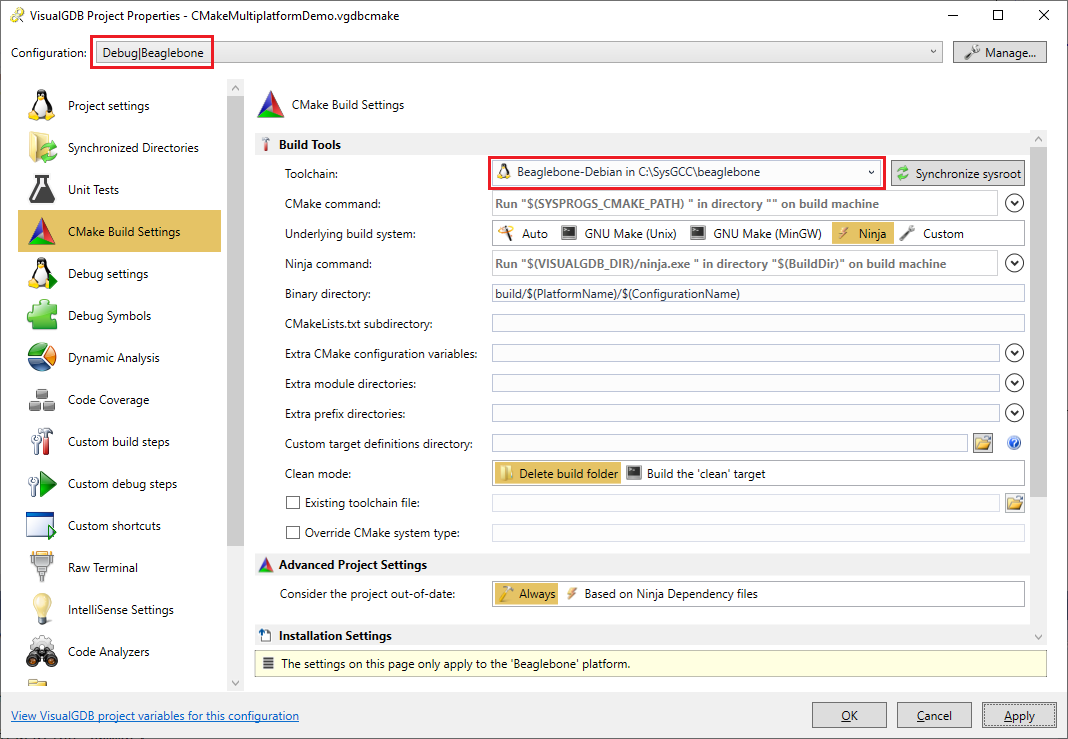
- Make sure the new Beaglebone platform is selected and change the toolchain to Beaglebone-Debian. Note how VisualGDB shows the scope of the currently shown settings at the bottom of the page:
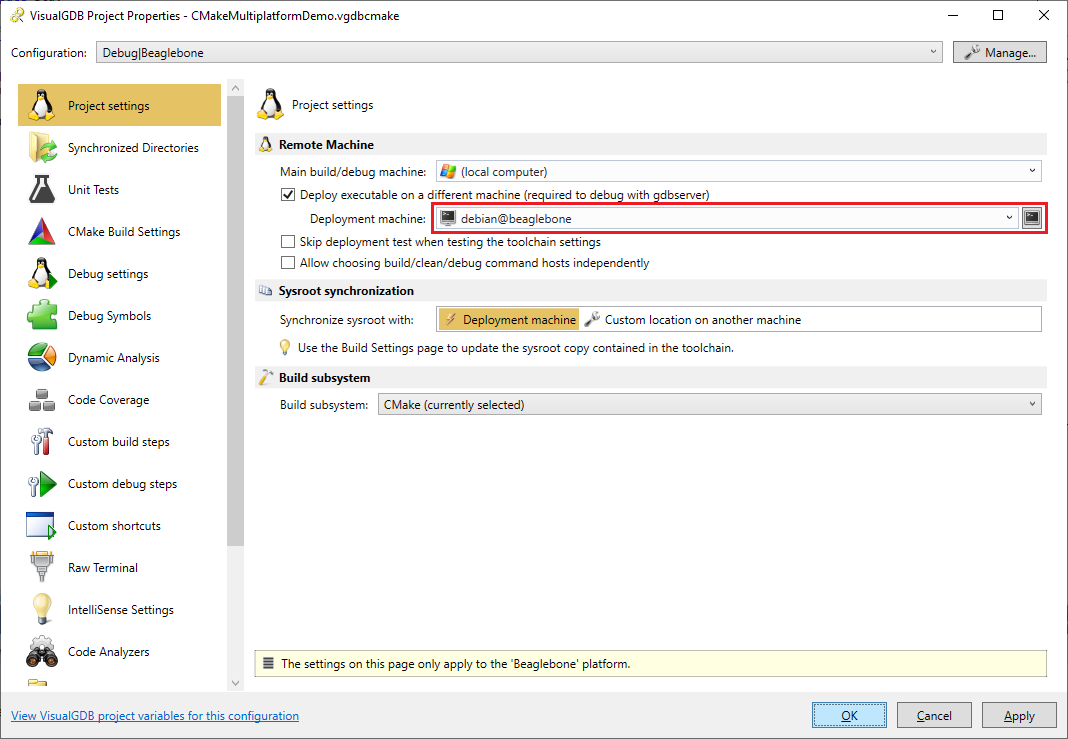
- Go to the Project Settings page and change the deployment machine to beaglebone:
- Now you will be able to switch between the Raspberry Pi and Beaglebone platforms using the Visual Studio’s platform selector:

- Try building the project for Beaglebone and verify the host name from the program output:

- Now we will add another platform targeting an Ubuntu machine that does not have a cross-toolchain. Open the VisualGDB Platform/Configuration Manager and add another Linux platform overriding Project and Build settings:
- Make sure the new platform is selected and switch the build/debug machine to your Ubuntu target. Also disable the deployment using a checkbox below:

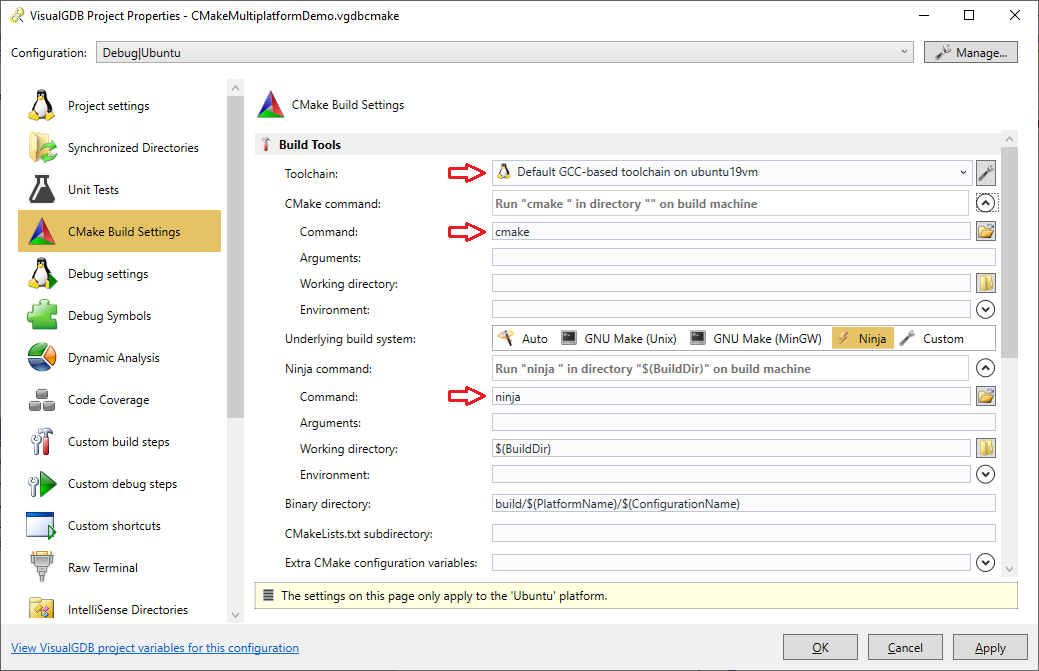
- VisualGDB will initially copy the Windows paths of cmake and ninja tools, that won’t work on the Linux machine. Replace them with the Linux paths and select the default GCC-based toolchain on the target:
- Now you will be able to build the project for the Ubuntu machine by selecting the Ubuntu platform:
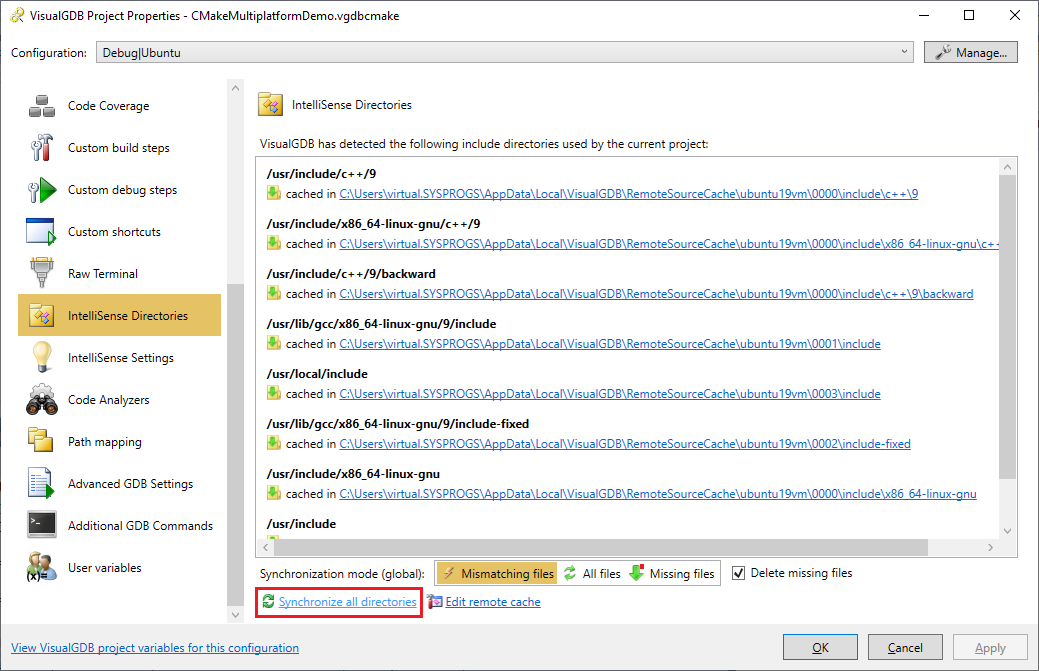
- If this is your first project targeting Ubuntu on that machine, you can update the cached IntelliSense directories using the Synchronize all directories button as shown below:
- Finally, we will add another platform to the project, that will build the code on Windows using a MinGW toolchain. Select the Beaglebone platform and click “Add a new Windows-based platform“. This will copy the applicable settings (e.g. Windows paths to CMake and Ninja) from the Beaglebone platform, so you won’t need to specify them manually. Then add “IS_WINDOWS_BUILD=1” to the Additional CMake Definitions field:
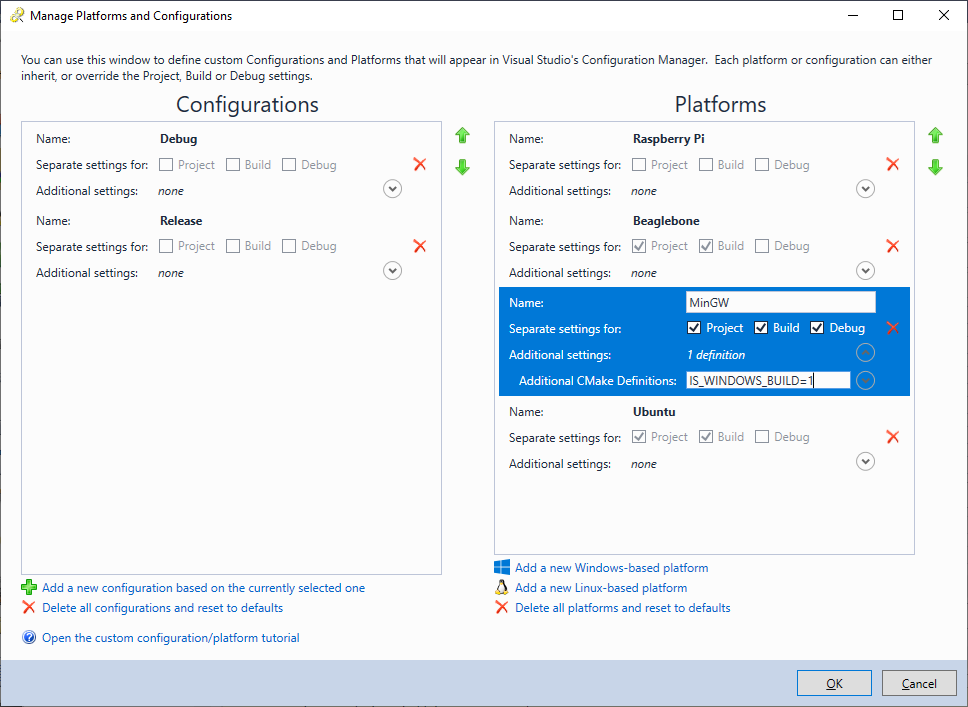 We will use the IS_WINDOWS_BUILD definition to check whether the code is being built for a Linux, or Windows target. Note that both configurations and platforms can provide additional CMake definitions, and VisualGDB will merge them together based on the selected configuration/platform.
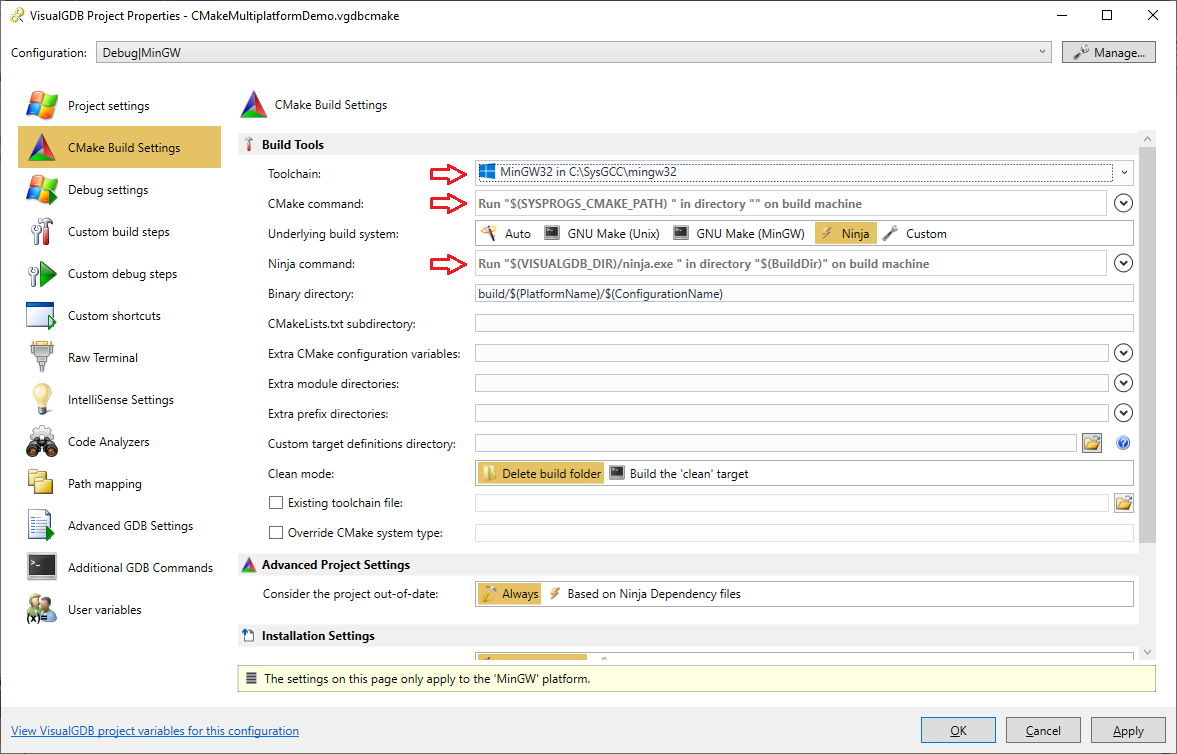
 - Go to the CMake Build Settings page of VisualGDB Project Properties and select a MinGW-based toolchain. Also make sure that the CMake and Ninja paths are valid for the Windows machine:
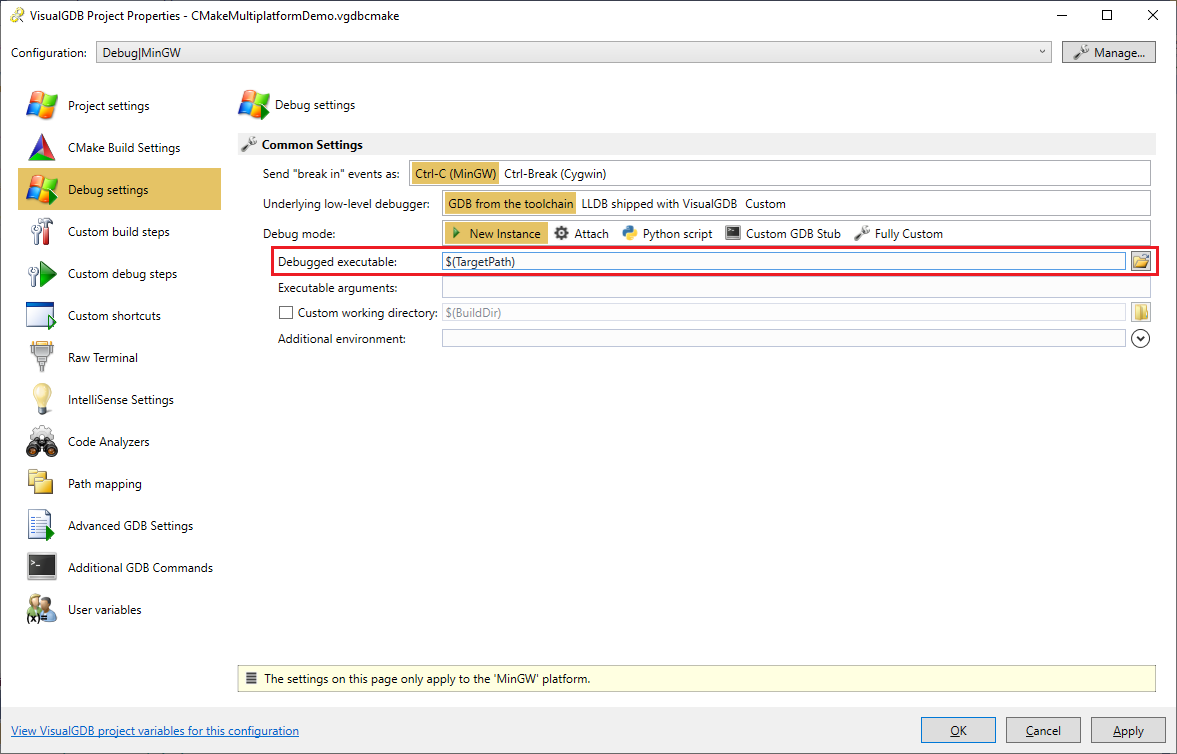
- On the Debug Settings page, set “Debugged Executable” to $(TargetPath):
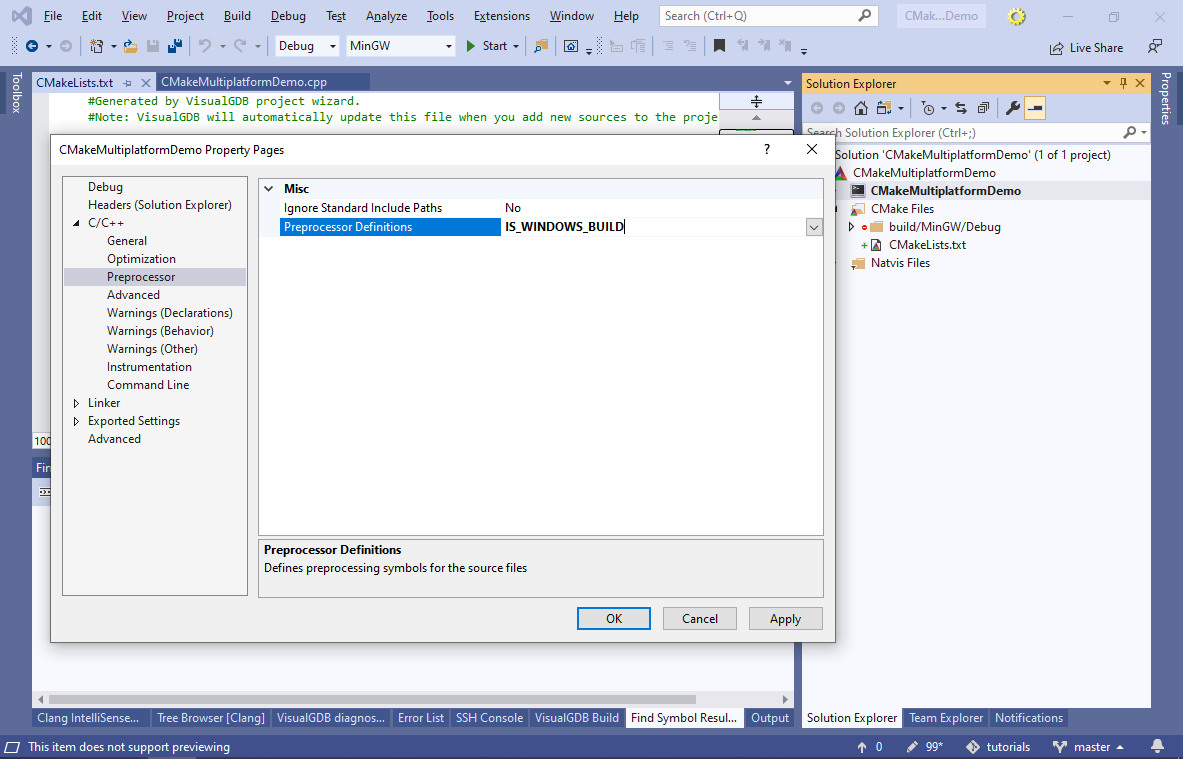
- Note that the IS_WINDOWS_BUILD definition specified when creating the platform, is a CMake-level definition. It does not automatically translate to a C/C++ macro. To check the current platform from the source code, we will need to first define the IS_WINDOWS_BUILD preprocessor macro, and then make it conditional to the CMake-level IS_WINDOWS_BUILD definition. Open VS Properties for the main executable and add the IS_WINDOWS_BUILD definition:
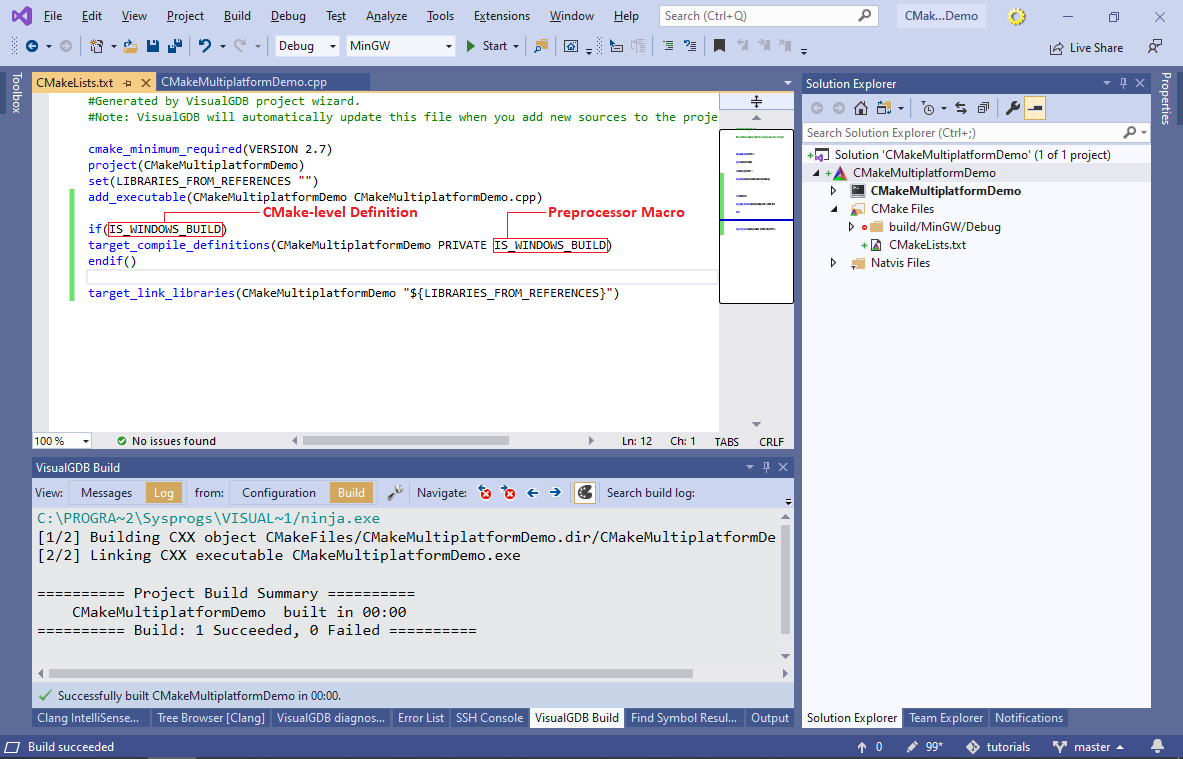
- VisualGDB will update the CMakeLists.txt file to define IS_WINDOWS_BUILD for CMakeMultiplatformDemo. Put that statement inside an if()/endif() block as shown below:
if(IS_WINDOWS_BUILD)
target_compile_definitions(CMakeMultiplatformDemo PRIVATE IS_WINDOWS_BUILD)
endif()
- Finally, update the main source file to check for the definition:
#include <iostream>
#include <unistd.h>

using namespace std;

int main(int argc, char *argv[])
{
    char tmp[512];
#ifdef IS_WINDOWS_BUILD
    strcpy(tmp, "Windows");
#else
    gethostname(tmp, sizeof(tmp));
#endif
    cout << "The current host name is " << tmp << std::endl;
	return 0;
}
Now you will be able to build the project for both Windows and Linux:

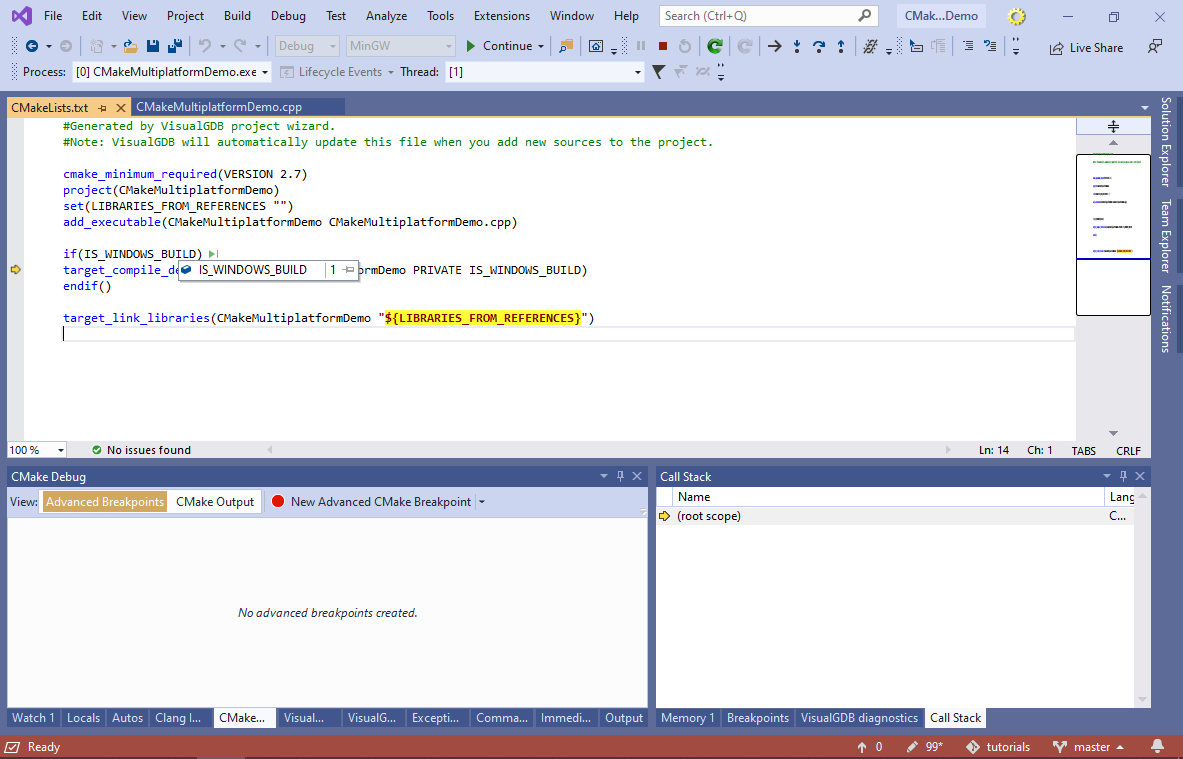
- You can troubleshoot CMake configuration issues by using VisualGDB’s CMake debugger. Simple right-click on the project node in Solution Explorer and select “Launch CMake Debugger” to step through the CMake scripts, set breakpoints and evaluate CMake-level variables:
 Note that the same Advanced CMake Project can cover multiple CMakeLists.txt files, defining multiple targets. You can use the if()/endif() syntax together with configuration-specific or platform-specific definitions to declare targets that will only appear for certain platforms/configurations. Common settings (such as toolchain, or debugging parameters) will be reused for all targets inside the same Advanced CMake Project.
You can find the source code of the project shown in this tutorial in our Github Repository.