Creating a Basic Live Watch Plugin
This tutorial shows how to create a basic Live Watch plugin that can be used to quickly show the relevant information about your program in the Live Watch window. We will first create a basic C++ project running on an STM32 device, and will then proceed to creating a Live Watch plugin that will show advanced information about this project. Note that the Live Watch functionality is not limited to STM32. It works on any device that supports background memory reads (most modern ARM Cortex devices, RISC-V, including ESP32C3, but not MSP430 or Xtensa-based ESP32).
Although the Live Watch plugins are developed using C#, this tutorial does not require any prior C# knowledge, shows every necessary setup step, and explains the key differences between C# and C++ that are relevant for developing of the Live Watch plugins.
Both projects created in this tutorial can be obtained from our GitHub repository.
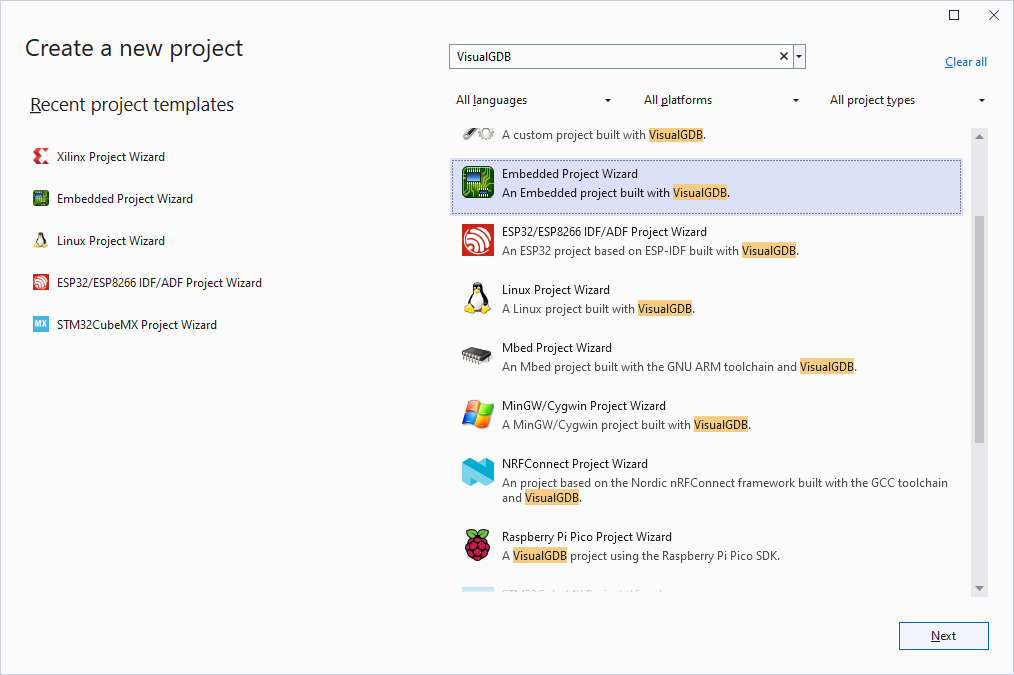
- Start Visual Studio and locate the VisualGDB Embedded Project Wizard:
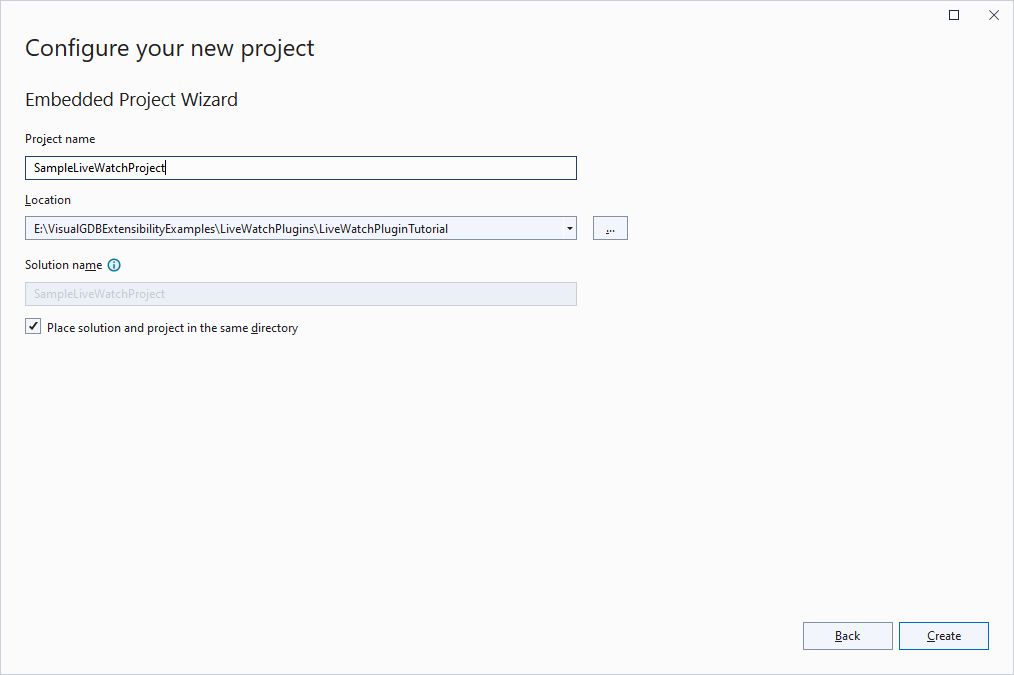
- Enter the name and location for your project:
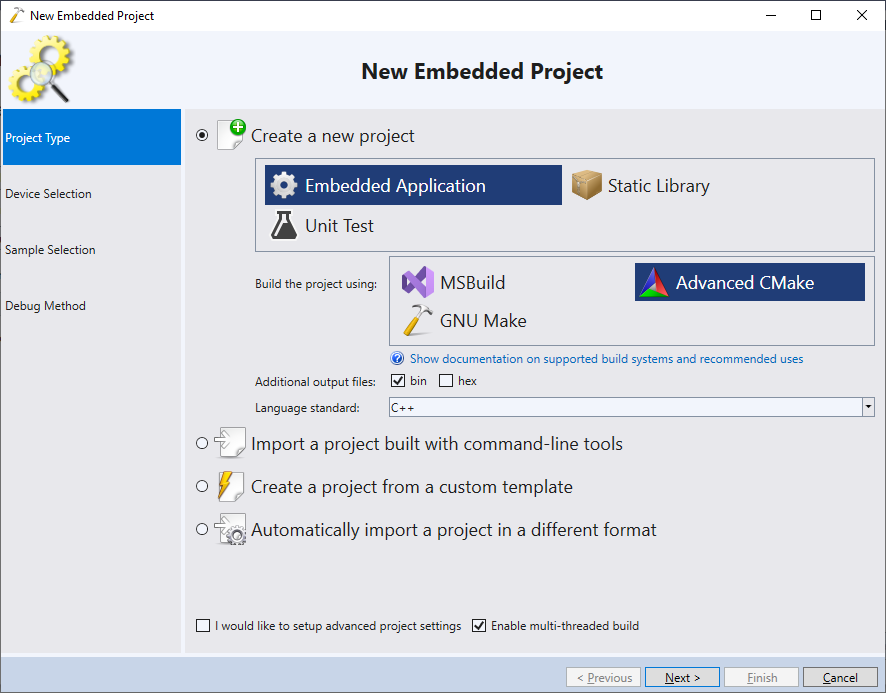
- Proceed with creating an embedded application. In this tutorial we will use Advanced CMake, however any other build system (e.g. MSBuild) will work as well:
- Select the embedded device you would like to target. Any device that supports background memory reads will work:

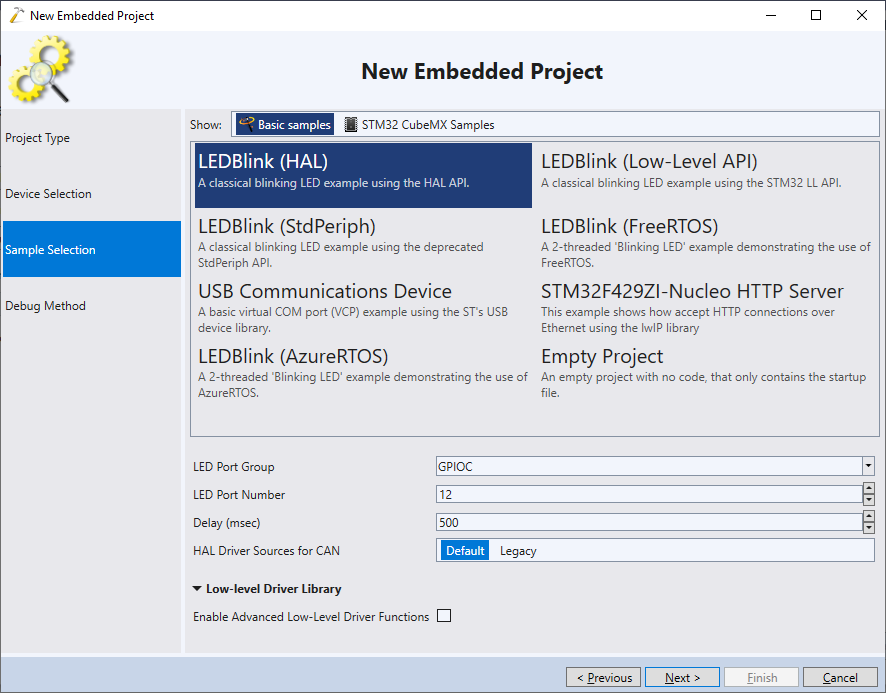
- Pick a sample project to clone. We suggest cloning the most basic sample possible to avoid interference between the code in the sample and the code we will be adding:
- Finally, select your debugging settings and click “Finish” to generate the project:

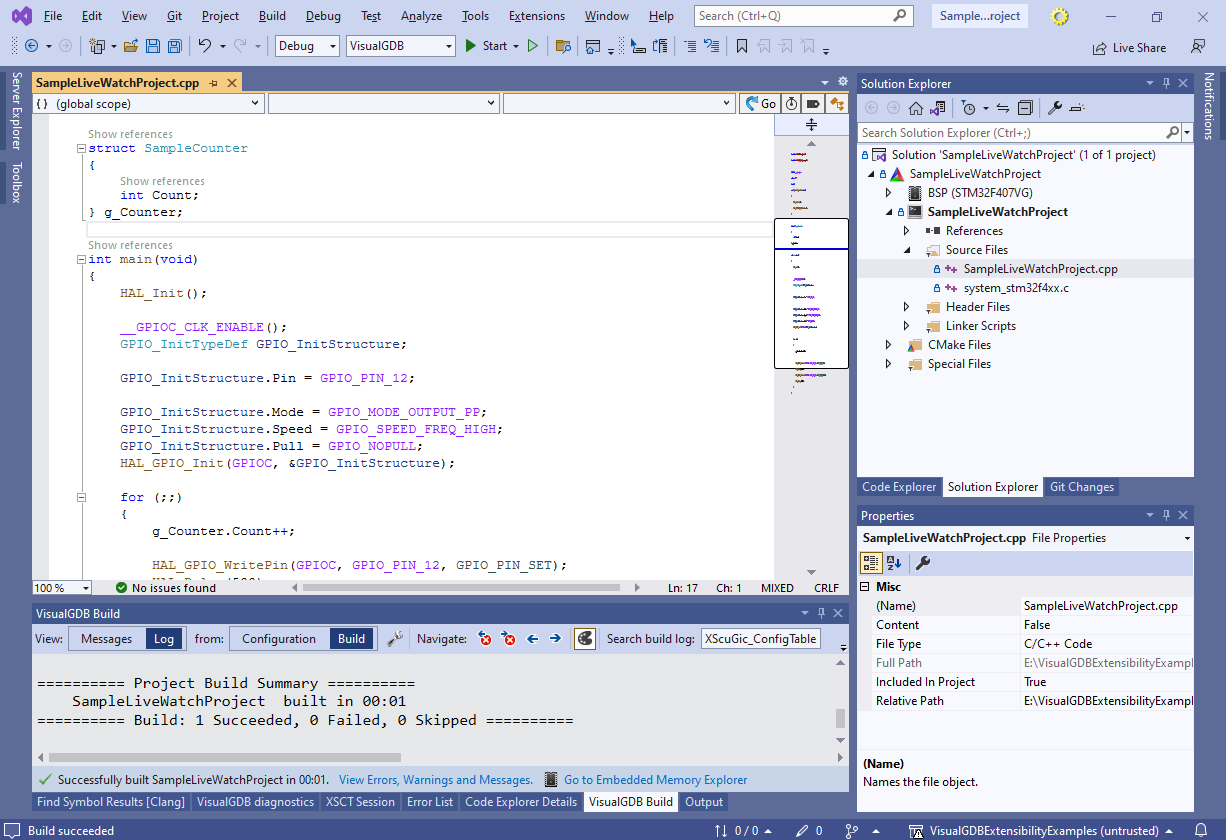
- Once the project has been created, add the following code to the main file:
struct SampleCounter
{
    int Count;
} g_Counter;
then modify the main loop to periodically increment the value of Count:
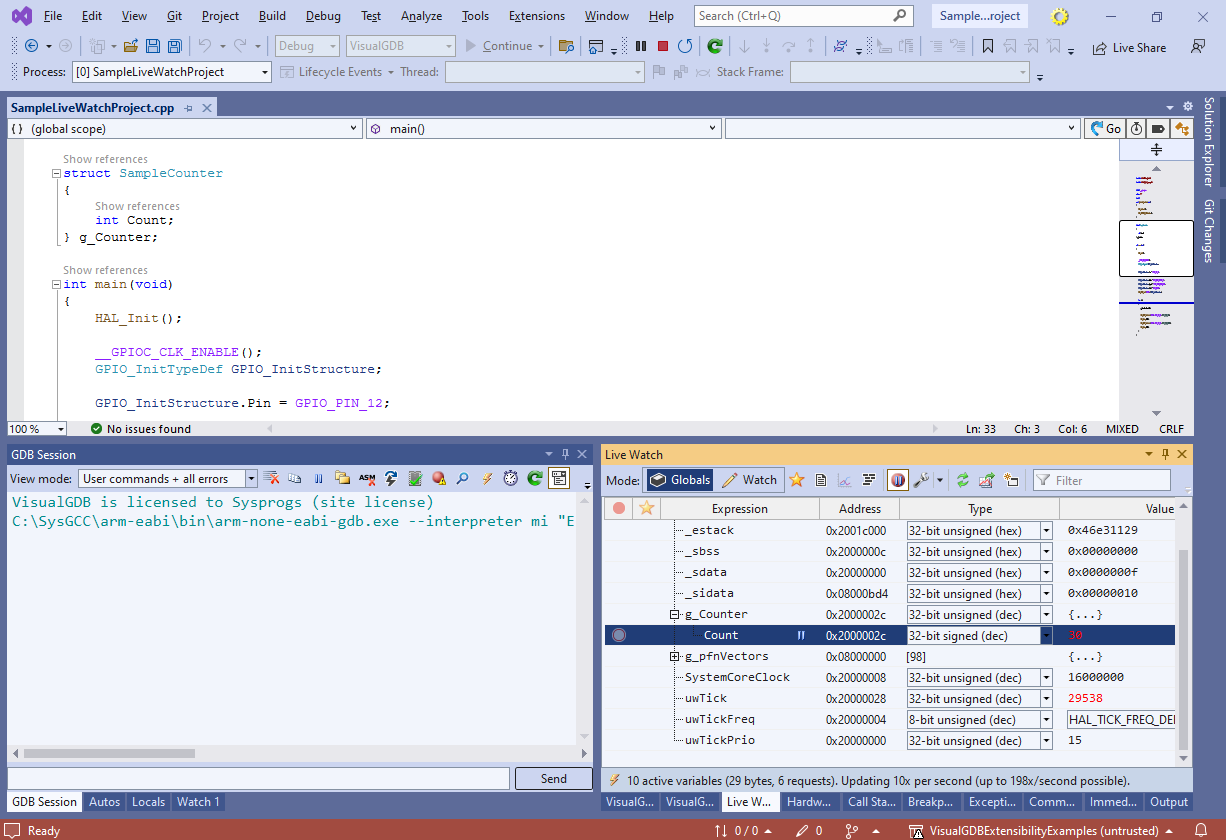
- Press F5 to start debugging. Use the Debug->Windows->Live Watch command to display the Live Watch view and locate the g_Counter.Count member in it:
 The Globals view in the Live Watch window can help you quickly locate different variables and tag them as favorite, however it cannot automatically group them based on meaning, or do advanced operations like parsing linked lists. In order to support that, we will be creating a Live Watch plugin that can explicitly read the relevant variables in the program, and explicitly create a tree of Live Watch nodes following any layout that shows the relevant information the best way.
 - Before you begin creating the plugin, make sure you have installed the .Net desktop development support via Tools->Get Tools and Features, or by launching the Visual Studio installer via the Start menu:

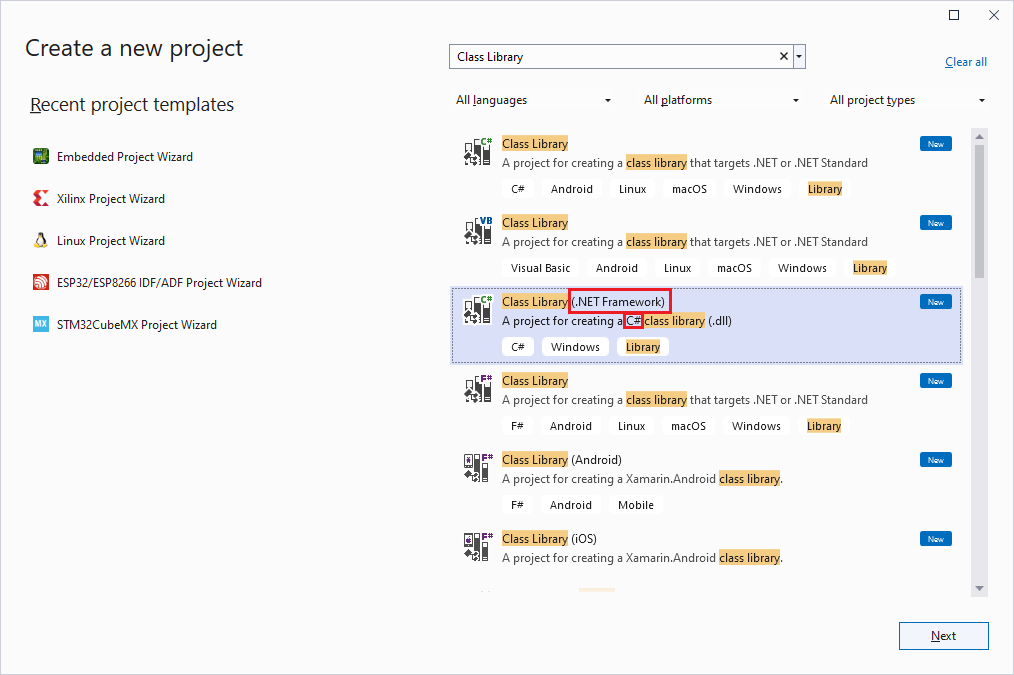
- Close the previously created VisualGDB project and open the C# Class Library (.NET framework) wizard. Make sure you do not use the .NET Core/.NET Standard wizard:
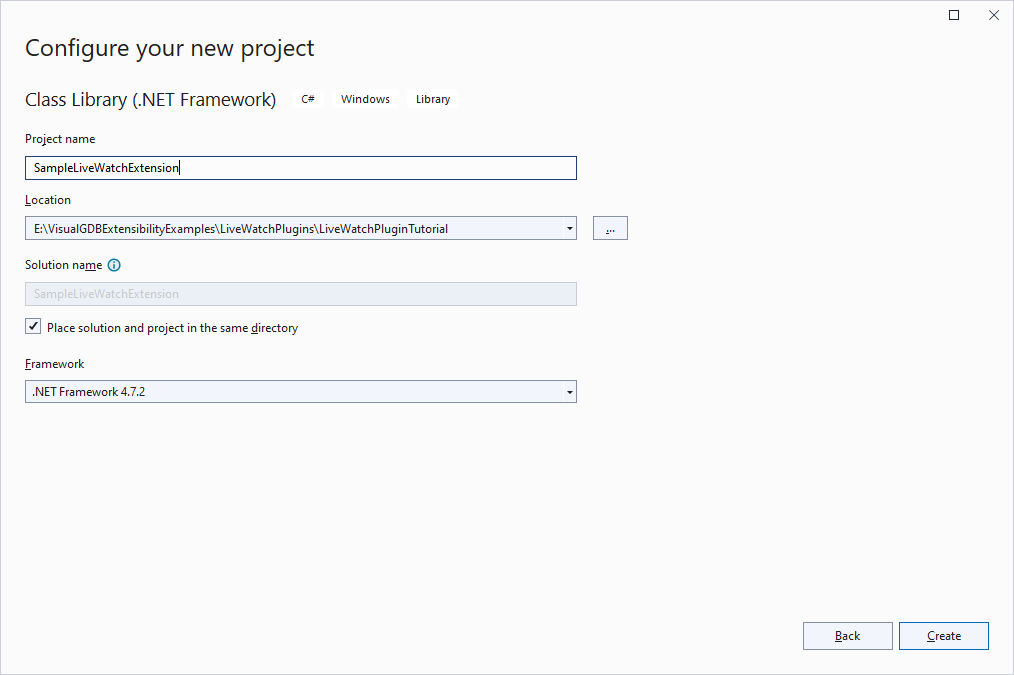
- Enter the name and location for the plugin project:
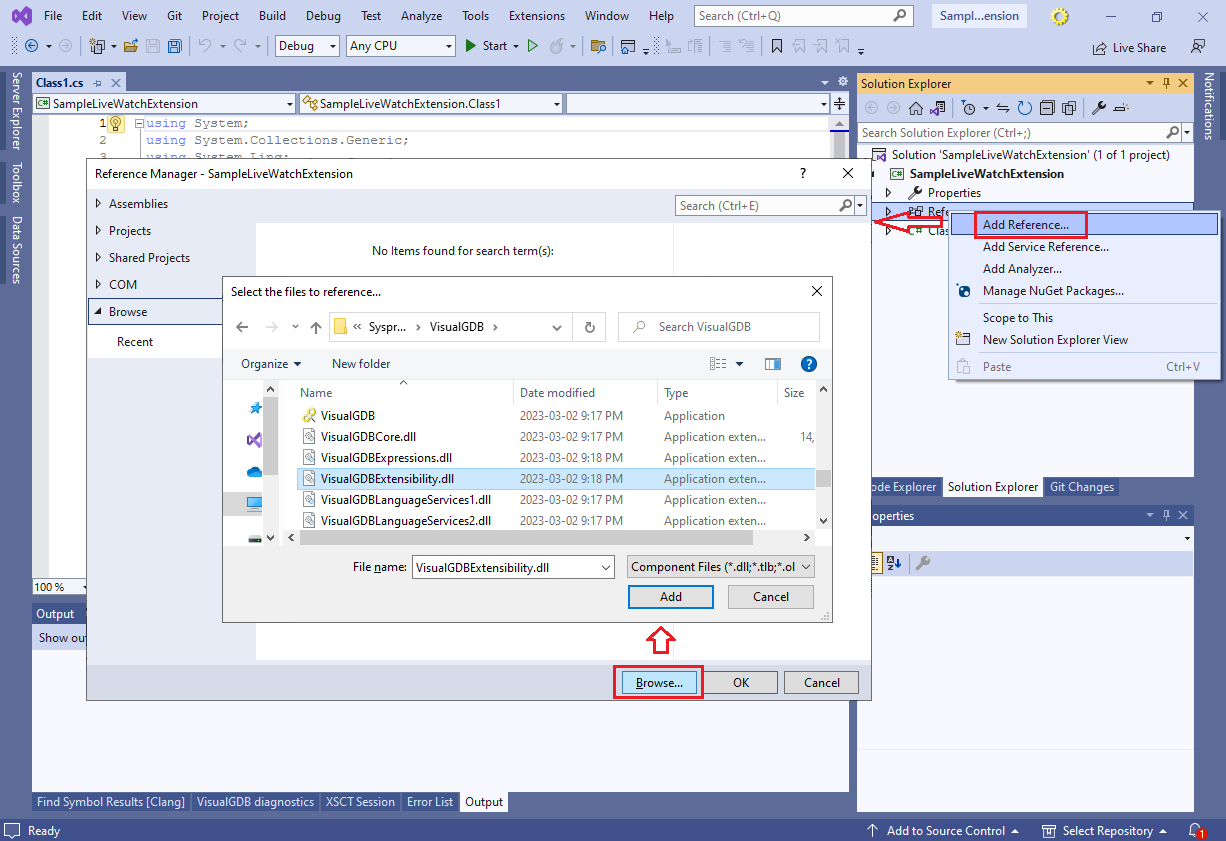
- Right-click on the References item in Solution Explorer and click “Add Reference“. Then go to the “Browse” tab, click the “Browse” button and select the C:\Program Files (x86)\Sysprogs\VisualGDB\VisualGDBExtensibility.dll file:
 If the reference list looks different from the screenshot, you might have accidentally created a .Net Standard project. If this is the case, please re-create it using the .Net Framework wizard.
 - Locate the Class1 class created by the wizard, rename it to SimpleLiveWatchExtensionPlugin (don’t use the same name as the project name!), and modify it to implement the ILiveWatchPlugin interface:
public class SampleLiveWatchExtensionPlugin : ILiveWatchPlugin
{
}
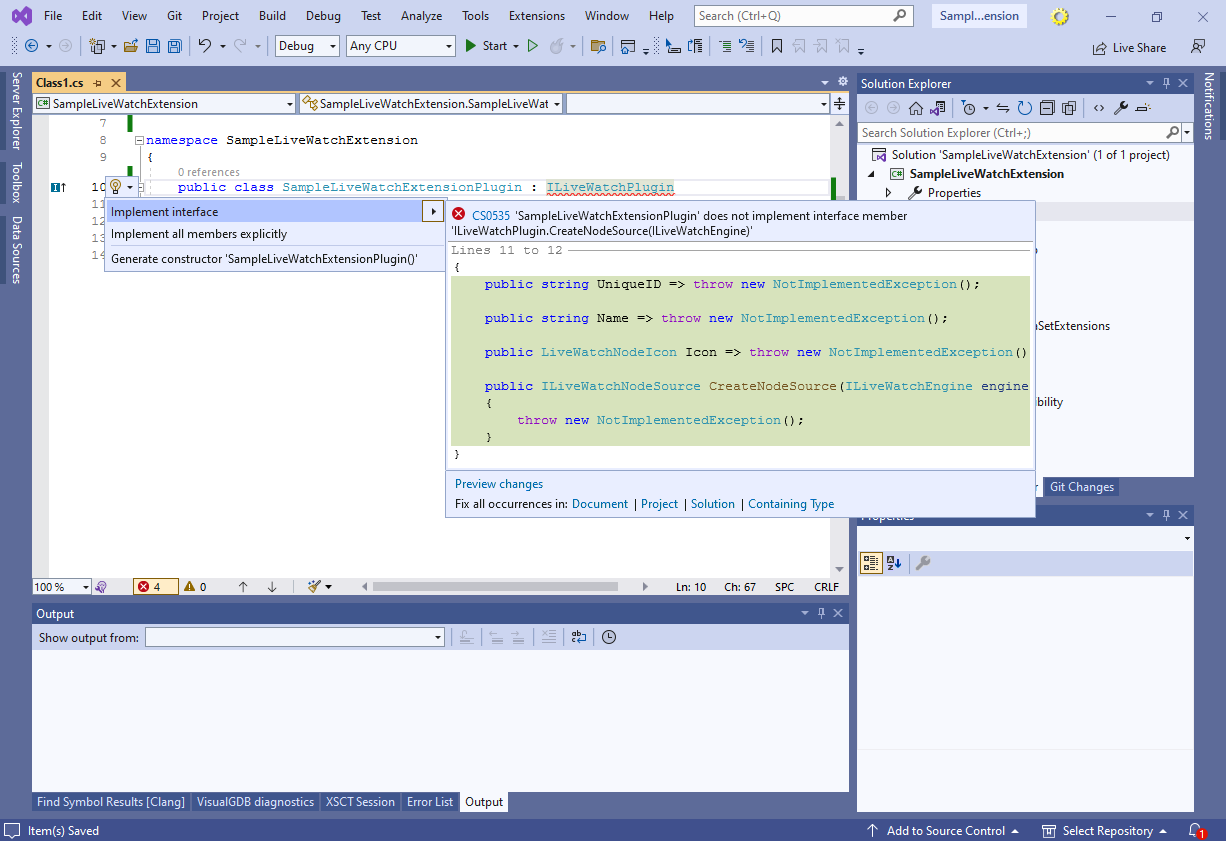
Then, navigate to the ILiveWatchPlugin word and press Ctrl+. so that Visual Studio will automatically implement the interface, and then customize it to return meaningful values:
 A minimal implementation will look like this:
    public class SampleLiveWatchExtensionPlugin : ILiveWatchPlugin
    {
        public string UniqueID => "com.sysprogs.example.livewatch.sample";
        public string Name => "Sample Plugin";
        public LiveWatchNodeIcon Icon => LiveWatchNodeIcon.Graph;
        public ILiveWatchNodeSource CreateNodeSource(ILiveWatchEngine engine)
        {
            return new SampleLiveWatchNodeSource();
        }
    }
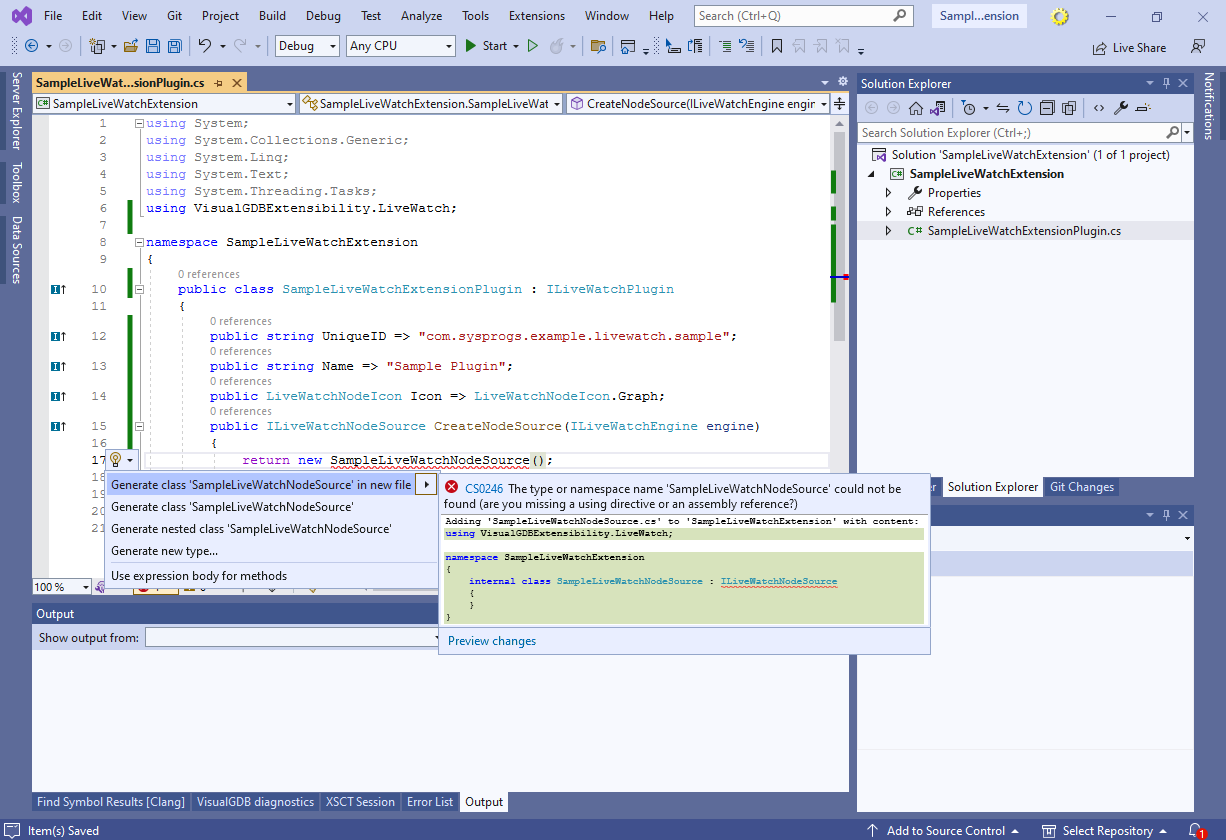
- Navigate to the SampleLiveWatchNodeSource word and press Ctrl+. again so that Visual Studio will generate the SampleLiveWatchNodeSource class for you:
- Similarly, generate an automatic implementation for ILiveWatchNodeSource and tweak it to return meaningful values, e.g.:
    internal class SampleLiveWatchNodeSource : ILiveWatchNodeSource
    {
        ILiveWatchNode[] _Nodes;

        public SampleLiveWatchNodeSource()
        {
            _Nodes = new ILiveWatchNode[]
            {
                new CounterListNode()
            };
        }

        public void Dispose()
        {
        }

        public ILiveWatchNode[] PerformPeriodicUpdatesFromBackgroundThread() => _Nodes;
    }
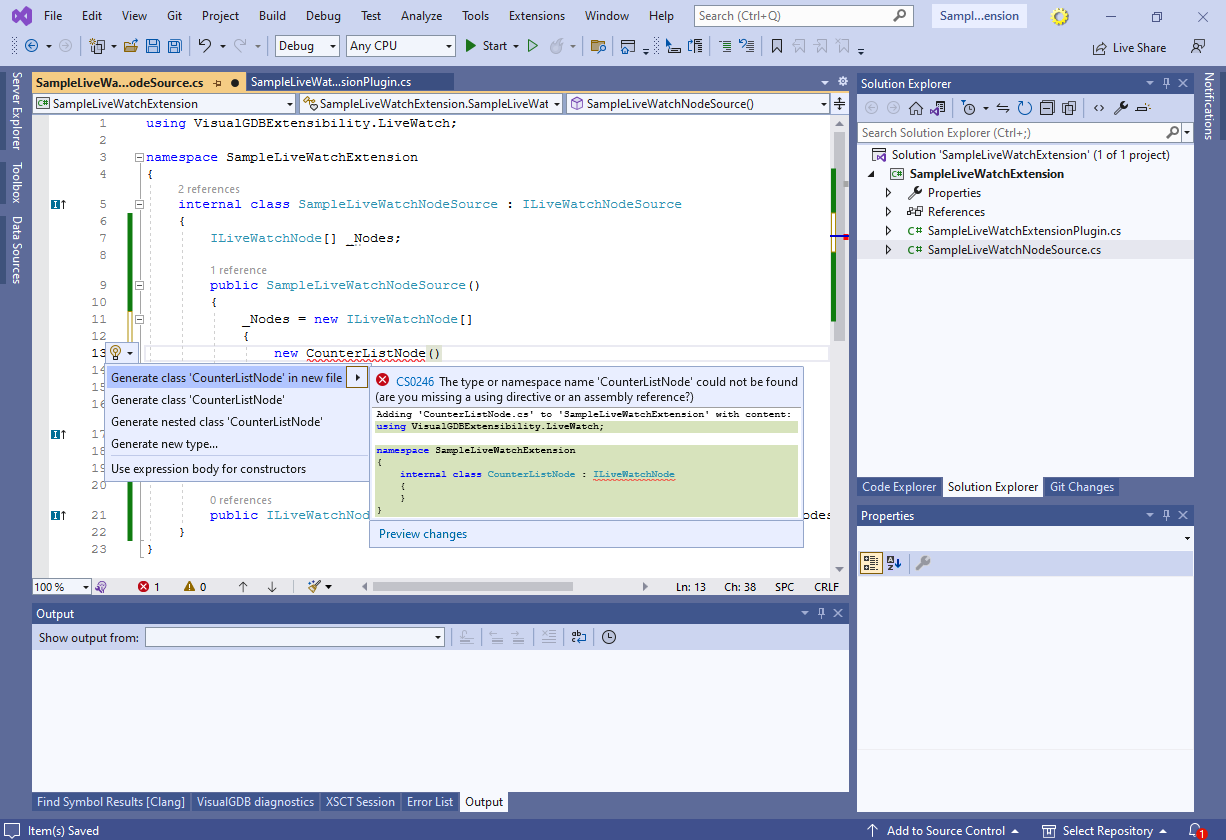
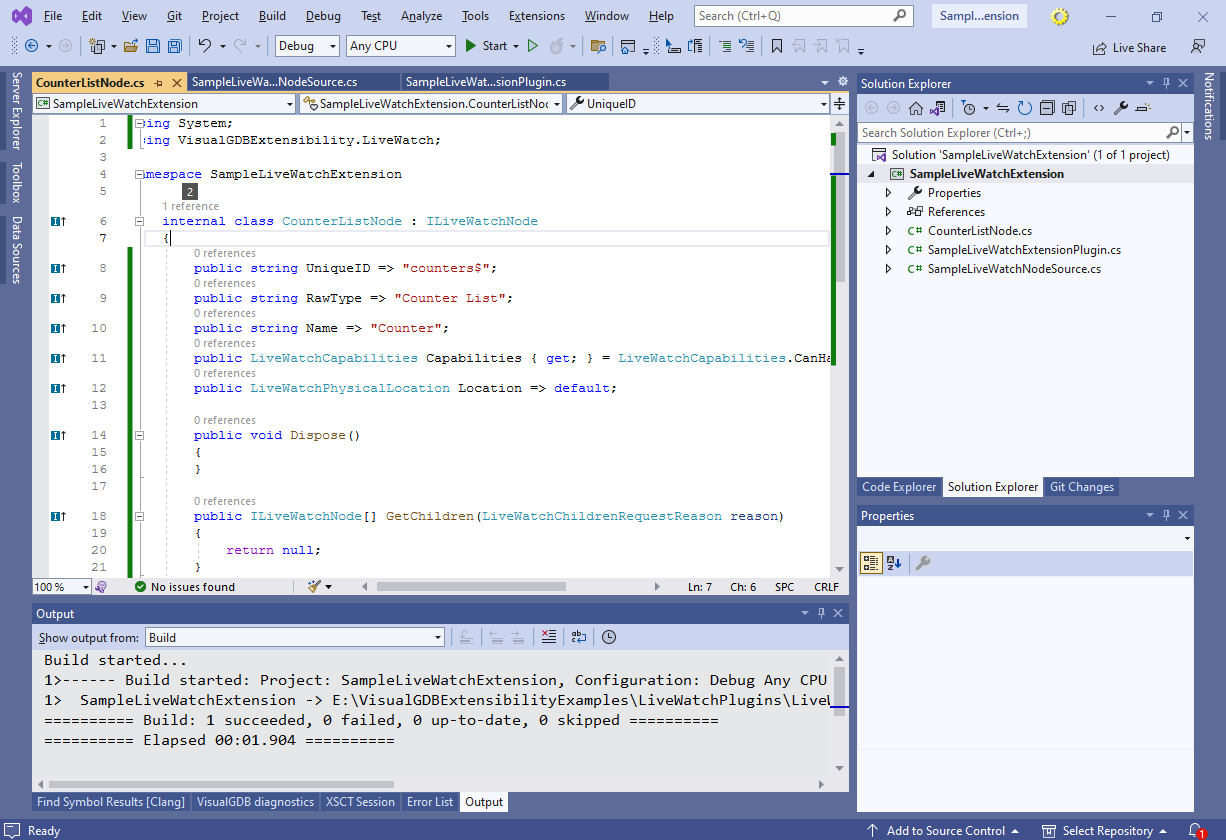
when done, generate a class for CounterListNode as well:
 Note that C# objects created with ‘new‘ do not need to be explicitly deleted; the .Net runtime will figure it out automatically in the background. However, some objects (e.g. Live watch nodes or Live Watch node sources) can benefit from an explicit cleanup method, similar to the C++ destructors. Their classes typically implement the IDisposable interface and have the Dispose() method that is automatically called by VisualGDB when it decides that it the object won’t be needed anymore (e.g. at the end of the debug session). If you want to do any non-trivial cleanup associated with the objects you created (e.g. close log files), the Dispose() method would be the right place to add it. Trivial cleanup, like deleting other objects created with new() is done by the .Net framework automatically.
 - Finally, generate an implementation for ILiveWatchNode and tweak it to return meaningful values, e.g.:
    internal class CounterListNode : ILiveWatchNode
    {
        public string UniqueID => "counters$";
        public string RawType => "Counter List";
        public string Name => "Counter";
        public LiveWatchCapabilities Capabilities { get; } = LiveWatchCapabilities.CanHaveChildren;
        public LiveWatchPhysicalLocation Location => default;

        public void Dispose()
        {
        }

        public ILiveWatchNode[] GetChildren(LiveWatchChildrenRequestReason reason)
        {
            return null;
        }

        public void SetSuspendState(LiveWatchNodeSuspendState state)
        {
        }

        public void SetValueAsString(string newValue) => new NotImplementedException();

        public LiveWatchNodeState UpdateState(LiveWatchUpdateContext context)
        {
            return new LiveWatchNodeState { Value = "Changed" };
        }
    }
now you can build the extension project and it should succeed:
 In this tutorial we have created a very basic node source that creates 1 node in its constructor, and then continuously returns just that node. In more complex examples, the PerformPeriodicUpdatesFromBackgroundThread() method could check some of the target’s variable values and decide to create/remove some nodes. Note that VisualGDB will automatically call the node’s Dispose() method if it is no longer reported by the node source or the parent node. You could use it to clean up any resources used by the node (we will cover it later).
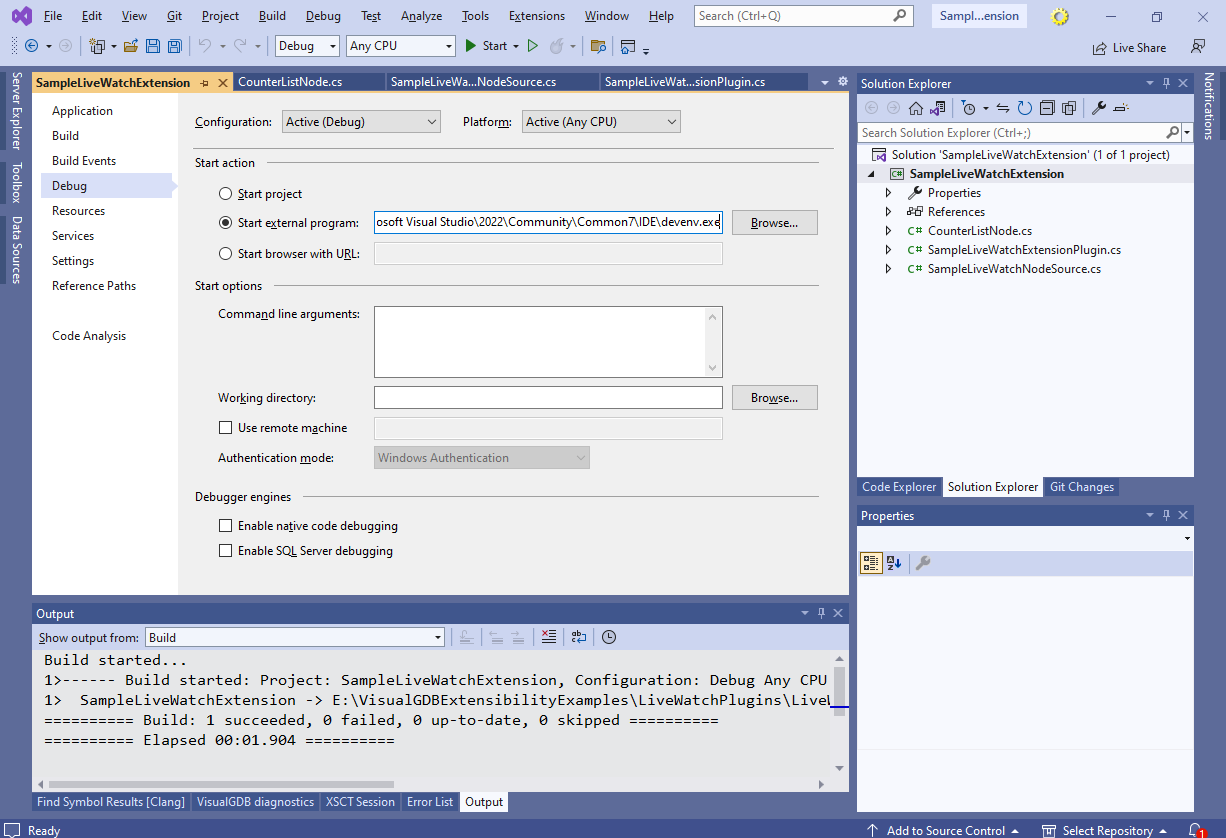
 - Before you can try out the plugin, you need to do 3 additional steps. First, configure the project to launch the Visual Studio process when you hit F5 via Project Properties -> Debug – >Start External Program -> <Visual Studio Path>\Common7\IDE\devenv.exe:
- Then, register the plugin with VisualGDB by creating a plugin.xml file in %LOCALAPPDATA%\VisualGDB\LiveWatchPlugins\<plugin ID> or <VisualGDB Directory>\LiveWatchPlugins\<plugin ID>:
<?xml version="1.0"?>
<LiveWatchPlugin xmlns:xsi="http://www.w3.org/2001/XMLSchema-instance" xmlns:xsd="http://www.w3.org/2001/XMLSchema">
	<UniqueID>com.sysprogs.example.livewatch.sample</UniqueID>
	<PluginModule>SampleLiveWatchExtension.dll</PluginModule>
	<PluginClass>SampleLiveWatchExtension.SampleLiveWatchExtensionPlugin</PluginClass>
	<SupportedMachineIDs>
		<int>40</int>
	</SupportedMachineIDs>
</LiveWatchPlugin>
The value of 40 corresponds to the ARM platform as defined in the ELF format documentation (see e_machine). It allows automatically filtering out the plugin for unsupported platforms. You can also add the following lines inside the LiveWatchPlugin definition to only load the plugin for projects that have the g_Counter symbol:
	<RequiredSymbols>
		<string>g_Counter</string>
	</RequiredSymbols>
Finally, copy or symlink the plugin DLL into the directory of the plugin.xml file, so that VisualGDB can load it automatically. If you use the mklink command (mklink <DLL name> <full path>), it will create a symbolic link to the DLL built with Visual Studio, so you won’t need to copy it after each build:

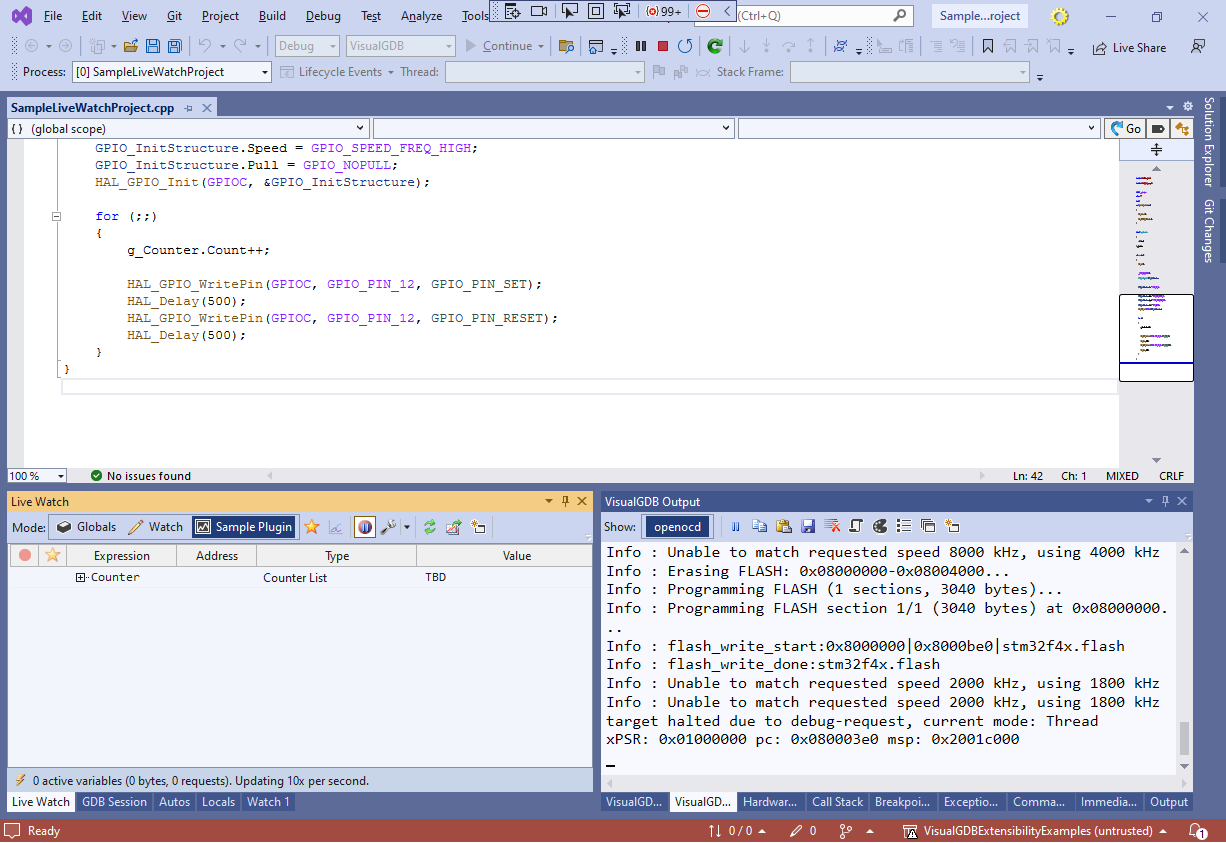
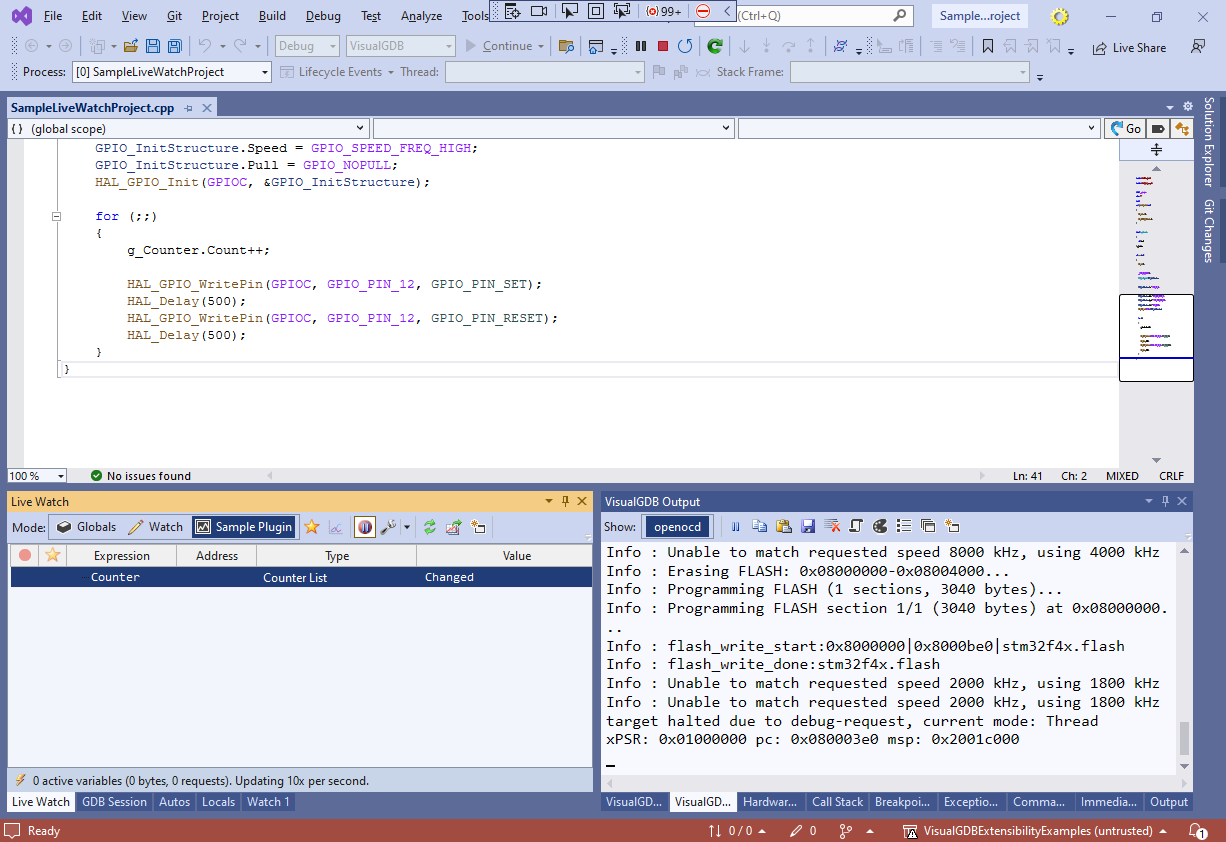
- Press F5 in the (outer) Visual Studio instance with the plugin. It will start another (inner) Visual Studio instance. Open the VisualGDB project in the inner instance and start debugging it as well. Note how the Sample Plugin view appears in the Live Watch window:
- Go to the outer Visual Studio instance and set a breakpoint in the UpdateState() method. Once it triggers, edit the code to return the value as “Changed”:
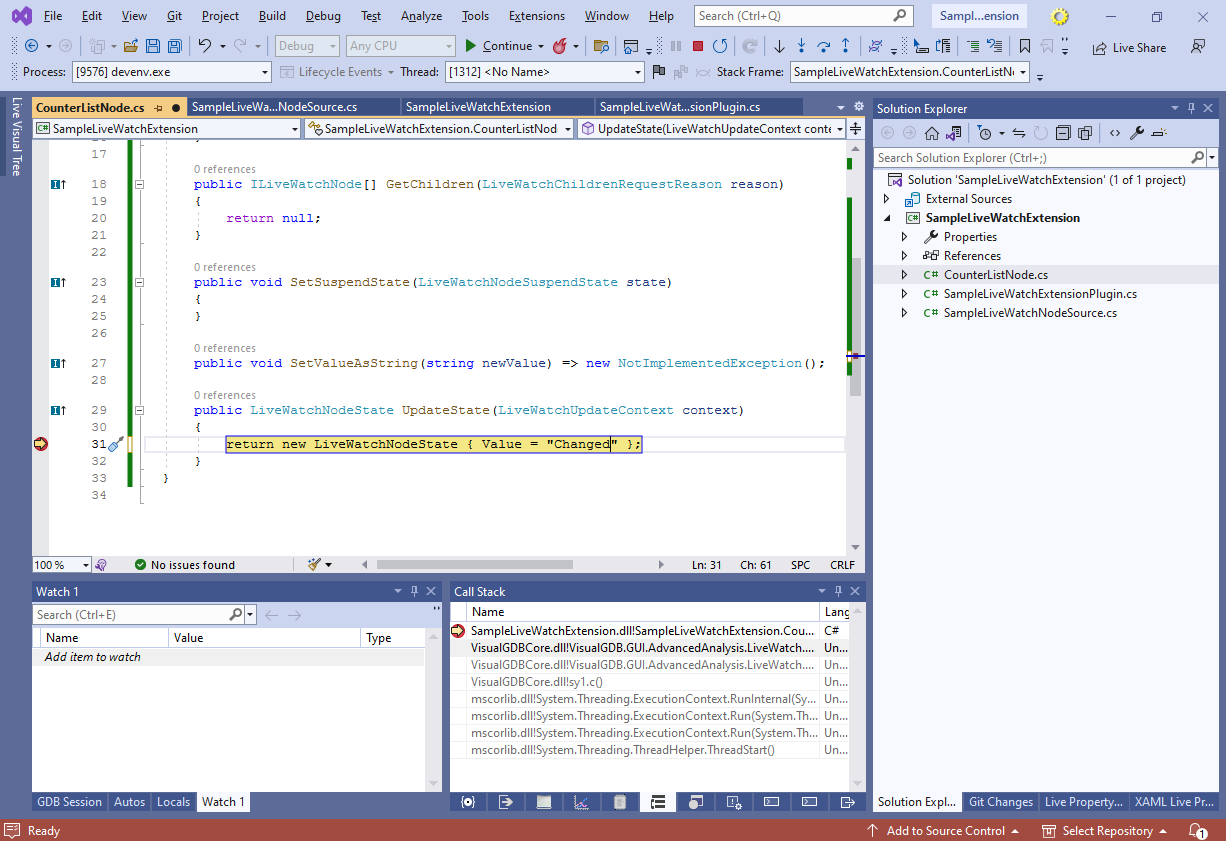
- Press F5 to continue. Visual Studio will automatically apply the changes to the plugin and you will see the “Changed” value immediately, without having to restart the inner Visual Studio. This is very convenient for quickly fixing or extending the plugins without having to restart the entire debug session:
Now that you have created a very basic (but not very functional) Live Watch plugin, follow our next tutorial to see how to make it display some useful values in a convenient way.
You can also find a detailed reference of Live Watch classes and interfaces here.