Developing C++ Programs for the Intel Edison Module with Visual Studio
This tutorial shows how to use VisualGDB to develop C/C++ programs for Intel Edison using Visual Studio and the Intel Edison SDK. Before you begin, install VisualGDB 5.0 or later.
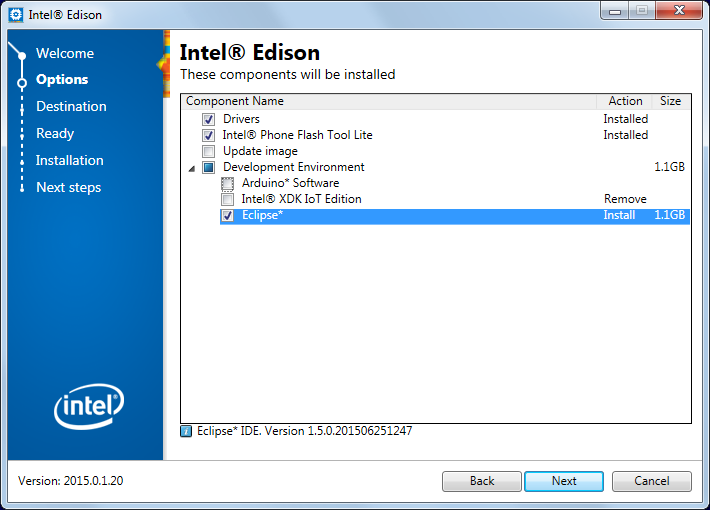
- Download the Intel Edison SDK Installer and run it. Ensure you select Eclipse under Development Environment as this will install the compiler and other files necessary to build and debug the code on Windows:
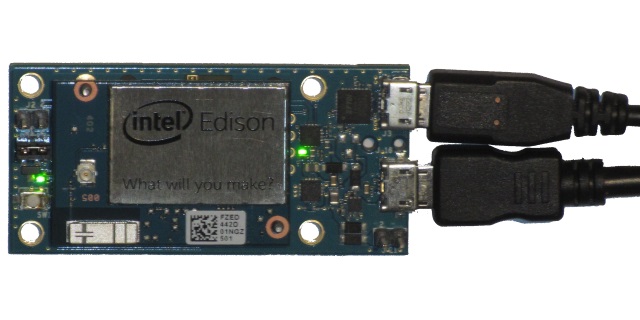
- Connect your Edison module to the computer using both USB connectors:
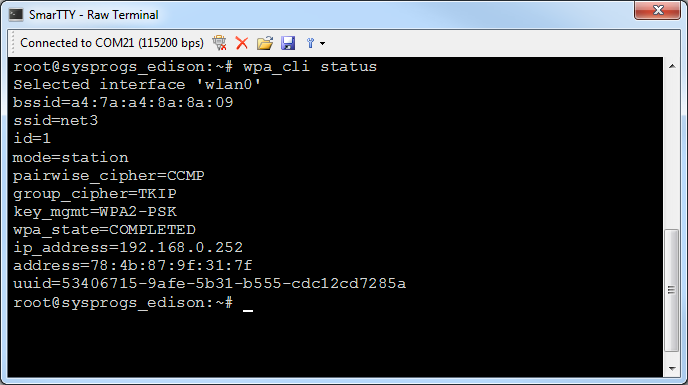
- Locate the Edison virtual COM port in the Device Manager and open it in a terminal program such as SmarTTY. If you have not configured your Edison module yet, tun the “configure_edison” command. Otherwise run the “wpa_cli status” command to see the IP address of the device:
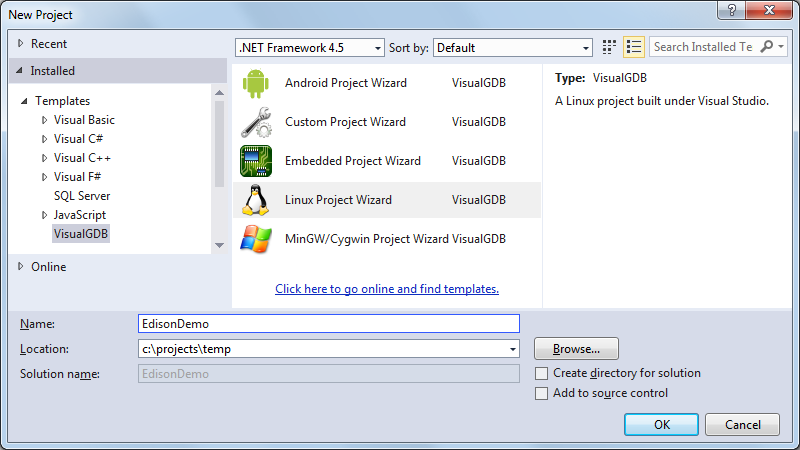
- Start Visual Studio. Select File->New->Project and choose the VisualGDB Linux Project Wizard:
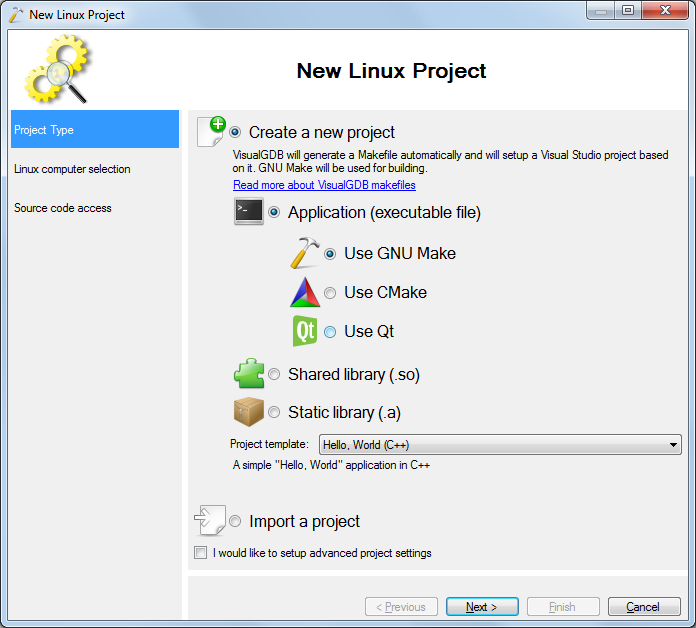
- Proceed with the default “Create new project” selection:
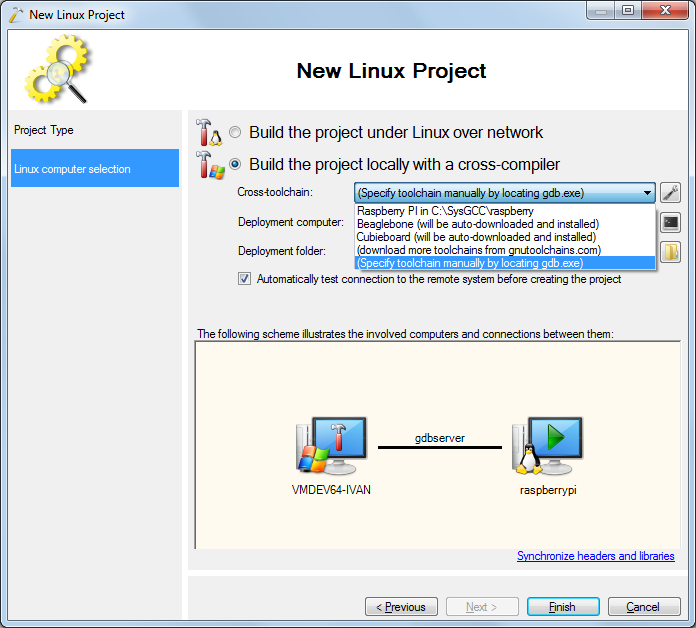
- Select “build the project locally” and then choose “Specify toolchain manually” in the cross-toolchain selector:
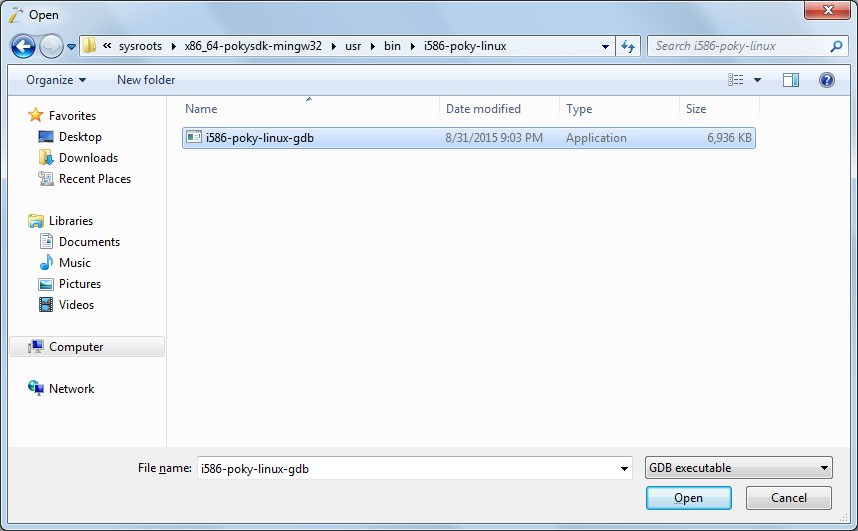
- Find the gdb binary in the Intel SDK directory. The default location for it is as follows:
C:\Intel\iotdk-ide-win\devkit-x86\sysroots\x86_64-pokysdk-mingw32\usr\bin\i586-poky-linux\i586-poky-linux-gdb.exe
- Select “Create a new SSH connection” in the “Deployment computer” and provide the settings for your Edison module:
Host Name (IP address shown in the output of “wpa_cli status”) User Name root Password (the password specified when running “configure_edison”) 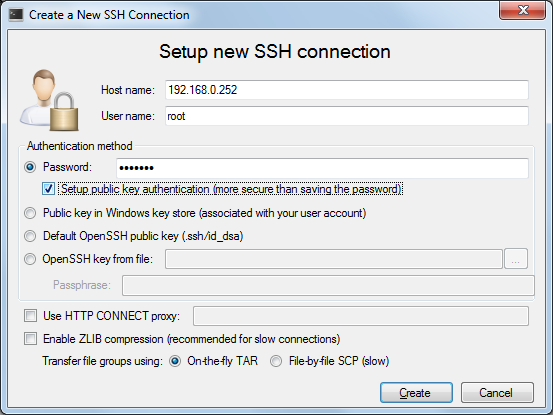
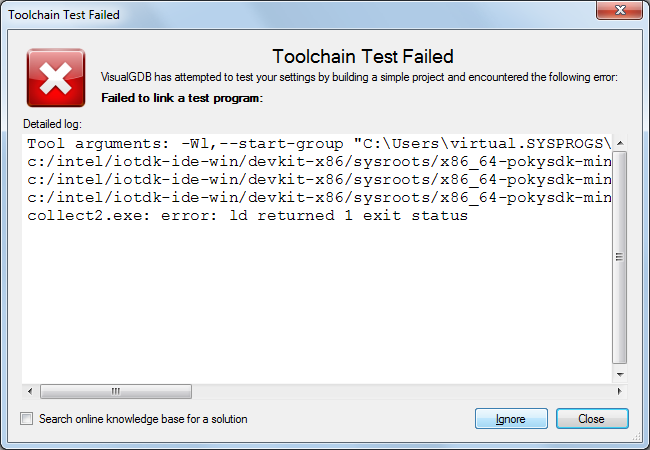
- Press “Finish” to generate your project. As the toolchain included with the Edison SDK is not configured with a correct sysroot path, the initial toolchain testing will fail. We will fix this once the project is created, so choose “Ignore” for now:
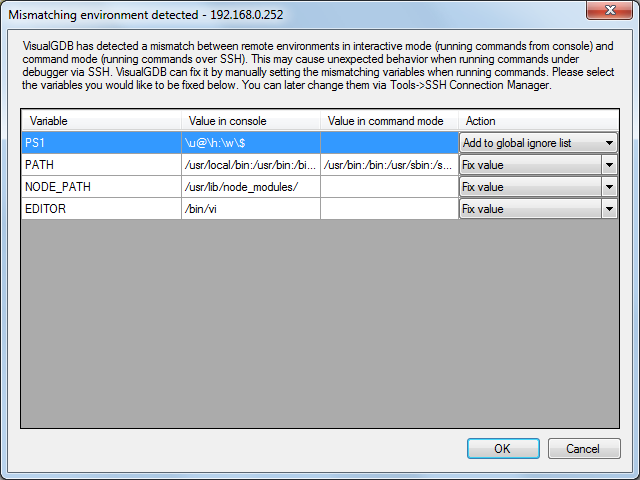
- VisualGDB will also detect that some of the environment variables do not match between the interactive SSH mode (used to start a shell like bash) and command SSH mode (used to run commands like GDB). Select “ignore” for the PS1 variable and “Fix value” for the others:
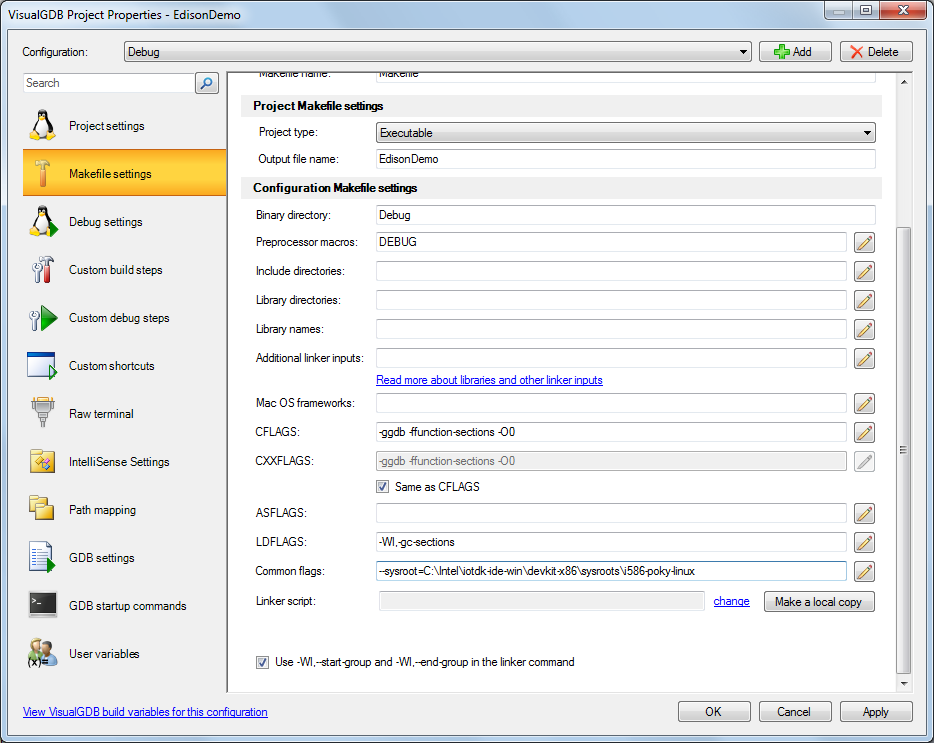
- Once the project is generated, right-click on it in Solution Explorer and select “VisualGDB Project Properties”. Then go to the Makefile Settings page and add the following line to Common Flags:
--sysroot=C:\Intel\iotdk-ide-win\devkit-x86\sysroots\i586-poky-linux
Replace the C:\Intel with the directory where you have installed your Edison SDK:
- When you press OK, VisualGDB will re-test the toolchain and configure IntelliSense based on the detected settings. Code completion and navigation will now work as usual. If you are using the Clang-based IntelliSense engine, you will also be able to use Code Map and other advanced features:
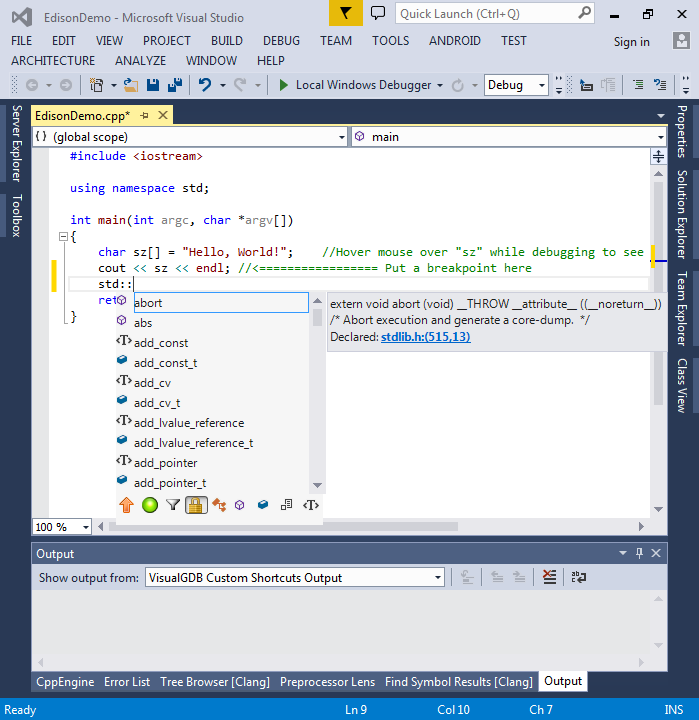
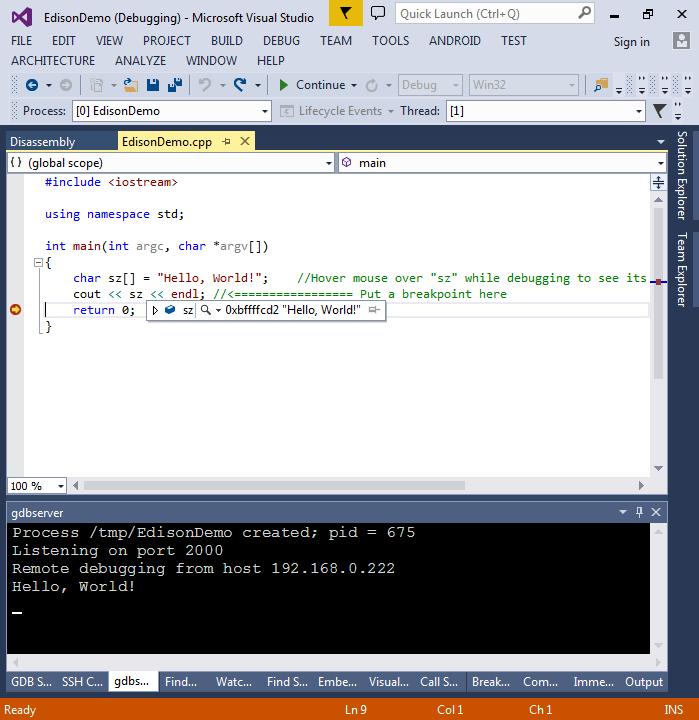
- Set a breakpoint and press F5 to build your project and start debugging it. VisualGDB will automatically deploy it and show the output in the gdbserver window: