Using Raspberry Pi 2 Camera from C++ Programs with Visual Studio
This tutorial shows how to use the Raspberry Pi 2 camera from C++ programs developed with Visual Studio and VisualGDB. Before you begin, install VisualGDB 5.0r5 or later. We will also show how to get the latest Raspberry Pi Jessie image and use the corresponding cross-toolchain for faster compilation.
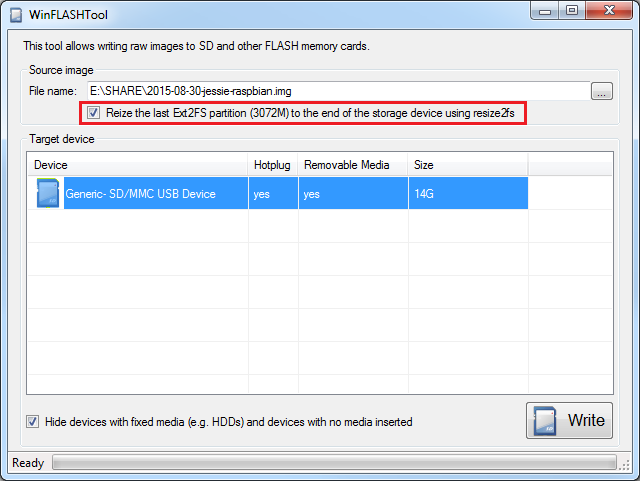
- Download the Raspberry Pi Jessie image and write it to the SD card. Ensure you select the “Extend the Ext2FS partition” checkbox so that the Linux partition can fit the entire SD card:
- Start Visual Studio and open the VisualGDB Linux project Wizard:
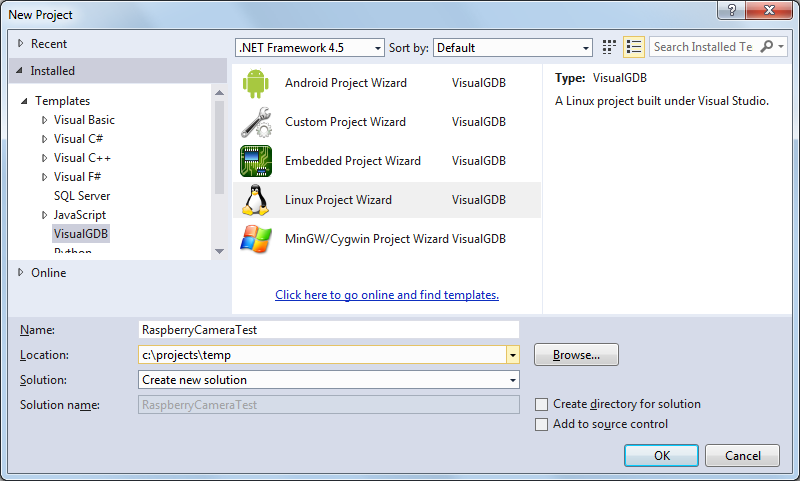
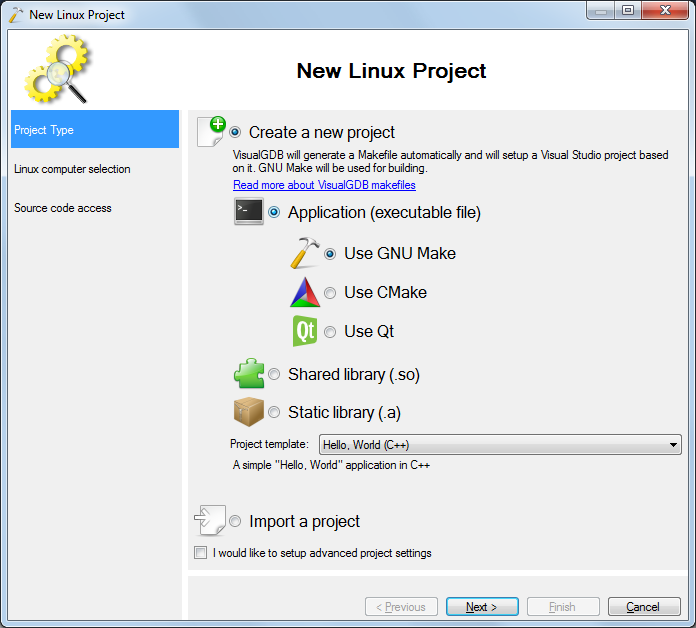
- Select “Application (executable file)” to create a new application project:
 Warning: this tutorial uses GNU Make, that is not recommended for new projects and may not work with the latest Raspberry Pi toolchain. Please consider using Advanced CMake or MSBuild instead.
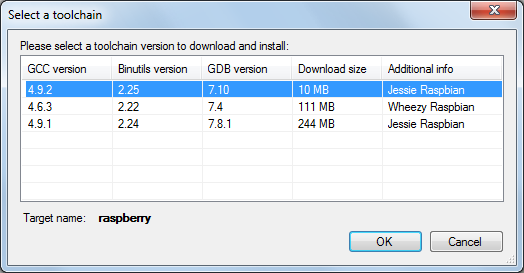
 - If you have not installed the Jessie toolchain for Raspberry Pi yet, you can select “download more toolchains” and then pick the toolchain from the list. Ensure you select the latest Jessie toolchain:
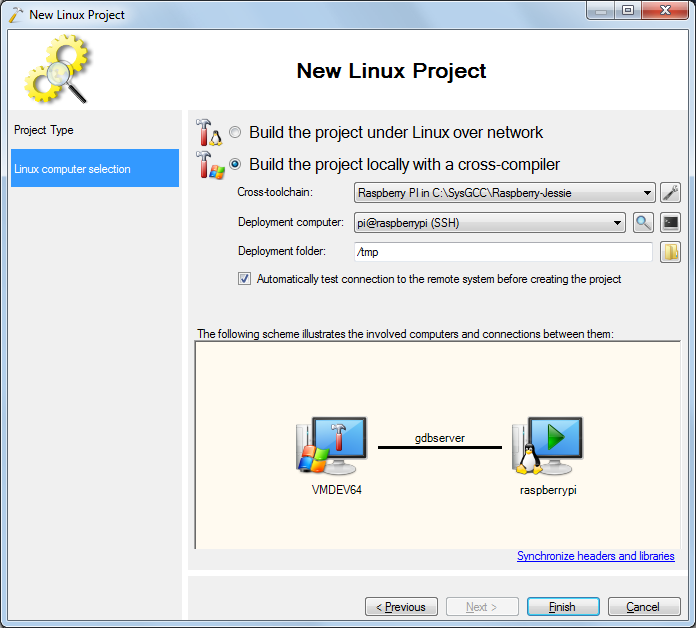
- Select the connection settings in the “Deployment computer” field or choose “Create a new SSH connection” if you have not connected to your Raspberry Pi from VisualGDB before:
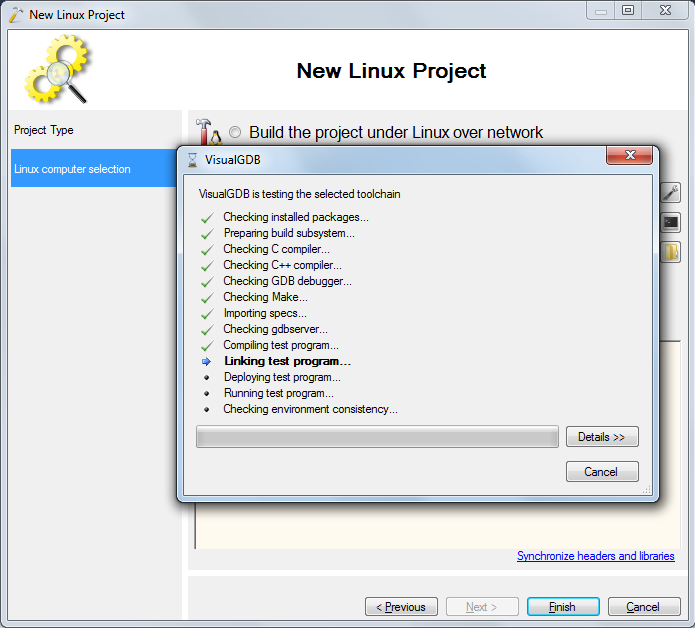
- Press “Finish” to create your project. VisualGDB will test the toolchain and ensure that it can build code that runs on your Raspberry Pi without any problems:
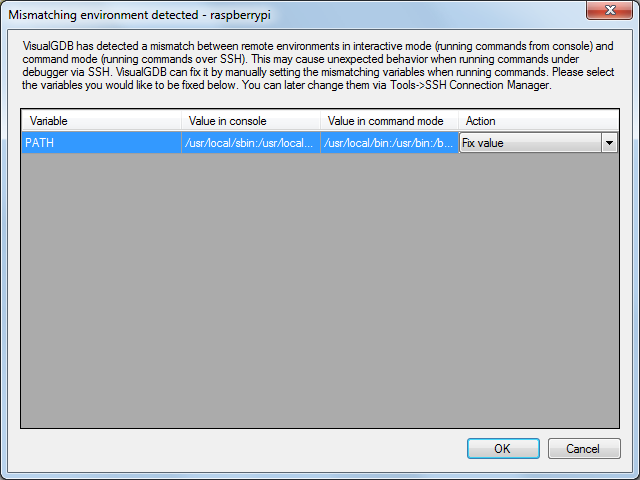
- VisualGDB may detect that the PATH variable is configured differently for interactive SSH sessions and commands started via SSH, potentially interfering with GDB debugging. Select “Fix value” to resolve this automatically:
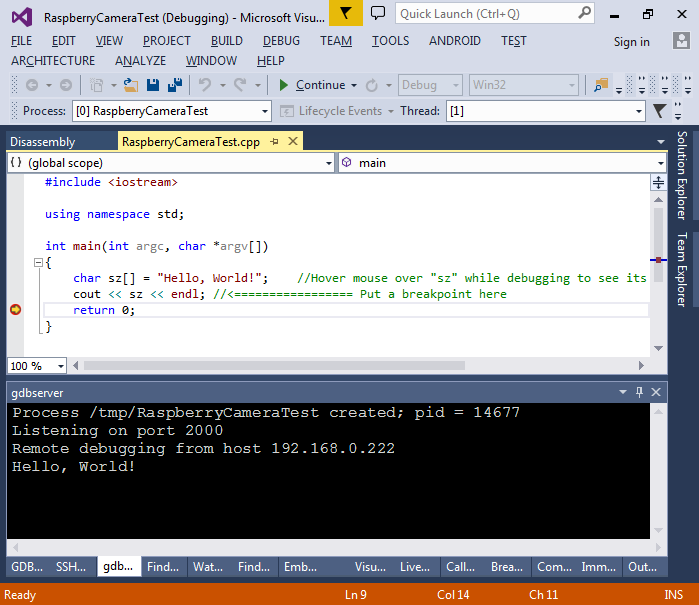
- Build your project, set a breakpoint on the return statement and run it with F5. Check the output in the “gdbserver” window for the “Hello, World” message:
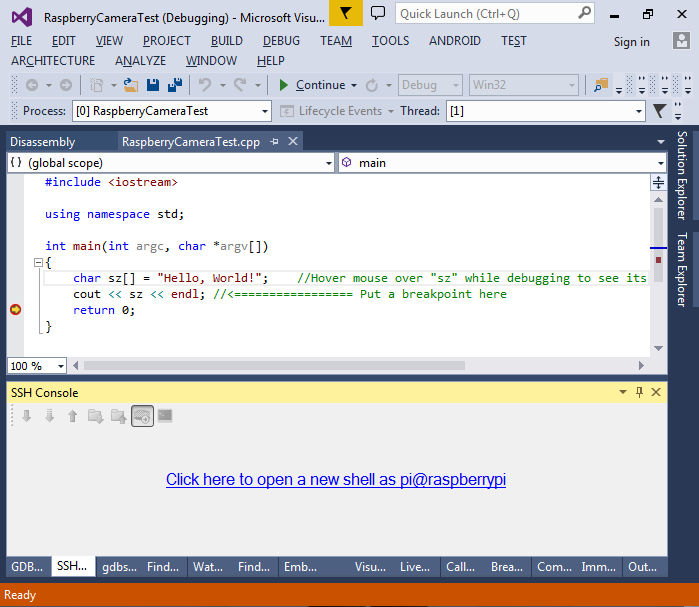
- Now we will configure the Raspberry Pi to use the camera module. Open the SSH Console via Debug->Windows->SSH Console:
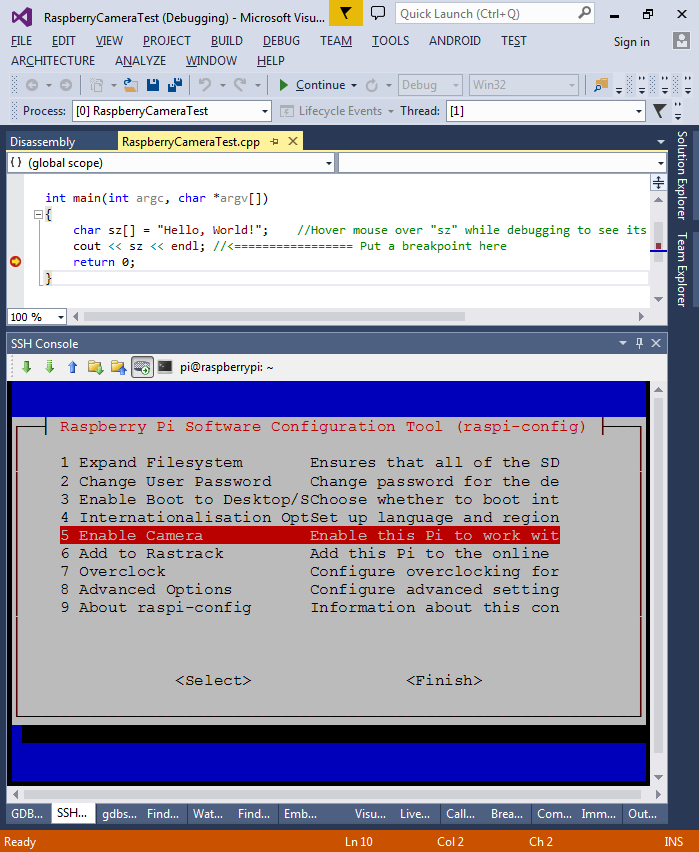
- Click on the “open a new shell” link and run the “sudo raspi-config” command. Then use the arrow keys to enable the camera module:
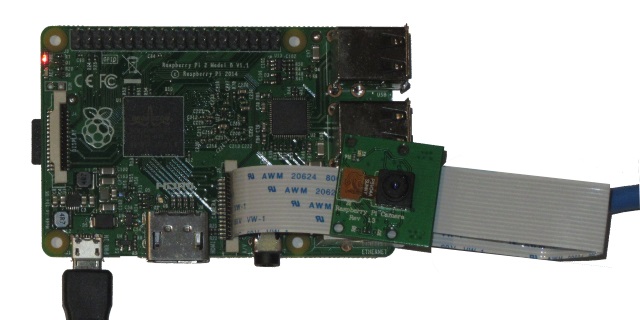
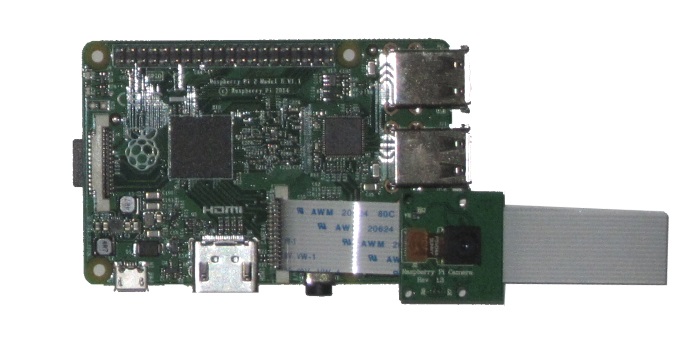
- Select “Finish” and shutdown your Raspberry Pi. Once the power is unplugged, connect the camera module as shown below:
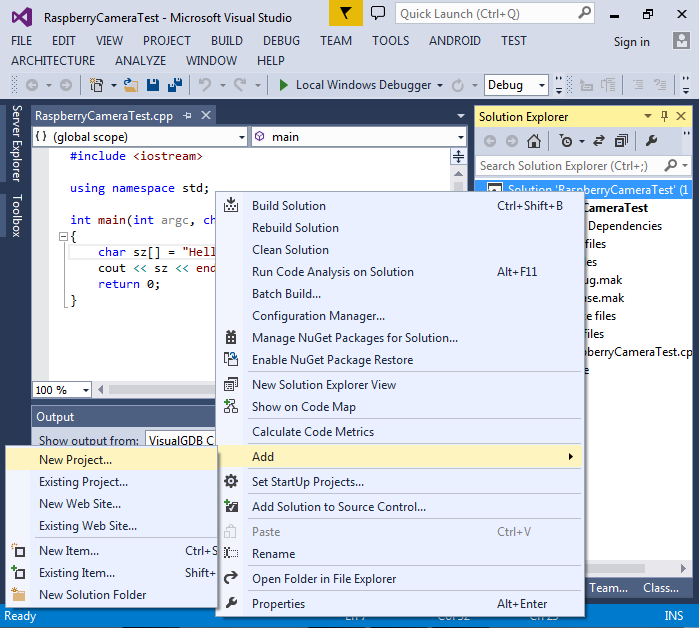
- We will use the Raspicam library from SourceForge to connect to the camera from C++ code. Download the latest source package and extract it somewhere on your Windows machine. Now we will import it to your Visual Studio solution by adding another project:
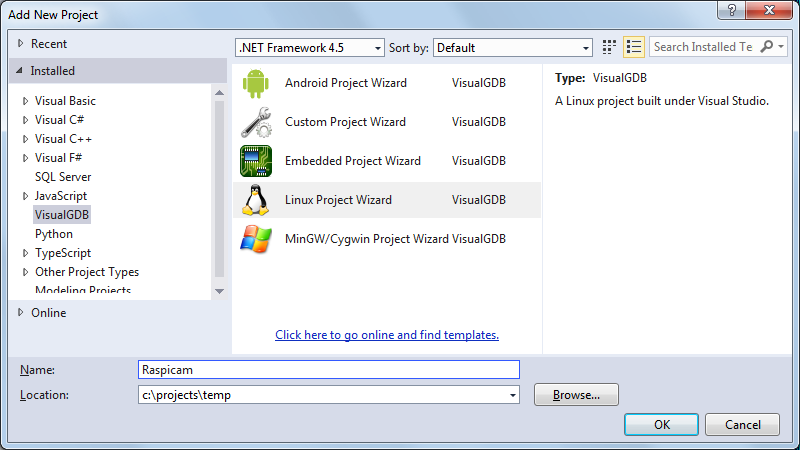
- Specify the name and location for the wrapper project. It can be a different folder than the one with the sources of raspicam:
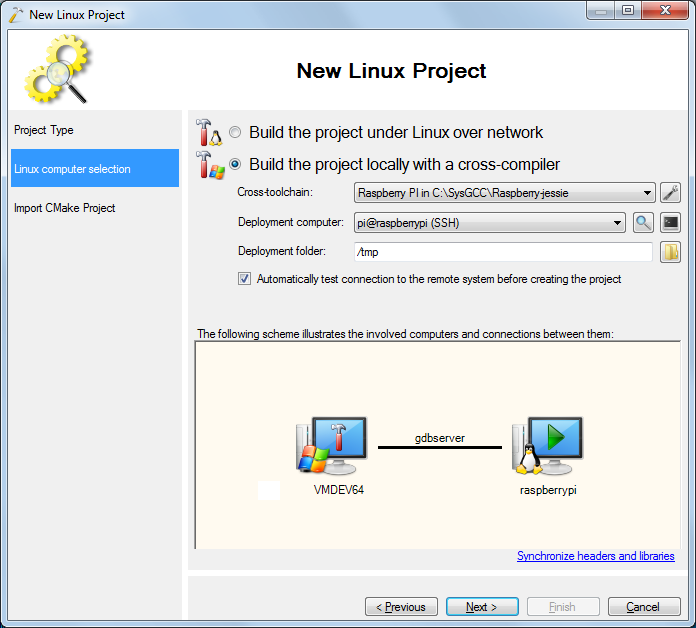
- On the first page of the wizard select “Import a project”:

- The next page will show the last used toolchain and computer locations. Click on the “cross-compiler” option and VisualGDB will load the last used settings automatically:
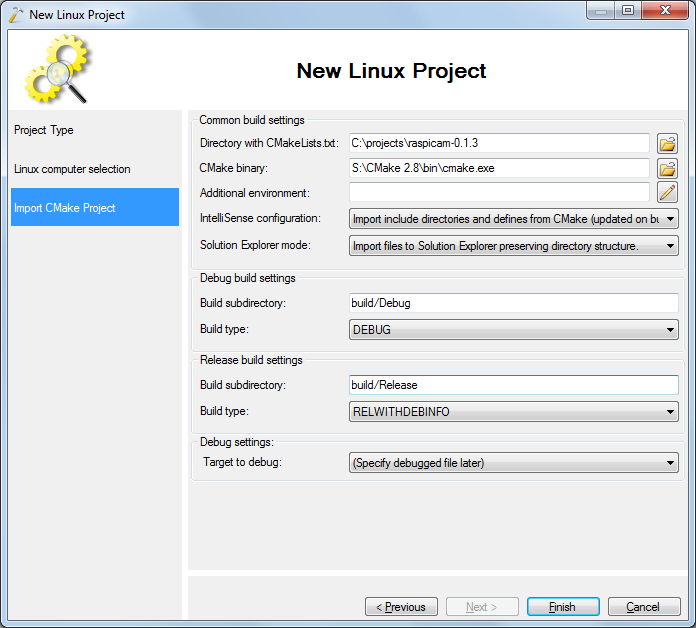
- On the last page specify the location of CMake on your Windows machine (you can download CMake for Windows here) and the directory where you have extracted the raspicam library:
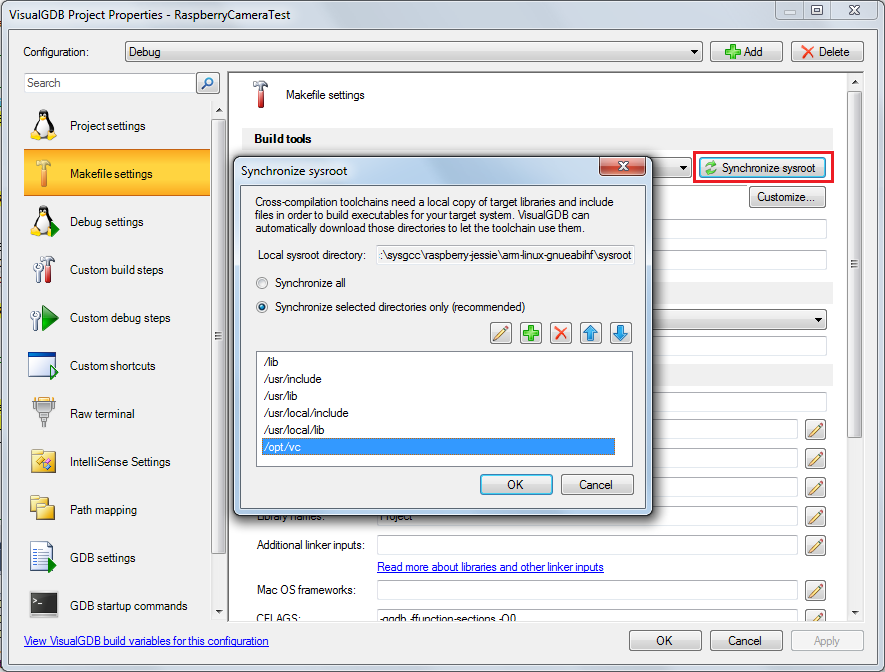
- Before you can build the raspicam library, you need to download the /opt/vc directory from Raspberry Pi to the toolchain sysroot folder. This can be done by opening VisualGDB Project Properties, going to the Makefile Settings page, clicking “Synchronize Sysroot” and adding the “/opt/vc” folder to the folder list:
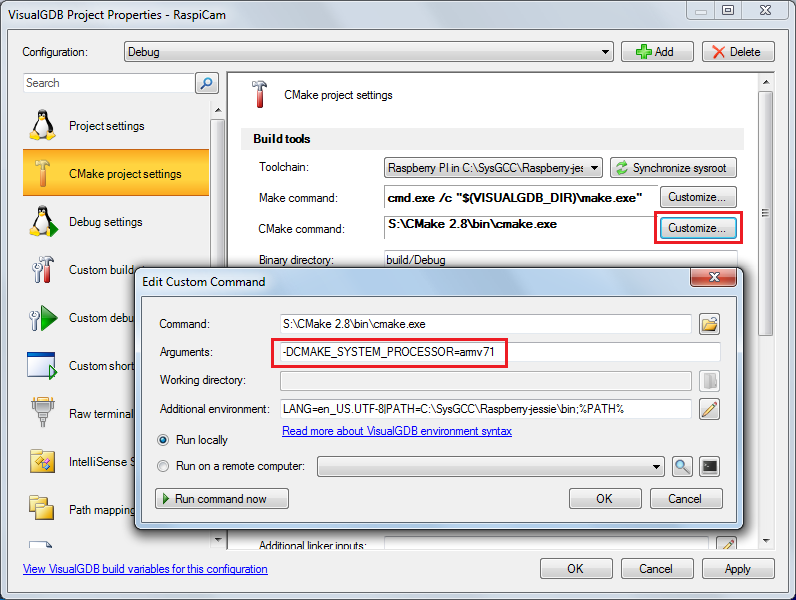
- The raspicam library checks the CMAKE_SYSTEM_PROCESSOR library to determine when it’s being built on Raspberry Pi. To support this, we need to specify the variable manually in the CMake project properties:
- If you try building the project now, CMake will complain that the mmal libraries are not found:
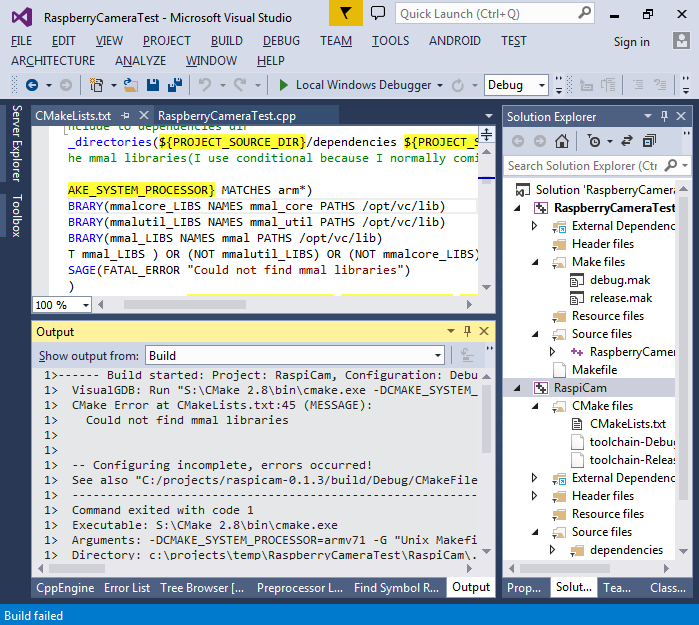
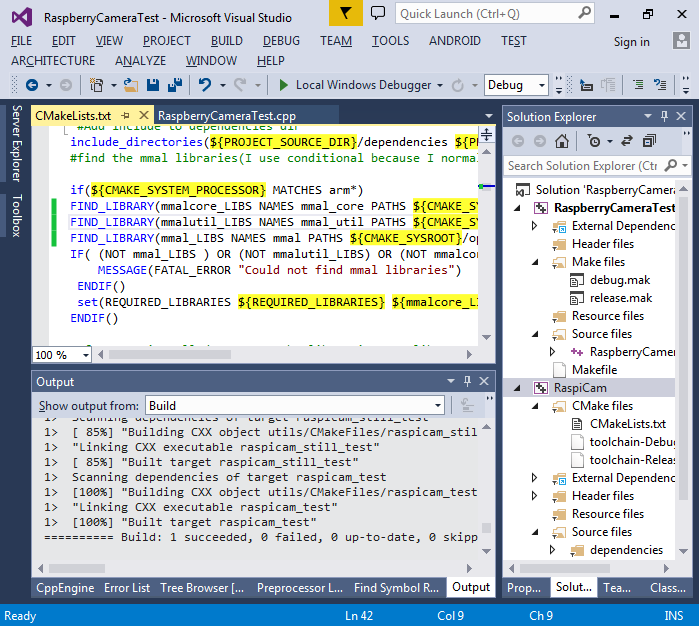
- This happens because the library search paths in CMakeLists.txt are hardcoded to /opt/vc and do not use the sysroot variable. Modify CMakeLists.txt accordingly to fix this:
FIND_LIBRARY(mmalcore_LIBS NAMES mmal_core PATHS ${CMAKE_SYSROOT}/opt/vc/lib)
FIND_LIBRARY(mmalutil_LIBS NAMES mmal_util PATHS ${CMAKE_SYSROOT}/opt/vc/lib)
FIND_LIBRARY(mmal_LIBS NAMES mmal PATHS ${CMAKE_SYSROOT}/opt/vc/lib)
- Now you should be able to build the RaspiCam project successfully:
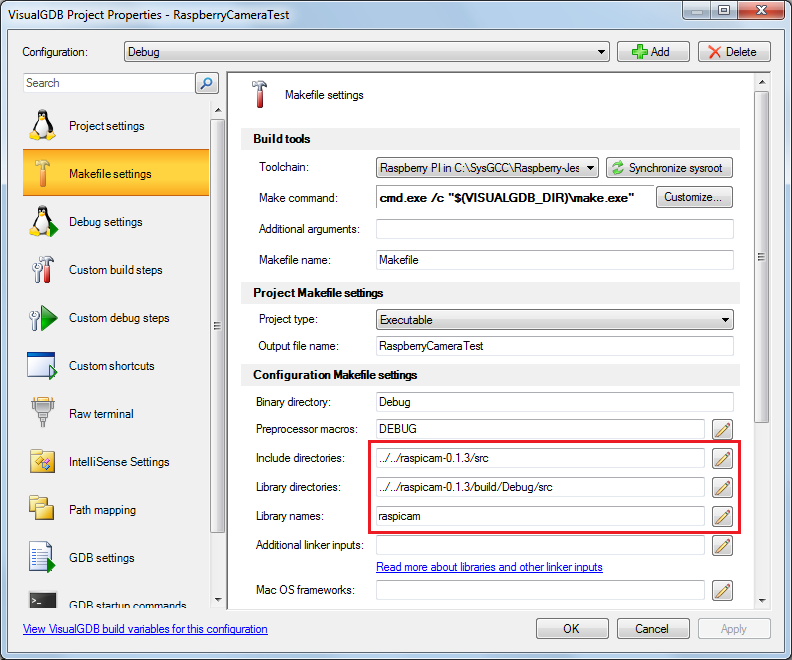
- In order to use the header files and libraries from the project add the corresponding paths to the include and library directories of your main project. Also add “raspicam” to the library list so that the project is linked against it:
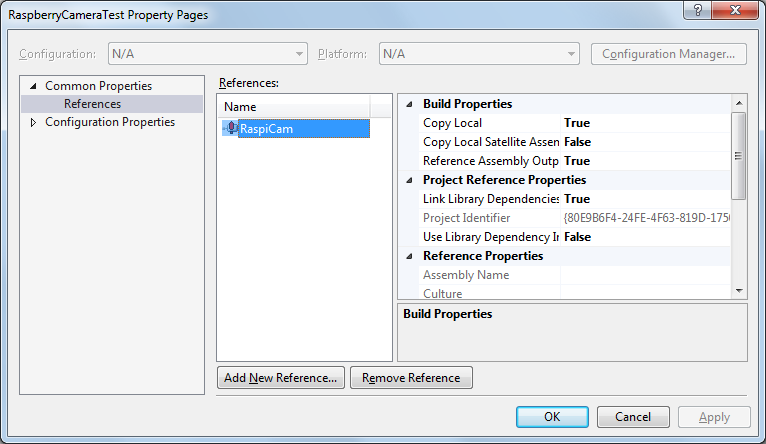
- Finally, add a project reference to the RaspiCam library from your main project so that Visual Studio knows in which order to build the projects:
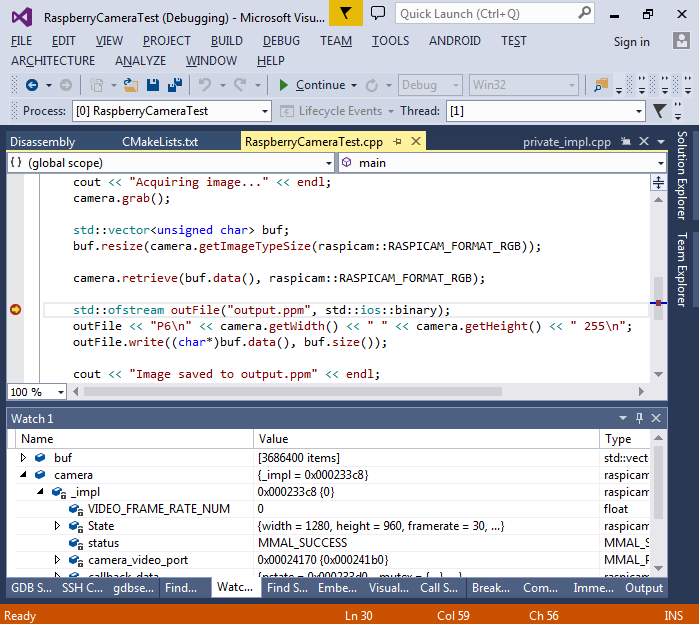
- Now we can add some code using the camera to the main source file:
#include <fstream>
#include <iostream>
#include <vector>
#include <raspicam.h>
#include <unistd.h>

using namespace std;


int main(int argc, char **argv)
{
    raspicam::RaspiCam camera;

    if (!camera.open())
    {
        cerr << "Could not open the camera" << endl;
        return 1;
    }

    cout << "Initial delay..." << endl;
    sleep(3);
    cout << "Acquiring image..." << endl;
    camera.grab();

    std::vector<unsigned char> buf;
    buf.resize(camera.getImageTypeSize(raspicam::RASPICAM_FORMAT_RGB));

    camera.retrieve(buf.data(), raspicam::RASPICAM_FORMAT_RGB);

    std::ofstream outFile("output.ppm", std::ios::binary);
    outFile << "P6\n" << camera.getWidth() << " " << camera.getHeight() << " 255\n";
    outFile.write((char*)buf.data(), buf.size());

    cout << "Image saved to output.ppm" << endl;
    return 0;
}
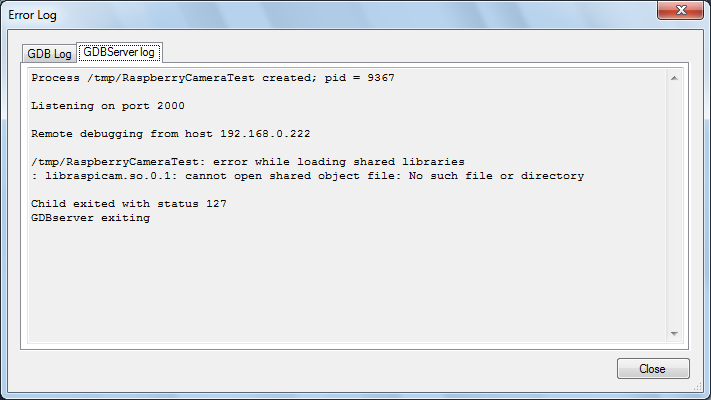
- If you build the project and start debugging it now, VisualGDB will report that the session could not be started and the detail window will show a missing shared library:
- This happens because the CMake files in the RaspiCam project specify a lot of different targets and VisualGDB does not know which of them should be deployed. Open VisualGDB Project Properties for the library project and specify the missing library as the explicit debugged executable:
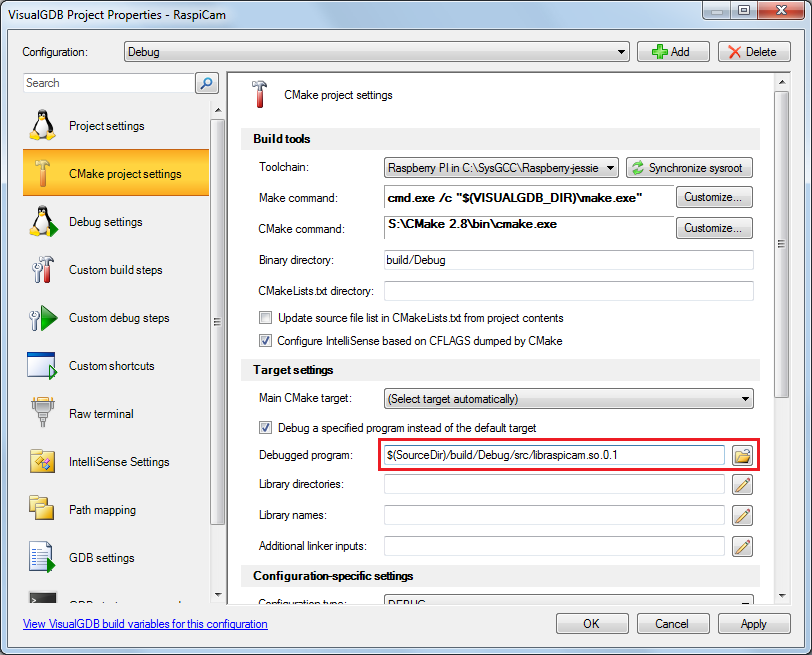
- As VisualGDB deploys the outputs of the debugged project and all projects referenced by it, this will ensure that the library gets deployed along with the main binary and you should be able to run and step through the program:
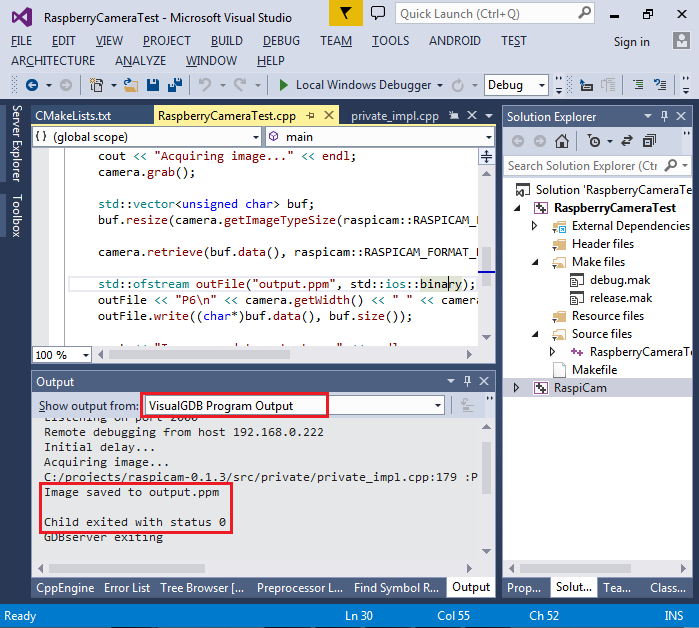
- Once the program exits, you can check the output window to see that the image has been written successfully:
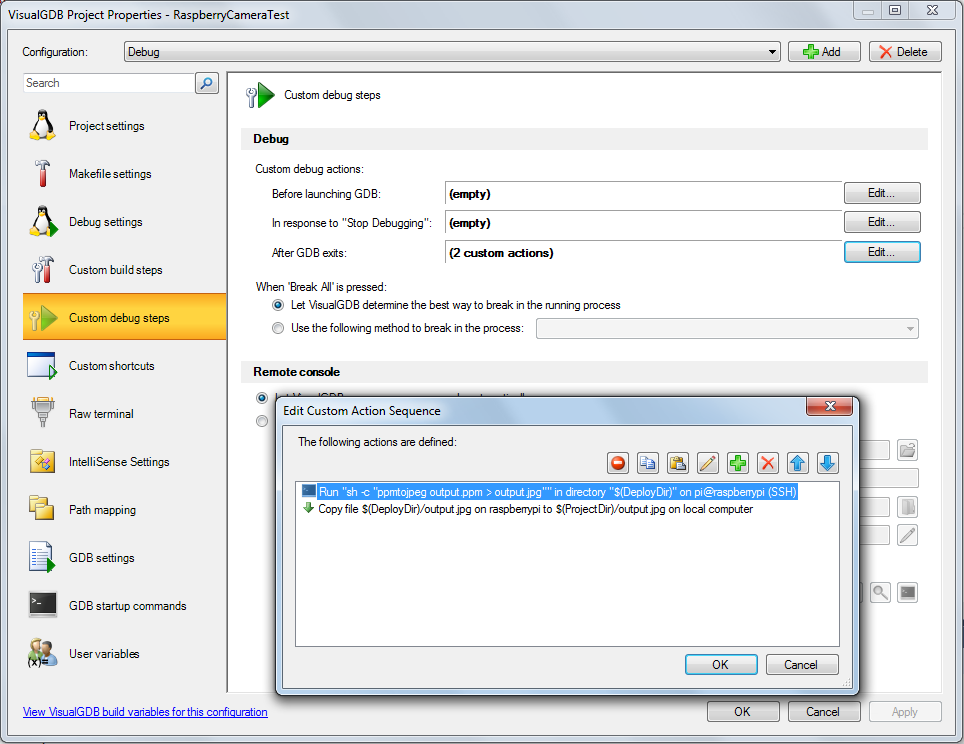
- If you are using a Custom edition or higher, you can configure VisualGDB to automatically convert the image to a .jpg one and download it to the Windows machine. Install the “netpbm” package on Raspberry Pi by running “sudo apt-get install netpbm” and add 2 actions shown below to the post-debug action list:
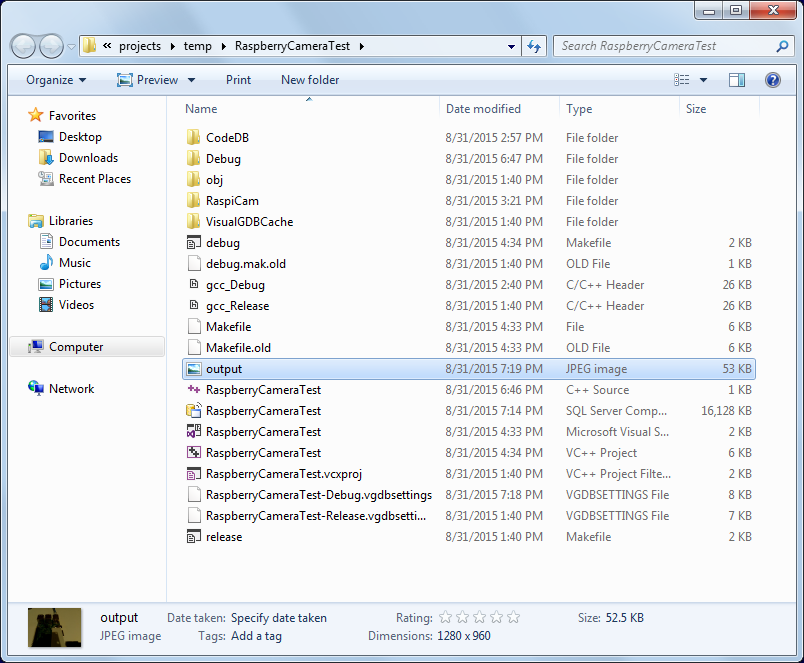
- If you run your project now, you should be able to see the output.jpg file copied to the project directory on the Windows machine:
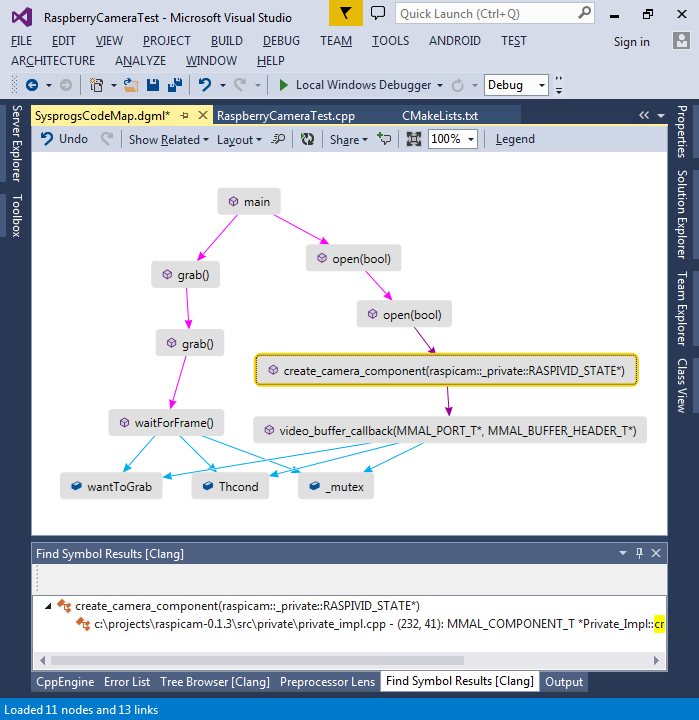
- As you have imported the RaspiCam project into Visual Studio, you can now use the Code Map window to explore the relations between its functions and fields used by them: