Developing STM8 Projects with Visual Studio
This tutorial shows how to develop projects for the STM8 devices with Visual Studio and VisualGDB. We will show how to create a basic “Blinking LED” project, build and debug it with Visual Studio.
The STM8 devices are not supported by the mainstream GCC compiler, hence VisualGDB supports the STM8 devices by integrating with the Cosmic CXSTM8 compiler. You can download a free edition of CXSTM8 on this page.
Another option would be to use the open-source SDCC compiler, however it is incompatible with the STM8 StdPeriph library due to:
- No support for placing functions into separate sections. Building the library without manually commenting out the unused functions will overflow FLASH.
- No support for placing functions into RAM. The STM8 FLASH driver won’t work.
Hence, the VisualGDB support for STM8 devices relies on the Cosmic CXSTM8 compiler. Make sure you install it before proceeding with this tutorial. Once you have installed CXSTM8, follow the steps below to create, build and debug a basic project:
- Start Visual Studio and locate the VisualGDB Embedded Project Wizard:

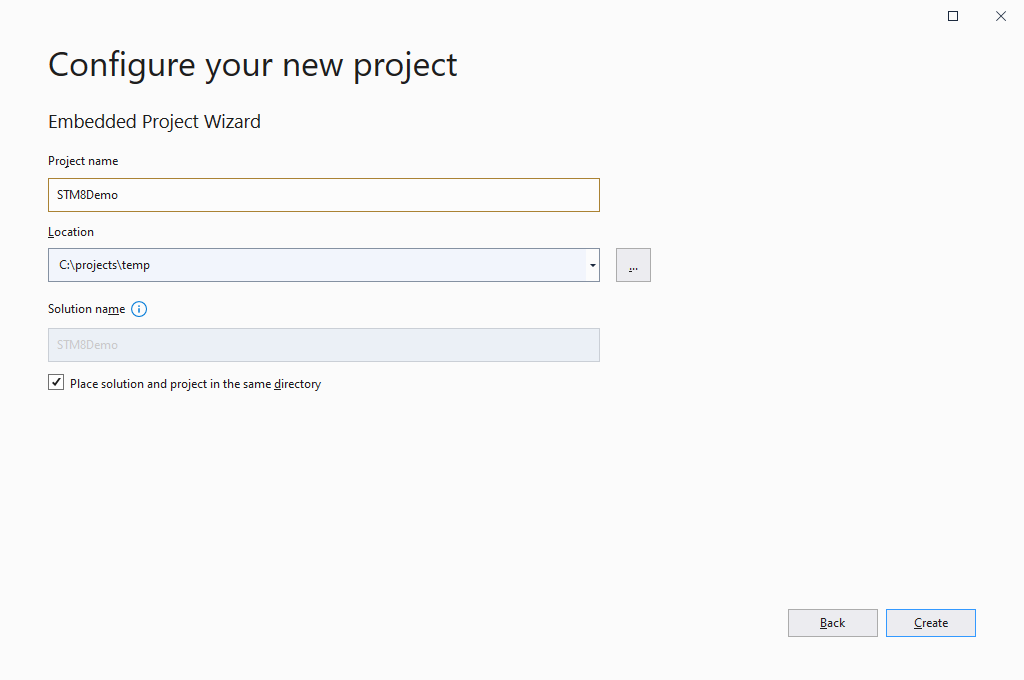
- Enter the name and location for your project:
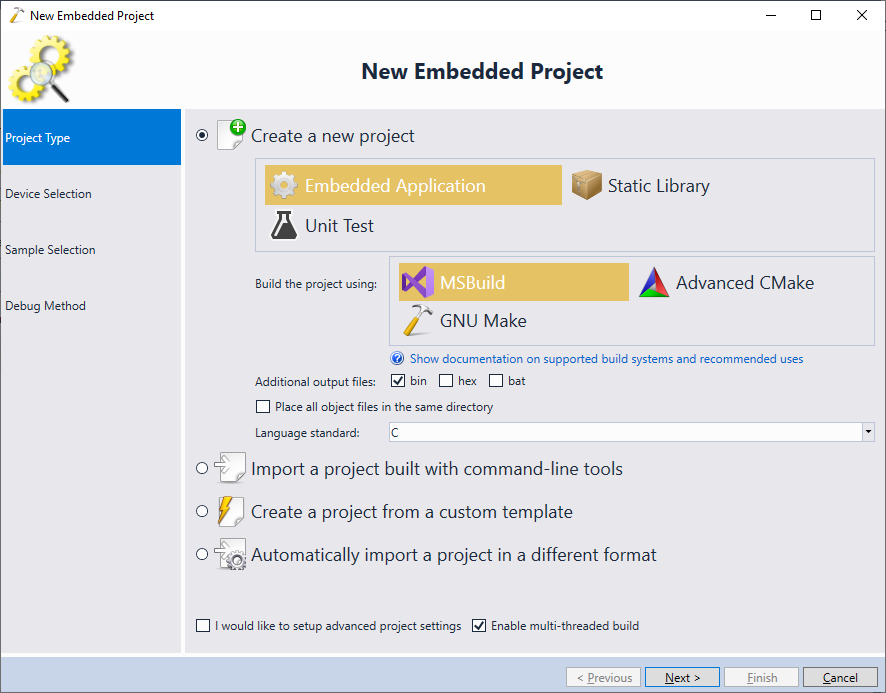
- Select “Create a new project -> Embedded Application -> MSBuild“. Note that the CXSTM8 compiler is considerably different from GCC, so the GNU Make and CMake-based projects do not support it:
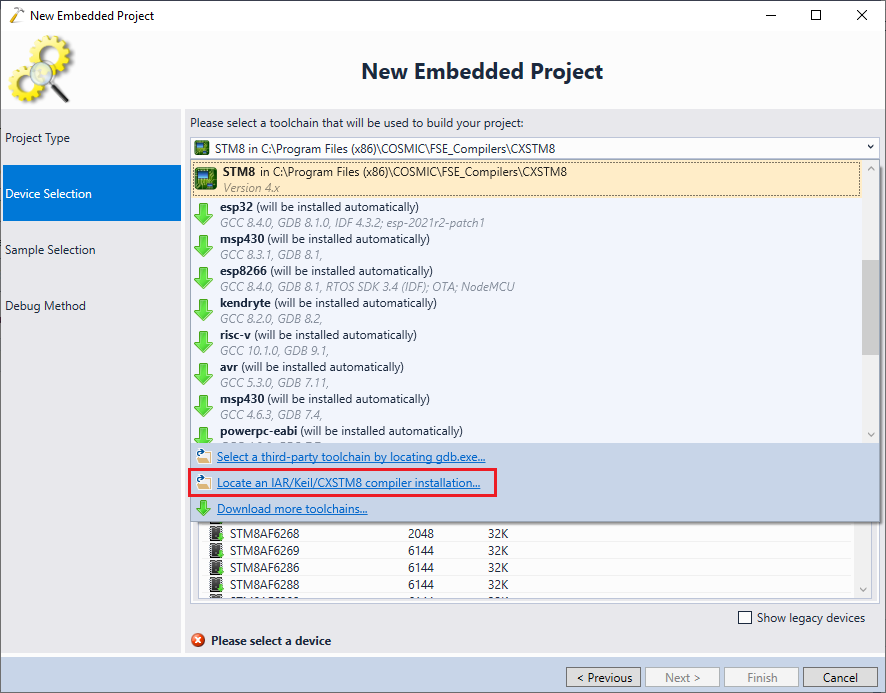
- If you have installed the CXSTM8 compiler, VisualGDB will automatically locate and display it in the toolchain list. If not, you can always locate it manually using the link at the bottom of the drop down list:
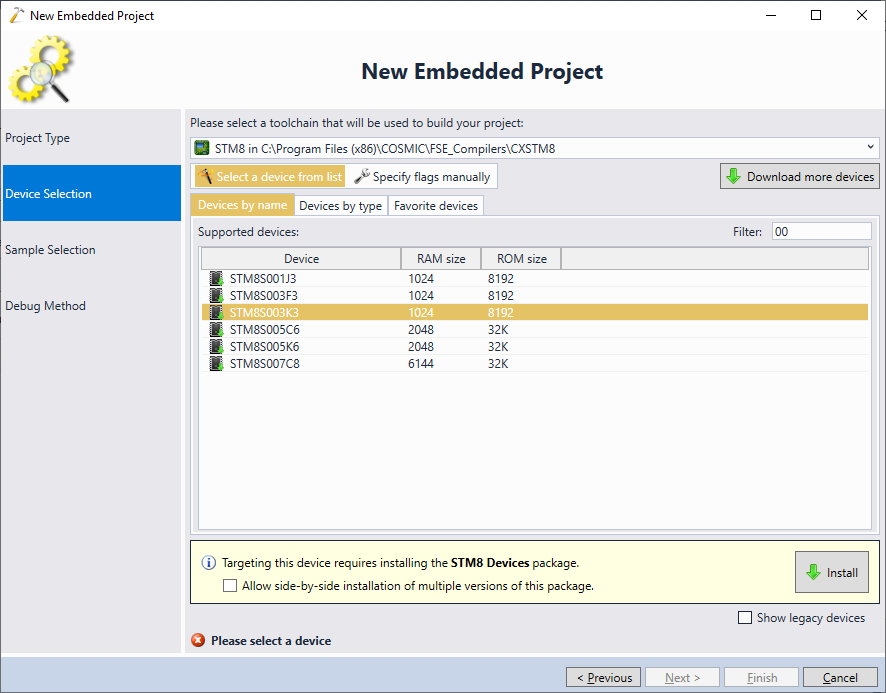
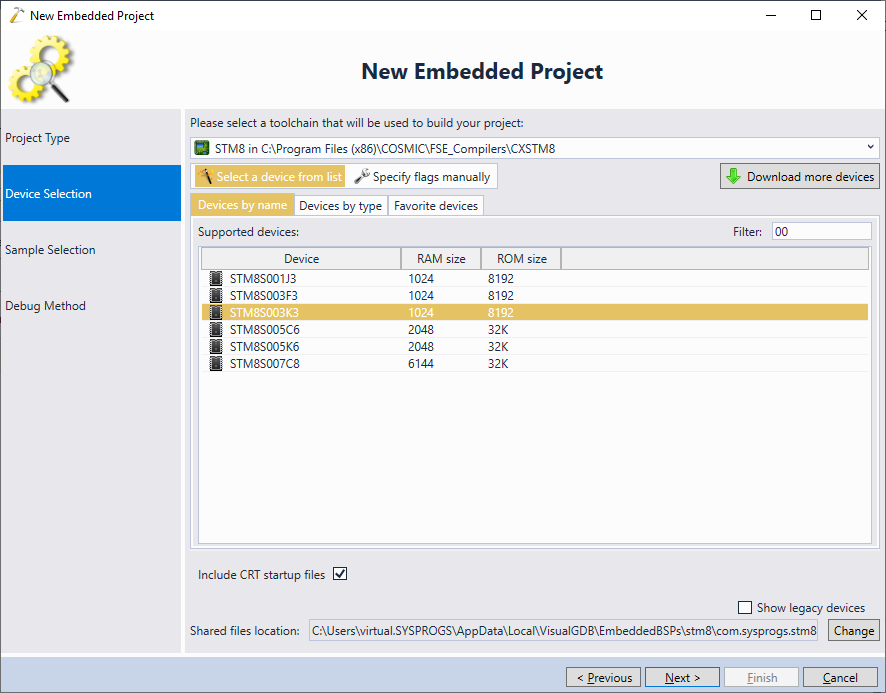
- Once you have selected the compiler, pick the device that you would like to target. In this tutorial, we will target the STM8003K3 device used in the STM8VLDISCOVERY board:
 If you have not created STM8-based projects before, click the “Install” button to automatically download the STM8 BSP. VisualGDB will automatically download the BSP that includes the StdPeriph libraries for all supported devices, and the sample projects from the ST’s SDKs.
 - Once the BSP has been downloaded, select your device from the list and click “Next”:
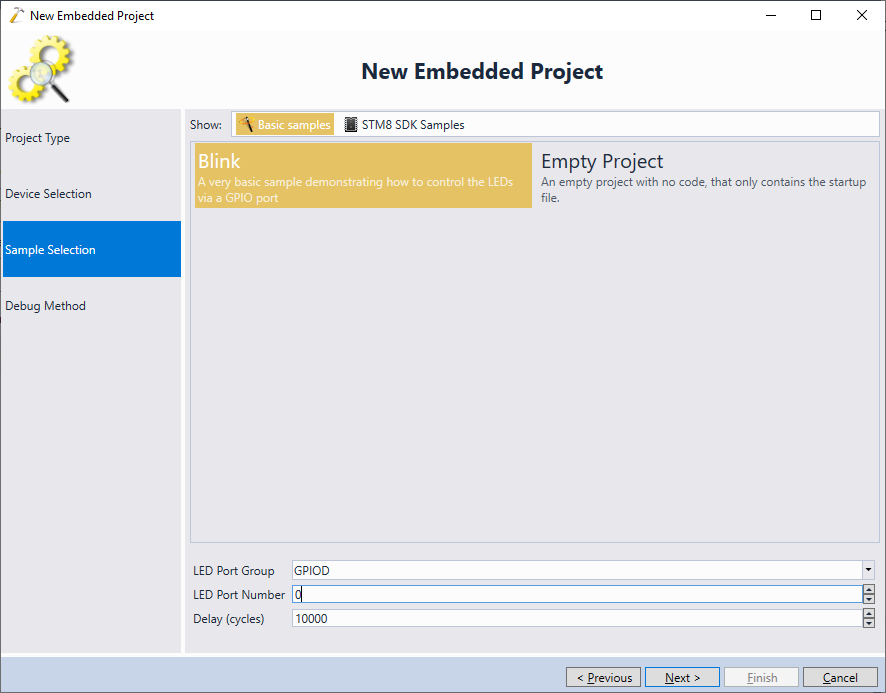
- The easiest way to test out an STM8 device would be to select the “Blink” sample and manually specify the LED port as shown below:
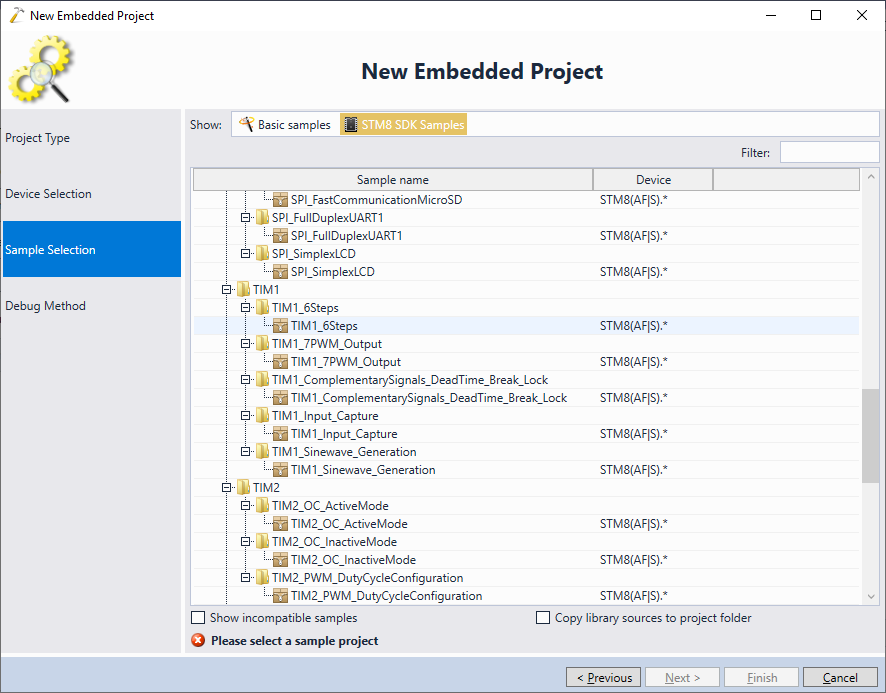
- Alternatively, you can clone one of the samples from the STM8 SDK, however they may not be compatible with all devices:
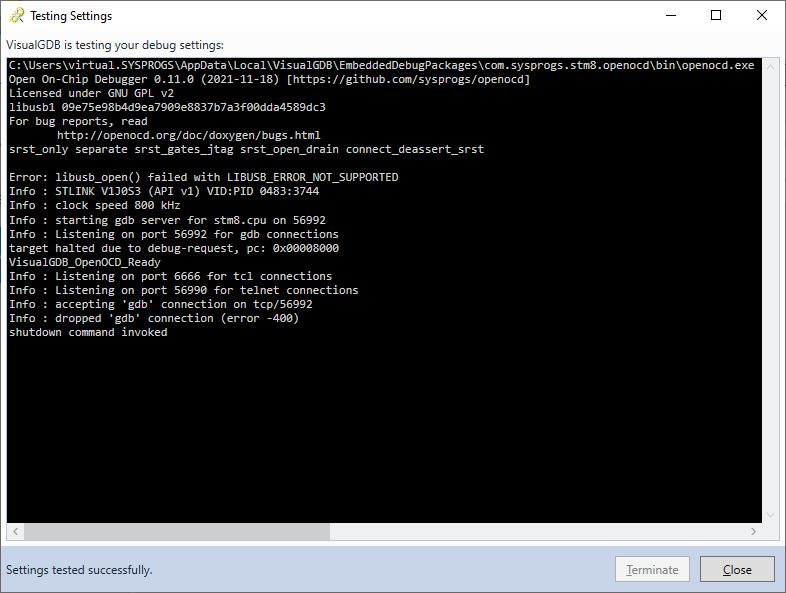
- Connect your board to the USB port and let VisualGDB detect the debug settings. Click “Test” to verify the connection to the device:

- Note that the STM8 devices use a separate OpenOCD package (that uses the same binary, but different scripts and USB drivers). If you encounter strange errors, make sure you are using the “com.sysprogs.stm8.openocd” package:
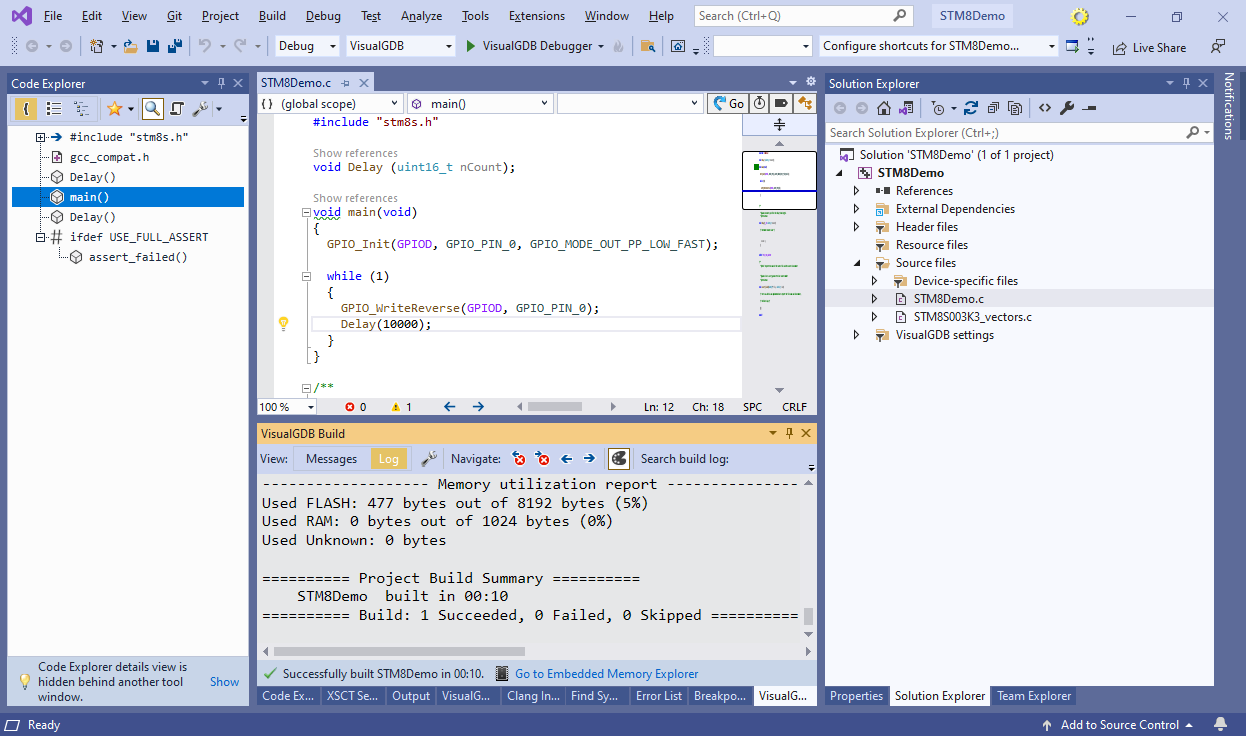
- Press “Finish” to complete the wizard. VisualGDB will generate a project consisting of the basic LED blinking code, the STM8 vector file, and the STM8 StdPeriph library:

- Build the project by pressing Ctrl-Shift-B:
- Press F5 to start debugging the project. If you have selected the correct LED port, the on-board LED will begin blinking:
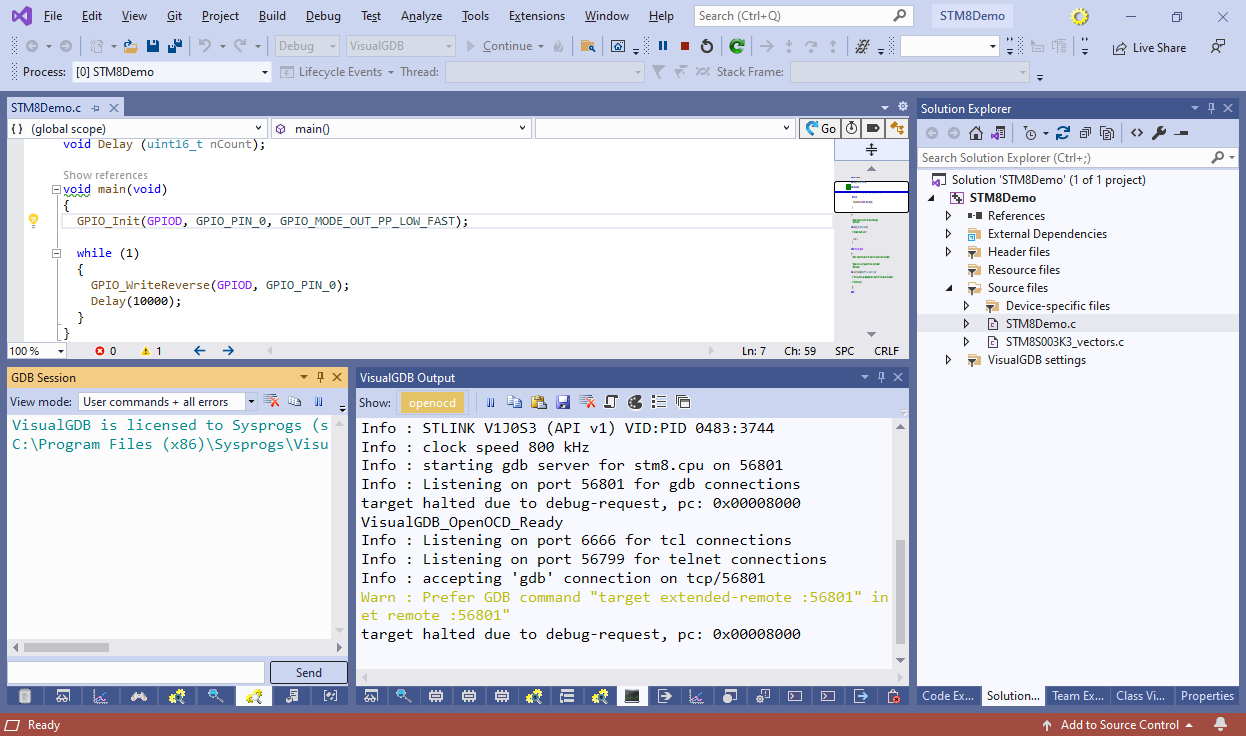
- Set a breakpoint on the call to GPIO_WriteReverse(). It will trigger almost immediately:
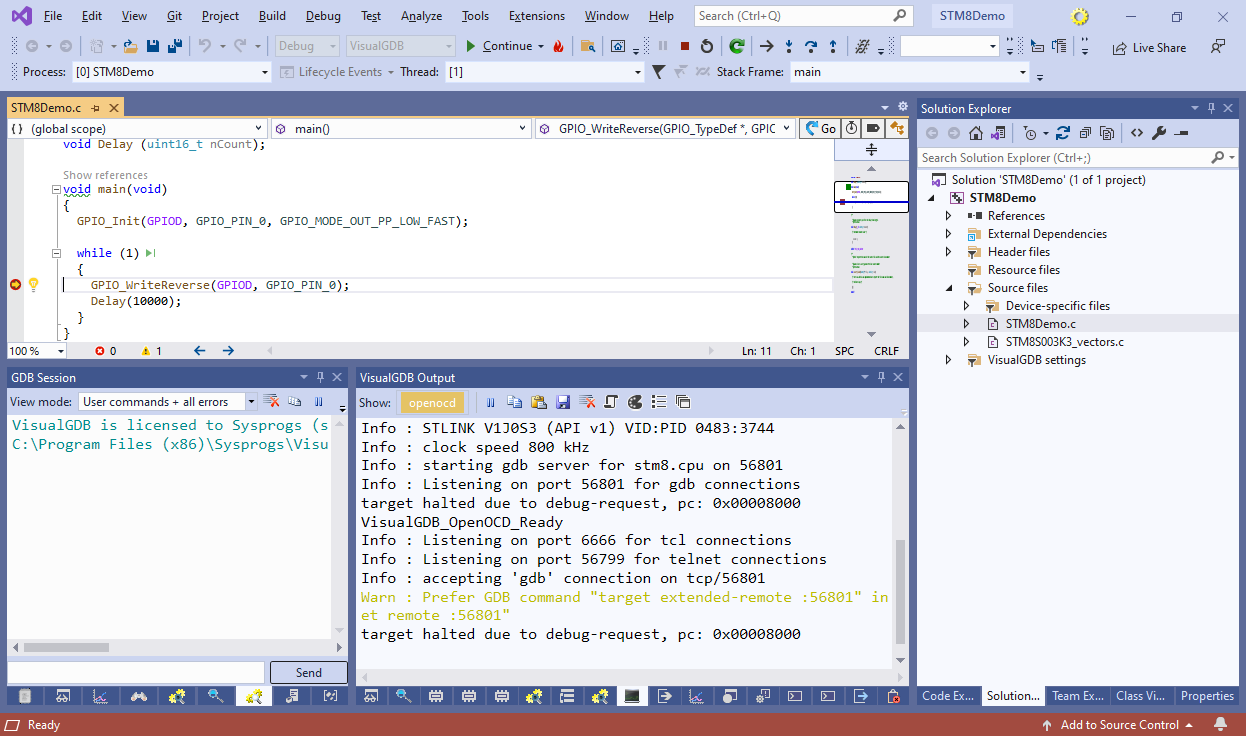
- You can evaluate the variables and step through the code as usual. However, due to the way the CXSTM8 compiler saves the registers, the backtrace and stepping over/out of functions may not work (GDB will display the “Register 4 was not saved” error):

You can use the regular VS Properties GUI to edit settings specific to the CXSTM8 compiler. VisualGDB will automatically display them instead of the regular GCC-specific properties: 
The STM8 port of gdb used by VisualGDB works reasonably well with the binaries produced by the Cosmic CXSTM8 compiler, aside from the step over/out glitches. We have patched the stm8 gdb to recover from the stack unwinding errors (see the stm8-gdb.patch file in the VisualGDB directory), so trying to step over the affected functions will result in stepping into them. As a quick workaround, consider setting a temporary breakpoint right after a function call, and resuming the program instead. Getting the unwinding to work properly would require patching gdb further to reconstruct the previous frame location by parsing the function prologue. If your company is using the stm8 gdb and would be interested in an improving it further, feel free to contact us to discuss the possible options.