Using the socket API on Raspberry Pi W with FreeRTOS
This tutorial shows how to create a basic TCP server for the Raspberry Pi Pico W board using FreeRTOS and the lwIP socket API.
The use of FreeRTOS adds minimal overhead due to switching between multiple threads, however it allows using the classical socket API with one thread per connection and eliminates the need to split the high-level logic between multiple callback functions invoked in the same thread.
In this tutorial we will clone the FreeRTOS iperf example from the Raspberry Pi Pico SDK and will update it to work as a generic TCP server.
Before you begin, install VisualGDB 5.6R8 or later.
- Start Visual Studio and locate the Raspberry Pi Pico project wizard:

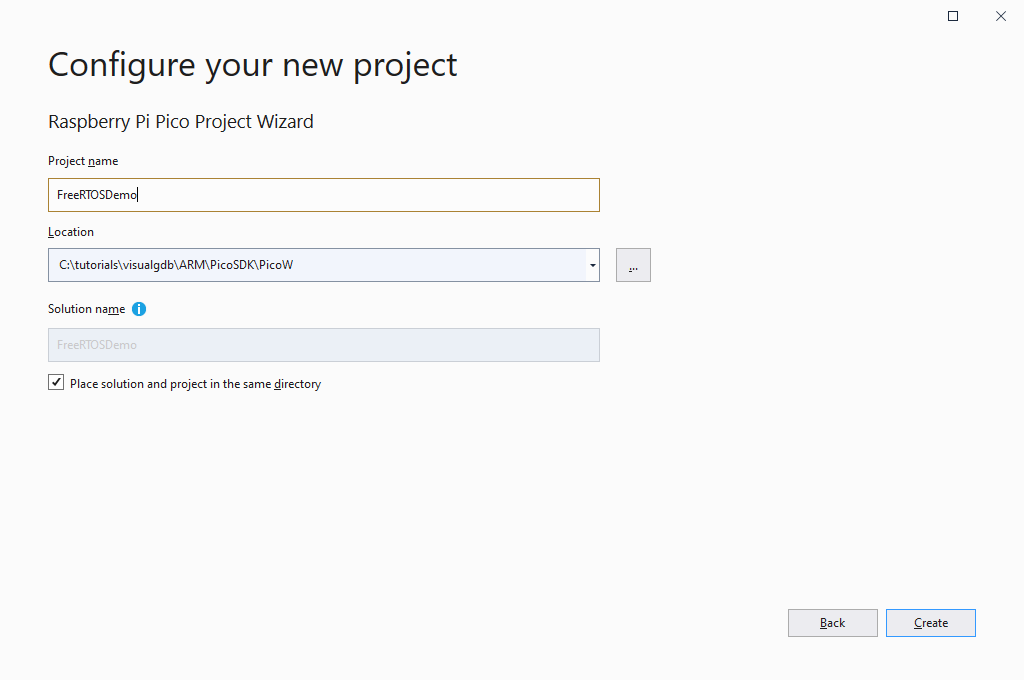
- Enter the name and location for your project:
- Proceed with creating a new project as shown below:

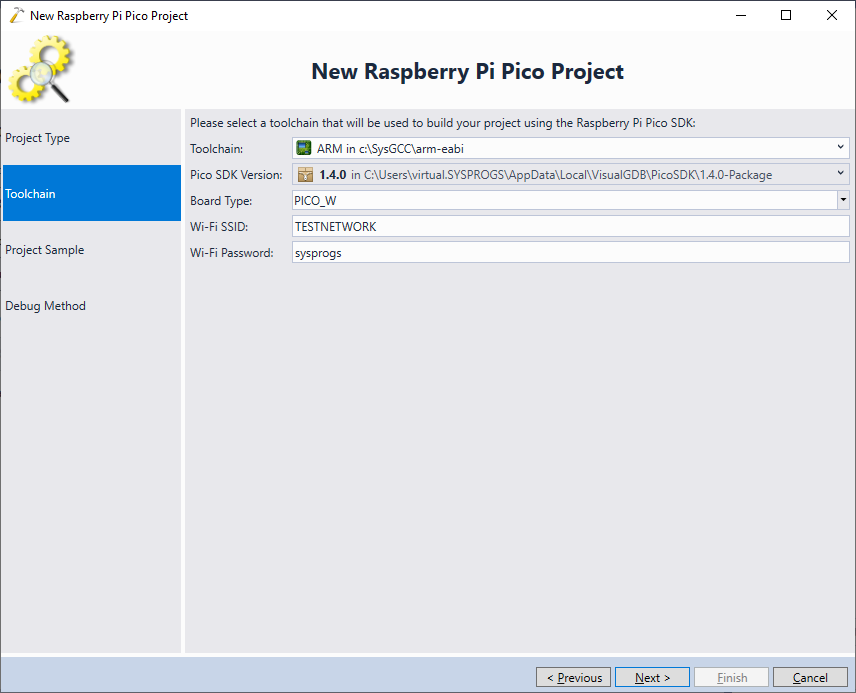
- Select your ARM toolchain, the Pico SDK 1.4.0+ and enter your Wi-Fi network settings:
 If you are not sure about the Wi-Fi setup, check out this tutorial for more details.
 - Select the freertos/iperf example and click “Next”:

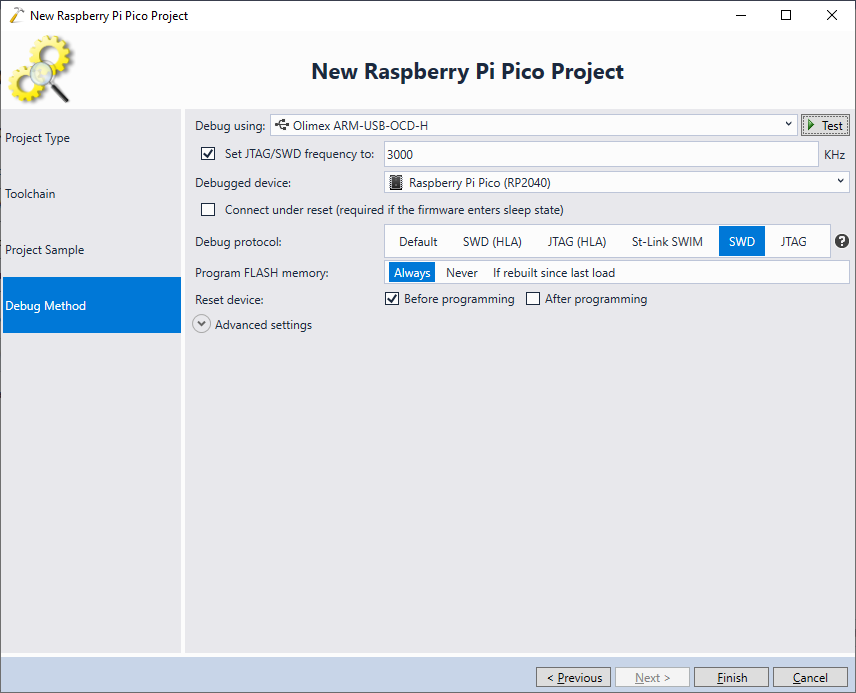
- Connect your Raspberry Pi Pico W to an SWD debug probe and select the matching settings on the Debug Method page:
 If this is the first time you are debugging this Pico W board, see this page for detailed instructions on getting SWD working.
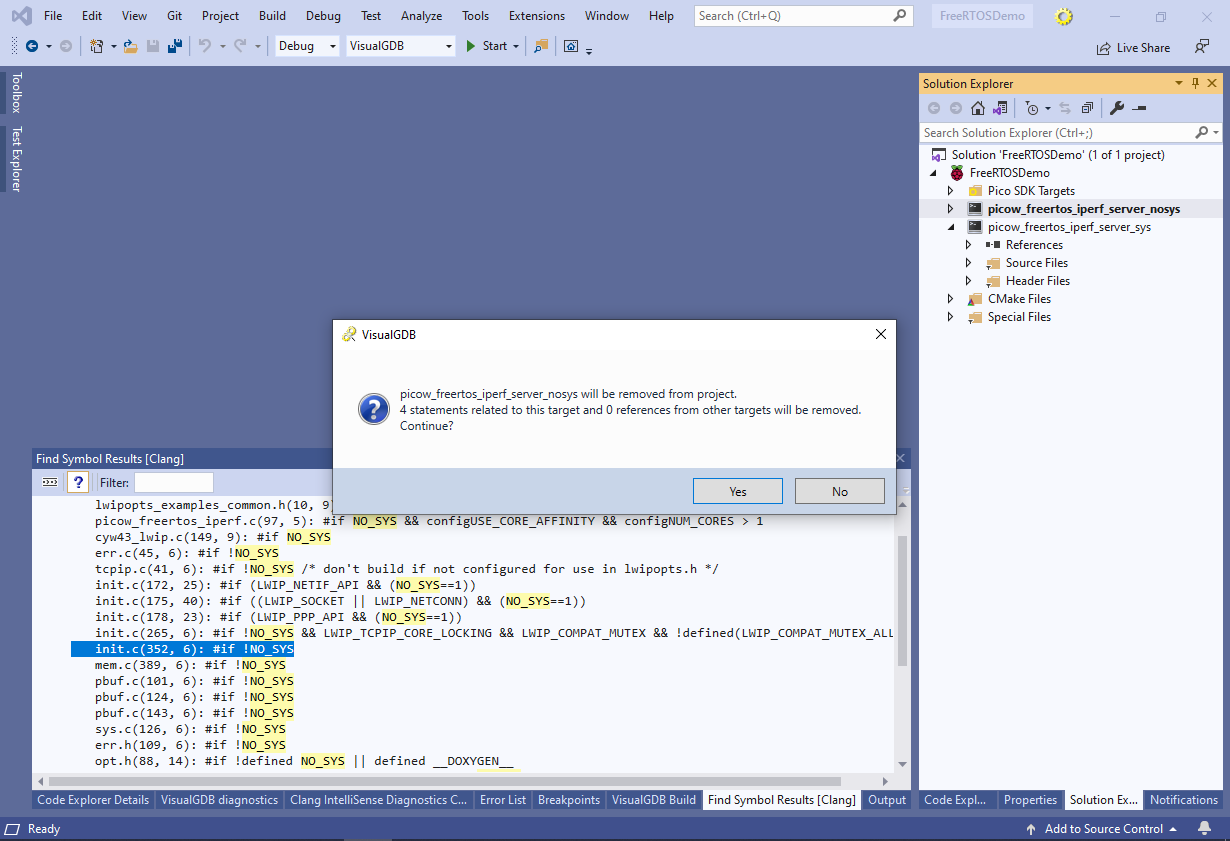
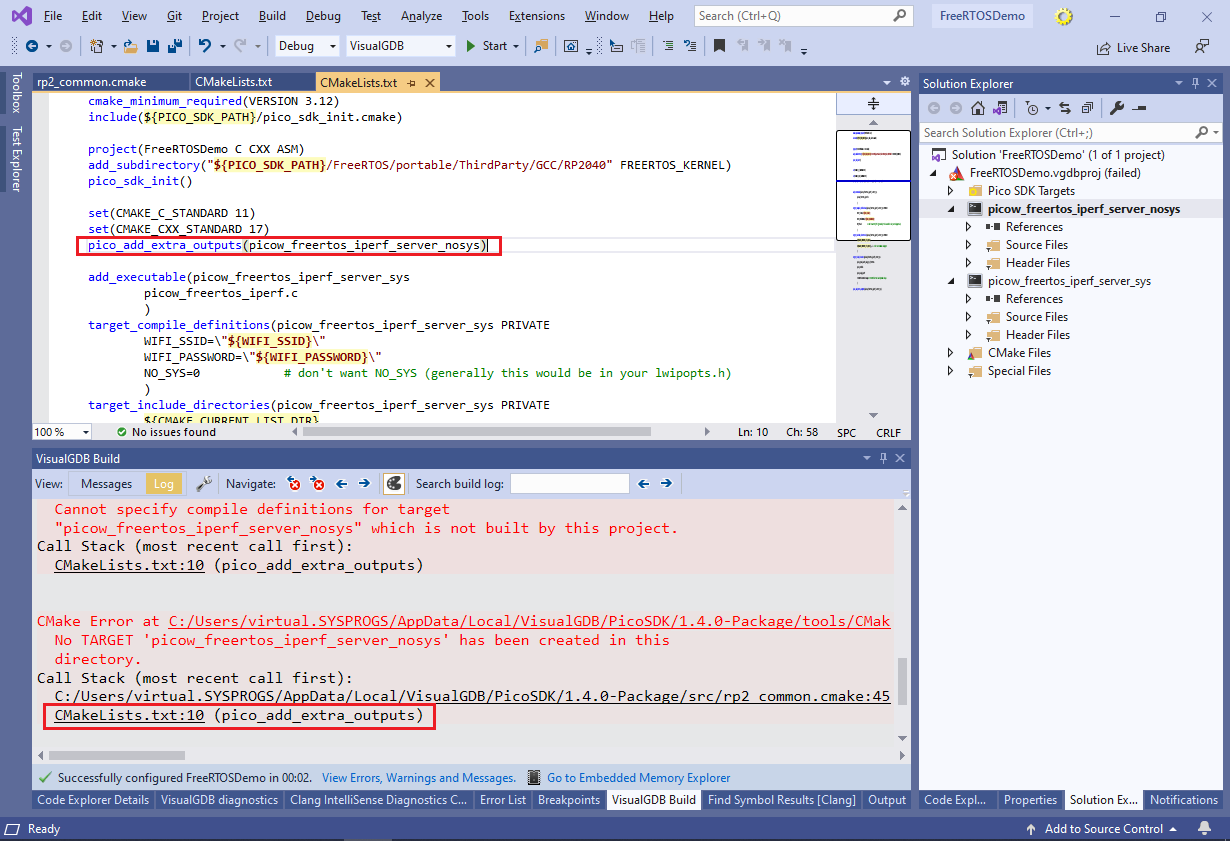
 - Press “Finish” to create the project. Note that the original iperf sample build 2 executables: pico_w_freertos_iperf_server_nosys and picow_freertos_iperf_server_sys. The difference between them is the lwIP NO_SYS macro, that removes FreeRTOS-specific support from lwIP, precluding the use of the regular socket API. To avoid any confusion, click on the pico_w_freertos_iperf_server_nosys target in Solution Explorer and press the Delete key to remove it:
- Note that VisualGDB will automatically clean up the regular CMake statements like add_executable() but not the Pico SDK-specific pico_add_extra_output() statement, so the project will refuse to load. Click on the last line in the CMake output to navigate to the line with the pico_add_extra_outputs() statement:
- Once you remove the statement and save the CMakeLists.txt file, the project will get loaded properly and the nosys executable will disappear:

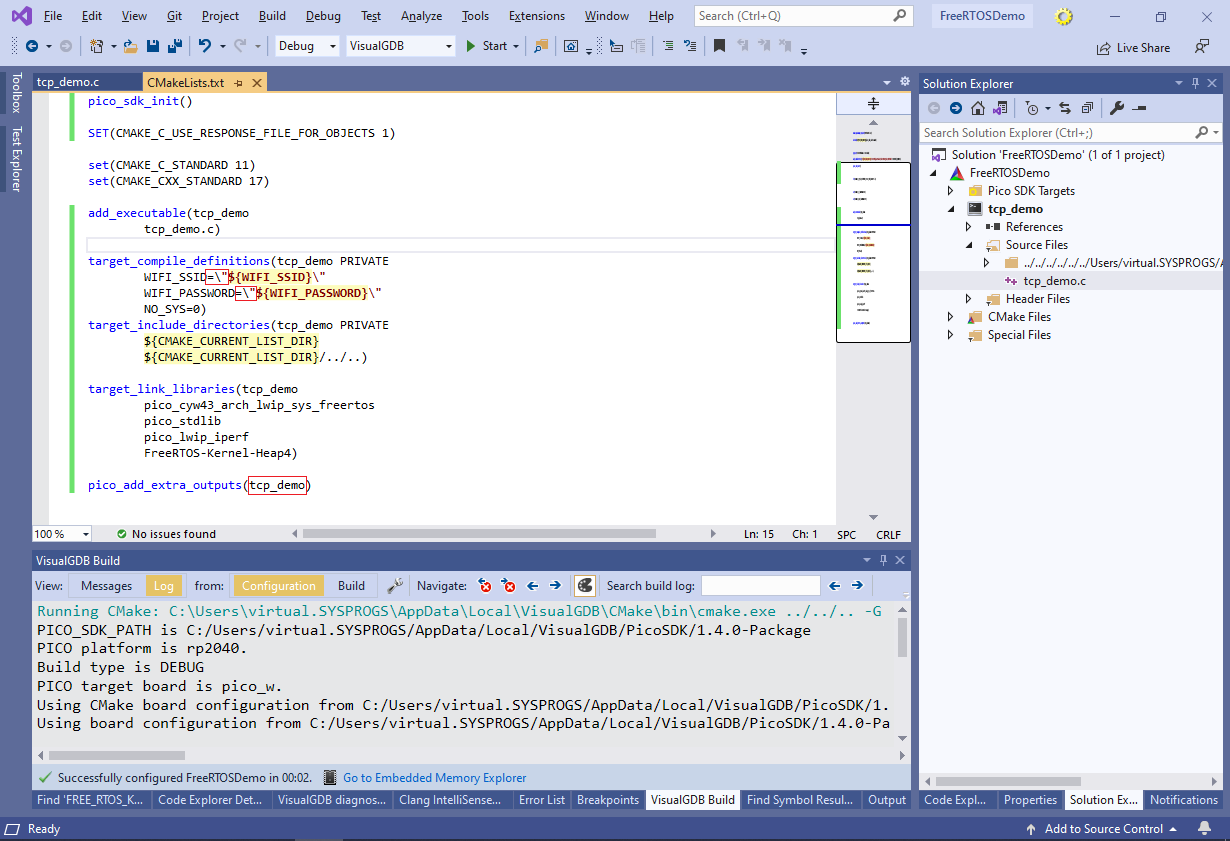
- You can also change the name of the main source file and the main executable to tcp_demo via Solution Explorer, however it may require a couple of manual adjustments:
- VisualGDB will automatically update the target_compile_definitions(), target_include_directories() and target_link_libraries() statements, but not the PicoSDK-specific pico_add_extra_outputs() statement. The latter will need to be updated manually.
- If you are using an older VisualGDB version, renaming the executable may insert a space after the WIFI_SSID/WIFI_PASSWORD definitions, preventing the build from succeeding. If this happens, simply remove the spaces and the project will build as expected.
- Replace the contents of the main source file with the following code:
#include "pico/cyw43_arch.h"
#include "pico/stdlib.h"

#include "lwip/apps/lwiperf.h"
#include "lwip/ip4_addr.h"
#include "lwip/netif.h"

#include "FreeRTOS.h"
#include "task.h"

#define TEST_TASK_PRIORITY (tskIDLE_PRIORITY + 2UL)

static void run_server()
{
    while (true)
    {
        vTaskDelay(100);
    }
}

static void main_task(__unused void *params)
{
    if (cyw43_arch_init())
    {
        printf("failed to initialise\n");
        return;
    }

    cyw43_arch_enable_sta_mode();

    printf("Connecting to WiFi...\n");

    if (cyw43_arch_wifi_connect_timeout_ms(WIFI_SSID, WIFI_PASSWORD, CYW43_AUTH_WPA2_AES_PSK, 30000))
    {
        printf("failed to connect.\n");
        exit(1);
    }
    else
    {
        printf("Connected.\n");
    }

    run_server();
    cyw43_arch_deinit();
}

int main(void)
{
    stdio_init_all();
    TaskHandle_t task;
    xTaskCreate(main_task, "MainThread", configMINIMAL_STACK_SIZE, NULL, TEST_TASK_PRIORITY, &task);
    vTaskStartScheduler();
}
This removes the logic for launching iperf, running lwIP without FreeRTOS integration, and starting the iperf client/server.
- If you try running this version of the code, it will fail with a SIGTRAP error indicating memory corruption. To find it out, check the Debug->Windows->Live Watch->FreeRTOS->Threads (requires VisualGDB Custom Edition or higher):
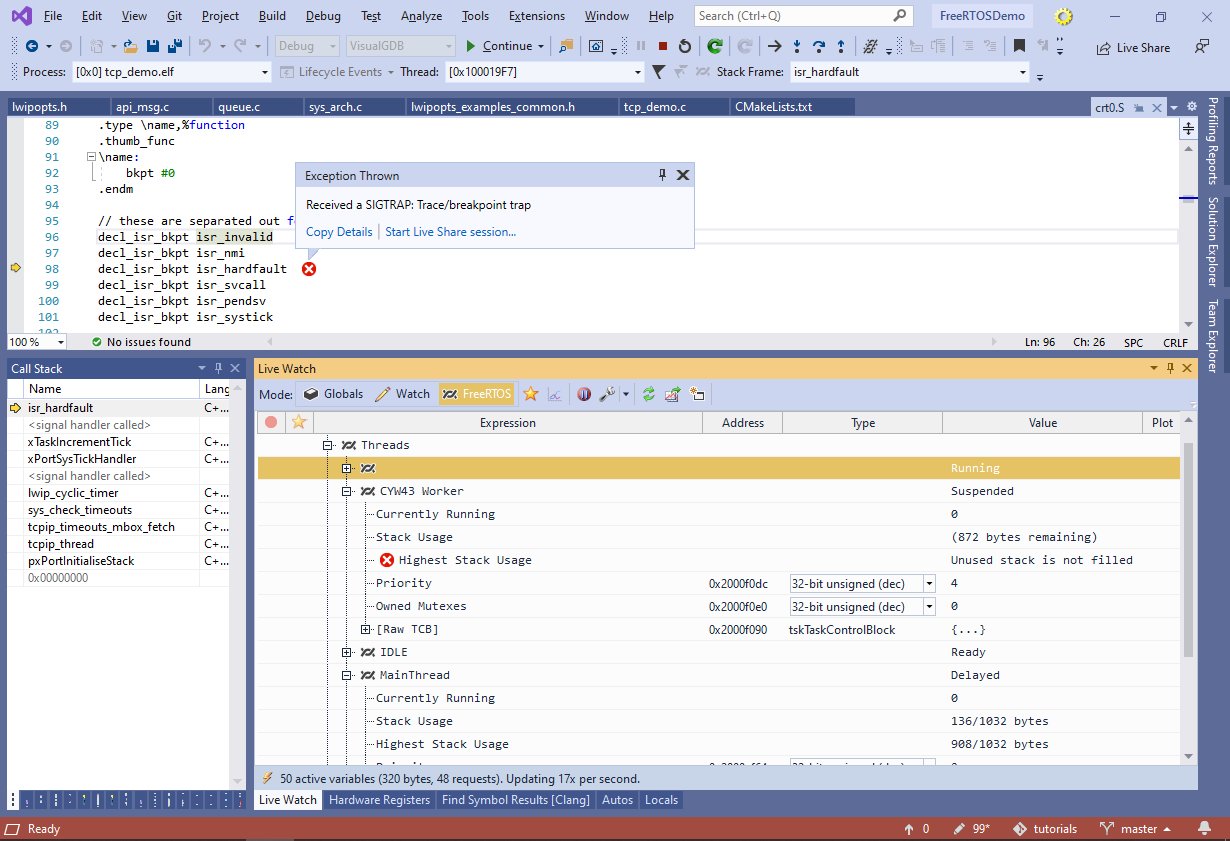 Note how the highest stack usage for the MainThread has almost exceeded the maximum value, and the maximum usage for CYW43 Worker thread cannot be computed, indicating that the stack has overflown.
 - If you search for the “CYW43 Worker” text in the entire project, you can find how the thread is created with the minimal stack size:

- Increase the stack size from 256 to 512 by editing the configMINIMAL_STACK_SIZE definition in FreeRTOSConfig.h. You can also edit the configTOTAL_HEAP_SIZE value to increase the size of the heap:

- Now it’s time to add logic for creating the sockets. Replace the previous version of run_server() with the following code:
#include <lwip/sockets.h>

static int handle_single_command(int conn_sock)
{
    vTaskDelay(100);
    return 0;
}

static void handle_connection(int conn_sock)
{
    while (!handle_single_command(conn_sock))
    {
    }

    closesocket(conn_sock);
}

static void run_server()
{
    int server_sock = socket(AF_INET, SOCK_STREAM, IPPROTO_IP);
    struct sockaddr_in listen_addr =
        {
            .sin_len = sizeof(struct sockaddr_in),
            .sin_family = AF_INET,
            .sin_port = htons(1234),
            .sin_addr = 0,
        };

    if (server_sock < 0)
    {
        printf("Unable to create socket: error %d", errno);
        return;
    }

    if (bind(server_sock, (struct sockaddr *)&listen_addr, sizeof(listen_addr)) < 0)
    {
        printf("Unable to bind socket: error %d\n", errno);
        return;
    }

    if (listen(server_sock, 1) < 0)
    {
        printf("Unable to listen on socket: error %d\n", errno);
        return;
    }

    printf("Starting server at %s on port %u\n", ip4addr_ntoa(netif_ip4_addr(netif_list)), ntohs(listen_addr.sin_port));

    while (true)
    {
        struct sockaddr_storage remote_addr;
        socklen_t len = sizeof(remote_addr);
        int conn_sock = accept(server_sock, (struct sockaddr *)&remote_addr, &len);
        if (conn_sock < 0)
        {
            printf("Unable to accept incoming connection: error %d\n", errno);
            return;
        }
        handle_connection(conn_sock);
    }
}
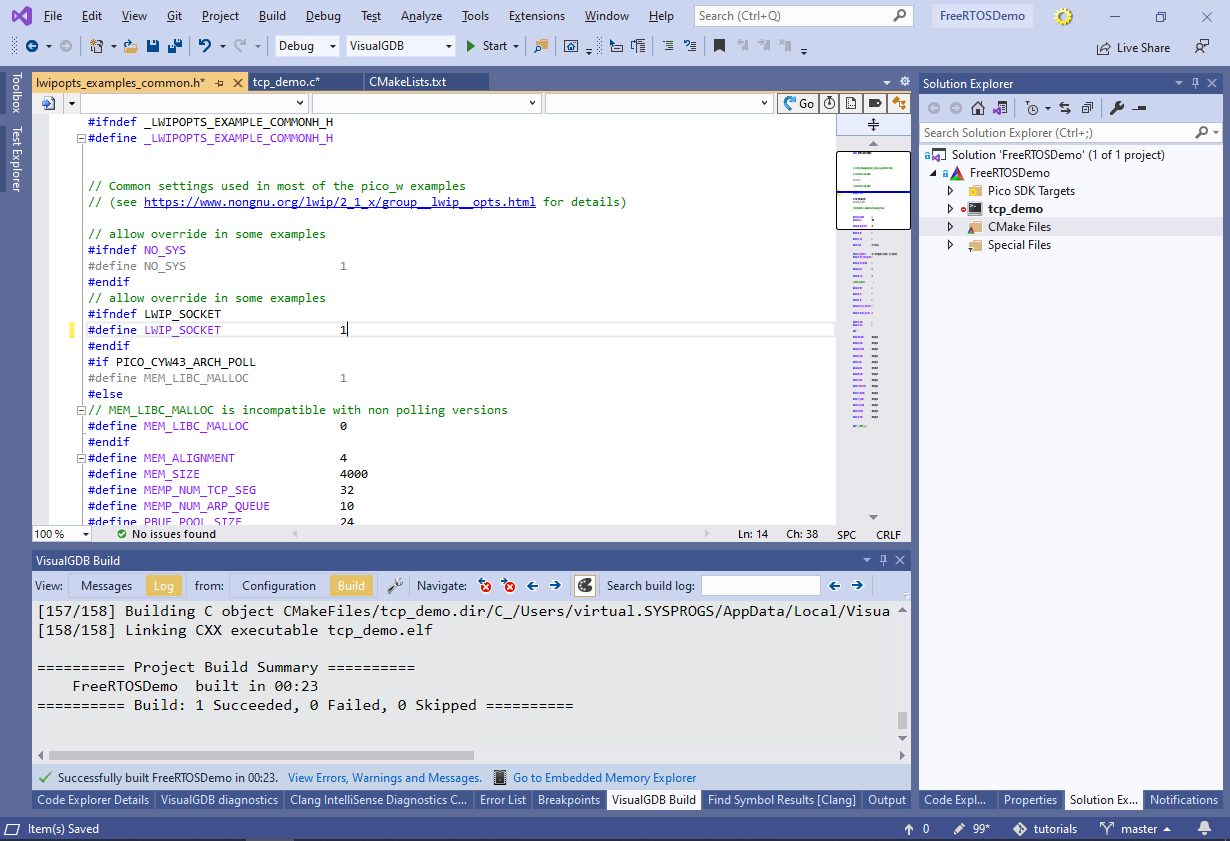
- The code will initially not compile because the socket API is not enabled in the Raspberry Pi Pico SDK by default. Locate the lwipopts_examples_common.h file in the project directory and set the LWIP_SOCKET definition to 1:
- If you try running this version of the code, the lwIP framework will trigger an exception when trying to create the socket. Going up the call stack will show that the netconn_alloc() function is trying to allocate a zero-sized queue because the DEFAULT_TCP_RECVMBOX_SIZE macro is set to 0:
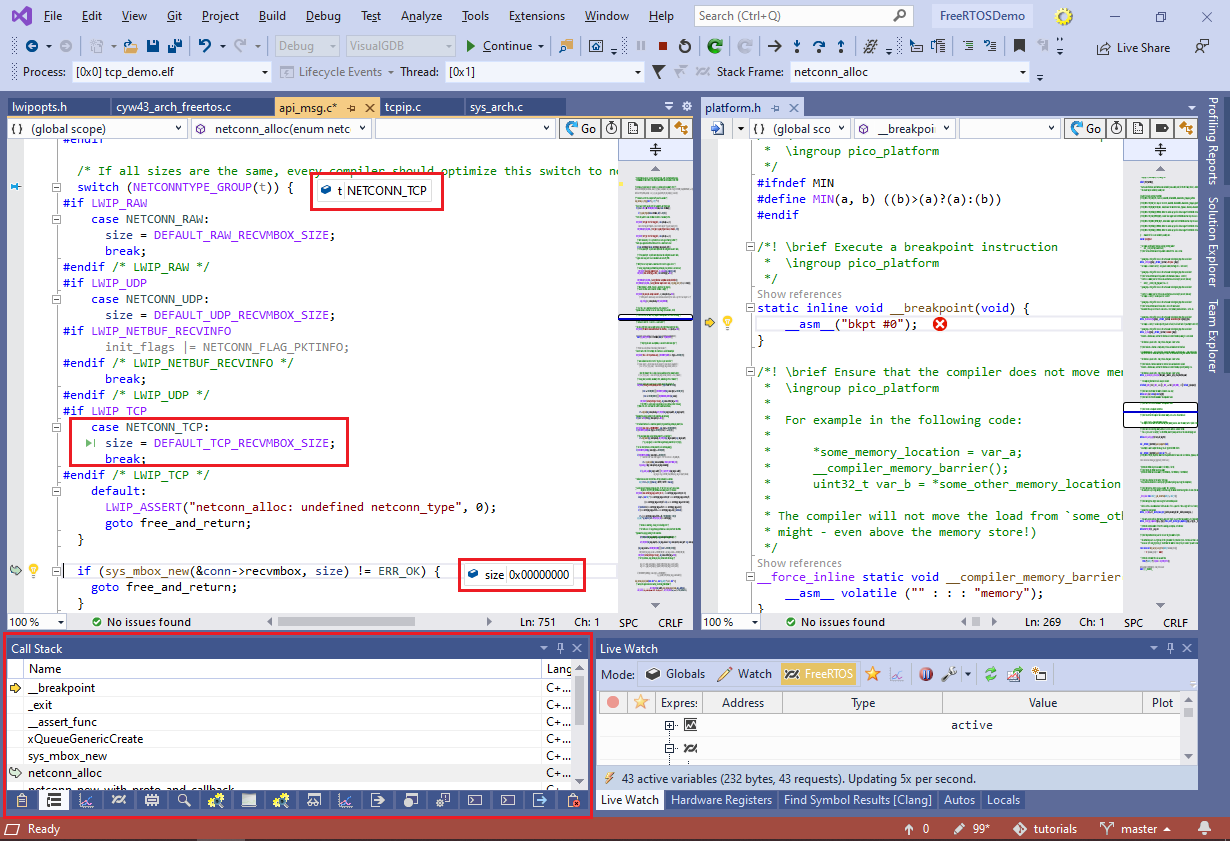
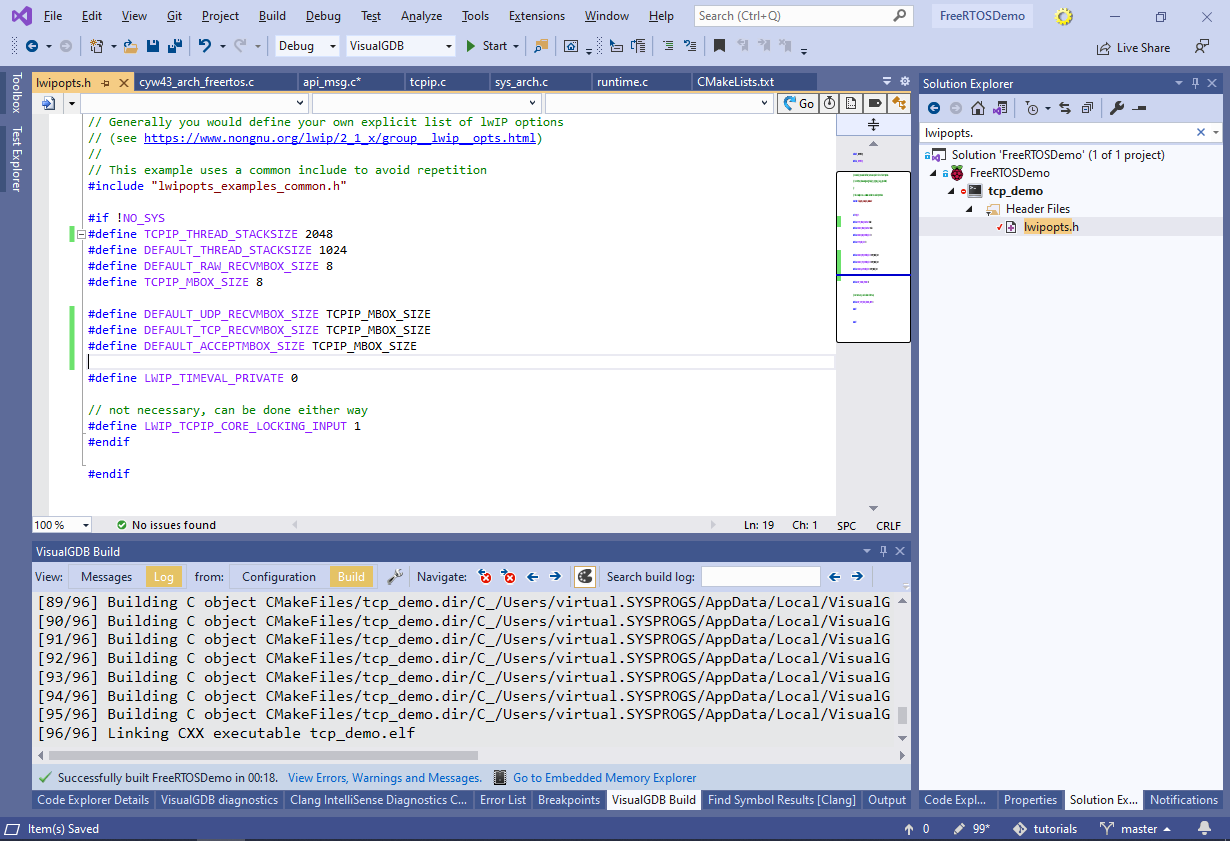
- In order to fix it, open the lwipopts.h file in the project directory and add the following code there:
#define DEFAULT_UDP_RECVMBOX_SIZE TCPIP_MBOX_SIZE
#define DEFAULT_TCP_RECVMBOX_SIZE TCPIP_MBOX_SIZE
#define DEFAULT_ACCEPTMBOX_SIZE TCPIP_MBOX_SIZE
Now the socket functions will work as expected:
- Finally, we can replace the empty handle_single_command() implementation with a more meaningful one:
static void send_message(int socket, char *msg)
{
    int len = strlen(msg);
    int done = 0;
    while (done < len)
    {
        int done_now = send(socket, msg + done, len - done, 0);
        if (done_now <= 0)
            return;
        done += done_now;
    }
}

static int handle_single_command(int conn_sock)
{
    char buffer[128];
    int done = 0;
    send_message(conn_sock, "Enter command: ");

    while (done < sizeof(buffer))
    {
        int done_now = recv(conn_sock, buffer + done, sizeof(buffer) - done, 0);
        if (done_now <= 0)
            return -1;
        done += done_now;
        char *end = strnstr(buffer, "\r", done);
        if (!end)
            continue;
        *end = 0;

        if (!strcmp(buffer, "on"))
        {
            cyw43_arch_gpio_put(0, true);
            send_message(conn_sock, "The LED is now on\r\n");
        }
        else if (!strcmp(buffer, "off"))
        {
            cyw43_arch_gpio_put(0, false);
            send_message(conn_sock, "The LED is now off\r\n");
        }
        else
        {
            send_message(conn_sock, "Unknown command\r\n");
        }
        break;
    }

    return 0;
}
It will ask the user to enter a command, and will then expect either the “on” command for turning on the LED, or “off” for turning it off.
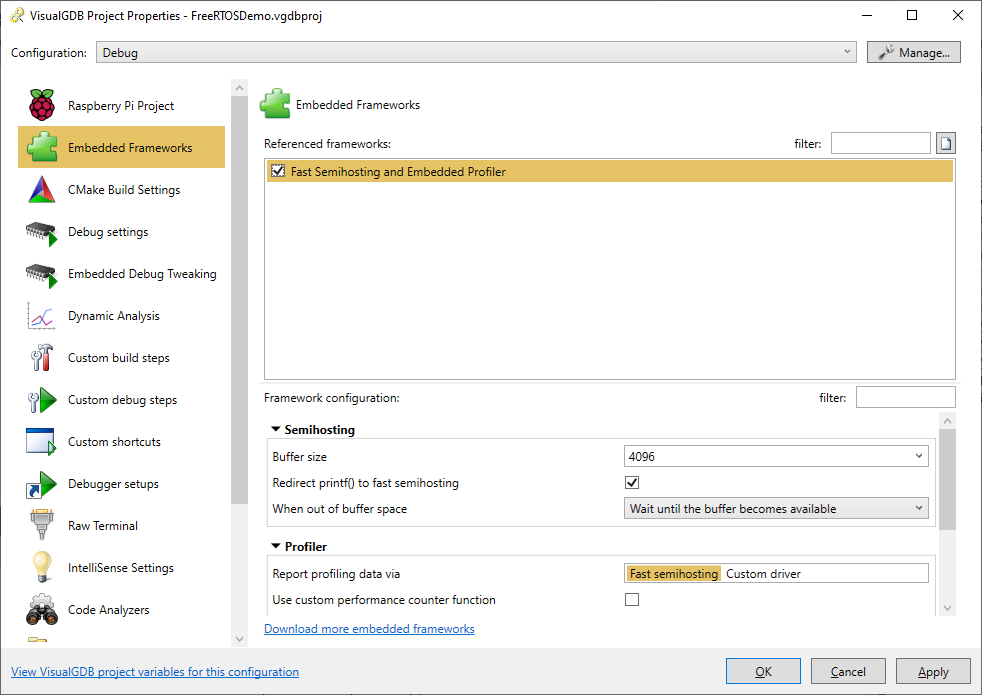
- Before you run this code, we advise opening VisualGDB Project Properties and referencing the Fast Semihosting and Embedded Profiler framework so that you can see the output from printf() without having to connect to the UART pins:
- Try running the program now. It will connect to the Wi-Fi network and will display the IP address it acquired:
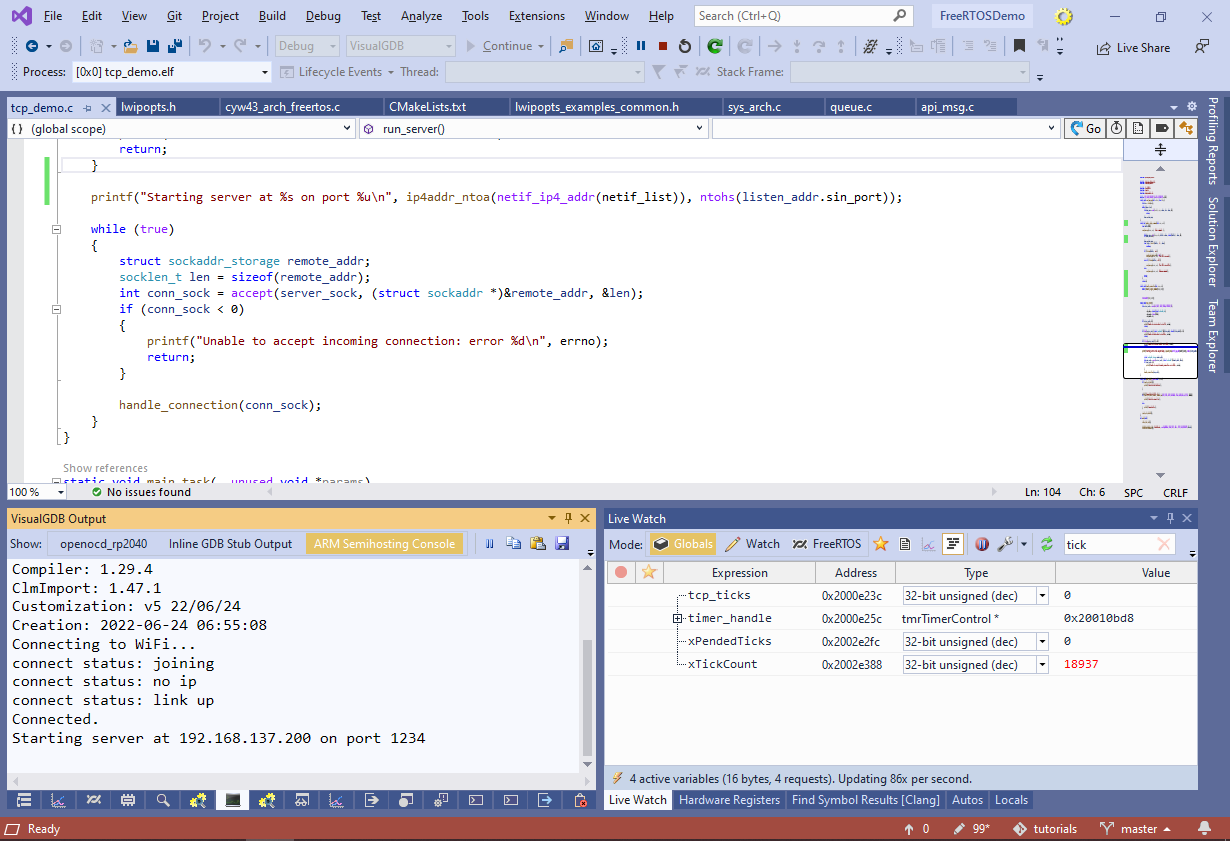
- Try connecting to the shown IP address via telnet (Start->Run->telnet <IP> 1234) and running some commands. Observe how the LED turns on and off:
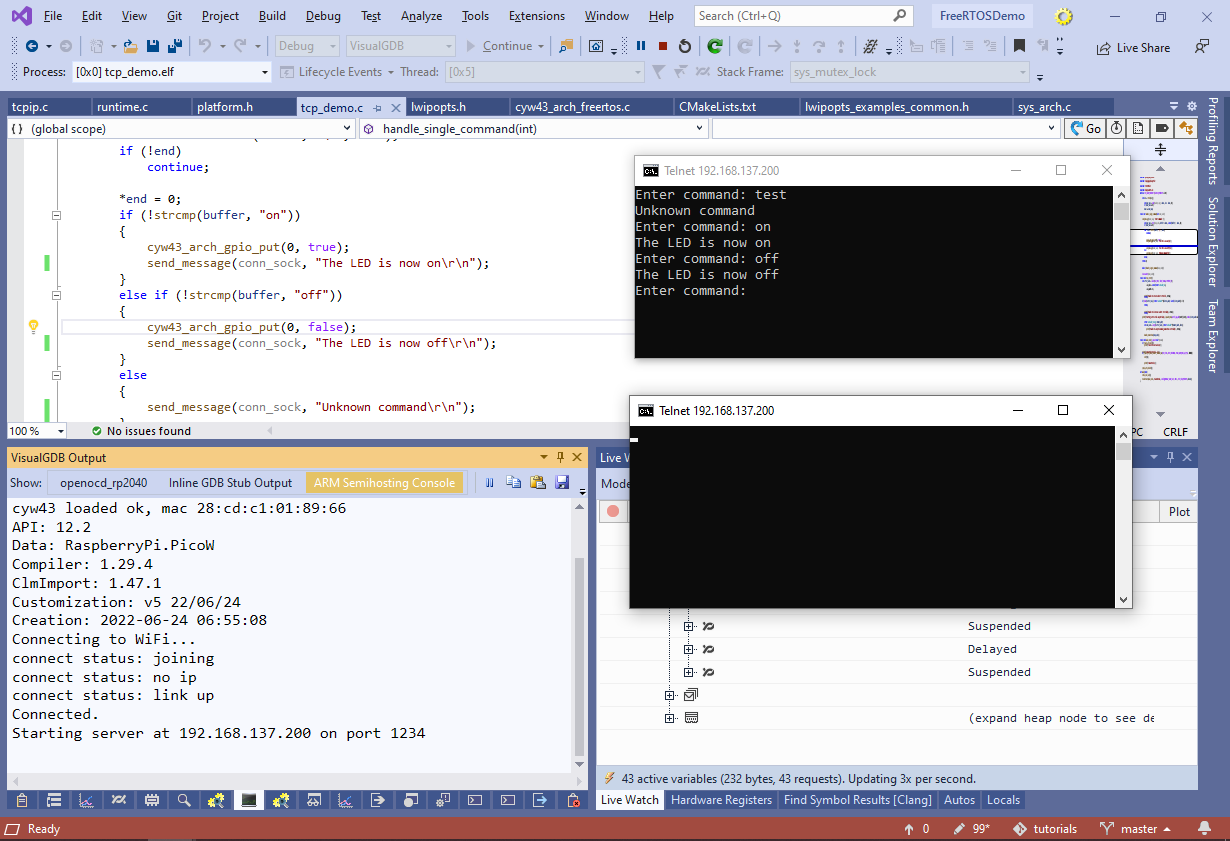 Note that opening subsequent telnet connections won’t work until the first connection is closed because the code still handles them within one thread.
 - This limitation can be easily avoided if we create a separate thread for each incoming connection. First of all, create a semaphore that will limit the amount of simultaneously running connection threads:
const int kConnectionThreadCount = 3;
static xSemaphoreHandle s_ConnectionSemaphore;

int main()
{
    /* .... */
    s_ConnectionSemaphore = xSemaphoreCreateCounting(kConnectionThreadCount, kConnectionThreadCount);
    vTaskStartScheduler();
}
Then update the handle_connection() function to start a new thread instead of running in-place:
static void do_handle_connection(void *arg)
{
    int conn_sock = (int)arg;
    while (!handle_single_command(conn_sock))
    {
    }

    closesocket(conn_sock);
    xSemaphoreGive(s_ConnectionSemaphore);
    vTaskDelete(NULL);
}

static void handle_connection(int conn_sock)
{
    TaskHandle_t task;
    xSemaphoreTake(s_ConnectionSemaphore, portMAX_DELAY);
    xTaskCreate(do_handle_connection, "Connection Thread", configMINIMAL_STACK_SIZE, (void *)conn_sock, TEST_TASK_PRIORITY, &task);
}
Finally, increase the backlog size passed to the listen() function in run_server():
if (listen(server_sock, kConnectionThreadCount * 2) < 0)
{
    printf("Unable to listen on socket: error %d\n", errno);
    return;
}
- Now you will be able to handle up to kConnectionThreadCount connections simultaneously without having to manually pass the state between callback functions:
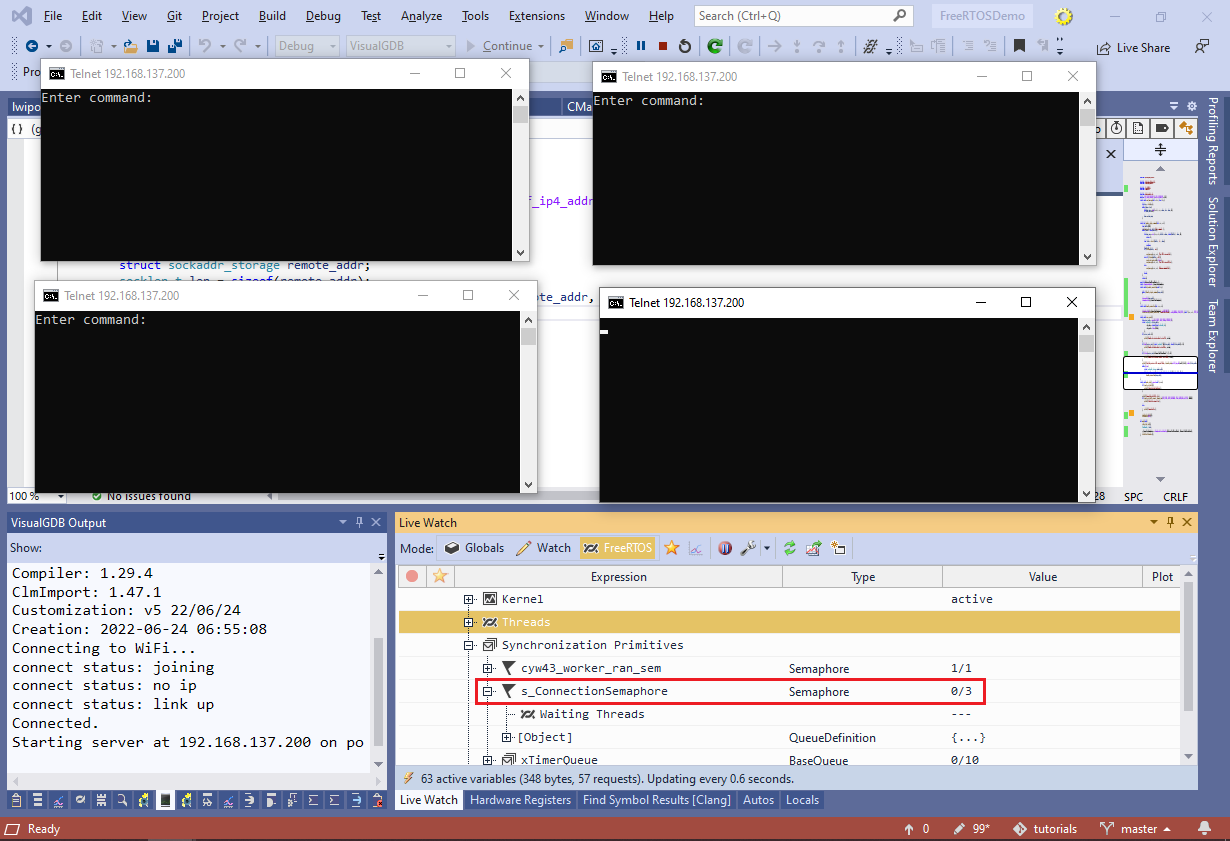 You can use the Live Watch view to monitor the value of the s_ConnectionSemaphore semaphore in the real time. It will reflect the number of currently running connection threads.
You can find the source code for the project shown in this tutorial in our GitHub repository.