Creating Embedded Bootloader Projects with MSBuild
This tutorial shows how to create an MSBuild-based project for an embedded bootloader that will be stored in a separate region of the FLASH memory and can be linked independently from the main project:
This is a simplified version of the GNU Make-based bootloader tutorial. We will focus on configuring MSBuild to link the outputs from 2 projects together and will leave out details about interrupt handling and system calls that are described in the GNU Make-based tutorial. For even better development experience, consider following the Advanced CMake bootloader tutorial instead.
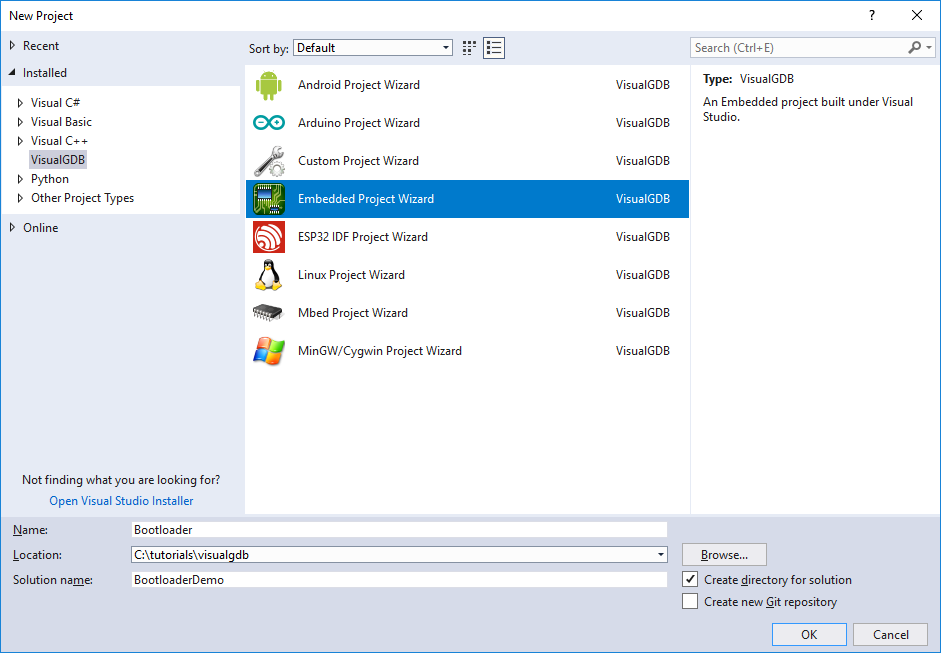
- Start Visual Studio and open the VisualGDB Embedded Project Wizard. Check the “Create directory for solution” checkbox as we will later create another project in the same solution:
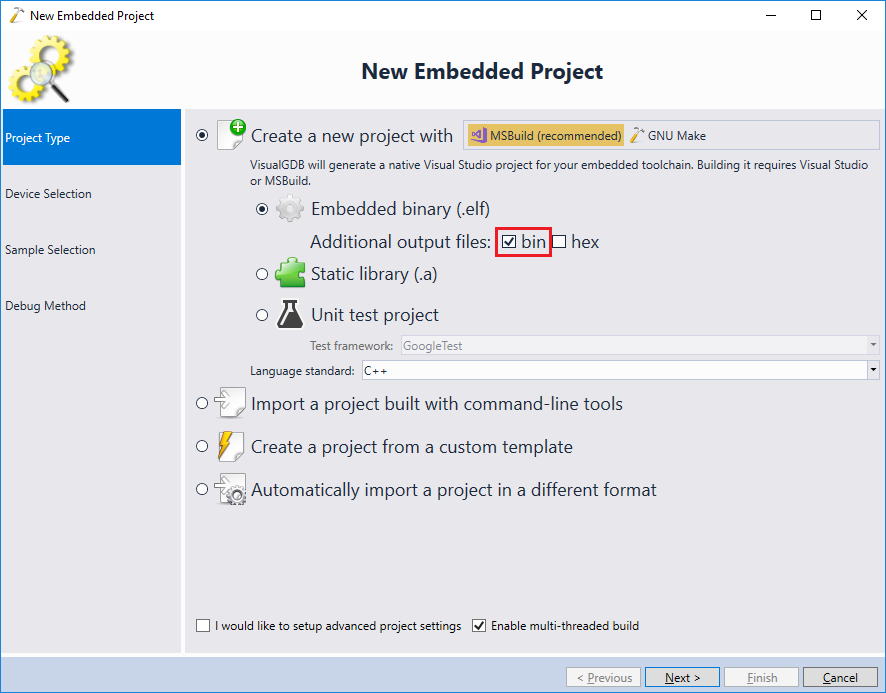
- On the first page select “Create a new project with MSBuild”, choose “Embedded Binary” and check the “bin” checkbox:
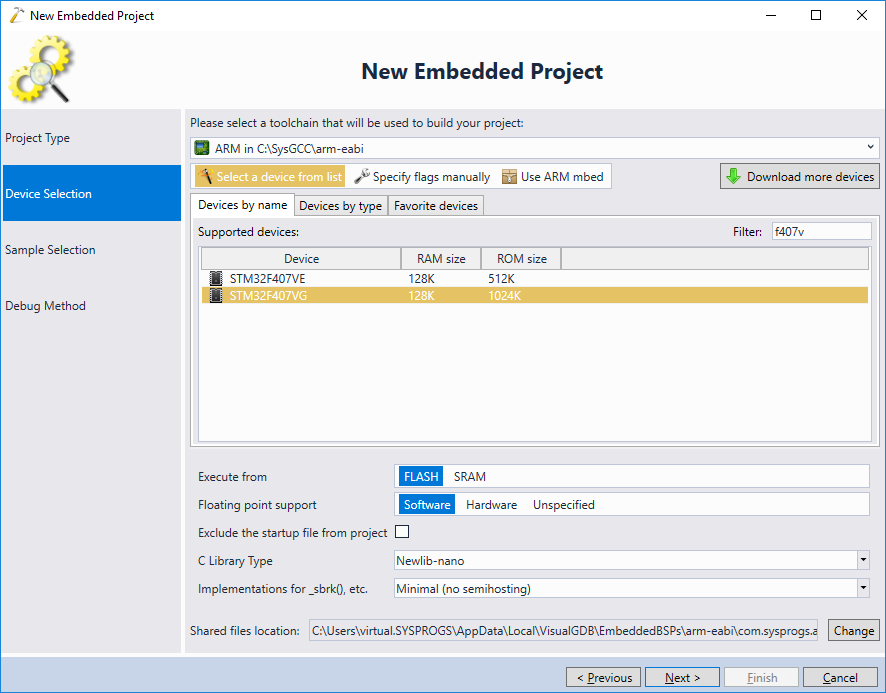
- Then select your toolchain and the device you would like to target. In this tutorial we will target the STM32F4-Discovery board with the STM32F407VG device:
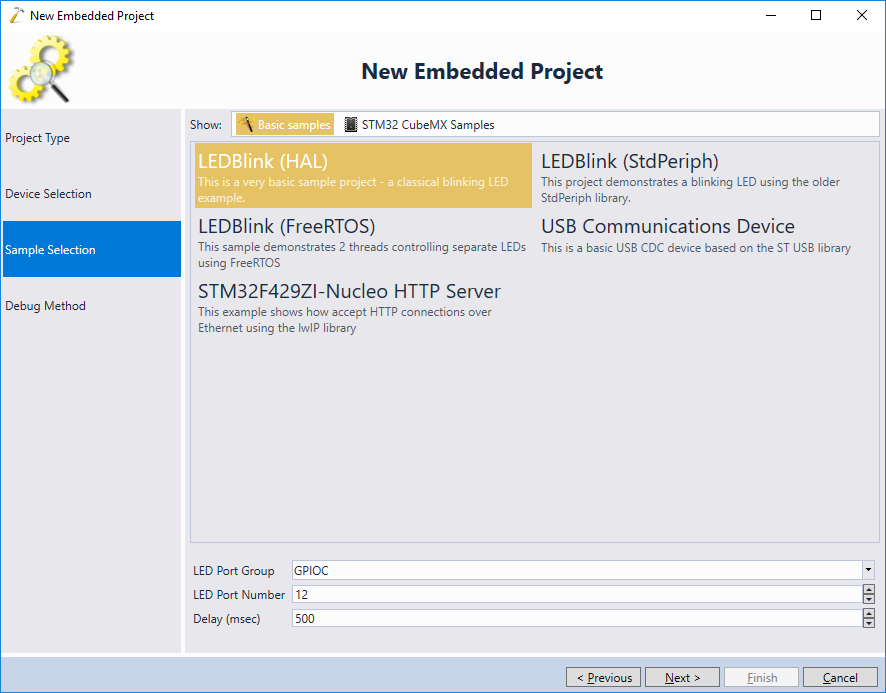
- We will create the bootloader based on the LEDBlink example, so select it in the list and click “Next”:
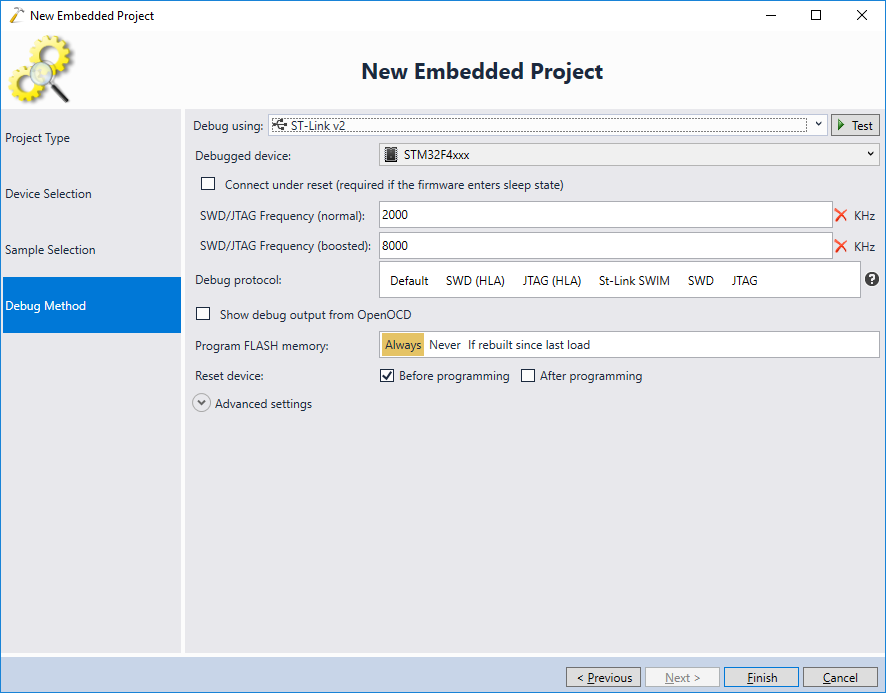
- Select the debug method compatible with your board and press “Finish” to generate the project:
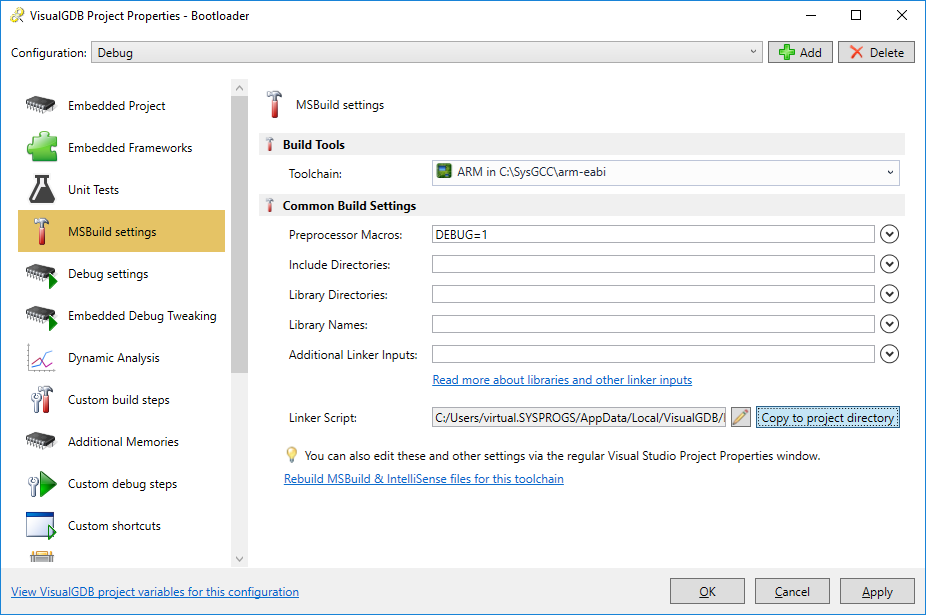
- Once the project is created, open VisualGDB Project Properties and make a local copy of the linker script file:
- We will now modify the linker script to reflect the memory layout used by the bootloader and the application. The only modification required on the bootloader side is to define the _app_start symbol to point to the start of the actual application (see the entire linker script here):
_app_start = 0x08000000 + 0x4000;
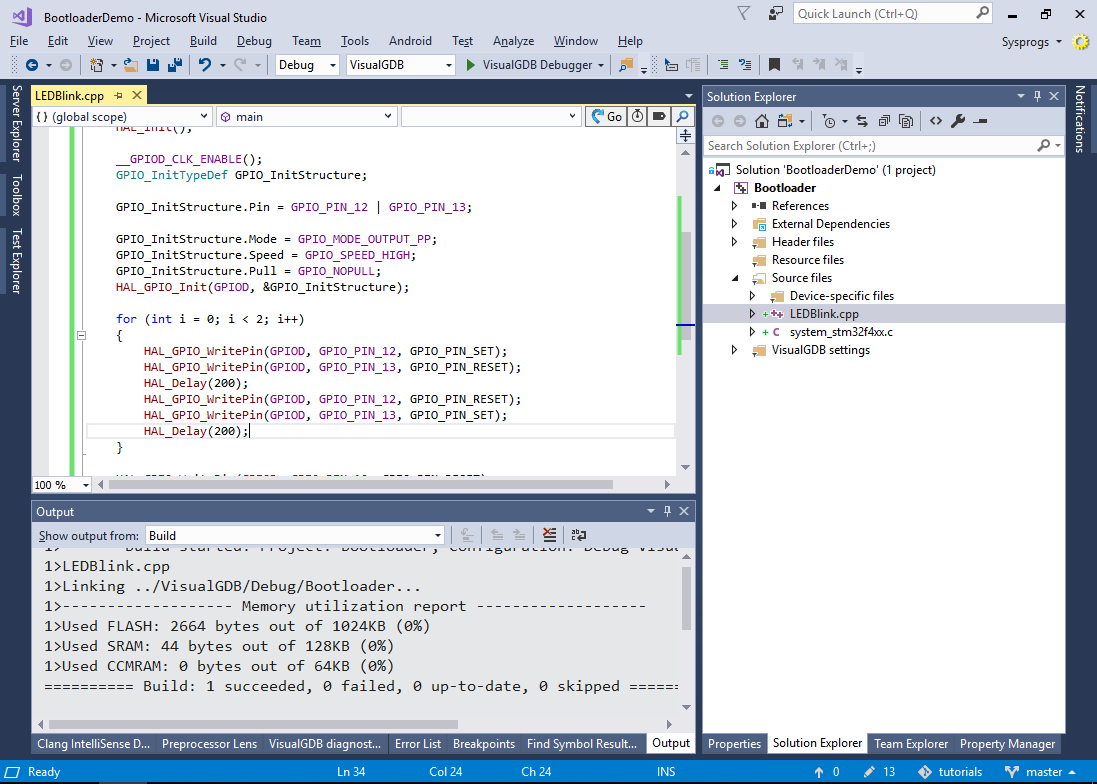
Then replace the contents of the main file with this code. It will blink the on-board LEDs twice and then pass control to the main application by calling the function stored at the second slot after the _app_start address (we will later place the main application’s reset handler there):
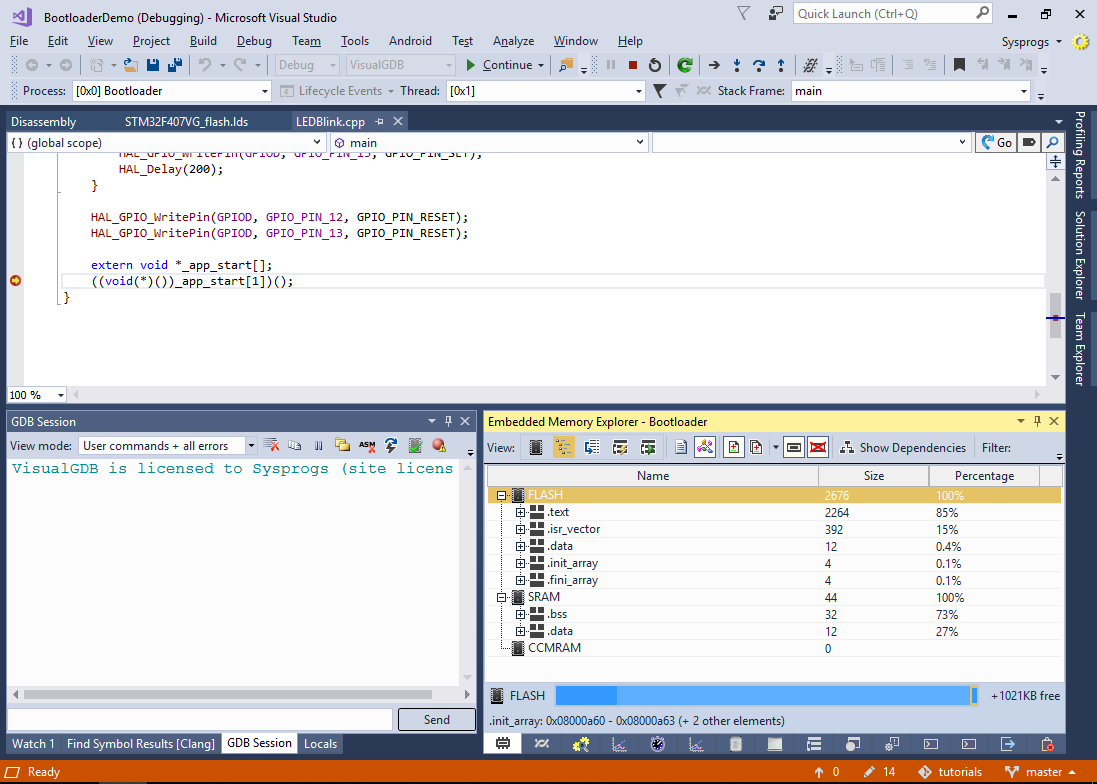
- Set a breakpoint at the _app_start() call and start debugging. Verify that the on-board LEDs blink twice and that the breakpoint hits immediately after:
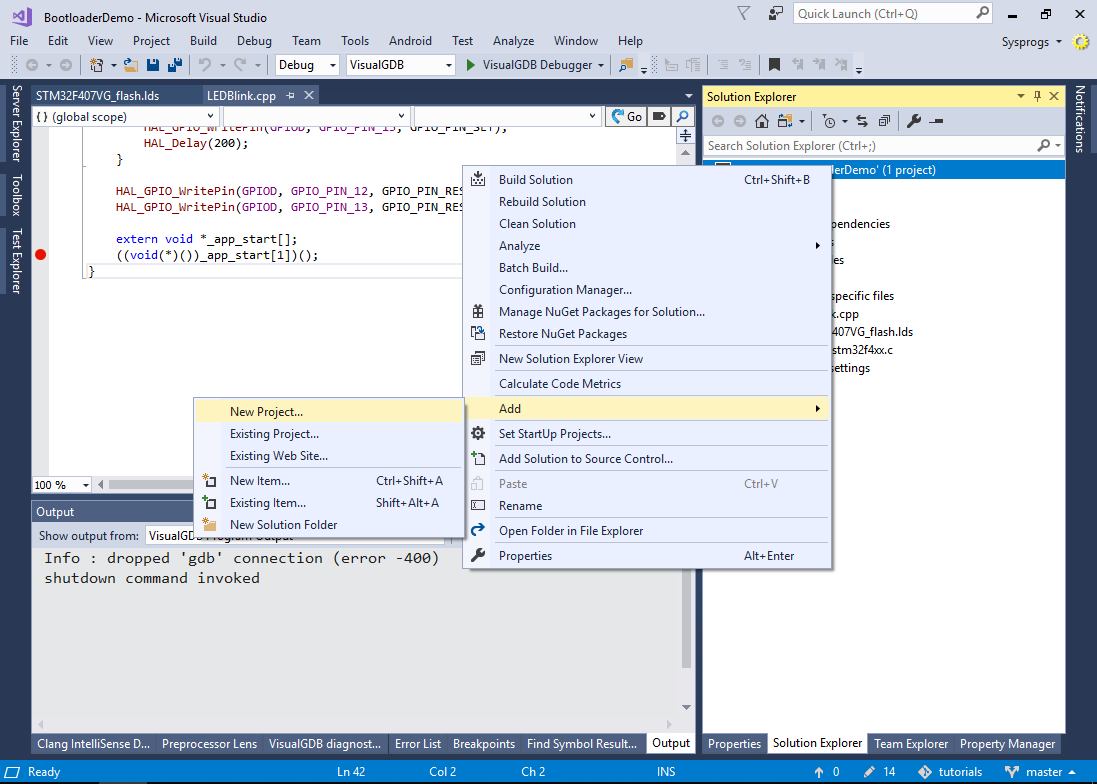
- As we don’t have the actual application in the FLASH memory yet, stepping into _app_start() will likely cause the program to crash, so instead press Shift-F5 to end the debug session and create another project in the solution:
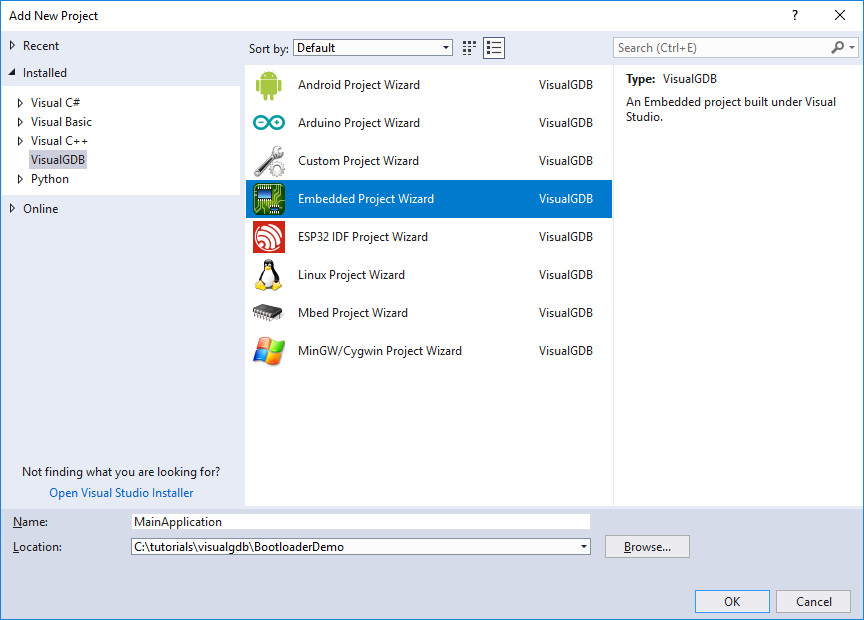
- Select the VisualGDB Embedded Project Wizard and create the project using the same settings as before:
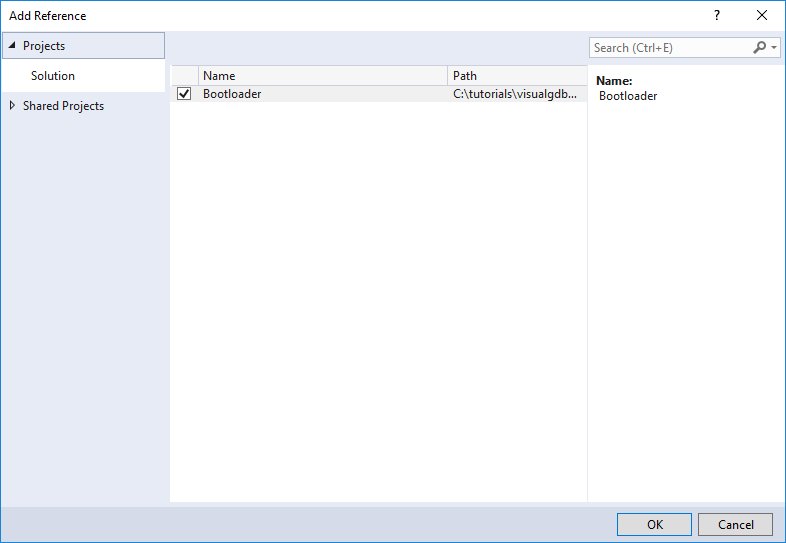
- Once the project is created, right-click on it in Solution Explorer and select “Add->Reference”:

- Add a reference from the main application project to the bootloader project:
- Make a copy of the main application’s linker script and add a .bootldr section before the .isr_vector section:
.bootldr :
{
    . = ALIGN(4);
    KEEP(*(.bootldr))
    FILL(0xFFFFFF)
    . = 0x4000;
} > FLASH
Now the linker will automatically search all linker inputs for symbols defined in the .bootldr section and will place them at the beginning of the FLASH memory. E.g. you could add the following declaration to one of the main application’s source files:
char __attribute__((section(".bootldr"))) g_Bootloader[] = { 0x01, 0x02, 0x03, 0x04 };
This would place the “01 02 03 04” bytes at the beginning of the FLASH memory, followed by the padding until the offset of 0x4000 where the rest of the program would be located (note that 01 02 03 04 is not a valid bootloader binary and is only provided to demonstrate how the linker places sections).
The interrupt table that will follow the .bootldr section will be placed at offset of 0x4000, so the _app_start symbol defined in the bootloader will point straight to it. Hence the call to _app_start[1]() from the bootloader will hence resolve to the main application’s reset handler, beginning the normal initialization sequence for the main application. - As manually writing down the bootloader contents in a source file won’t be practical, we will now modify the build rules of the main project to automatically take it from the .bin file produced by the bootloader project. Create a bootloader.props file in your main project’s directory and add the following text there:
<Project ToolsVersion="4.0" xmlns="http://schemas.microsoft.com/developer/msbuild/2003"> <Target Name="BuildBootloaderLinkerInputs"> <GenericGNUTool Sources = "@(_ResolvedProjectReferencePaths->'%(FullPath).bin')" Condition="'%(_ResolvedProjectReferencePaths.GNUTargetType)' == 'Application'" ToolPath="$(GNUToolchainBinaryDirectory)" ToolchainPrefix="$(GNUToolchainPrefix)" ExtraPath="$(GNUToolchainExtraPath)" VisualGDBSettingsFile="$(VisualGDBSettingsFile)" TargetPath="$(TargetPath)" ToolExeNameBase="ld" ResponseFileTag="bin2o" RepeatForEachSource="true" PrimaryOutput="@(_ResolvedProjectReferencePaths->'%(FullPath).bootldr-o0')" FastUpToDateCheckDatabaseFile="$(FastUpToDateCheckDatabaseFile)" RemoteBuildMakefile="$(RemoteBuildMakefile)" CommandFormat="-r -b binary $< -o $@"/> <GenericGNUTool Sources = "@(_ResolvedProjectReferencePaths->'%(FullPath).bootldr-o0')" Condition="'%(_ResolvedProjectReferencePaths.GNUTargetType)' == 'Application'" ToolPath="$(GNUToolchainBinaryDirectory)" ToolchainPrefix="$(GNUToolchainPrefix)" ExtraPath="$(GNUToolchainExtraPath)" VisualGDBSettingsFile="$(VisualGDBSettingsFile)" TargetPath="$(TargetPath)" ToolExeNameBase="objcopy" ResponseFileTag="bootldr-rename" RepeatForEachSource="true" PrimaryOutput="@(_ResolvedProjectReferencePaths->'%(FullPath).bootldr-o')" FastUpToDateCheckDatabaseFile="$(FastUpToDateCheckDatabaseFile)" RemoteBuildMakefile="$(RemoteBuildMakefile)" CommandFormat="--rename-section .data=.bootldr $< $@"/> <ItemGroup> <Link Include="@(_ResolvedProjectReferencePaths->'%(FullPath).bootldr-o')" Condition="'%(_ResolvedProjectReferencePaths.GNUTargetType)' == 'Application'"/> </ItemGroup> </Target> <PropertyGroup> <LinkOrLibDependsOn>$(LinkOrLibDependsOn);BuildBootloaderLinkerInputs</LinkOrLibDependsOn> </PropertyGroup> </Project>
The .props file defines a new target that will be executed before linking the main application. The target will perform 3 operations:
- For all referenced projects of type “Application” it will convert the <output file>.bin file into a .o file (equivalent to defining the g_Bootloader symbol in the .data section).
- It will then rename the .data section in those files (in this example, only 1 file is used as we have only 1 bootloader project) to .bootldr.
- Finally, it will add those files as regular linker inputs.
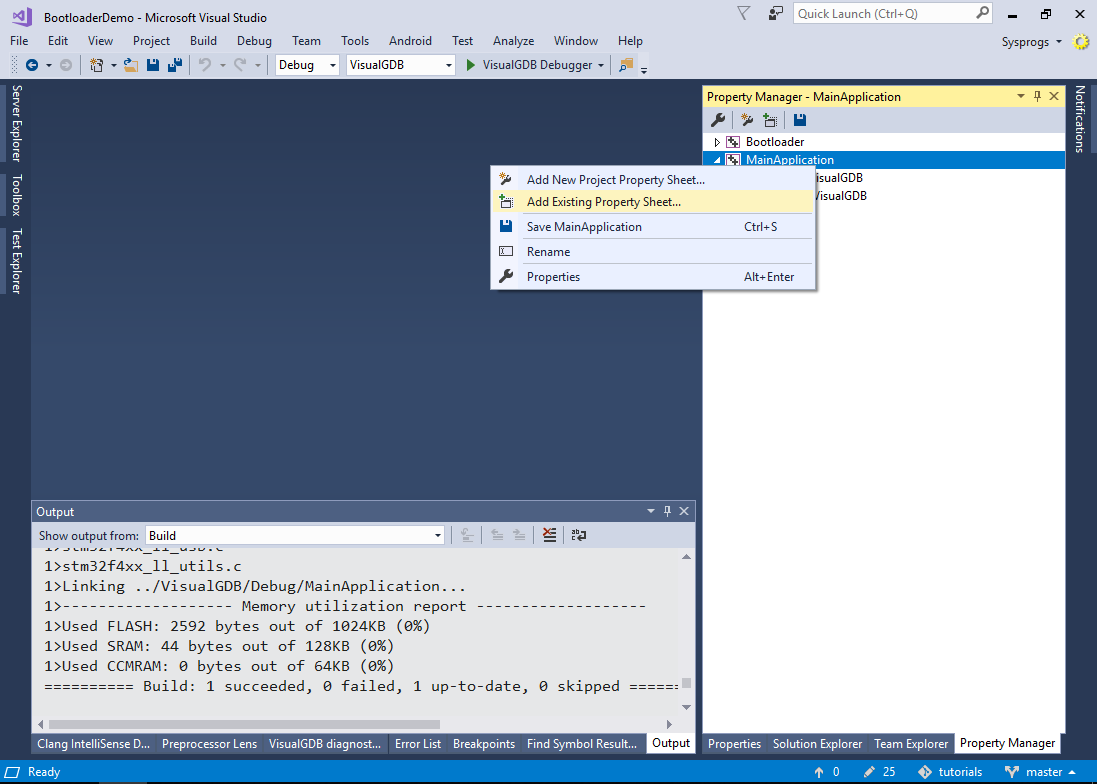
- Reference the .props file from your main project by opening View->Other Windows->Property Manager and then selecting “Add Existing Property Sheet” for the main application:
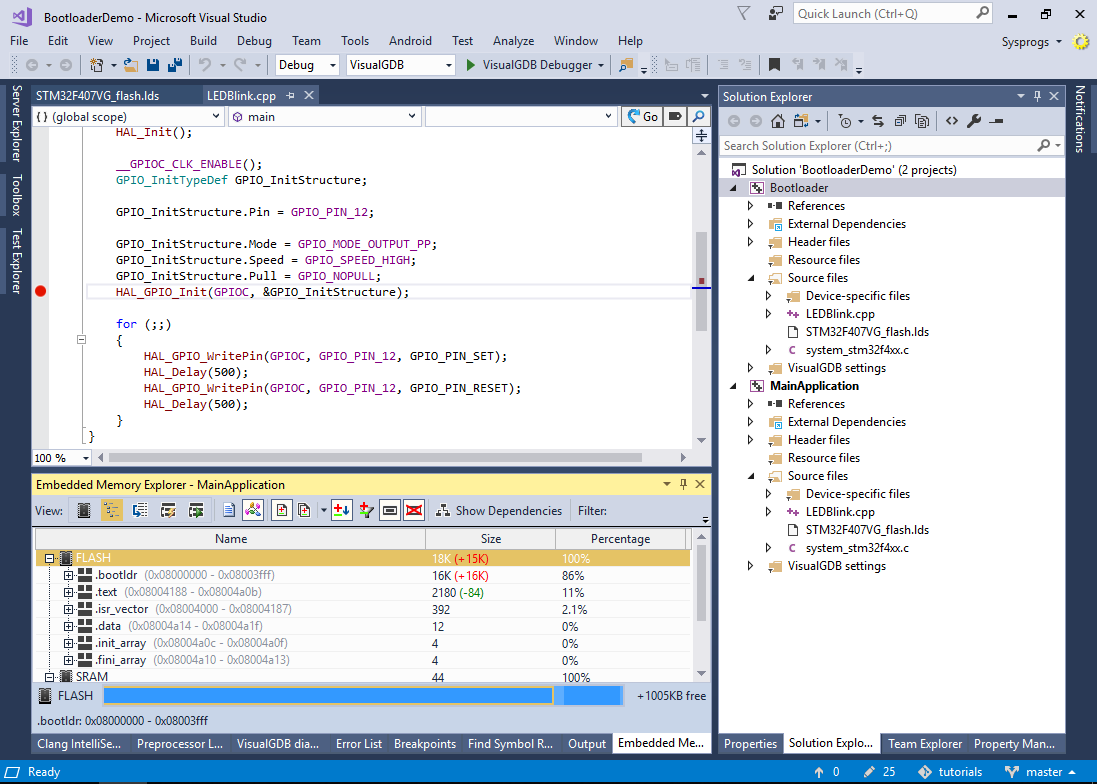
- Now you can build your solution. Set MainApplication as the startup project via the context menu and open Embedded Memory Explorer. See how the .bootldr section got placed at the beginning of the FLASH memory followed by the .isr_vector exactly at 0x08004000:
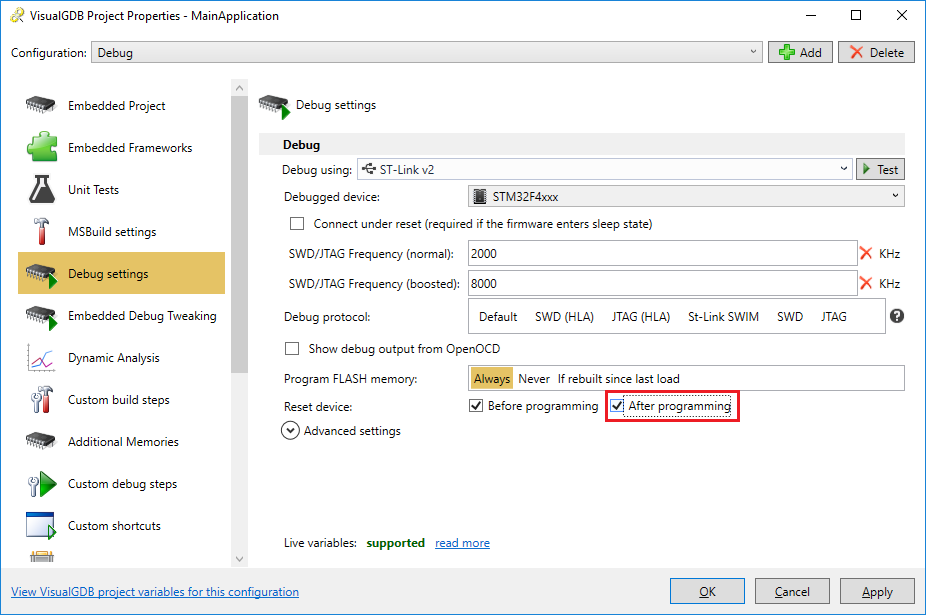
- If you try debugging your project now, OpenOCD will override the default behavior of the CPU and will jump to your program’s entry point bypassing the bootloader. To disable this behavior, set the “Reset device after programming” flag:
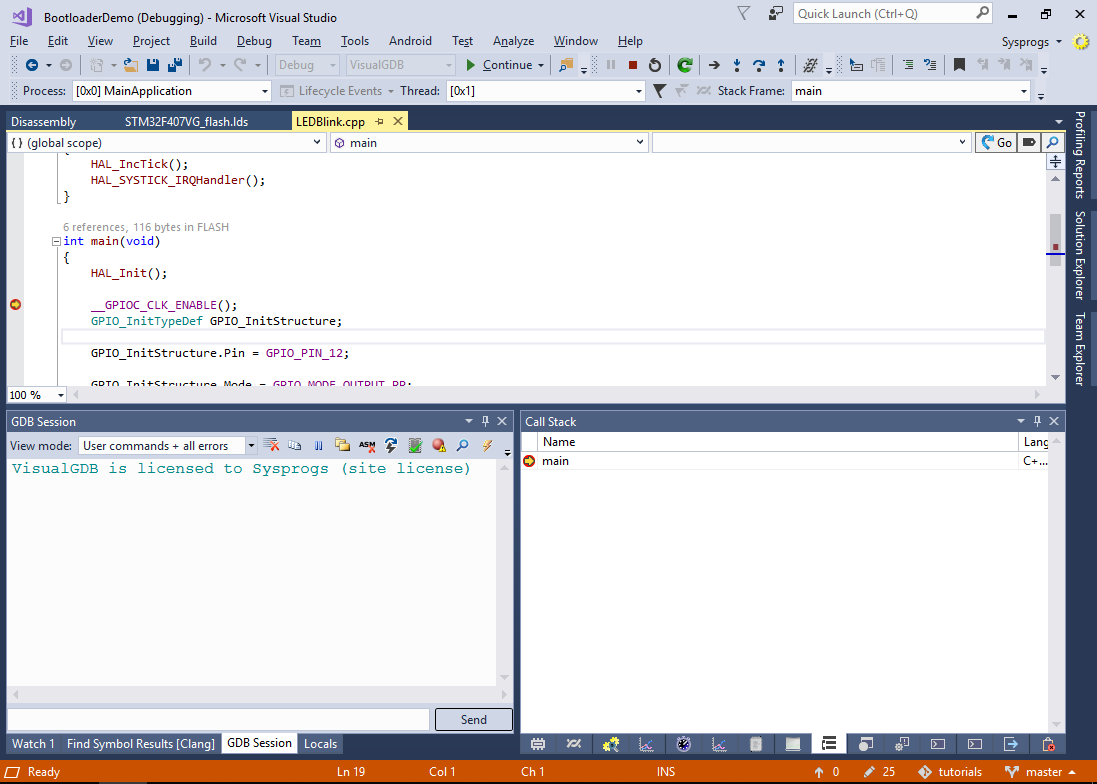
- Now you can press F5 to debug your application. The LEDs will blink twice as the bootloader gets initialized and then the main application will be called by it:
You can find the project shown in this tutorial in our Github repository here: https://github.com/sysprogs/tutorials/tree/master/visualgdb/ARM/BootloaderDemo
To learn about handling interrupts in bootloader-based setups and using syscalls from the application to the bootloader, follow the second part of the GNU Make-based bootloader tutorial.