Using OpenCV library on Raspberry Pi
This tutorial shows how to use the OpenCV 2 library in cross-compiled projects for Raspberry Pi 2. Before you begin, download the Raspberry Pi Jessie image and write it to the SD card. Then get a cross-toolchain compatible with the image from the gnutoolchains.com website.
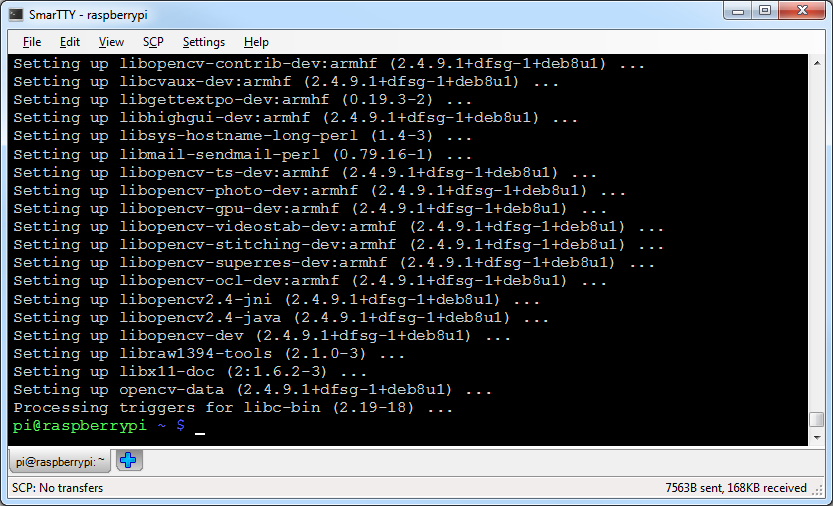
- Connect to your Raspberry Pi via SSH and run the “sudo apt-get install libopencv-dev” command to install OpenCV:
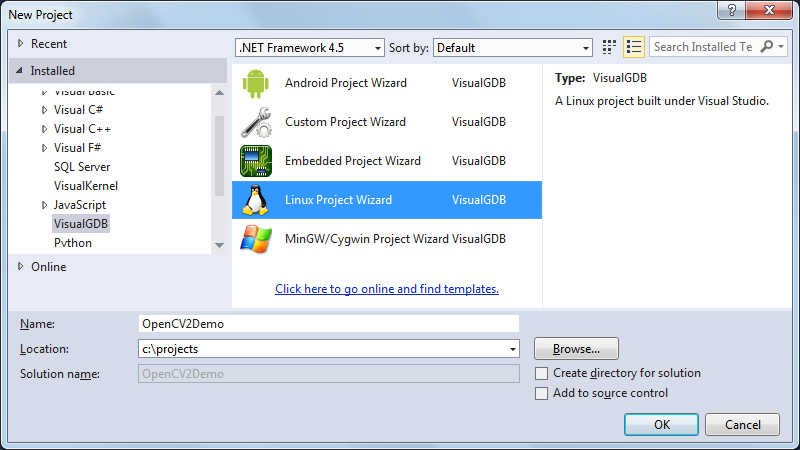
- Start Visual Studio and open the VisualGDB Linux Project Wizard:
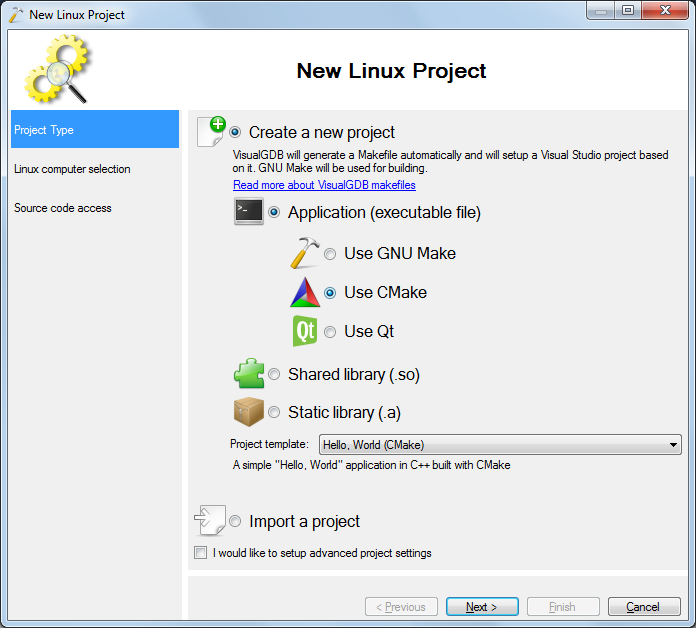
- OpenCV comes with configuration files for CMake that simplify including the library from CMake projects. Hence we will use CMake to build our demo application. Select it in the wizard:
- Select “Build the project with a cross-compiler” and choose your Raspberry Pi board in the “deployment computer” field:

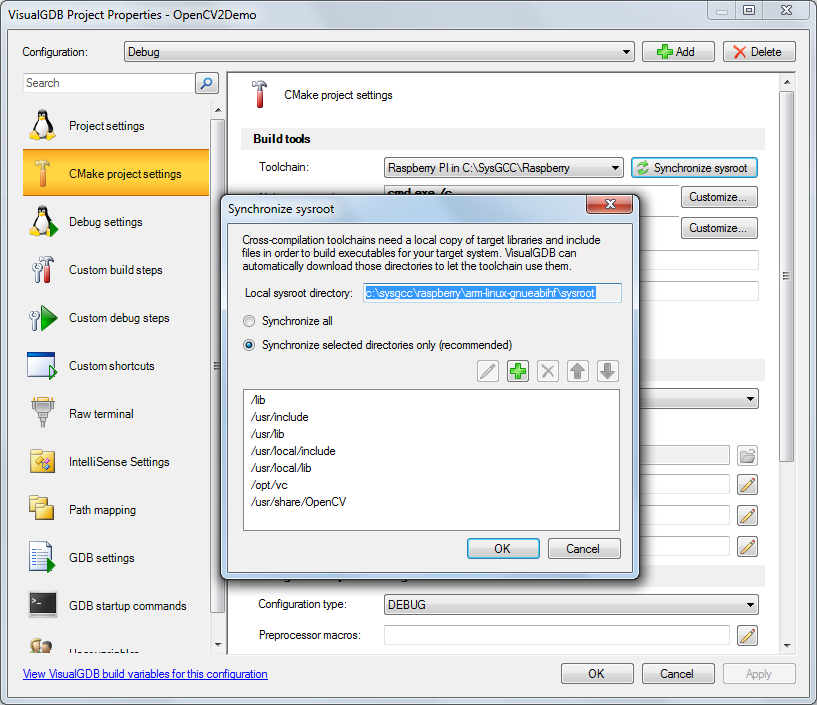
- Press “Finish” to create your project. Then open VisualGDB Project Properties, go to the CMake page and click “Synchronize sysroot”. Ensure that /opt/vc and /usr/share/OpenCV (not lowercase /usr/share/opencv) are selected:
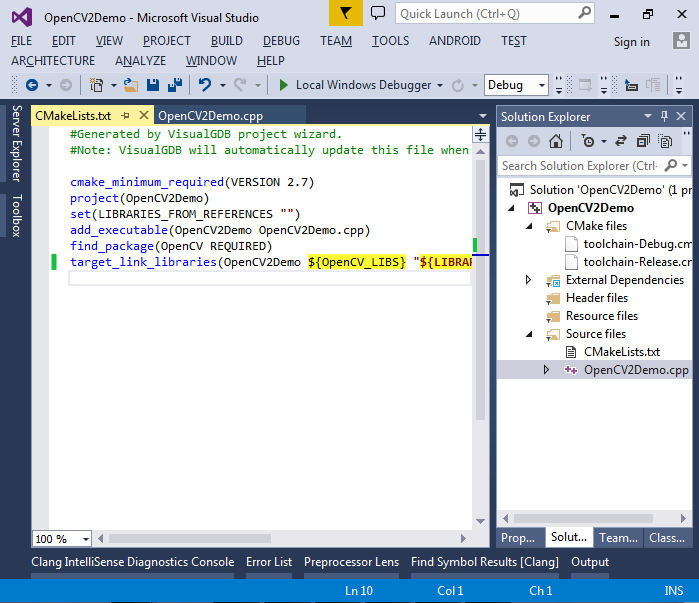
- Open the CMakeLists.txt file in the newly created project and add the following line after add_executable():
find_package(OpenCV REQUIRED)
Also add ${OpenCV_LIBS} to target_libraries() statement:
- Open VisualGDB Project Properties and set the CMAKE_PREFIX_PATH variable for the CMake command to point at <sysroot>\usr\share\OpenCV:

- Replace the contents of the main source file with the following code from the find_contours sample in OpenCV:
/**
 * @function findContours_Demo.cpp
 * @brief Demo code to find contours in an image
 * @author OpenCV team
 */

#include "opencv2/highgui/highgui.hpp"
#include "opencv2/imgproc/imgproc.hpp"
#include <iostream>
#include <stdio.h>
#include <stdlib.h>

using namespace cv;
using namespace std;

Mat src; Mat src_gray;
int thresh = 100;
int max_thresh = 255;
RNG rng(12345);

/// Function header
void thresh_callback(int, void*);

/**
 * @function main
 */
int main(int, char** argv)
{
  /// Load source image and convert it to gray
    src = imread(argv[1], 1);

      /// Convert image to gray and blur it
    cvtColor(src, src_gray, COLOR_BGR2GRAY);
    blur(src_gray, src_gray, Size(3, 3));

      /// Create Window
    const char* source_window = "Source";
    namedWindow(source_window, WINDOW_AUTOSIZE);
    imshow(source_window, src);

    createTrackbar(" Canny thresh:", "Source", &thresh, max_thresh, thresh_callback);
    thresh_callback(0, 0);

    waitKey(0);
    return (0);
}

/**
 * @function thresh_callback
 */
void thresh_callback(int, void*)
{
    Mat canny_output;
    vector<vector<Point> > contours;
    vector<Vec4i> hierarchy;

      /// Detect edges using canny
    Canny(src_gray, canny_output, thresh, thresh * 2, 3);
    /// Find contours
    findContours(canny_output, contours, hierarchy, CV_RETR_TREE, CV_CHAIN_APPROX_SIMPLE, Point(0, 0));

      /// Draw contours
    Mat drawing = Mat::zeros(canny_output.size(), CV_8UC3);
    for (size_t i = 0; i < contours.size(); i++)
    {
        Scalar color = Scalar(rng.uniform(0, 255), rng.uniform(0, 255), rng.uniform(0, 255));
        drawContours(drawing, contours, (int)i, color, 2, 8, hierarchy, 0, Point());
    }

      /// Show in a window
    namedWindow("Contours", WINDOW_AUTOSIZE);
    imshow("Contours", drawing);
}
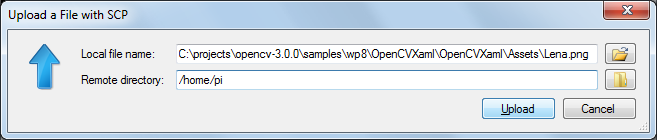
- Upload any PNG image that will be used to check out contour detection to the Raspberry Pi. In this tutorial we will use the Lena.png file from the OpenCV package:
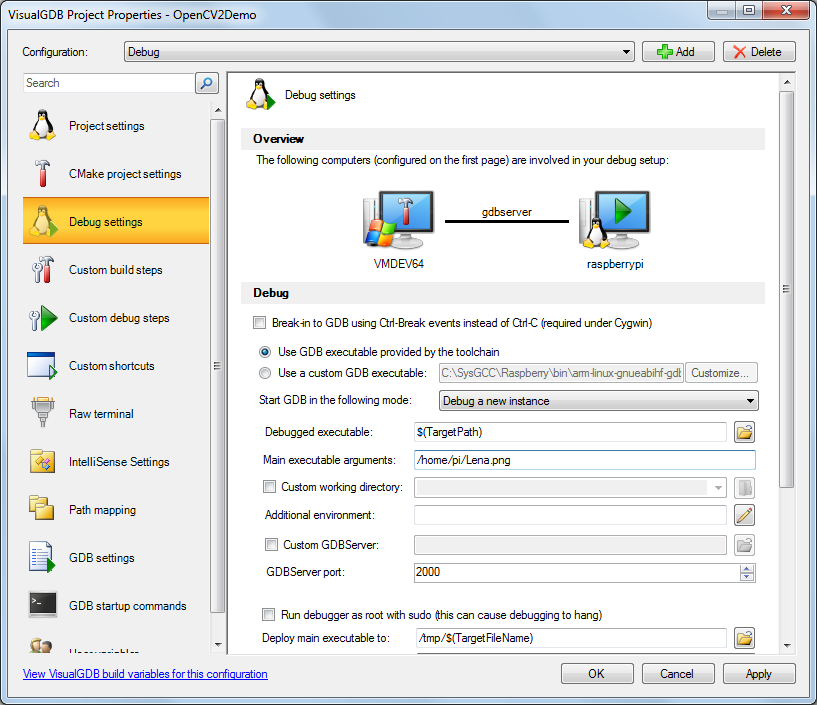
- Specify the path to the uploaded image in the command-line arguments to your application via VisualGDB Project Properties:
- Press F5 to start debugging the application. You will see two windows: one with the original image and another one with the contours:
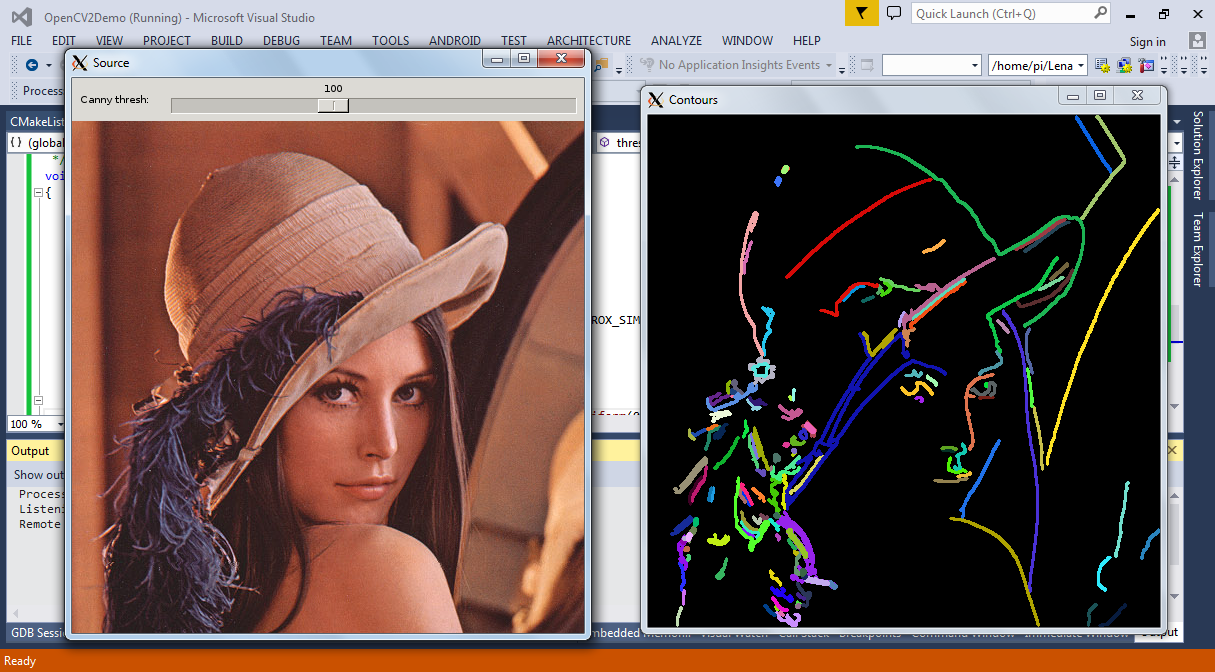 You can move the trackbar in the left window to change the threshold value for the edge detection algorithm.


To learn how to cross-compile OpenCV 3 for Raspberry Pi and step through its source code, follow this tutorial.
Read this tutorial for detailed instructions on using OpenCV with the Raspberry Pi camera module.