Using Test Resources with Embedded Unit Test Projects
This tutorial shows how to use the Test Resource Manager API to access the files in the project’s TestResources subdirectory from your embedded unit test projects.
We will create a basic unit test project verifying the behavior of the sinf() function on the STM32F4-Discovery board and will use the test resources to feed 2 megabytes of test data into the device, that would normally not fit into the device’s memory. Before you begin, install VisualGDB 5.5 or later.
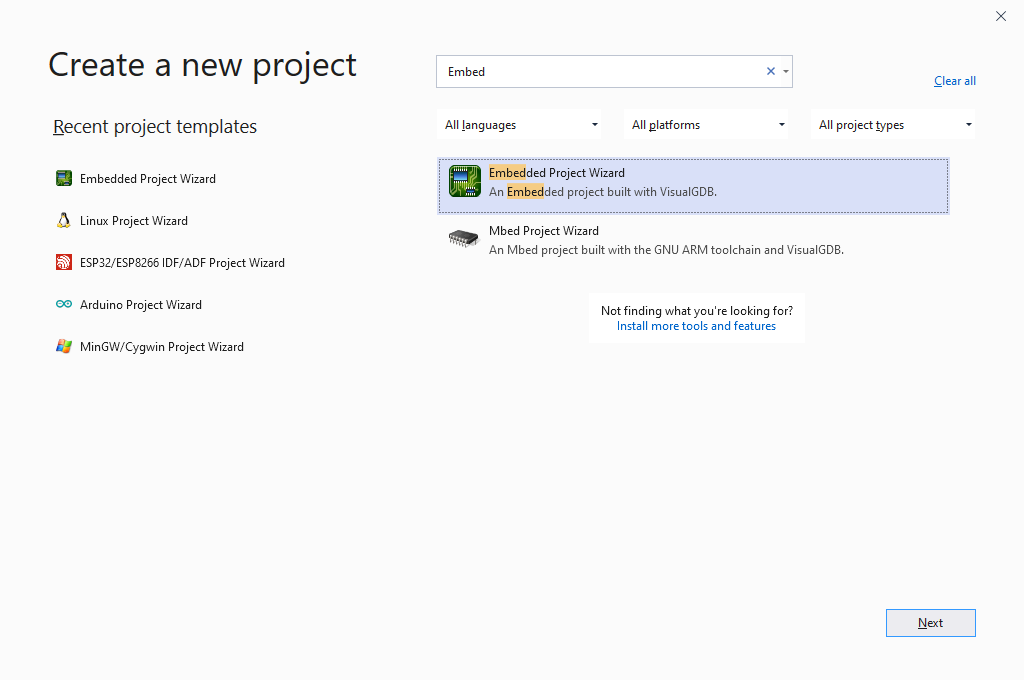
- Start Visual Studio and select the VisualGDB Embedded Project Wizard:
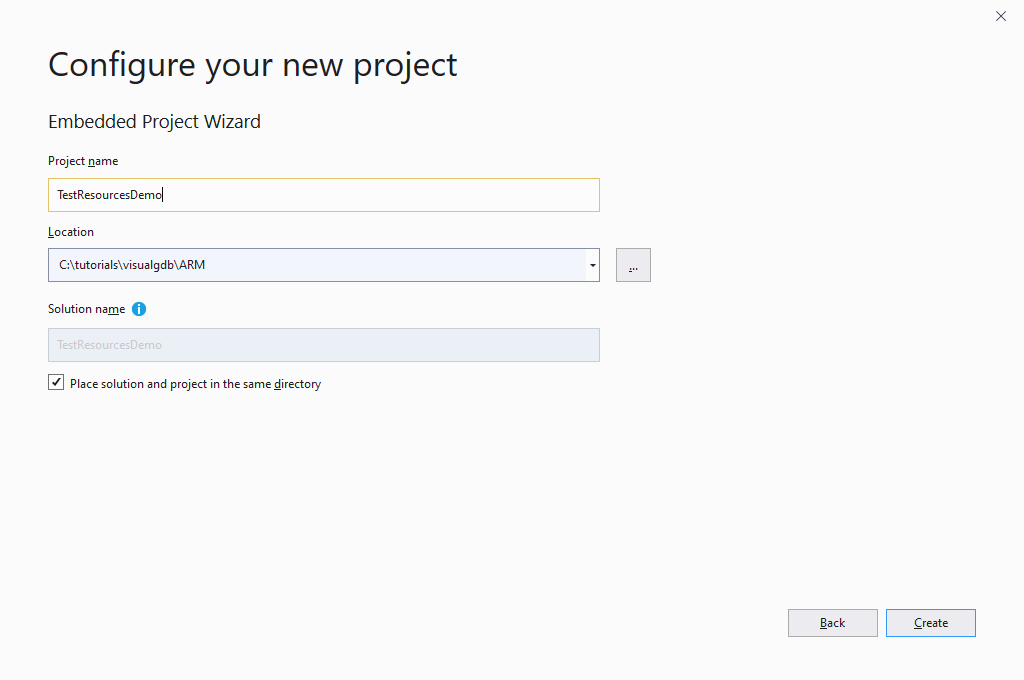
- Specify the name and location for your project and press “Create” to launch the VisualGDB’s portion of the wizard:
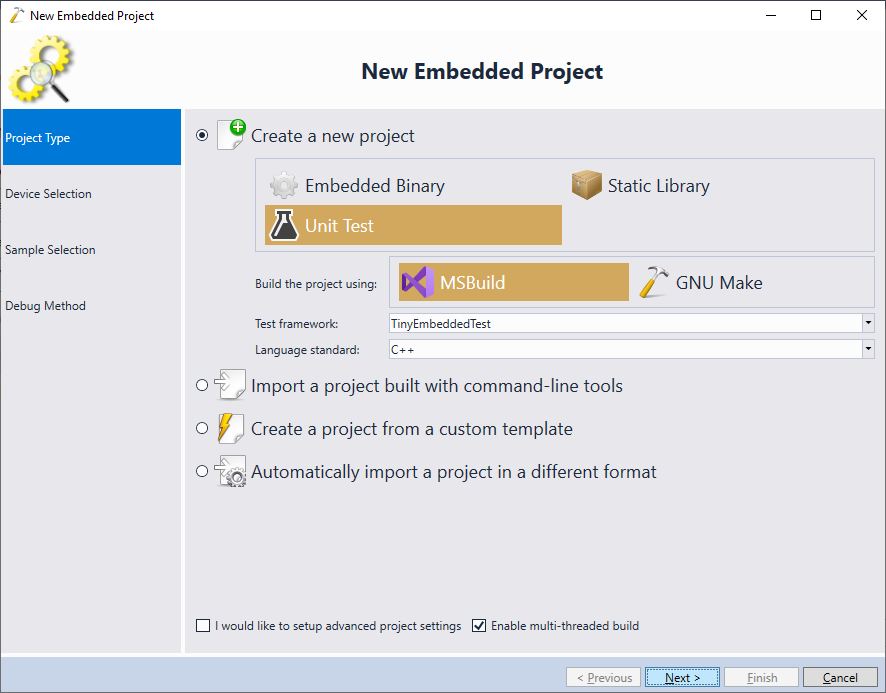
- On the first page of the VisualGDB Embedded Project wizard, select “Create a new project -> Unit Test -> MSBuild“. Then pick the test framework you would like to use. In this tutorial we will use the lightweight TinyEmbeddedTest framework, however the steps shown here will work with other frameworks as well:
- On the next page of the wizard choose the device you would like to target. As we are targeting the STM32F4Discovery board, we will pick the STM32F407VG device:
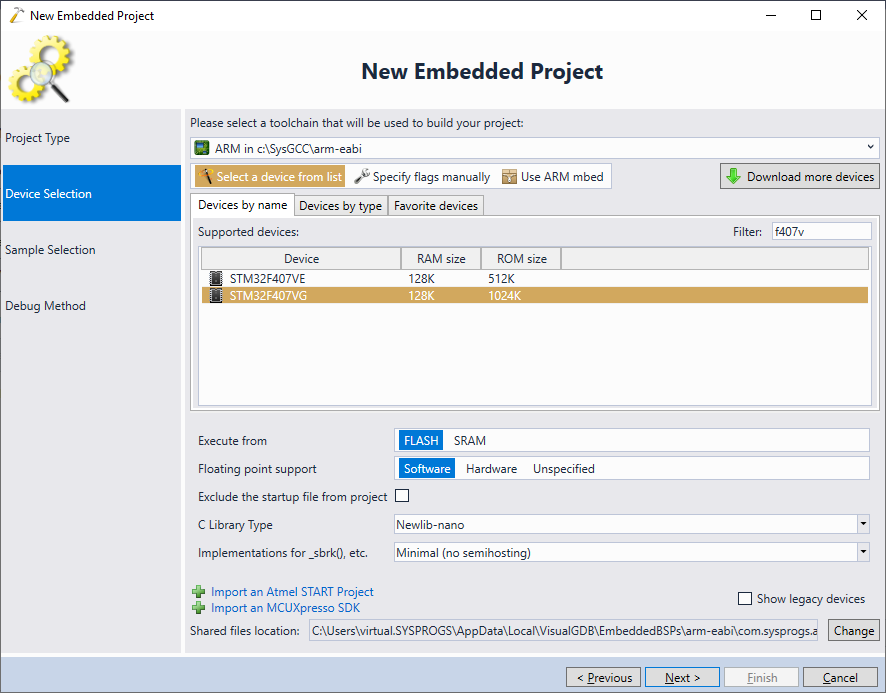 Although we demonstrate the test resources on the STM32F4-Discovery board, the steps shown in this tutorial will work for any ARM-based device that supports background memory access (most ARM Cortex-based devices do). Also it is recommended to select the software floating point mode when creating the project, as we will be later comparing it against the hardware mode.
 - On the next page proceed with the default sample for the TinyEmbeddedTest framework:

- Connect your embedded board to the USB port and let VisualGDB detect the debug configuration:

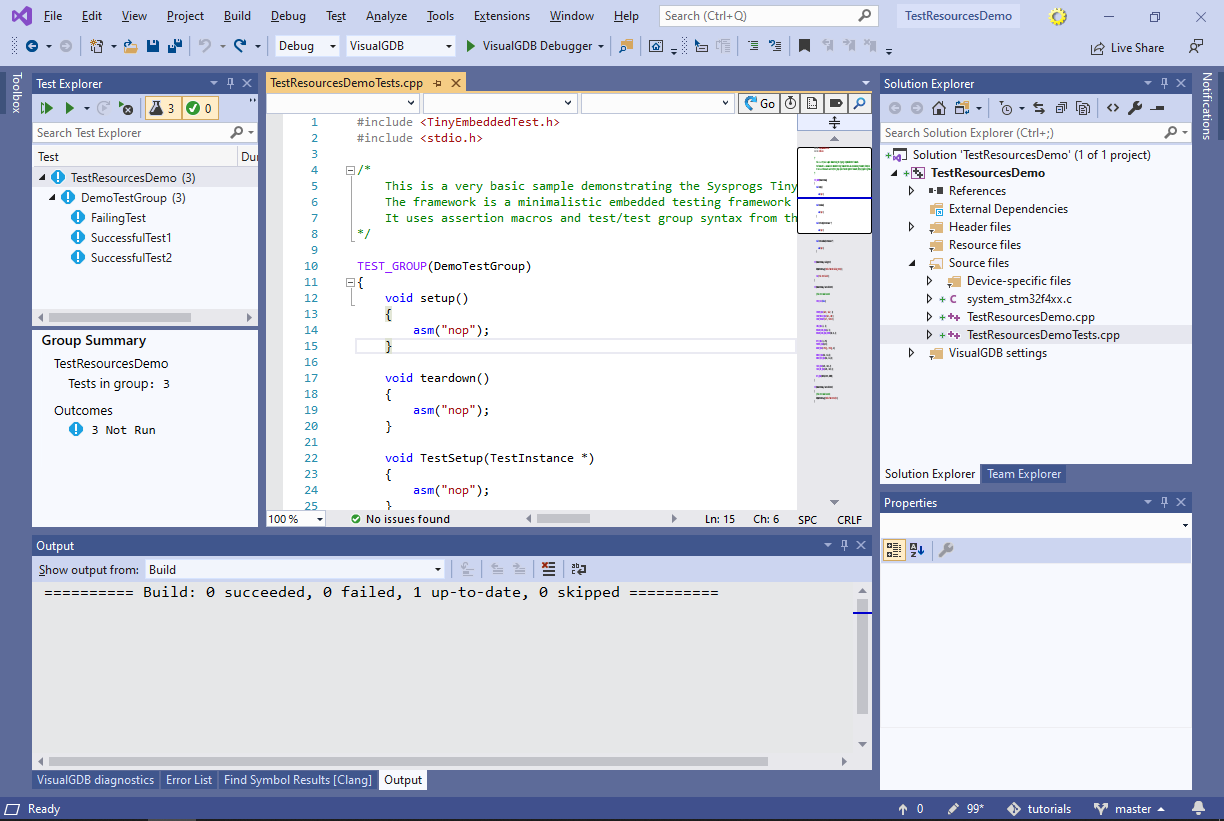
- Finally, press “Finish” to create the project. Once it is created, build it and ensure that the Test Explorer window shows the sample tests:
- Now we will add a test method that will read a stream of inputs to sinf() from one file on the Windows machine, a stream of outputs from another one and will compare them with the actual results produced by sinf(). Replace the contents of the Tests file with the following code:
#include <TinyEmbeddedTest.h>
#include <stdio.h>
#include <math.h>

#include <TestResourceManager.h>

TEST_GROUP(DataProcessingTestGroup)
{
};

uint32_t g_Progress;

TEST(DataProcessingTestGroup, SineTest)
{
    auto hInputs = TRMCreateFile("inputs.dat", sfmOpenReadOnly);
    auto hOutputs = TRMCreateFile("outputs.dat", sfmOpenReadOnly);
    uint32_t total = 0;

    CHECK(hInputs != 0);
    CHECK(hOutputs != 0);
    float buf1[1024], buf2[1024];

    for (;;)
    {
        ssize_t done = TRMReadFile(hInputs, buf1, sizeof(buf1));
        CHECK(done >= 0);

        if (!done)
            break;

        ssize_t done2 = TRMReadFile(hOutputs, buf2, done);
        CHECK_EQUAL(done, done2);
        for (int i = 0; i < (done / sizeof(buf1[0])); i++)
            CHECK_EQUAL(buf2[i], sinf(buf1[i]));

        total += done;
        g_Progress = total;
    }

    CHECK(total >= 1024 * 1024);

    TRMCloseFile(hInputs);
    TRMCloseFile(hOutputs);
}
You can find a detailed documentation on TRMCreateFile() and other similar functions here. Once you are done, build the project and start debugging the newly created test:

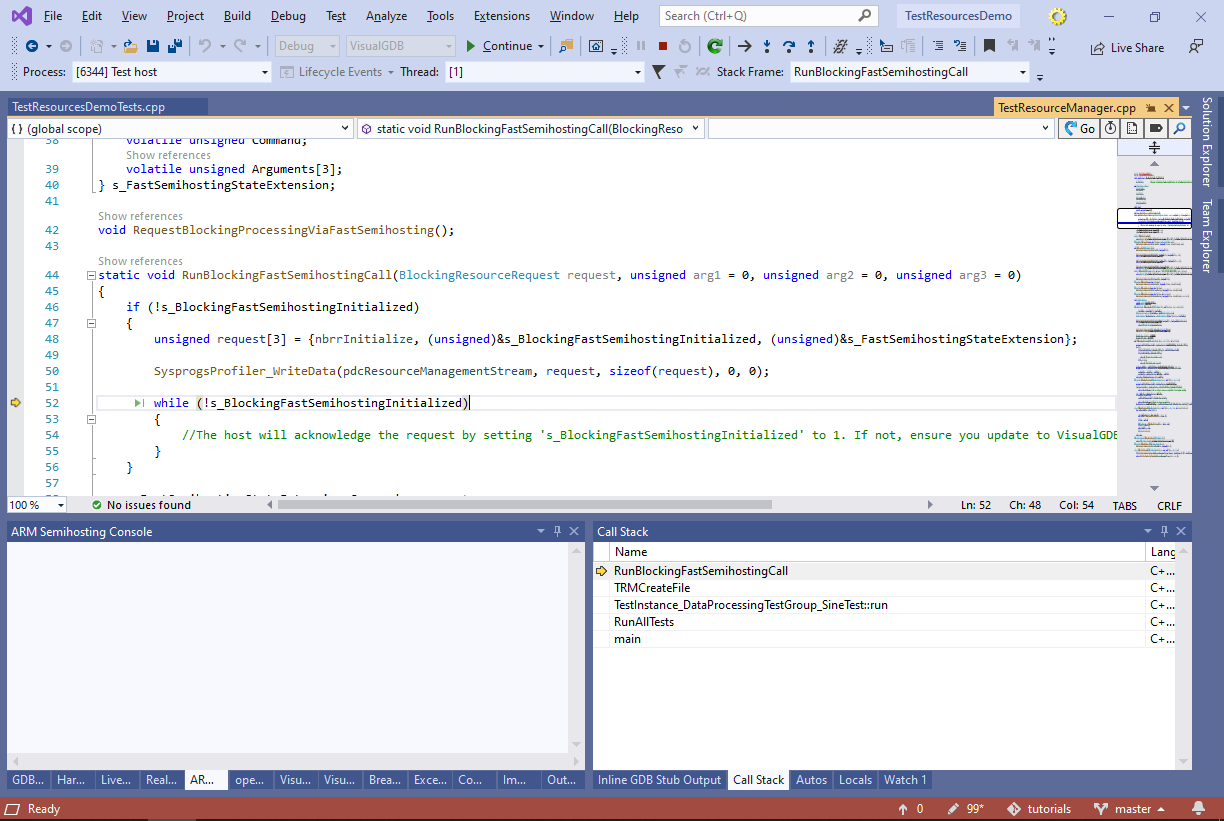
- If you are doing it for the first time, the test logic will freeze in the RunBlockingFastSemihostingCall() function. This happens because VisualGDB is not expecting the code to call the resource manager API:
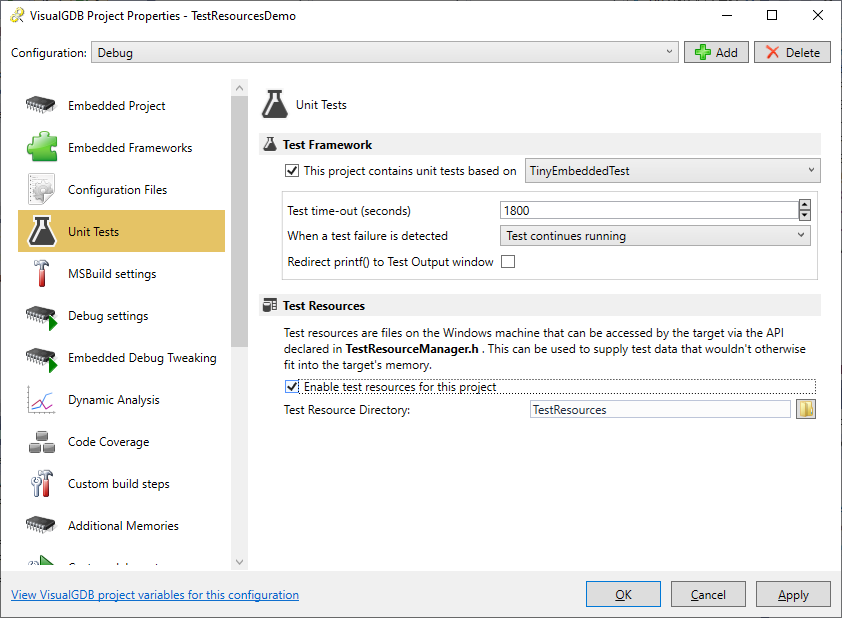
- Stop debugging the test and open VisualGDB Project Properties on the Unit Tests page. Enable the test resources for the project via a checkbox at the bottom of the page:
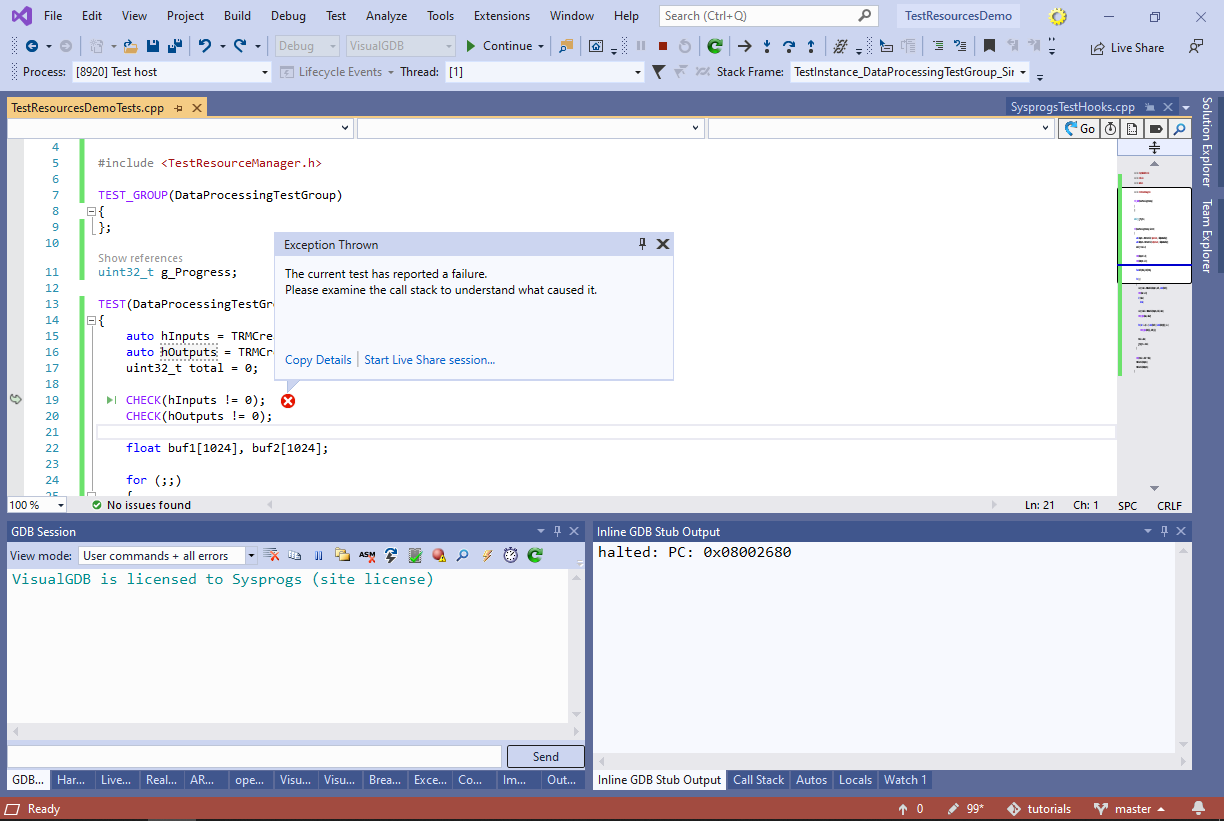
- Now you will be able to run the test, however it will immediately fail due to the missing inputs.dat file:
- We could generate the test files using a simple program on the Windows side, however in this tutorial we will generate them on the target and save them to the host via the Test Resource Manager API. Locate the main() function in your program and modify it as shown below:
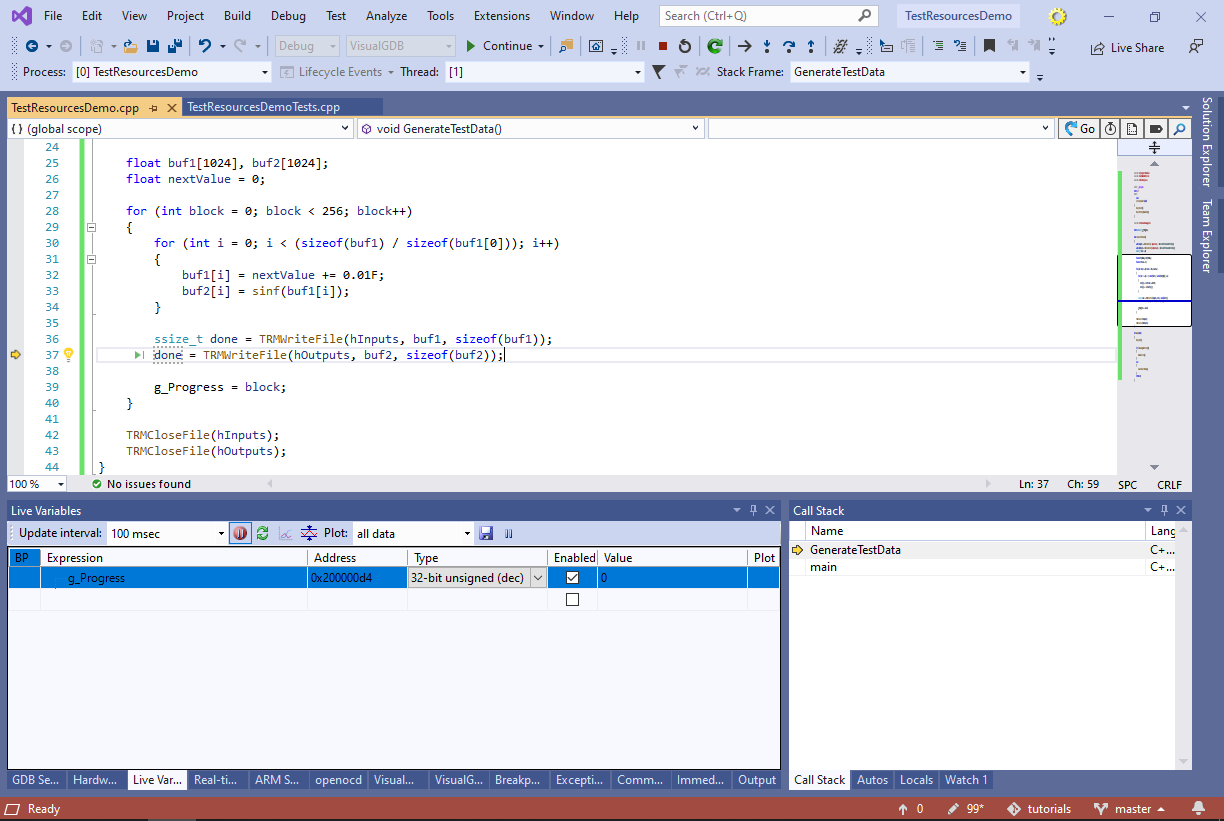
#include <TestResourceManager.h>

extern uint32_t g_Progress;

void GenerateTestData()
{
    auto hInputs = TRMCreateFile("inputs.dat", sfmCreateOrTruncateWriteOnly);
    auto hOutputs = TRMCreateFile("outputs.dat", sfmCreateOrTruncateWriteOnly);

    uint32_t total = 0;
    float buf1[1024], buf2[1024];
    float nextValue = 0;

    for (int block = 0; block < 256; block++)
    {
        for (int i = 0; i < (sizeof(buf1) / sizeof(buf1[0])); i++)
        {
            buf1[i] = nextValue += 0.01F;
            buf2[i] = sinf(buf1[i]);
        }

        ssize_t done = TRMWriteFile(hInputs, buf1, sizeof(buf1));
        done = TRMWriteFile(hOutputs, buf2, sizeof(buf2));
        g_Progress = block;
    }

    TRMCloseFile(hInputs);
    TRMCloseFile(hOutputs);
}

int main(void)
{
    HAL_Init();

    if (IsRunningUnitTests())
    {
        RunAllTests();
    }
    else
    {
        GenerateTestData();
    }
    return 0;
}
Note how GenerateTestData() is only called when no unit tests are running (i.e. when a debug session was started via Debug->Start Debugging). Set a breakpoint near a call to TRMWriteFile() and start a regular debug session by pressing F5. Once the breakpoint hits, add g_Progress to the Live Variables window:
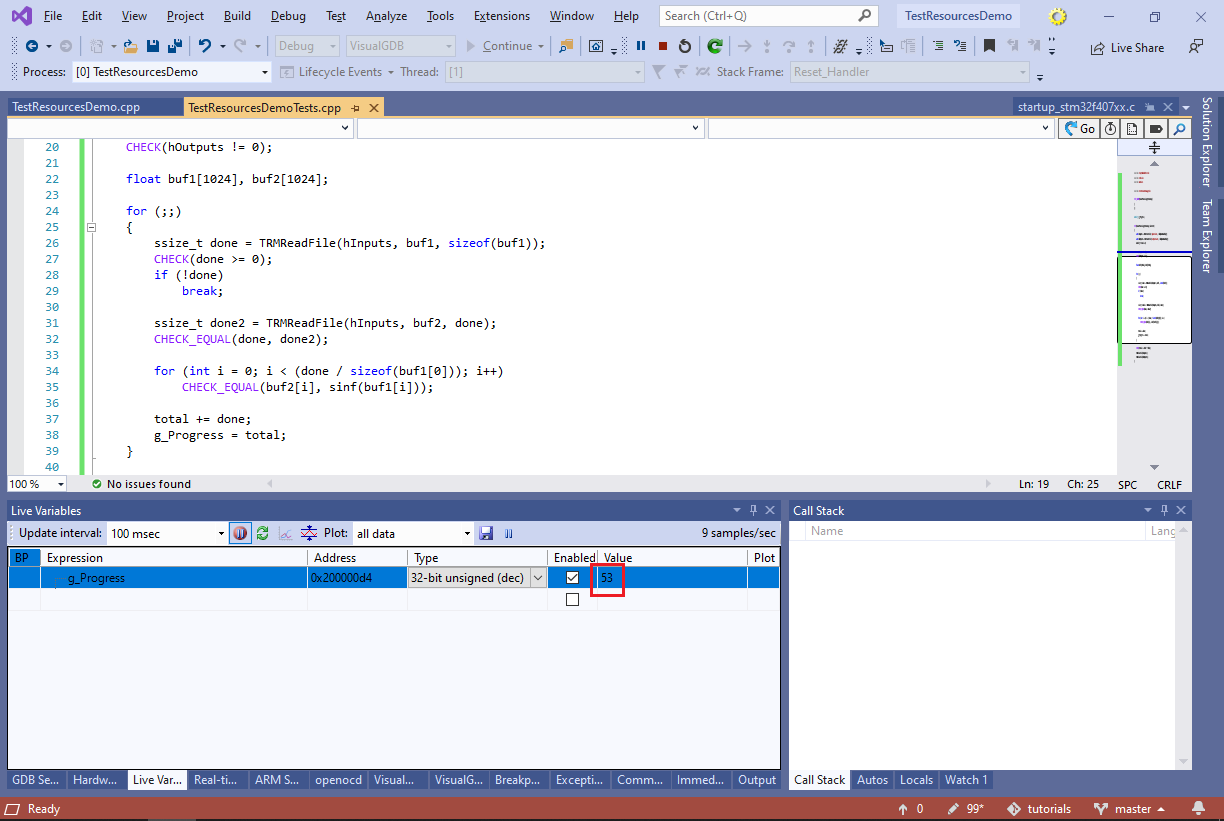
- Resume the debug session. You can now track the progress of the test file generation via the Live Variables view:
 When the counter stops updating, end the debug session and verify that the inputs.dat and outputs.dat files have been created in the TestResources directory and have the correct size:
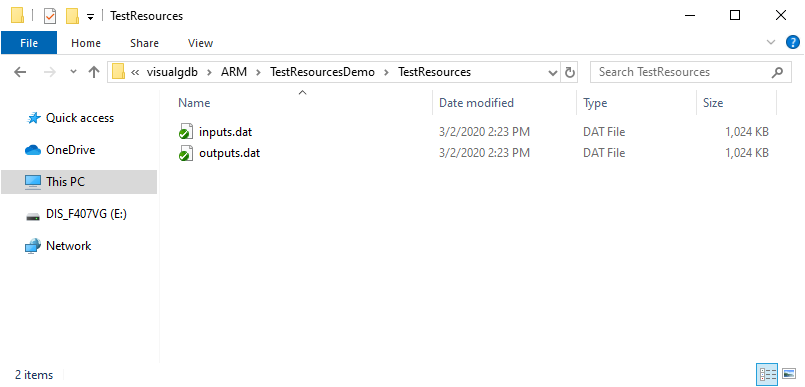 You can also add asm(“bkpt 255”) line to the end of GenerateTestData() to explicitly trigger a breakpoint when the test data has been generated.
 - Now you can start the SineTest again. This time it will be able to read the inputs.dat and outputs.dat and will succeed:
 Note that the test resource files will be saved in the TestResources subdirectory inside your project’s directory on the Windows machine.
 - Open VisualGDB Project Properties and switch the Floating Point setting to Hardware:
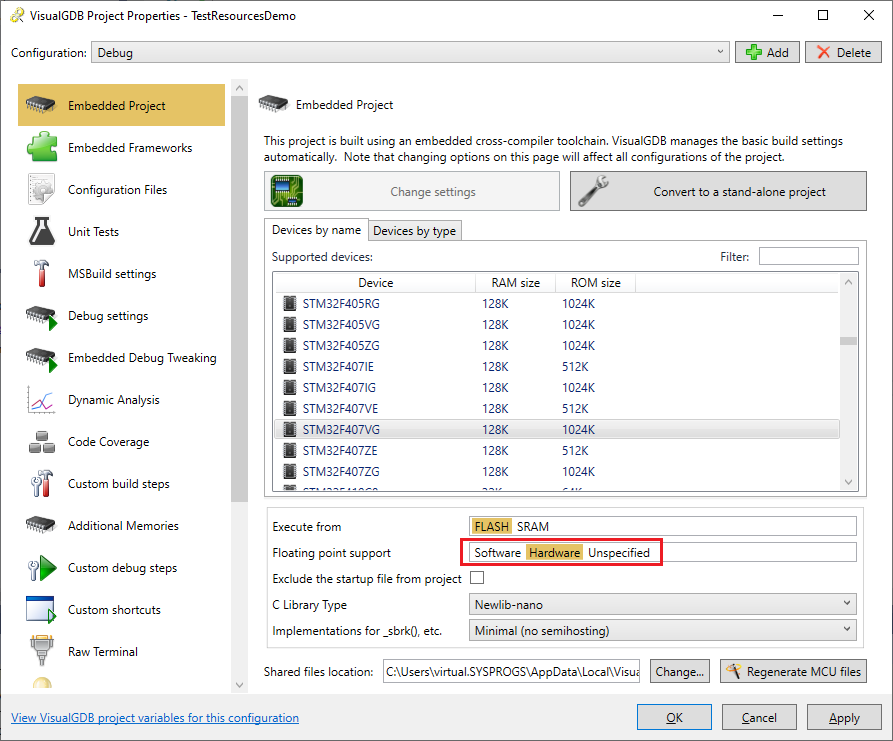
- Build the project and start running the test again. It will now fail due to minor differences between hardware and software floating point implementation:

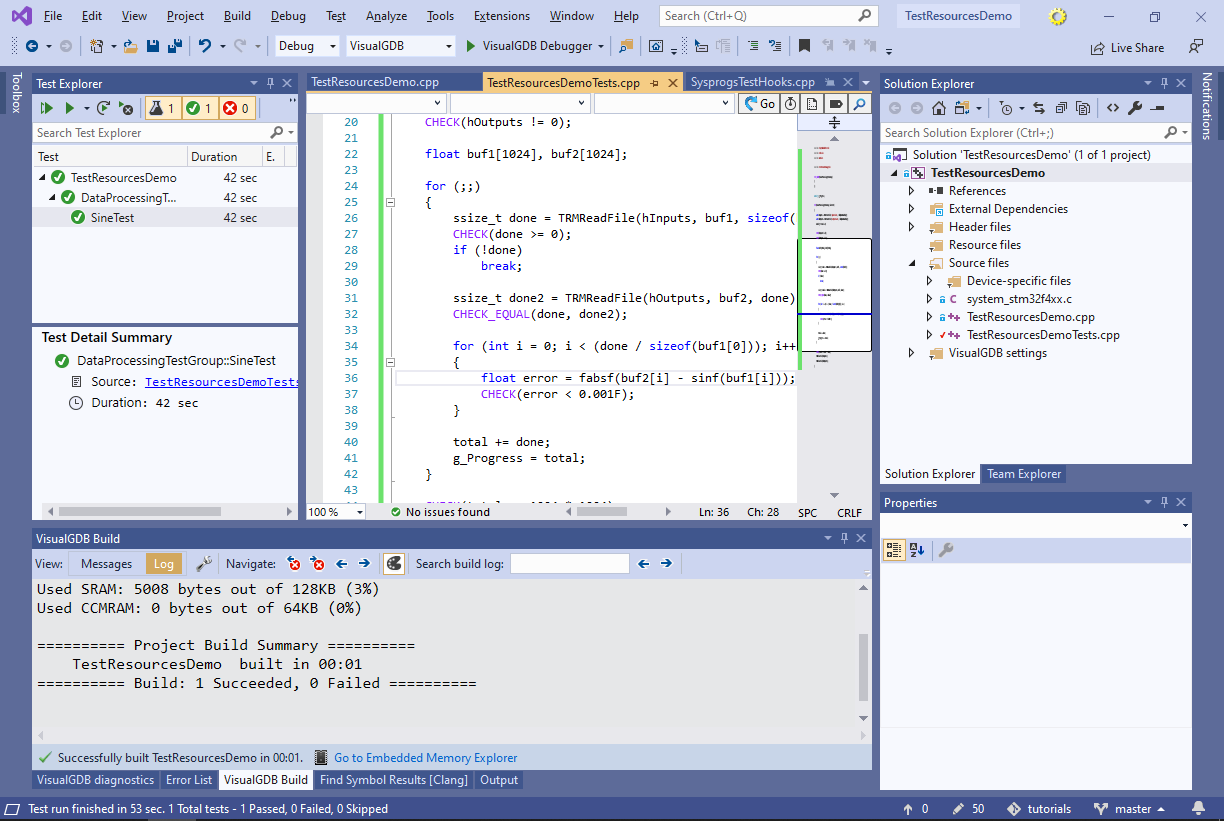
- In order to do a more meaningful comparison, replace the strict check of the sinf() output with the following code:
        for (int i = 0; i < (done / sizeof(buf1[0])); i++)
        {
            float error = fabsf(buf2[i] - sinf(buf1[i]));
            CHECK(error < 0.001F);
        }
Instead of comparing the returned value bit-by-bit (that won’t work due to different rounding and encoding used in different FP implementations), it will make sure that the difference between the values does not exceed the acceptable margin. The SineTest will now succeed:
You can find the code for the project shown in this tutorial in our GitHub repository.
If your test depends on transferring large amounts of data, make sure you use the TRM Burst API to optimize it even further.