Creating Simulation Platforms to Test Embedded Code without Hardware
This tutorial shows how to run high-level code of embedded projects directly on Windows in order to speed up development and tests. We will create a unit test project based on the TinyEmbeddedTest framework, will run the tests on the STM32F4 Discovery board, and will then create a separate simulation platform to run the tests directly on Windows.
Before you begin, install VisualGDB 5.5 or later.
- Start Visual Studio and open the VisualGDB Embedded Project Wizard:

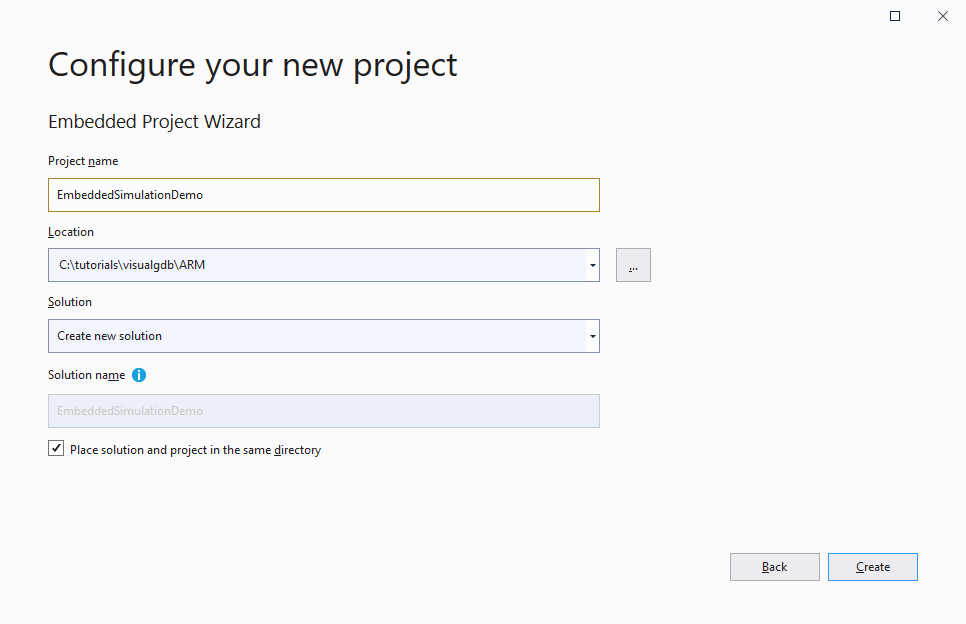
- Enter the name and location of your project:
- On the first page of the VisualGDB Project Wizard select “Unit Test -> Advanced CMake”. Make sure you are using the TinyEmbeddedTest or GoogleTest framework, as other frameworks do not support portability between Windows and embedded targets:
 If you are using Keil or IAR, start with creating a regular embedded CMake project and then reference the test framework (e.g. see this tutorial).
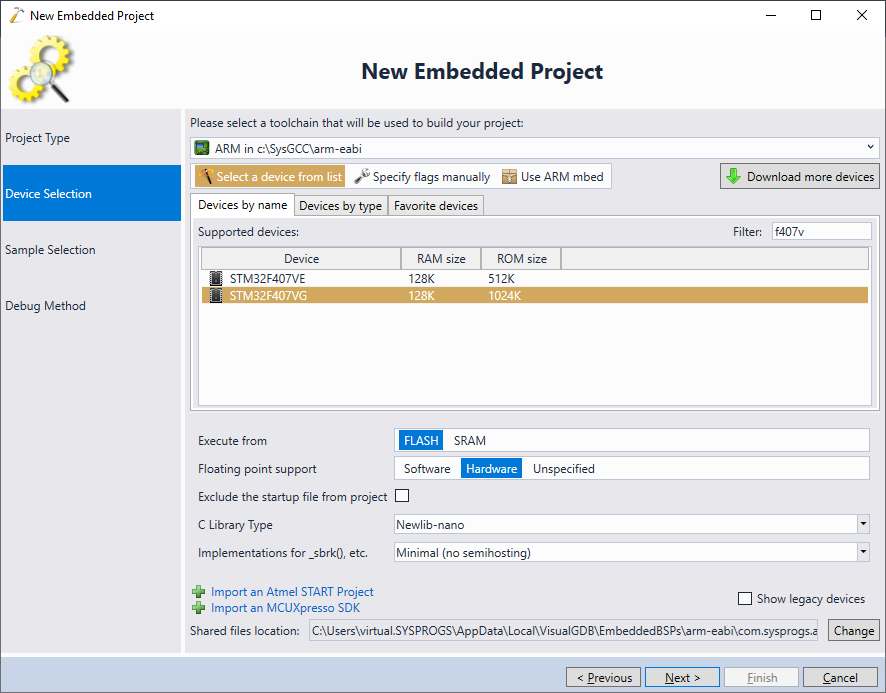
 - Select the toolchain and device you would like to target and press “Next”:
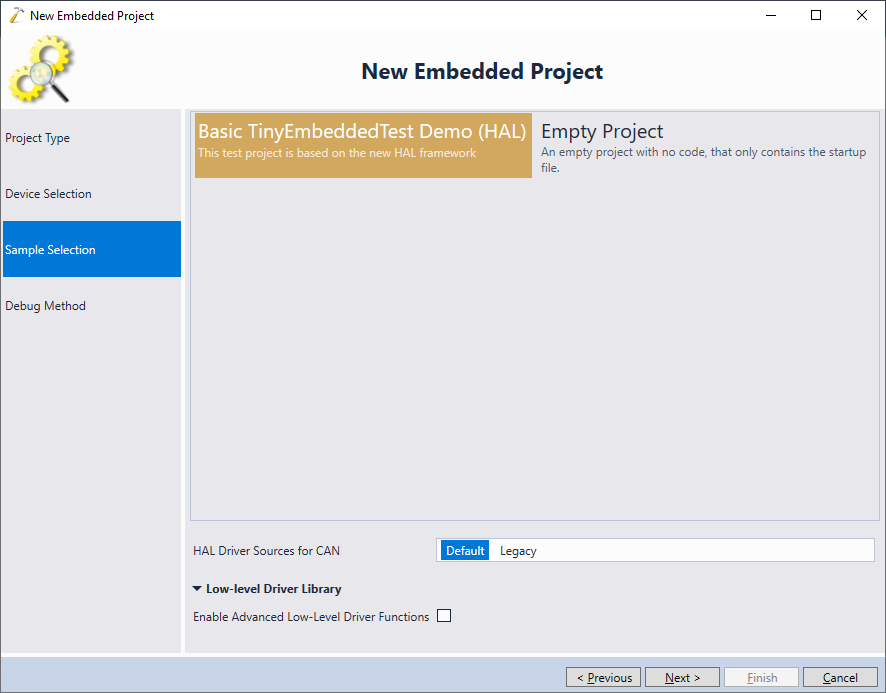
- Pick the basic test sample and proceed to the next page:
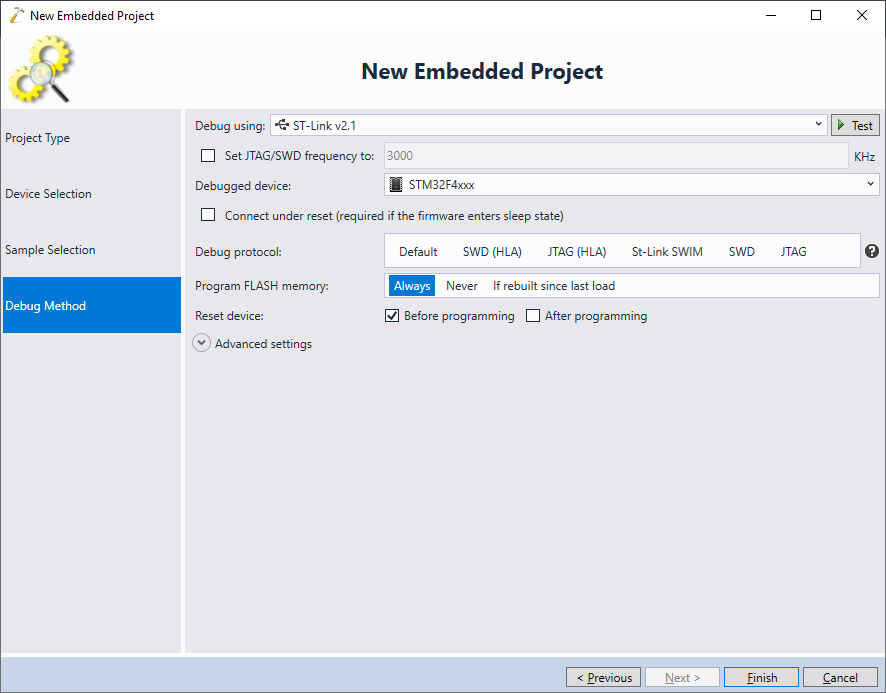
- Finally, select the debug settings that work with your target and click “Finish”:
- VisualGDB will create a CMake-based unit test project for the selected device. Try building it, and once the tests are discovered, run them via Test->Run All Tests:
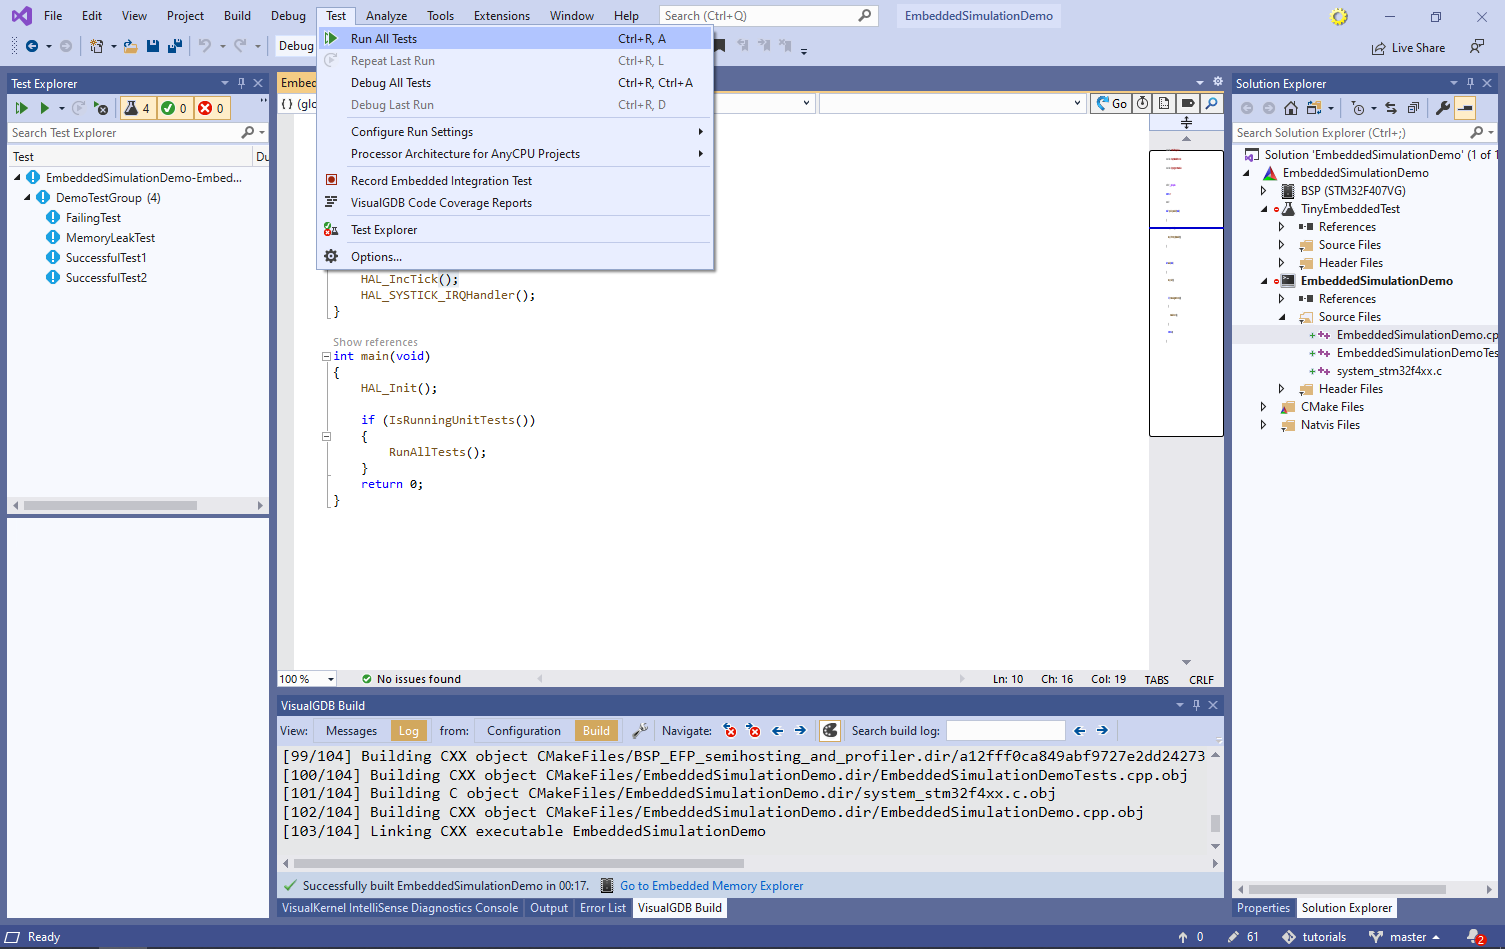
- VisualGDB will display the test outcome in the Test Explorer window:

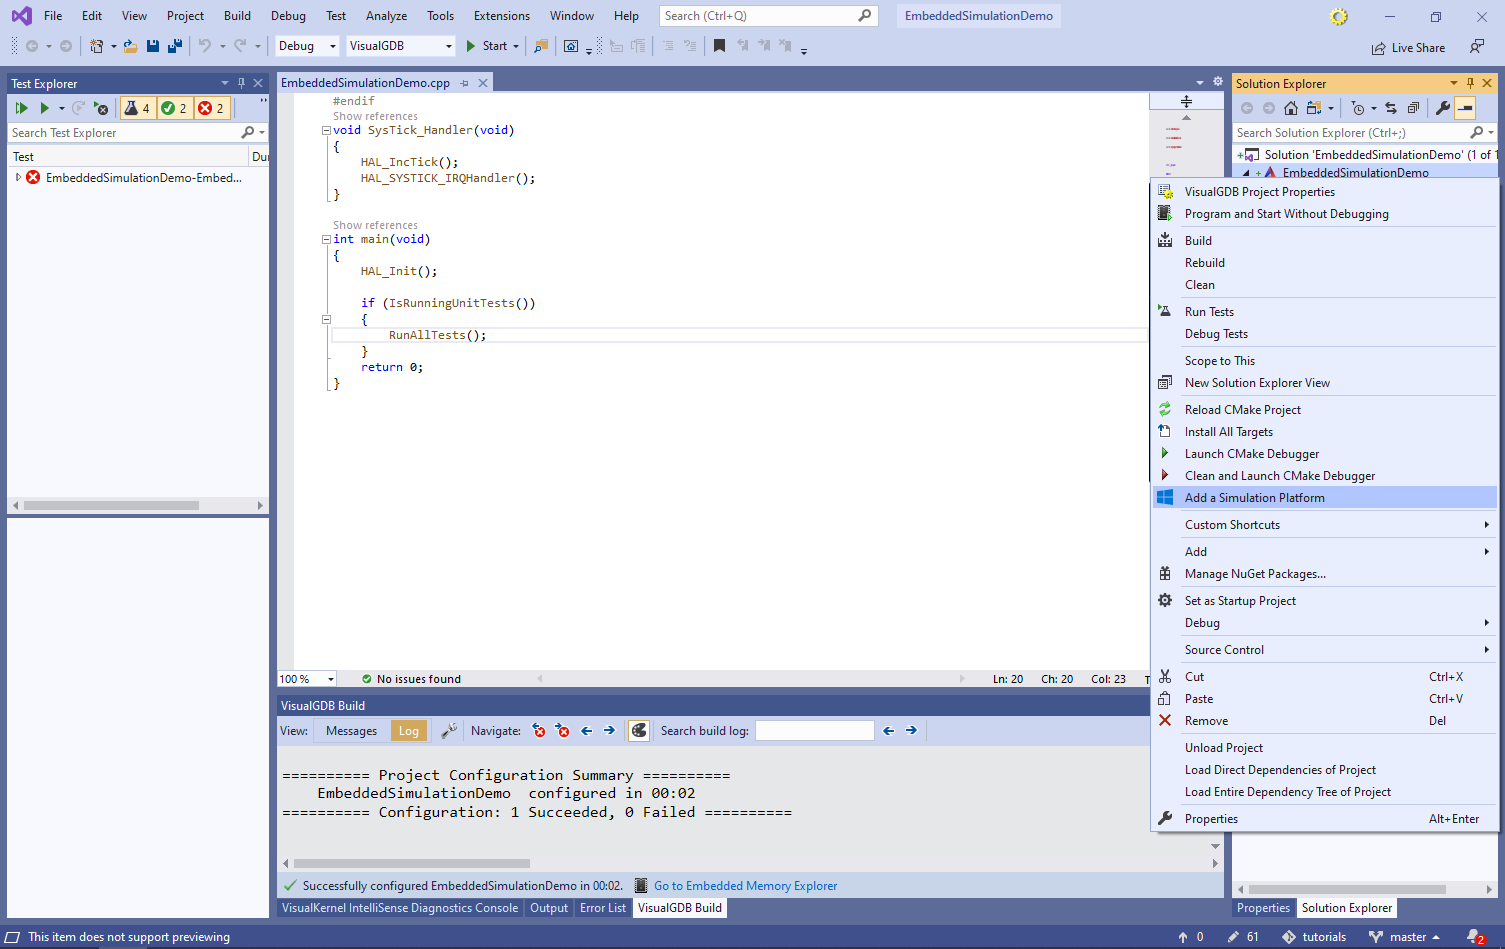
- The previous command ran the tests directly on the hardware, limiting the speed and the amount of available memory (you can still use Test Resources to feed large data streams into the device). Now we will create a separate VS platform to run the tests directly on Windows. Right-click on the project node in Solution Explorer (CMake icon) and select “Add a Simulation Platform”:
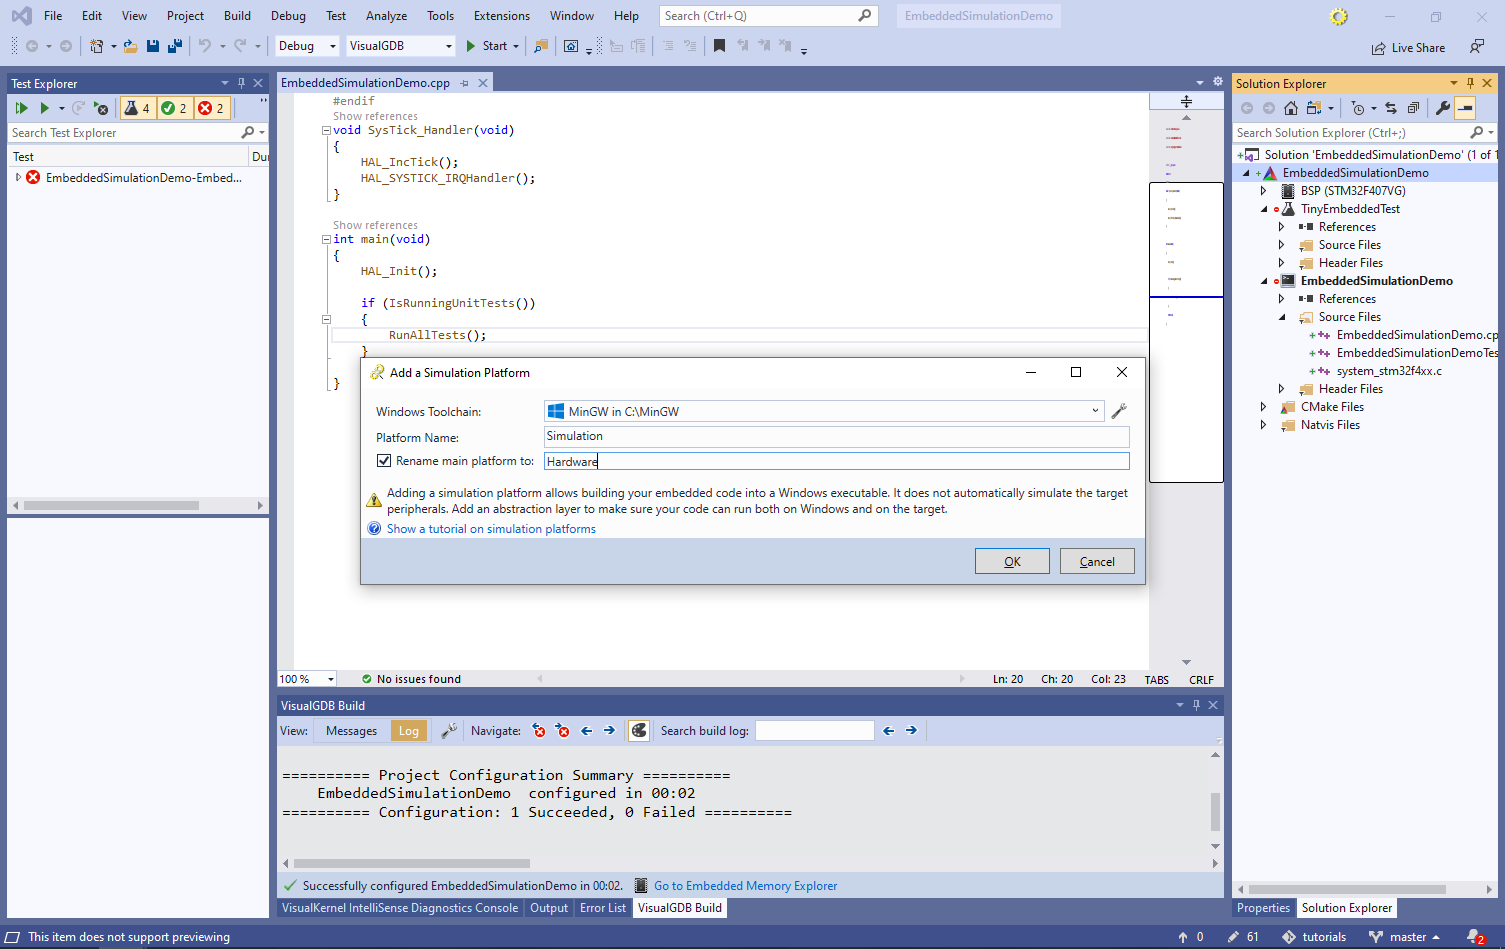
- VisualGDB will ask you for a MinGW-based toolchain (can be installed automatically), the name of the simulation platform, and will offer renaming the regular platform from “VisualGDB” to “hardware”. Press “OK” to confirm the platform names:
- Once the platform is created, switch to it via the VS Platform selector. Note that if you try building the project now, it will fail due to missing STM32-specific headers:
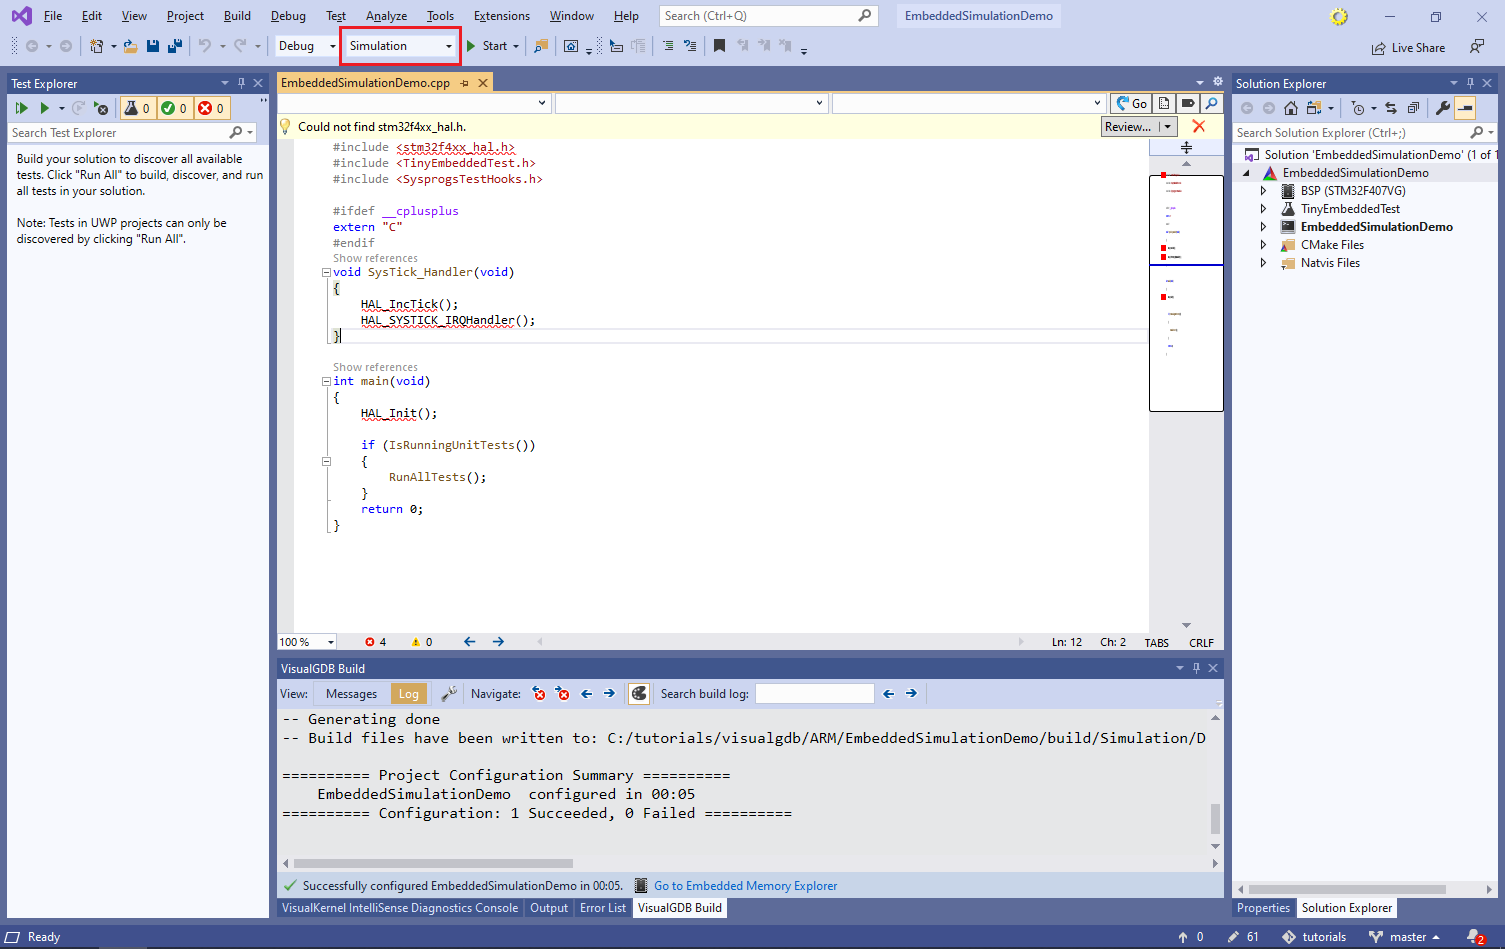
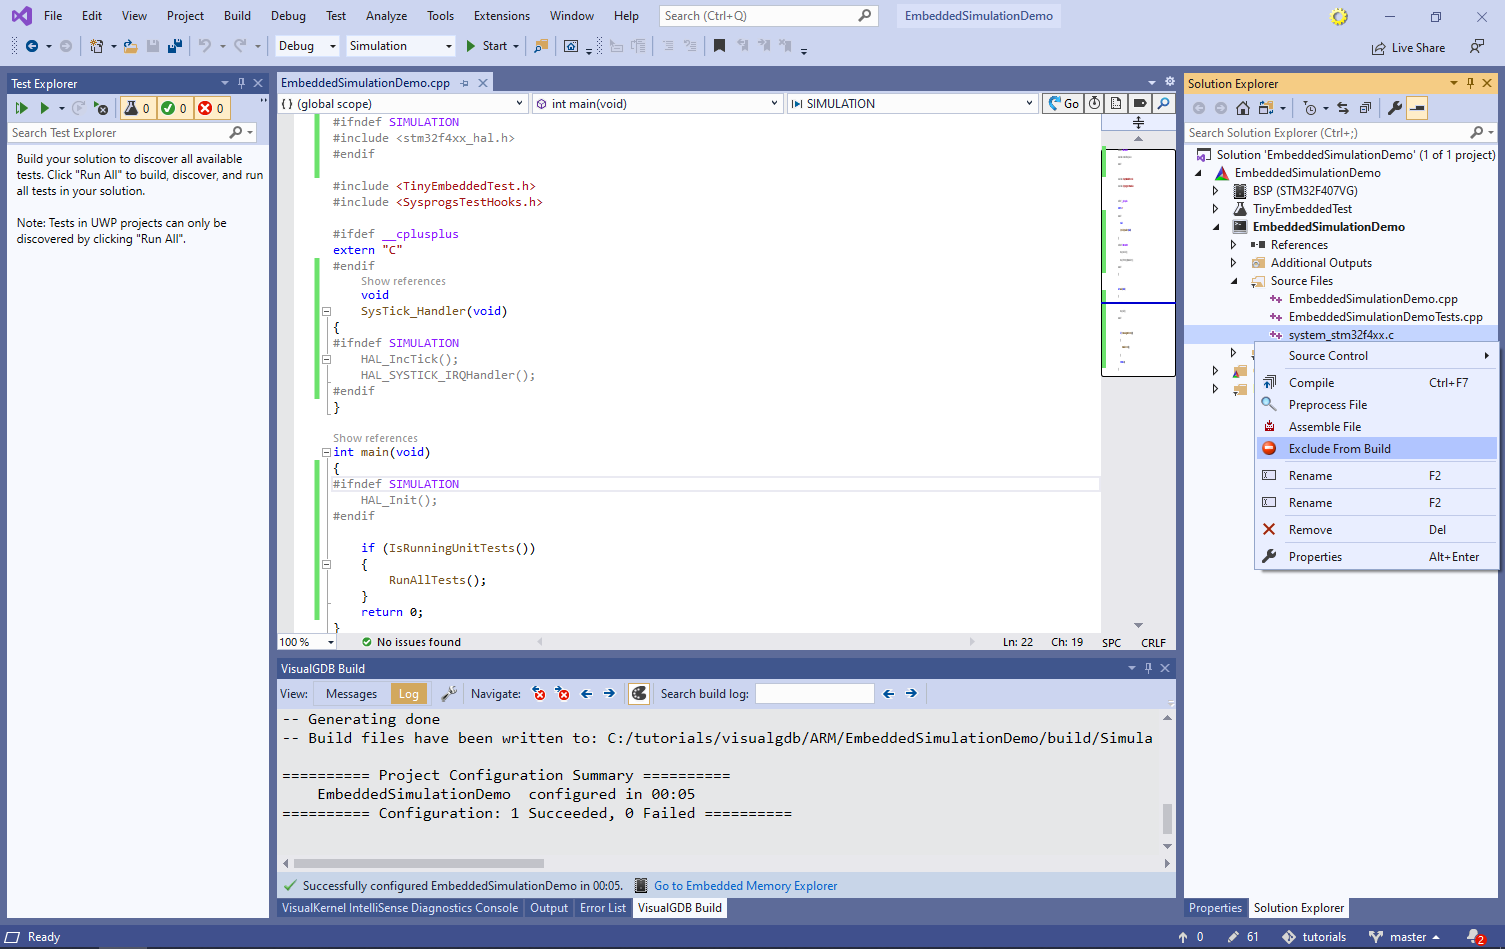
- This happens because the simulation platform does not emulate any target-specific hardware. Instead, it provides an easy way to build the high-level code with MinGW (GCC for Windows), relying on your own abstraction layer. In this example we will resolve the errors by wrapping STM32-specific code with #ifndef SIMULATION. You can also prevent STM32-specific files (e.g. system_stm32f4xx.c) from building via the “Exclude from Build” command (we will show how to make the exclusion conditional later):
 WARNING: If you are using GoogleTest, update the main() function to pass the command-line arguments to InitGoogleTest() as shown here.
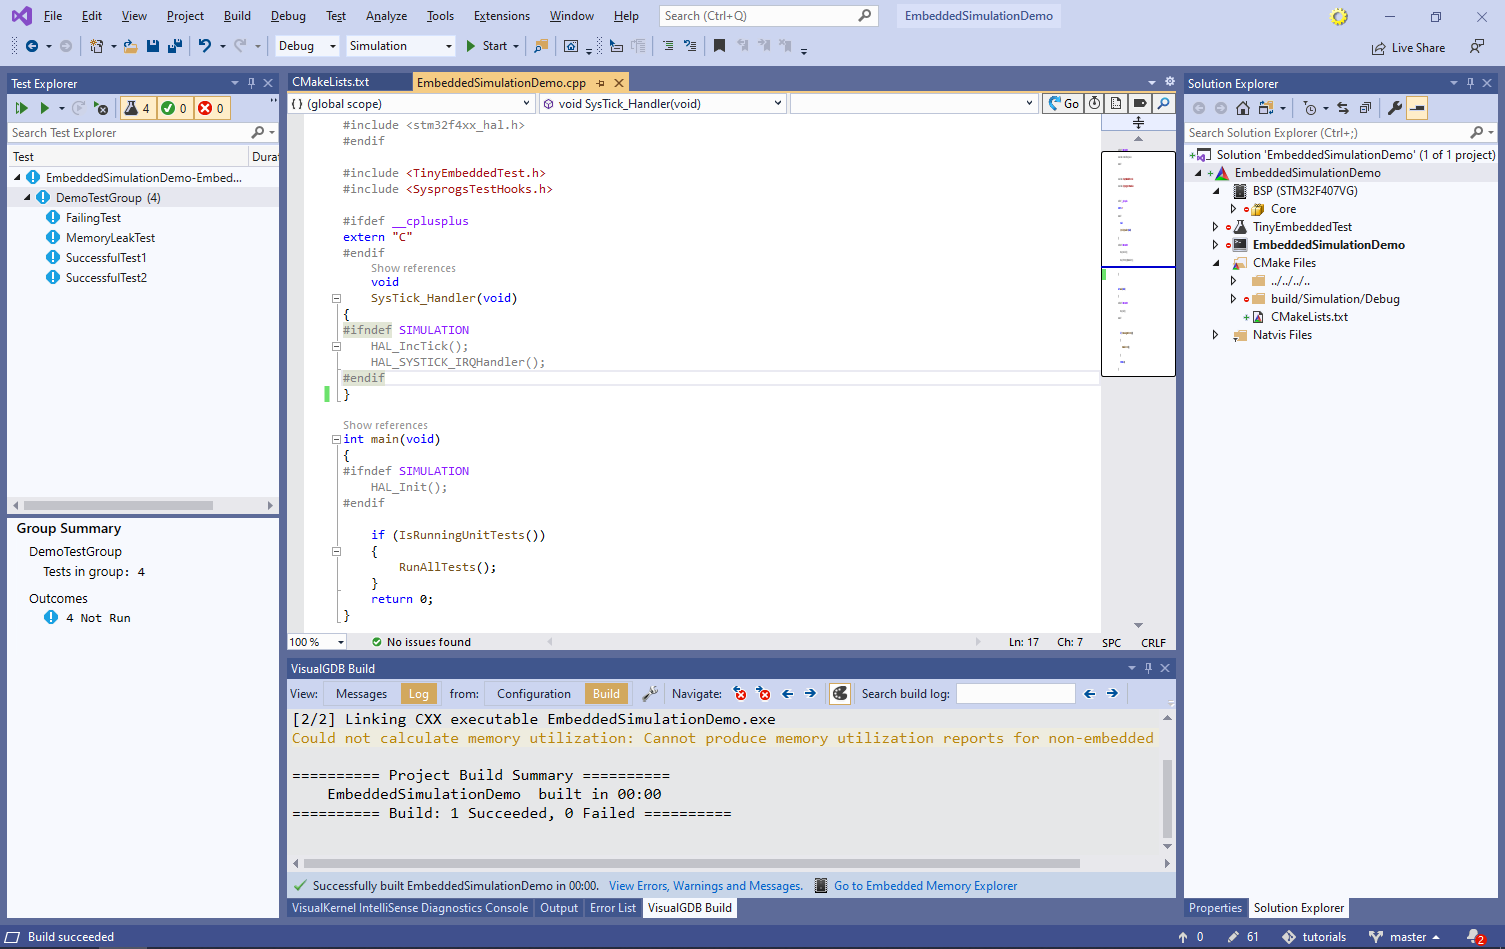
 - Now you will be able to build the project and run unit tests:
 If the tests do not appear in Test Explorer, try closing and reopening the solution to reset any VS-level caches.
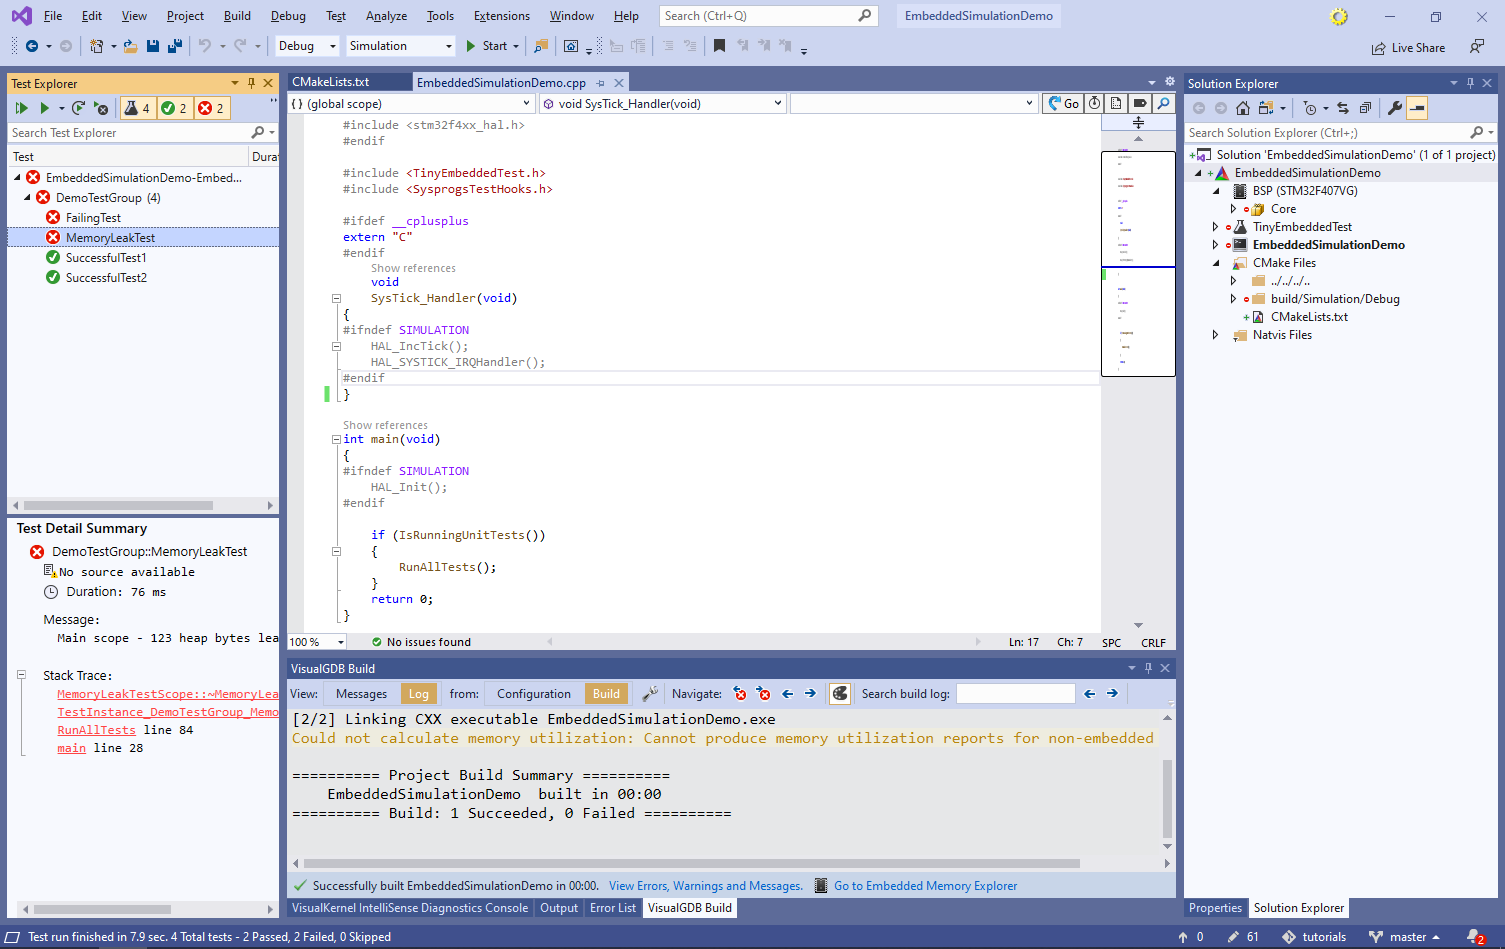
 - The tests will work the same way as they do for embedded targets, as long as they don’t include any hardware-specific code:
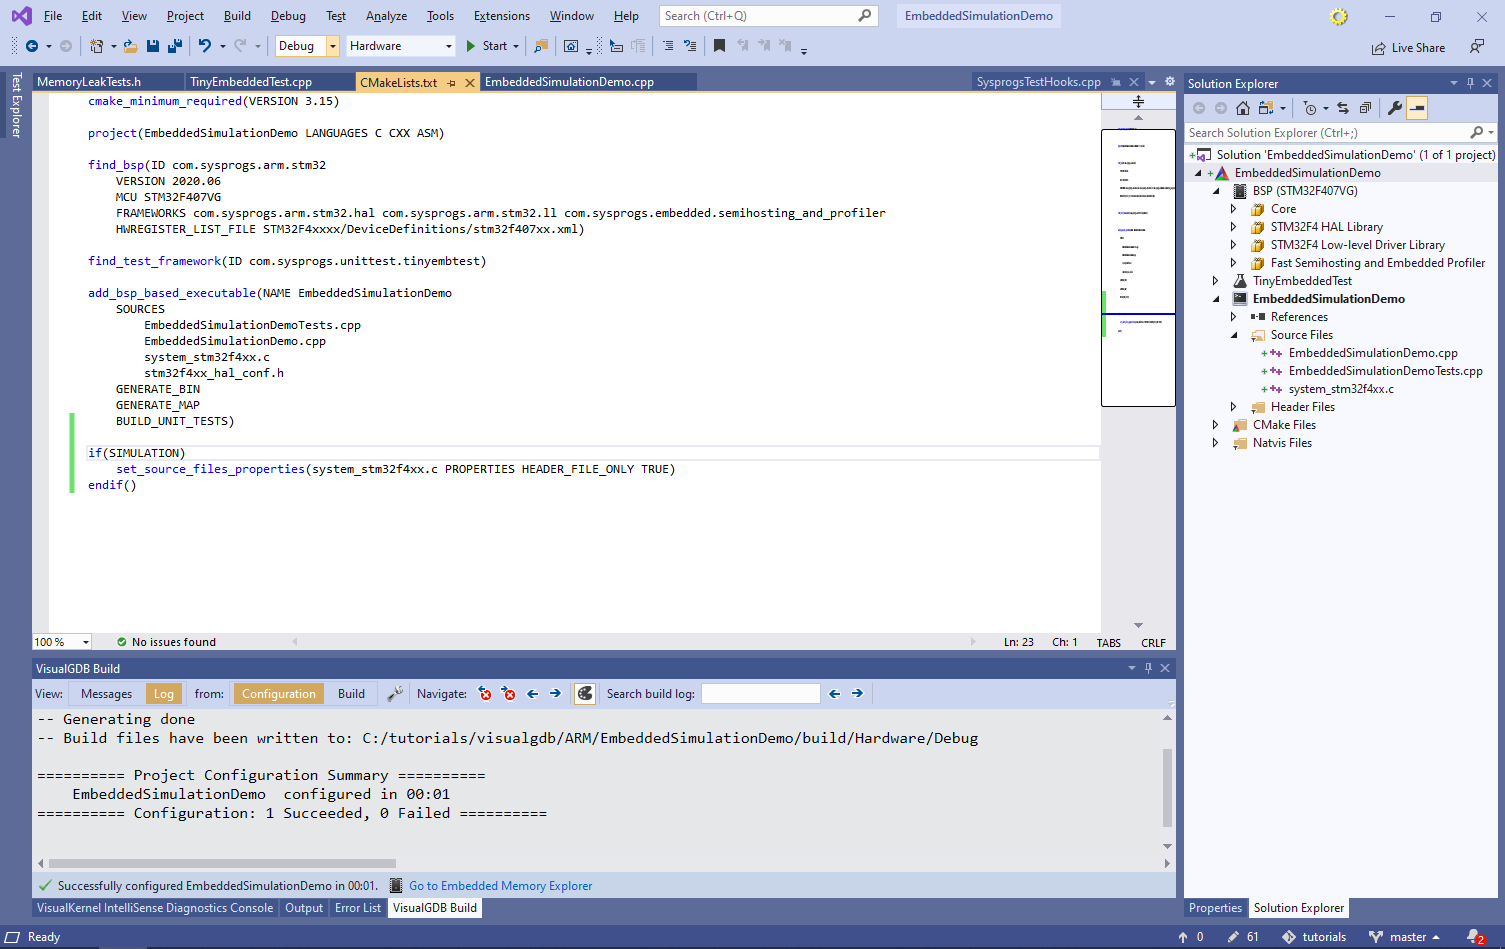
- If you try building the hardware platform now, it will fail because we have excluded the system_stm32f4xx.c file from building. To make the exclusion conditional, locate the set_source_file_properties() statement in CMakeLists.txt and wrap it with if(SIMULATION)/endif():
- If you would like to run some tests only on hardware (or only on simulation), you can always move them into a separate test executable. Right-click on the project node in Solution Explorer and select Add->New Item. Then select “Embedded Executable”:

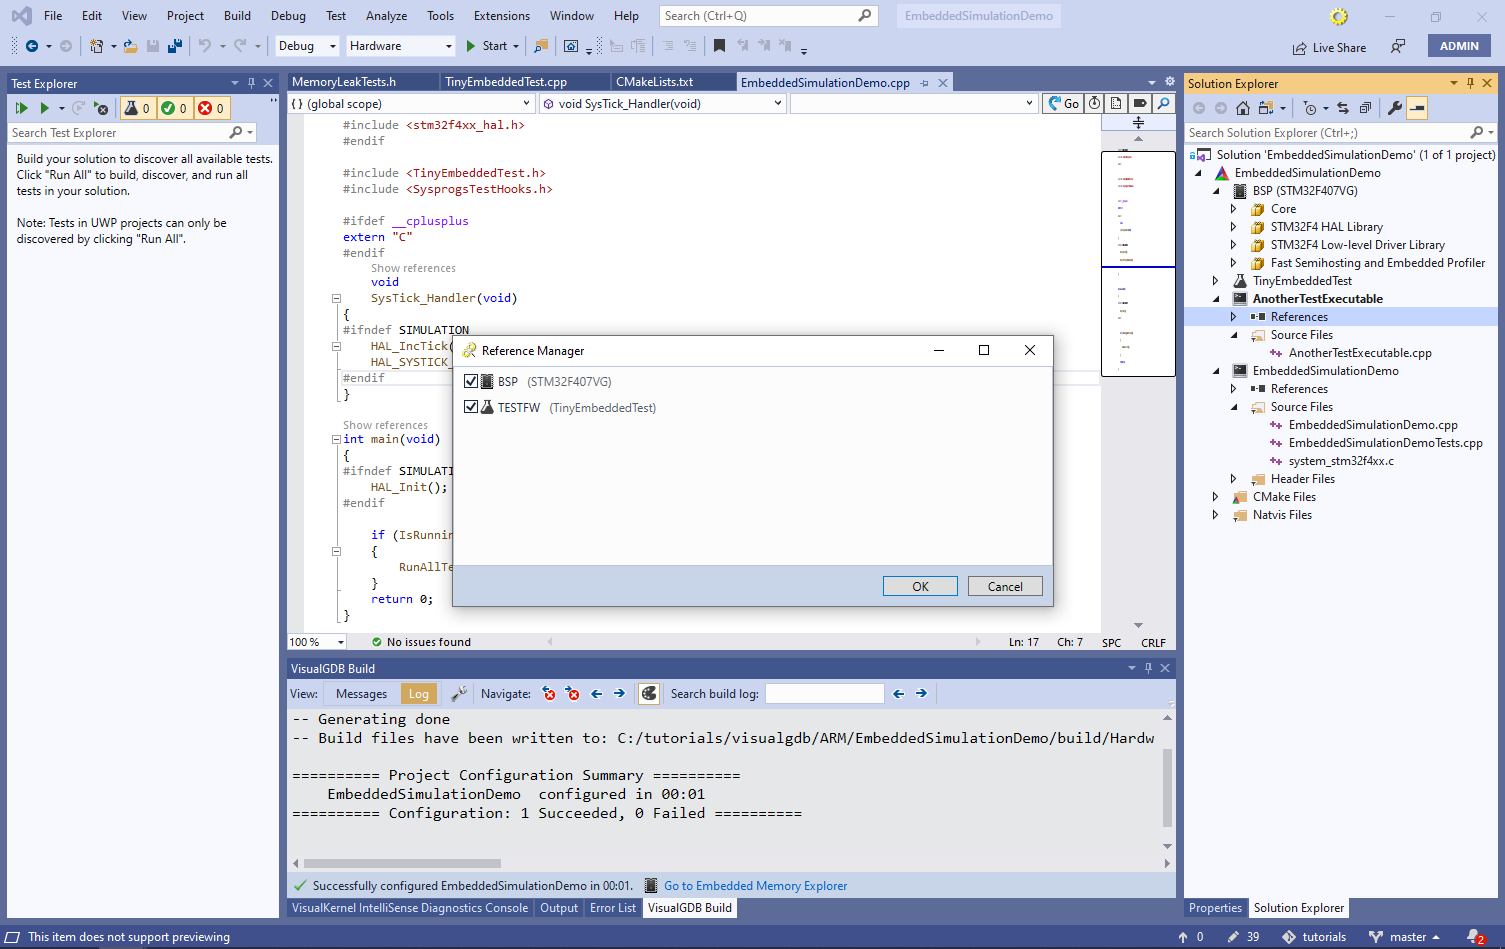
- Right-click on the executable and select Add->Add Reference. Then reference the test framework:
- Replace the contents of the main source file with the following code:
#include <TinyEmbeddedTest.h>

TEST_GROUP(AnotherTestGroup)
{
};

TEST(AnotherTestGroup, AnotherTest)
{
}

int main()
{
    RunAllTests();
    return 0;
}
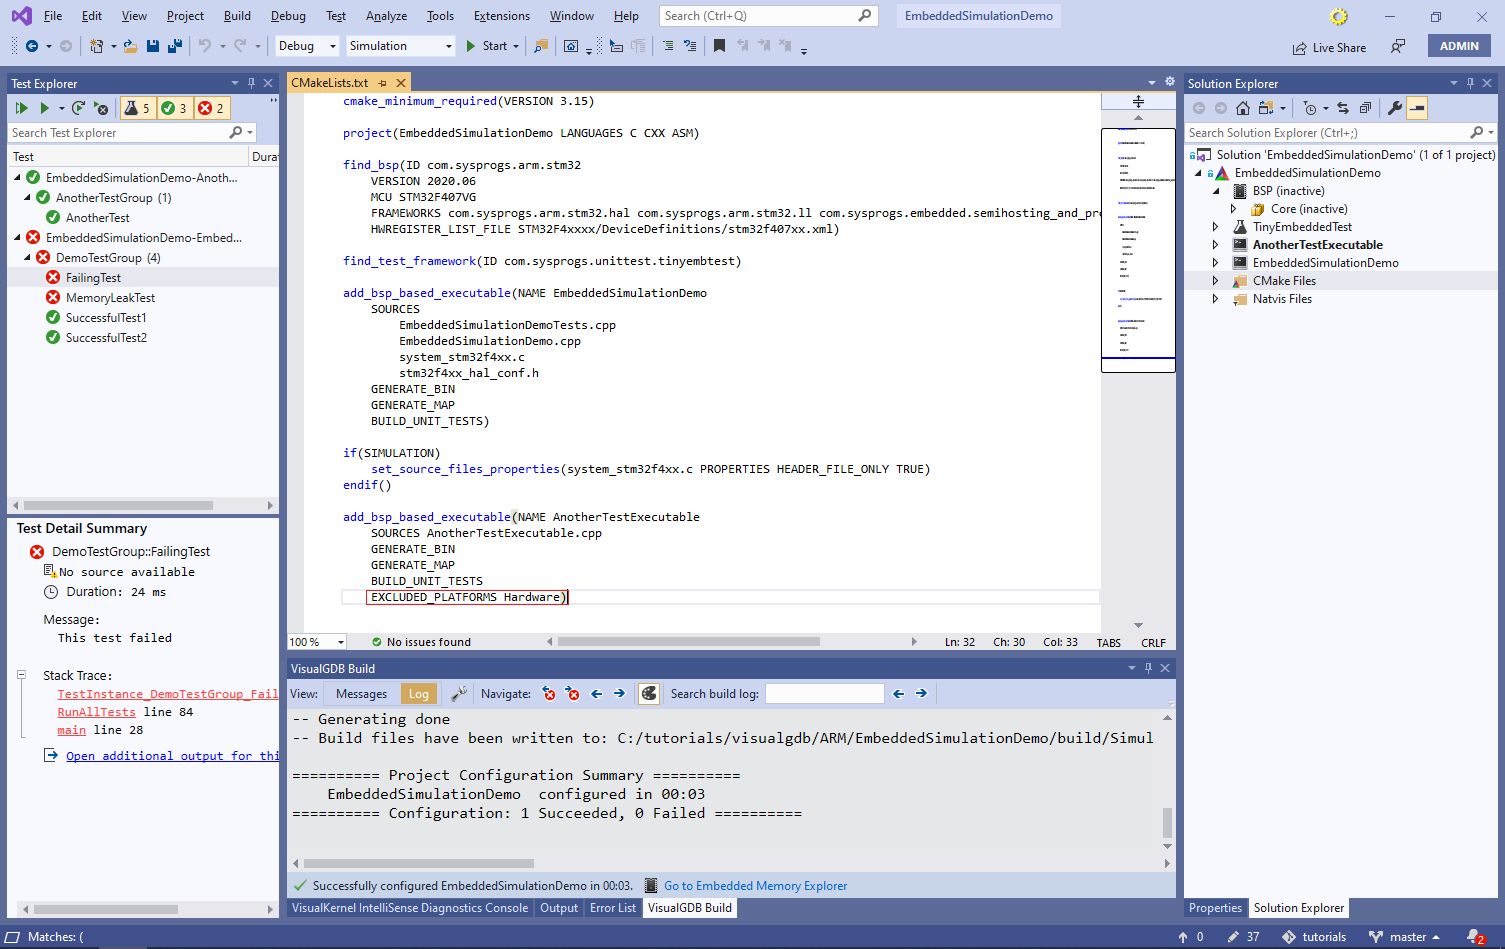
- Then right-click on the executable and select “Disable for Current Platform”:

- This will prevent AnotherTestExecutable from being built on the Hardware platform (see the EXCLUDED_PLATFORMS parameter CMakeLists.txt), but will still let you build and run the tests declared in it using the Simulation platform:
 If you would like to add code for simulating some STM32-specific peripherals, we advise placing it into a separate static library and disabling it for the Hardware platform. Disabled libraries will remain in Solution Explorer (so you can reference them unconditionally), but will not build any source files unless you switch to a supported platform.
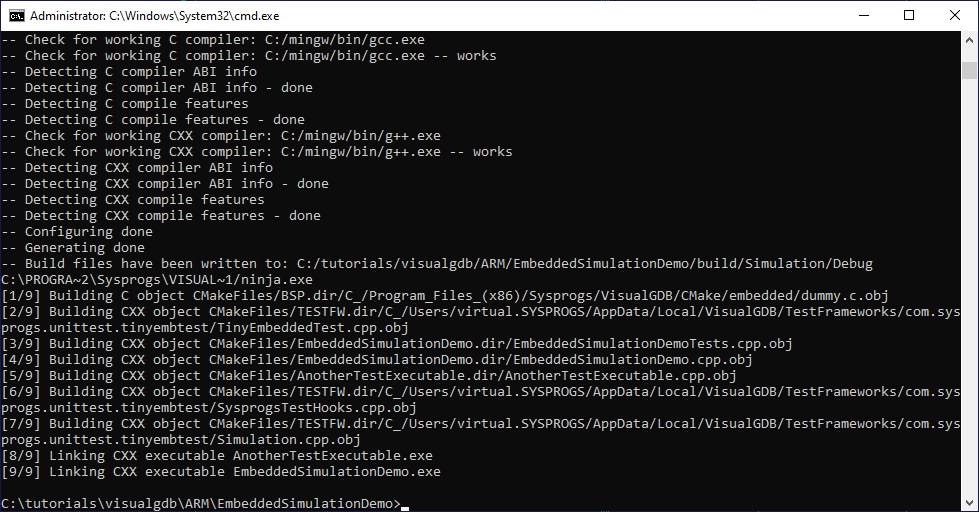
 - Finally, we will show how to build and run Embedded CMake test projects outside Visual Studio so that you can integrate them into your Continuous Integration environment. Open the Windows command prompt in the project directory and run the following command lines:
"%VISUALGDB_DIR%\VisualGDB.exe" /build EmbeddedSimulationDemo.vgdbcmake /platform:Hardware /config:Debug
"%VISUALGDB_DIR%\VisualGDB.exe" /build EmbeddedSimulationDemo.vgdbcmake /platform:Simulation /config:Debug
The first command line will build the unit tests for the hardware platform, while the second one will build Win32 executables using the MinGW toolchain:
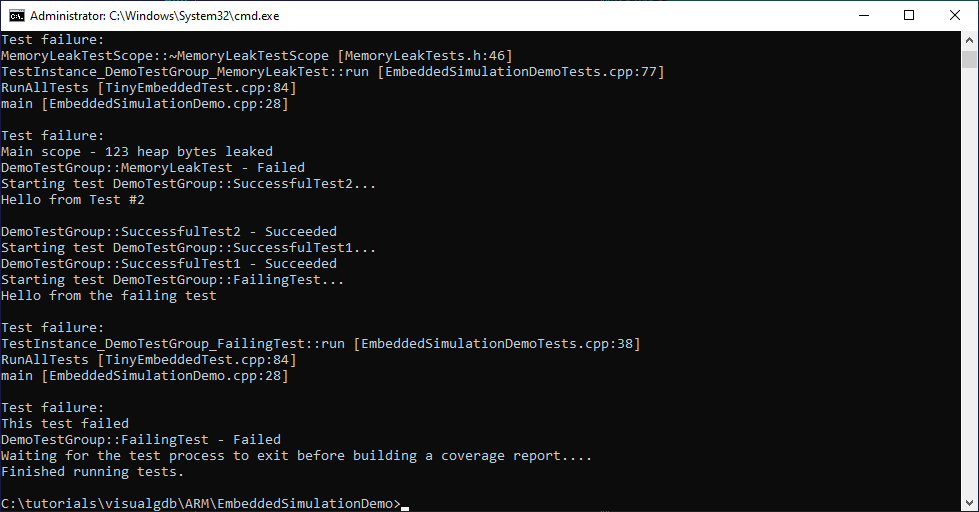
- Once the project is built, you can run all tests in a specific executable using the following command line:
"%VISUALGDB_DIR%\VisualGDB.exe" /runtests EmbeddedSimulationDemo.vgdbcmake /platform:Simulation /config:Debug /targetpath:build\Simulation\Debug\EmbeddedSimulationDemo.exe /vsoutput:results.trx
 Note that when running tests from Visual Studio, VisualGDB will query CMake for the detailed project structure, and will then determine the paths to the built executables from it. This step is skipped when running tests from command line, so the exact path to the built executable needs to be specified via the /targetpath parameter. If you would like to run tests from multiple executables (e.g. EmbeddedSimulationDemo.exe vs. AnotherTestExecutable.exe), simply invoke VisualGDB.exe multiple times, specifying a different target path each time.
 - You can also run the tests directly on the hardware using the command line shown below:
"%VISUALGDB_DIR%\VisualGDB.exe" /runtests EmbeddedSimulationDemo.vgdbcmake /platform:Hardware /config:Debug /targetpath:build\Hardware\Debug\EmbeddedSimulationDemo /vsoutput:results.trx
The results will be saved into the results.trx file compatible with the test results files produced by Visual Studio itself.
You can find the source code of the project shown in this tutorial in our Github repository.